
Common Causes of JNI Errors in Minecraft
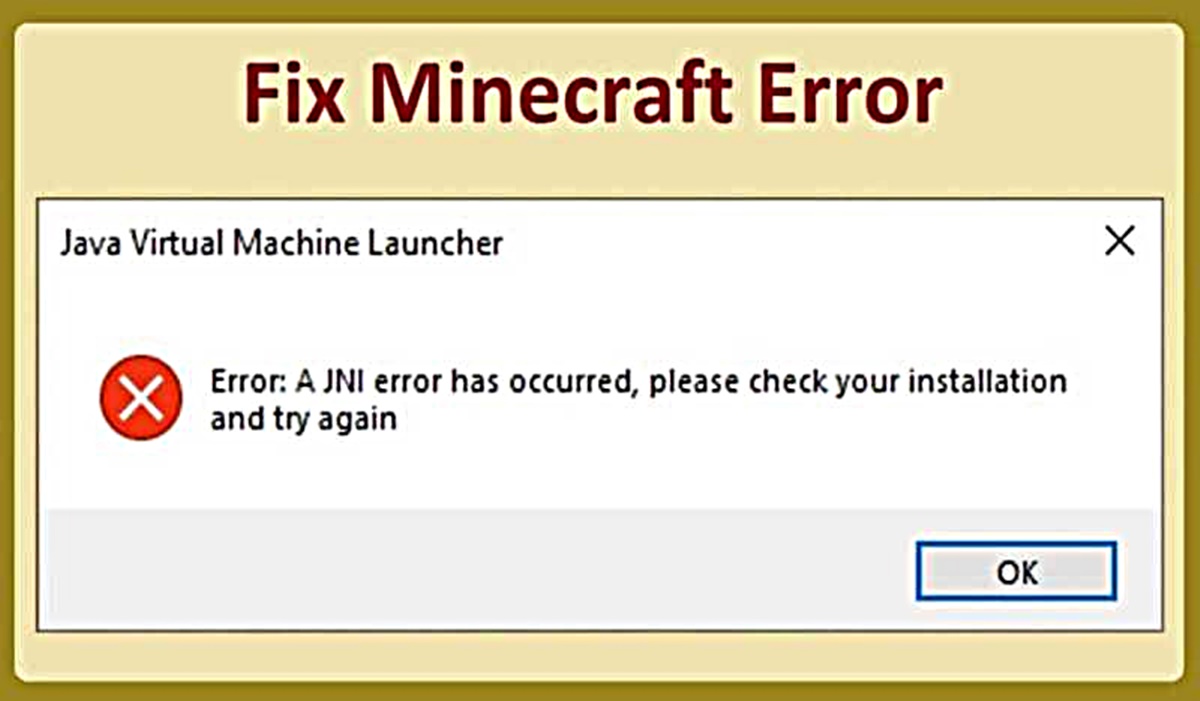
When playing Minecraft, encountering a JNI (Java Native Interface) error can be frustrating. JNI errors occur when there is a problem with the connection between Java code and native code. These errors can lead to crashes and gameplay interruptions. To resolve JNI errors, it is important to identify and address their underlying causes. Here are some common causes of JNI errors in Minecraft:
1. Outdated Java Runtime Environment (JRE): Using an outdated version of JRE can cause compatibility issues with Minecraft. Make sure you have the latest version installed on your system.
2. Improper installation or configuration of the Java Development Kit (JDK): Minecraft relies on the JDK to run. If the JDK is not installed correctly or configured properly, it can lead to JNI errors. Double-check your JDK installation and ensure it is up-to-date.
3. Incompatibility between Java versions and Minecraft versions: JNI errors can occur when there is a mismatch between the Java version and the Minecraft version you are using. Make sure you are running a compatible combination of Java and Minecraft.
4. Corrupted game files: If Minecraft game files become corrupted or incomplete, JNI errors may arise. Verify the integrity of your game files using the game launcher or reinstall the game to resolve any file-related issues.
5. Incorrect Minecraft launcher settings: Misconfigured launcher settings can trigger JNI errors. Check the launcher settings to ensure they are correctly set up for optimal gameplay.
6. Insufficient RAM allocation: Minecraft requires a sufficient amount of RAM to run smoothly. If the allocated RAM is inadequate, JNI errors may occur. Adjust the RAM allocation in the launcher settings to allocate more memory to Minecraft.
7. Corrupted Minecraft game data: If the game data within the Minecraft folder is corrupted, JNI errors can occur. Deleting the game data and reinstalling Minecraft can help resolve this issue.
8. Complex mods or resource packs: Introducing complex mods or resource packs into Minecraft can sometimes lead to JNI errors. Disable or remove any mods or resource packs temporarily to see if the JNI errors persist.
If you have tried these troubleshooting steps and are still experiencing JNI errors in Minecraft, seeking technical support from the Minecraft community or Mojang can provide further assistance in resolving the issue.
Checking the Game Requirements
Before delving into the troubleshooting process for JNI errors in Minecraft, it is essential to ensure that your system meets the necessary game requirements. Inadequate hardware or software specifications can contribute to JNI errors and other performance issues. Here are the key aspects to evaluate:
1. Operating System Compatibility: Ensure that your operating system is compatible with Minecraft. Minecraft requires Windows 10, macOS Mojave (10.14), or a Linux distribution that supports Java.
2. System Specifications: Check if your computer meets the minimum system requirements. Minecraft recommends a processor with at least 2.6 GHz clock speed or higher, 8 GB of RAM, and dedicated graphics with OpenGL 4.5 support.
3. Java Version: Minecraft heavily relies on Java to run. Make sure you have the correct version of Java installed. Currently, Minecraft recommends using Java 8, although newer versions may work as well.
4. Updated Graphics Drivers: Outdated or incompatible graphics drivers can cause JNI errors. Verify that your graphics card is up to date by visiting the manufacturer’s website and downloading the latest driver version.
5. Available Storage Space: Ensure that you have enough free storage space on your hard drive to accommodate Minecraft and its associated files. Lack of disk space can lead to performance issues and JNI errors.
6. Network Connectivity: Minecraft requires an internet connection to download updates, access multiplayer servers, and authenticate your game. Check your network connection and ensure you have a stable internet connection.
By cross-checking these game requirements and making necessary adjustments, you can eliminate potential barriers that may lead to JNI errors in Minecraft. It is important to note that adhering to the minimum requirements may result in limited performance, and meeting or exceeding the recommended specifications will provide a smoother gaming experience.
Updating Java Runtime Environment (JRE)
Since Minecraft relies heavily on Java, keeping your Java Runtime Environment (JRE) up to date is crucial to prevent JNI errors. Outdated versions of JRE can lead to compatibility issues and affect the performance of Minecraft. Here are the steps to update your JRE:
1. Check Your Current JRE Version: Open the command prompt or terminal and type “java -version” to see the version of Java installed on your system. It is recommended to have the latest stable version.
2. Visit the Official Java Website: Go to the official website of Java and navigate to the Download section. Ensure that you download the appropriate version of JRE for your operating system.
3. Download and Install JRE: Click on the download link for the latest version of JRE that corresponds to your system. Once the download is complete, run the installer and follow the on-screen instructions to install the updated version of JRE.
4. Configure JRE Path: In some cases, you may need to configure the JRE path to ensure Minecraft uses the updated version. This step is necessary if you have multiple versions of Java installed on your system.
- Windows: Go to the Control Panel, search for “System,” and click on “Edit the system environment variables.” In the System Properties window, click on the “Environment Variables” button. Under “System variables,” find the “Path” variable, select it, and click on “Edit.” Add the path to the directory where the new JRE is installed (e.g., C:\Program Files\Java\jre1.8.0_301\bin) and click “OK” to save the changes.
- macOS and Linux: Open the terminal and enter the command “sudo nano /etc/environment.” Add the path to the new JRE installation directory (e.g., PATH=”/usr/local/java/jre1.8.0_301/bin:$PATH”) and save the changes by pressing Ctrl+X, Y, Enter.
5. Test Minecraft with the Updated JRE: Launch Minecraft and check if the JNI errors persist. If they do, verify that Minecraft is using the correct JRE version by pressing F3 when the game is running. Look for the “Java:” line, which should display the updated JRE version.
By updating your JRE to the latest version and configuring the JRE path, you can ensure better compatibility between Java and Minecraft, minimizing the chances of experiencing JNI errors while playing the game.
Installing or Updating the Java Development Kit (JDK)
The Java Development Kit (JDK) is essential for running Minecraft, as it provides the necessary tools and libraries for Java development. If you encounter JNI errors in Minecraft, installing or updating the JDK can help resolve compatibility issues. Here’s how to install or update the JDK:
1. Determine the Current JDK Version: Open the command prompt or terminal and type “java -version” to check the version of JDK installed on your system. If you have Java 8 installed, it is recommended to use that version for compatibility with Minecraft.
2. Visit the Official JDK Website: Go to the official website of Oracle JDK or OpenJDK and navigate to the Downloads section. Choose the appropriate JDK version based on your operating system and architecture.
3. Download and Install JDK: Click on the download link for the desired JDK version. Once the download is complete, run the installer and follow the on-screen instructions to install the JDK on your system. Make sure to select the appropriate options during installation, such as setting the installation path and accepting the license agreement.
4. Set JDK Path and Environment Variables: To ensure Minecraft uses the updated JDK version, you need to configure the JDK path and set the necessary environment variables.
- Windows: Go to the Control Panel, search for “System,” and click on “Edit the system environment variables.” In the System Properties window, click on the “Environment Variables” button. Under “System variables,” click on “New” and add the following variables:
- Variable Name: JAVA_HOME
- Variable Value: Path to the JDK directory (e.g., C:\Program Files\Java\jdk1.8.0_301)
- macOS and Linux: Open the terminal and enter the command “sudo nano /etc/environment.” Add the following line:
- JAVA_HOME=”/usr/local/java/jdk1.8.0_301″
5. Test Minecraft with the Updated JDK: Launch Minecraft and check if the JNI errors still occur. If they do, verify in the Minecraft game output (accessible by pressing F3) that the correct JDK version is being used.
By installing or updating the JDK and properly configuring the JDK path and environment variables, you ensure that Minecraft has the necessary tools and libraries for optimal performance, reducing the likelihood of encountering JNI errors during gameplay.
Ensuring Compatibility Between Java Versions and Minecraft Versions
One of the common causes of JNI errors in Minecraft is a mismatch between the Java version and the Minecraft version being used. To avoid such compatibility issues, it is important to ensure that the Java version and Minecraft version are compatible with each other. Here are the steps to ensure compatibility:
1. Check Minecraft Version: Identify the version of Minecraft you are running. This information is typically displayed in the Minecraft launcher or in the game’s main menu.
2. Verify Java Version: Determine the recommended or required Java version for the specific Minecraft version you are playing. This information can typically be found on the Minecraft website or official forums.
3. Update Java if Needed: If your current Java version does not match the required version for your Minecraft version, it is necessary to update your Java installation. Visit the official Java website and download the appropriate Java version. Install it following the on-screen instructions.
4. Remove Incompatible Java Versions: In some cases, having multiple versions of Java installed on your system can cause conflicts and lead to JNI errors. To avoid this, uninstall any outdated or incompatible Java versions from your system.
5. Set Java Version for Minecraft (MultiMC users): If you are using the MultiMC launcher to manage your Minecraft installations, follow these steps to set the Java version specifically for each Minecraft instance:
- Open MultiMC and select the Minecraft instance you want to modify.
- Click on “Edit Instance” and navigate to the “Settings” tab.
- In the “Java” section, choose the desired Java version from the drop-down menu.
- Click “OK” to save the changes.
6. Test Compatibility: Launch Minecraft and check if the JNI errors still persist. Monitor the game output for any compatibility messages or errors related to the Java version. Make sure that the game runs smoothly without any issues.
By ensuring compatibility between the Java version and the Minecraft version you are using, you minimize the chances of encountering JNI errors. This step is vital to ensure a stable and enjoyable Minecraft gaming experience.
Verifying the Integrity of Minecraft Game Files
If you are experiencing JNI errors in Minecraft, it is possible that the game files have become corrupted or incomplete. Verifying the integrity of the game files can help identify and resolve any issues that may be causing these errors. Here’s how you can do it:
1. Open the Minecraft Launcher: Launch the Minecraft Launcher on your computer. If you don’t have it installed, download it from the official Minecraft website.
2. Select the Game Installation: In the Minecraft Launcher, select the game installation affected by the JNI errors. This step is applicable if you have multiple game installations or versions.
3. Click on “Options”: Locate and click on the “Options” button for the selected game installation. It is usually located next to the “Play” button.
4. Choose “Force Update”: In the options menu, look for the “Force Update” or “Force Update Game” button. This option forces the launcher to download and install a fresh copy of the game files.
5. Confirm the Action: A warning message may appear notifying you that this action will remove any modifications or customizations you have made. If you are okay with this, confirm the action to proceed with the verification and update process.
6. Wait for the Update: The Minecraft Launcher will begin verifying the game files and downloading any missing or corrupted files. This process may take some time, depending on your internet connection speed and the size of the game files.
7. Launch the Game: Once the update is complete, click on the “Play” button in the Minecraft Launcher to launch the game with the verified and updated game files.
8. Test for JNI Errors: After launching the game, play for a while and observe if the JNI errors still occur. Monitor the game closely to check if the errors persist or if the game’s performance improves.
By verifying the integrity of the Minecraft game files, you can ensure that you have a clean and complete installation. This process helps eliminate any corrupted files that may contribute to JNI errors, providing a more stable and enjoyable Minecraft gaming experience.
Modifying Minecraft Launcher Settings
If you are encountering JNI errors in Minecraft, modifying certain settings in the Minecraft Launcher can potentially help resolve them. The launcher provides various options that can be adjusted to optimize your gameplay experience and minimize errors. Here’s how you can modify the Minecraft Launcher settings:
1. Open the Minecraft Launcher: Launch the Minecraft Launcher on your computer. If you don’t have it installed, download it from the official Minecraft website.
2. Select the Game Installation: In the Minecraft Launcher, select the game installation you are experiencing the JNI errors with. This step is applicable if you have multiple game installations or versions.
3. Click on “Options”: Locate and click on the “Options” button next to the selected game installation. It is usually located next to the “Play” button.
4. Modify JVM Arguments: In the options menu, look for the “JVM Arguments” or “Java Arguments” field. This field allows you to modify the Java Virtual Machine (JVM) settings for Minecraft. Add or modify the arguments to allocate more memory to Minecraft, which can help improve performance and prevent JNI errors. For example, you can add “-Xmx4G” to allocate 4GB of RAM to Minecraft. Note that the exact value you use will depend on the available memory on your system.
5. Adjust Other Settings: While in the options menu, you can also adjust other launcher settings that may impact Minecraft’s performance. For example, you can change the game resolution, enable advanced graphics settings, or adjust the maximum frame rate. Experiment with different settings to find the configuration that works best for your system.
6. Save the Changes: After making the desired modifications to the launcher settings, click on the “Save” or “Apply” button to save the changes.
7. Launch the Game: Once the settings are saved, click on the “Play” button in the Minecraft Launcher to launch the game with the modified settings. Monitor the game closely to check if the JNI errors persist or if the gameplay improves.
By modifying the Minecraft Launcher settings, particularly the JVM arguments and other performance-related options, you can optimize Minecraft’s performance and potentially eliminate JNI errors. Remember to experiment with different settings to find the configuration that works best for your system’s specifications.
Allocating Sufficient RAM to Minecraft
Minecraft relies heavily on system resources, particularly RAM (Random Access Memory), to run smoothly. Allocating an insufficient amount of RAM to Minecraft can lead to performance issues and JNI errors. By adjusting the RAM allocation, you can ensure that Minecraft has enough memory to operate effectively. Here’s how you can allocate sufficient RAM to Minecraft:
1. Open the Minecraft Launcher: Launch the Minecraft Launcher on your computer. If you don’t have it installed, download it from the official Minecraft website.
2. Select the Game Installation: In the Minecraft Launcher, select the game installation affected by the JNI errors. This step is applicable if you have multiple game installations or versions.
3. Click on “Options”: Locate and click on the “Options” button for the selected game installation. It is usually located next to the “Play” button.
4. Modify JVM Arguments: In the options menu, look for the “JVM Arguments” or “Java Arguments” field. This field allows you to allocate a specific amount of RAM to Minecraft. By default, Minecraft typically allocates a modest amount of RAM. However, if you have a computer with ample memory, you can increase this allocation to enhance performance and reduce JNI errors.
5. Specify the RAM Allocation: Add the following argument to the JVM Arguments field to allocate more RAM to Minecraft: “-XmxN”, where N represents the amount of RAM you want to allocate. For example, to allocate 4 gigabytes (GB) of RAM, input “-Xmx4G”. Note that the value you use will depend on the available memory on your system.
6. Save the Changes: After modifying the JVM Arguments, click on the “Save” or “Apply” button to save the changes.
7. Launch the Game: Once the settings are saved, click on the “Play” button in the Minecraft Launcher to launch the game with the allocated amount of RAM. Monitor the game closely to see if the JNI errors still persist or if the performance improves.
Allocating sufficient RAM to Minecraft ensures that the game has the necessary resources to run smoothly, thereby reducing the likelihood of experiencing JNI errors. However, it is essential to allocate an amount of RAM that is appropriate for your system’s capabilities, as allocating too much RAM can lead to other performance issues or conflicts.
Deleting Minecraft Game Data and Reinstalling
If you are still encountering persistent JNI errors in Minecraft, it may be necessary to delete the game data and reinstall Minecraft from scratch. This process can help resolve any underlying issues related to corrupted or conflicting game files. Here’s how you can delete Minecraft game data and reinstall it:
1. Backup Game Saves and Configurations: Before proceeding with the reinstall, it is important to backup any important game saves, resource packs, or custom configurations you want to preserve. Locate the Minecraft game directory on your computer and make a copy of the necessary files and folders.
2. Uninstall Minecraft: Open the Control Panel on your computer and navigate to the Programs or Applications section. Locate Minecraft in the list of installed programs, right-click on it, and select “Uninstall” to remove Minecraft from your system.
3. Delete Minecraft Game Data: After uninstalling Minecraft, navigate to the Minecraft game directory (typically found in the “AppData” folder on Windows, or the Library folder on macOS). Delete the entire Minecraft folder to remove all remaining game files and data.
4. Download the Latest Version: Visit the official Minecraft website and download the latest version of Minecraft that corresponds to your operating system. Follow the on-screen instructions to download the installer or setup file.
5. Install Minecraft: Once the download is complete, run the installer or setup file and follow the prompts to install Minecraft on your computer. Make sure to select the appropriate options during installation, such as game installation location and any additional components or resource packs.
6. Restore Game Saves and Configurations: After the reinstallation, copy back the game saves, resource packs, and custom configurations that you had backed up earlier into the appropriate directories in the new Minecraft game folder.
7. Launch the Game: Start Minecraft and check if the JNI errors have been resolved. Monitor the game closely to ensure smooth gameplay without any further errors.
By deleting Minecraft game data and performing a fresh reinstall, you eliminate any potential issues stemming from corrupted or conflicting game files. This process provides a clean slate for Minecraft and can help resolve persistent JNI errors.
Seeking Technical Support from Minecraft Community or Mojang
If you have tried various troubleshooting steps and still continue to experience JNI errors in Minecraft, it may be time to seek technical support from the Minecraft community or Mojang, the developers of Minecraft. Their expertise and resources can offer valuable guidance in resolving complex issues. Here are some avenues to explore:
1. Minecraft Official Support: Visit the official Minecraft support website or forums to access a wealth of information, FAQs, and troubleshooting guides. Here, you can search for specific topics related to JNI errors or post your own questions for assistance from the Minecraft community.
2. Minecraft Community Forums: Engage with the vast Minecraft community through forums such as Minecraft Forums, Minecraft Reddit, or various Minecraft Discord servers. These platforms offer spaces where players can share experiences, seek advice, and collaborate to solve technical issues.
3. Social Media Platforms: Follow official Minecraft accounts on social media platforms like Twitter or Facebook. Often, they provide timely updates, announcements, and support-related content that can help you address JNI errors.
4. Mojang Support: If the issue you are facing persists or requires more specialized assistance, contact Mojang support directly. They can provide individualized support and guidance for troubleshooting JNI errors or other technical difficulties.
5. Bug Reporting: If you suspect that the JNI error is a result of a bug in Minecraft, consider reporting it through the official Minecraft Bug Tracker. This platform allows you to submit detailed bug reports, helping the developers identify and fix issues in future game updates.
When seeking technical support, provide specific details about the JNI error, including any error messages, steps to reproduce the issue, and any relevant system information. This information will assist others in accurately diagnosing and addressing the problem.
Remember, the Minecraft community is vast and passionate, with many experienced players and enthusiasts eager to help. Don’t hesitate to reach out for assistance if you have exhausted all other options. By seeking technical support, you increase your chances of finding a resolution to the JNI errors and enjoying uninterrupted gameplay in Minecraft.