
Choosing the Right Hosting Option
When it comes to creating your own Minecraft server, one of the first things you need to consider is the hosting option that best fits your needs. There are several hosting options available, each with its own set of advantages and considerations. By understanding the different hosting options, you can make an informed decision and ensure a smooth and enjoyable Minecraft server experience.
1. Self-Hosting: If you have a powerful computer and a reliable internet connection, self-hosting might be a viable option for you. This involves running the server directly from your own machine. While this option provides you with complete control over your server and eliminates the need to pay for hosting services, it comes with some downsides. Self-hosting requires technical knowledge to set up and maintain the server, and your server’s performance may be affected by your internet connection.
2. Shared Hosting: Shared hosting is a popular choice for Minecraft server owners who want an affordable and hassle-free option. With shared hosting, you rent server space from a hosting provider that specializes in Minecraft server hosting. This option is ideal for small to medium-sized servers that don’t require extensive resources. However, keep in mind that since you are sharing server resources with other users, the performance of your server may be affected if there is high traffic or resource usage from other servers on the same host.
3. Virtual Private Servers (VPS): A VPS offers more control and resources than shared hosting. With a VPS, you get dedicated server resources allocated specifically for your Minecraft server. This option is suitable for larger servers that require more power and customization options. While VPS hosting provides better performance compared to shared hosting, it requires some technical knowledge to set up and manage.
4. Dedicated Server: If you are looking for the highest level of performance and control, a dedicated gaming server is the way to go. With a dedicated server, you have an entire physical server dedicated solely to your Minecraft server. This option is ideal for very large servers or servers that require extensive modifications and customizations. However, dedicated servers are the most expensive hosting option, so it’s important to carefully consider your needs and budget before choosing this option.
When selecting a hosting option, consider factors such as server size, performance requirements, technical expertise, and budget. It’s also a good idea to read reviews and compare different hosting providers to ensure you choose a reliable and reputable service. By carefully considering your needs and the available options, you can choose the hosting option that best fits your requirements and enjoy a seamless Minecraft server experience.
Installing Java
In order to run a Minecraft server, you need to have Java installed on your computer. Java is a programming language that Minecraft relies on to function properly. Follow the steps below to install Java and ensure compatibility with your Minecraft server.
1. Check if Java is already installed: Before installing Java, first check if it is already installed on your computer. Open the Command Prompt or Terminal and type in the command “java -version”. If Java is already installed, it will display the installed version. If not, you will need to proceed with the installation.
2. Download and install Java: Visit the official Java website and download the latest version of Java compatible with your operating system. Once the download is complete, run the installer and follow the on-screen instructions to install Java on your computer.
3. Set up Java environment variables: After installing Java, you need to set up the Java environment variables. This step ensures that your computer recognizes Java and allows Minecraft to access it. The process for setting up environment variables varies depending on your operating system:
- Windows: Go to the System Properties, click on “Advanced system settings”, then click on “Environment Variables”. Under “System variables”, click on “New” and enter the variable name as “JAVA_HOME” and the variable value as the path to your Java installation folder.
- Mac: Open Terminal and enter the command “nano ~/.bash_profile”. Add the following line at the end of the file: “export JAVA_HOME=/Library/Java/Home”. Save the file and exit. Then, enter the command “source ~/.bash_profile” to apply the changes.
- Linux: Open Terminal and enter the command “sudo nano /etc/environment”. Add the following line at the end of the file: “JAVA_HOME=path_to_java_folder”. Save the file and exit. Restart your computer for the changes to take effect.
4. Verify Java installation: To ensure that Java is installed correctly, open the Command Prompt or Terminal and type in the command “java -version” again. It should now display the installed version without any errors.
By following these steps, you can successfully install Java on your computer and ensure compatibility with your Minecraft server. Java is an essential component for running a Minecraft server, and having it properly installed will ensure a smooth and enjoyable server experience.
Downloading the Minecraft Server Software
To create your own Minecraft server, you’ll need to download the Minecraft server software. This software allows you to host and manage your server, giving you control over various settings and configurations. Follow the steps below to download the Minecraft server software and prepare it for installation:
1. Access the official Minecraft website: Visit the official Minecraft website (minecraft.net) and navigate to the “Downloads” section. Here, you’ll find the latest version of the Minecraft server software available for download.
2. Choose the desired server version: Select the version of Minecraft that you want to use for your server. It’s recommended to choose the latest stable version to ensure compatibility with the most recent game features and improvements.
3. Download the server software: Click on the download link for the server software, which will typically be a .jar file. Save the file to a location on your computer that is easily accessible.
4. Create a dedicated folder for the server: It’s a good practice to create a dedicated folder for your Minecraft server files. This folder will contain the server software, configuration files, and any additional resources required to run your server. Choose a location on your computer where you want to store these files and create a new folder with a descriptive name.
5. Move the downloaded server software: Take the downloaded .jar file and move it into the dedicated folder you created in the previous step. This will ensure that all the server files are stored in one centralized location.
6. Prepare server configuration: Before running the Minecraft server software, you may need to configure certain settings. Open the server folder and locate the server.properties file. Open this file with a text editor and modify the settings according to your preferences. You can customize aspects such as the server name, world size, and multiplayer settings.
7. Run the server software: To start your Minecraft server, simply double-click on the server .jar file you downloaded. This will open a command prompt or terminal window, and the server software will begin initializing. It may take a few moments for the server to fully start up, so be patient.
8. Accept the EULA: The first time you run the server software, it will generate some necessary files and display the Minecraft End User License Agreement (EULA) in the command prompt or terminal. To proceed, open the EULA text file, read the agreement, and change “eula=false” to “eula=true” to indicate your acceptance of the terms. Save the file and restart the server.
By following these steps, you’ll be able to successfully download the Minecraft server software and prepare it for installation. Remember to regularly check for updates and keep your server software up to date to ensure the best performance and compatibility with the Minecraft game.
Setting Up Port Forwarding
Port forwarding is an essential step in creating a Minecraft server that allows other players to connect to your server over the internet. By setting up port forwarding, you establish a pathway for incoming connections to reach your server. Follow the steps below to set up port forwarding for your Minecraft server:
1. Determine your router’s IP address: To access your router’s settings, you need to know its IP address. Open the Command Prompt or Terminal and enter the command “ipconfig” (for Windows) or “ifconfig” (for macOS or Linux). Look for the “Default Gateway” or “Router” IP address, which represents your router’s IP.
2. Access your router’s settings: Open a web browser and enter your router’s IP address in the address bar. This should take you to your router’s settings page. You may need to enter a username and password to log in. Refer to your router’s documentation or contact your internet service provider if you don’t know the login credentials.
3. Locate the port forwarding section: The location of the port forwarding settings varies depending on your router’s make and model. Look for a section labeled “Port Forwarding” or “Virtual Servers” within your router’s settings.
4. Add a new port forwarding rule: In the port forwarding section, add a new rule by clicking on “Add” or “New”. Enter a descriptive name for the rule, such as “Minecraft Server”. Specify the internal and external ports as 25565, which is the default port used by Minecraft servers. Choose the protocol as “TCP” or “TCP/UDP”. Enter the local IP address of the computer running your Minecraft server.
5. Save and apply the changes: Once you have entered the port forwarding details, save and apply the changes. Your router will now forward any incoming connections on port 25565 to your Minecraft server.
6. Verify the port forwarding: To ensure that the port forwarding is correctly set up, ask a friend or use an online port checking tool to test if the Minecraft server port is open and accessible from outside your network. If the port is open, other players will be able to connect to your server using your public IP address.
It’s important to note that the steps above provide a general guideline for setting up port forwarding, but the process may vary depending on your specific router model and firmware. Refer to your router’s documentation or contact your internet service provider for detailed instructions on setting up port forwarding.
By correctly configuring port forwarding, you can enable players from around the world to join your Minecraft server and immerse themselves in your unique gaming experience.
Configuring Server Properties
Configuring the server properties is an important step in customizing your Minecraft server to suit your needs. The server properties file contains various settings that allow you to control aspects of gameplay, multiplayer, and server performance. By adjusting these settings, you can create a unique and personalized Minecraft server experience. Follow the steps below to configure the server properties:
1. Access the server properties file: Locate the server.properties file within your Minecraft server folder. You can use a text editor to open and modify this file. Make sure to create a backup of the original file before making any changes.
2. Adjust server settings: Within the server.properties file, you will find a list of configurable options. Let’s explore some of the most common settings:
- Server Port: The server port determines which port your Minecraft server listens on for incoming connections. The default port is 25565. You can change this if you have configured port forwarding to use a different port number.
- Game Mode: The game mode determines the default gameplay mode for new players. Options include Survival, Creative, Adventure, and Spectator. Choose the game mode that suits your server’s theme and objectives.
- Difficulty: The difficulty setting affects the level of challenge in the game. Options range from Peaceful (no hostile mobs) to Hard (tougher mobs and survival challenges).
- Motd: The “motd” (Message of the Day) is a short description that appears in the Minecraft server list. Customize it to give potential players an idea of what your server offers.
- Max Players: Set the maximum number of players allowed on your server at the same time. Consider the capacity of your server and the bandwidth available when choosing this value.
- View Distance: This setting determines how far players can see in the game. Higher values increase the visible distance but may impact server performance.
3. Save and apply the changes: Once you have made the desired modifications to the server.properties file, save the changes and close the text editor. Restart your Minecraft server to apply the new settings.
4. Test and adjust: After restarting your server, join it to test the changes you made. Ensure that the gameplay, difficulty, and other settings reflect your desired configuration. If needed, you can always access the server.properties file again to make further adjustments.
By properly configuring the server properties, you can tailor your Minecraft server to create a unique and engaging experience for your players. Take the time to experiment with the settings and find the perfect balance that matches your vision for the server.
Adding Plugins and Mods
One of the great features of Minecraft is its ability to be customized with plugins and mods. These additions can enhance gameplay, add new features, and create unique experiences for players on your server. Follow the steps below to add plugins and mods to your Minecraft server:
1. Understand the difference between plugins and mods: Plugins and mods serve different purposes in Minecraft. Plugins are extensions that modify or add features to the game without changing the underlying code. They are compatible with server versions like Bukkit, Spigot, or Paper. Mods, on the other hand, are modifications to the Minecraft game itself and require the installation of Forge or another mod loader.
2. Find reliable sources for plugins and mods: When searching for plugins or mods, it’s essential to use trusted sources to ensure their safety and compatibility with your server and Minecraft version. Some popular platforms for plugins and mods include Bukkit, Spigot, CurseForge, and the official Minecraft forums.
3. Download the desired plugins or mods: Once you’ve found the plugins or mods you want to add, download them to your computer. Make sure they are compatible with your server version and that their installation instructions are clear and straightforward.
4. Install plugins: For plugins, simply place the plugin file into the “plugins” folder within your Minecraft server directory. Restart the server, and the plugin should load and become active. Some plugins may require additional configuration through their respective configuration files.
5. Install mods: Installing mods usually involves the use of a mod loader like Forge. Install the mod loader by following the provided instructions. Once the mod loader is installed, place the mod files into the “mods” folder within your Minecraft server directory. Restart the server, and the mods should be loaded and ready to use.
6. Test and manage plugins and mods: Join your server and test the added plugins or mods to ensure they function as expected. It’s important to regularly update and maintain your plugins or mods to ensure compatibility with the latest Minecraft updates. Some plugins may have their own management commands or configuration files that you can modify to fine-tune their behavior.
Adding plugins and mods can greatly enhance the gameplay experience on your Minecraft server. However, it’s important to exercise caution and research compatibility and reliability before adding them. Make sure to read user reviews and forum discussions to ensure that the plugins or mods you choose are well-maintained and properly supported.
Enabling Whitelist and Setting Permissions
Managing player access and permissions on your Minecraft server is crucial for creating a safe and enjoyable environment. Enabling the whitelist and setting permissions ensures that only approved players can join the server and defines the actions they can perform. Follow the steps below to enable the whitelist and set permissions on your Minecraft server:
1. Enable the whitelist: Open the server.properties file in your Minecraft server directory using a text editor. Look for the “enable-whitelist” setting and change it to “true”. Save the changes and restart your server to activate the whitelist.
2. Add players to the whitelist: To add players to the whitelist, open the whitelist.json file in your server directory. Add each player’s Minecraft username surrounded by double quotation marks (“”) on separate lines. Save the file after adding all the desired usernames.
3. Set player permissions and roles: To manage player permissions and roles, you will need a plugin such as PermissionsEx, LuckPerms, or GroupManager. These plugins allow you to define specific permissions for different ranks or groups of players on your server. Install the plugin and follow its documentation to configure the permissions and assign them to players or groups.
4. Assign default permissions: Define a set of default permissions for new players who join the server. These permissions will be automatically assigned to players who are not part of any specific group or rank. Specify their default permissions in the plugin’s configuration file, or by using commands provided by the plugin.
5. Test and verify permissions: Join your server using a player account with different permission levels to test and verify the assigned permissions. Make sure that players have the correct permissions to access certain commands, interact with specific blocks, or perform other actions according to their assigned roles.
6. Regularly manage and update permissions: As players join, leave, or change roles on your server, it’s important to regularly update and manage their permissions. Remove players who are no longer active, adjust permissions for different roles, and ensure that the server’s permissions align with your intended player experience.
By enabling the whitelist and setting permissions, you can create a controlled and secure environment on your Minecraft server. This allows you to curate the player base and provide a customized experience while maintaining a safe and enjoyable community.
Managing Server Files and Backups
Properly managing server files and creating regular backups is crucial for maintaining the stability and security of your Minecraft server. This ensures that you have a backup of your server data in case of any unforeseen issues or data loss. Follow the steps below to effectively manage your server files and create backups:
1. Organize server files: Keep your server files organized by creating a dedicated folder for your Minecraft server. Store all server-related files, such as the server.jar file, server properties, plugins, and mods, within this folder. Having a clear file structure makes it easier to manage and locate specific files when needed.
2. Regularly update server files: Stay up-to-date with the latest server files by regularly checking for updates and applying any necessary patches or bug fixes. Updates often provide performance improvements and new features, so it’s important to keep your server software current.
3. Implement a backup strategy: Protect your server data by implementing a backup strategy. Regularly create backups of your server files, including world data, plugin configurations, and player data. There are several ways to create backups, such as manually copying the server folder to an external storage device, using backup software, or utilizing server management tools that offer automated backup features.
4. Schedule regular backups: Set up a schedule for regular backups to ensure that your server data is consistently backed up. Consider the frequency of backups based on the frequency of changes and the importance of the server data. For example, you may choose to create daily backups for a highly active server or weekly backups for a less active server.
5. Store backups securely: It’s essential to store your backups in a secure location to protect them from loss or corruption. External storage devices, cloud storage services, or offsite backups are all viable options. Remember to keep multiple copies of backups to avoid a single point of failure.
6. Test backups regularly: Periodically test your backups to ensure that they are functioning correctly and can be restored if needed. This allows you to identify any issues or errors with the backup process and address them promptly.
7. Document your backup procedure: Document the process of creating backups and restoring them in case of server issues. This documentation will be valuable in case you need to recover your server or delegate backup tasks to other administrators.
By effectively managing your server files and creating regular backups, you can mitigate the risk of data loss and ensure the long-term stability of your Minecraft server. Taking these proactive measures will give you peace of mind and safeguard your server’s valuable data.
Starting and Accessing Your Minecraft Server
Once you have set up your Minecraft server and configured all the necessary settings, it’s time to start and access your server to begin your Minecraft adventure. Follow the steps below to start and access your Minecraft server:
1. Start the server: To start your Minecraft server, double-click on the server.jar file that you previously downloaded and placed in your server directory. This will launch the server software and begin the server initialization process. You may need to wait a moment for the server to fully start up.
2. Monitor server progress: As the server starts up, monitor the console or command prompt window that opens. It will display the server’s progress and any errors or warnings that may occur during the initialization process. Make sure to resolve any issues that arise before proceeding.
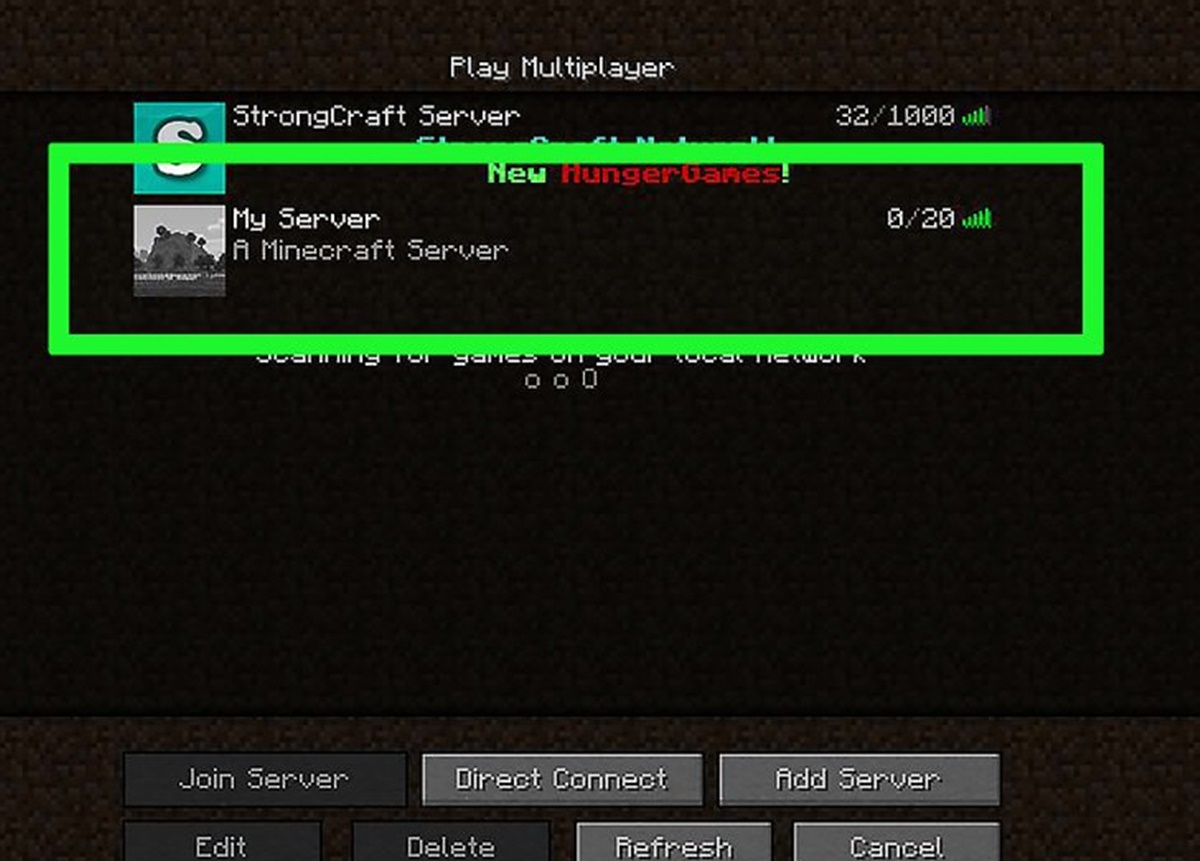
3. Connect to the server: To connect to your Minecraft server, open the Minecraft game on your computer. Click on “Multiplayer” and then “Add Server.” Enter a name for the server in the “Server Name” field. In the “Server Address” field, enter “localhost” if you are hosting the server on the same computer. If hosting on a different computer, enter the IP address or domain name associated with the computer running the server.
4. Join the server: After adding the server, click on the server’s name in the multiplayer menu to join. If the server is running and accessible, you will be connected to the server, and you’ll see the Minecraft world generate. You can now start playing on your own or invite friends to join.
5. Grant friends access: If you want to allow friends to join your server, provide them with the IP address or domain name associated with your server. They can add the server to their Minecraft multiplayer list using the provided information and connect to your server to play together.
6. Use server management tools: Consider using server management tools like Multicraft or McMyAdmin to simplify server management tasks. These tools offer an intuitive web-based control panel that allows you to start, stop, and manage your server remotely, as well as access advanced settings and configurations.
7. Regularly save and backup your world: Don’t forget to regularly save your Minecraft world progress by using the “/save” command or server management tools. Additionally, continue to create backups of your server files to protect your progress and ensure you can restore the server in case of any issues or data loss.
By following these steps, you can start and access your Minecraft server, invite friends to join, and embark on countless adventures in your very own custom Minecraft world.
Troubleshooting Common Issues
Running a Minecraft server can occasionally come with challenges and technical issues. To ensure a smooth gameplay experience for you and your players, it’s essential to be familiar with common issues and their potential solutions. Here are some troubleshooting steps for common Minecraft server issues:
1. Connection Issues: If players are having trouble connecting to your server, check if the server IP address or domain name is entered correctly in the multiplayer menu. Ensure that your port forwarding settings are correctly configured and that your router is allowing incoming connections on the specified port.
2. Server Lag: Server lag can be caused by various factors, including insufficient resources, high player counts, or excessive plugins or mods. Make sure your server has enough processing power, memory, and bandwidth to handle the player load. Consider optimizing your server by removing unnecessary plugins or mods and adjusting server settings such as view distance and entity counts.
3. Plugin or Mod Compatibility: If your server encounters issues after adding a new plugin or mod, check for compatibility issues with your server version and other installed plugins or mods. Look for updated versions or alternatives that address the compatibility problem. Remove or disable any plugins or mods causing conflicts to restore functionality.
4. Server Crashes: Server crashes can occur due to various reasons, such as software glitches or hardware issues. Check your server logs for any error messages or stack traces that can provide insight into the cause of the crash. Update server software and plugins or mods to their latest stable versions, as they often include bug fixes and stability improvements.
5. Whitelist and Permissions: If players are unable to join or experience permission-related issues, ensure that you have correctly configured the whitelist and permissions settings. Verify that players’ usernames are correctly added to the whitelist file, and check if the permission nodes or group assignments are properly set up in your permission plugin’s configuration.
6. Server Backup and Data Loss: Regularly create backups of your server files, including the world data and configuration files. This will protect you from unexpected data loss due to server crashes or other unforeseen circumstances. Ensure that your backup strategy is working correctly and periodically test restoring from backups to verify their integrity.
7. Performance Optimization: If your server is experiencing poor performance, consider optimizing server settings and configurations. Reduce unnecessary resource usage by adjusting view distances, limiting entity counts, or disabling certain server features. Monitor server resource usage and diagnose potential bottlenecks to identify areas for improvement.
Remember to consult relevant documentation, forums, or seek assistance from other server administrators or community members if you encounter persistent issues. Troubleshooting server issues can sometimes require trial and error, but with patience and persistence, you can resolve most common problems and ensure a smooth and enjoyable Minecraft server experience.