
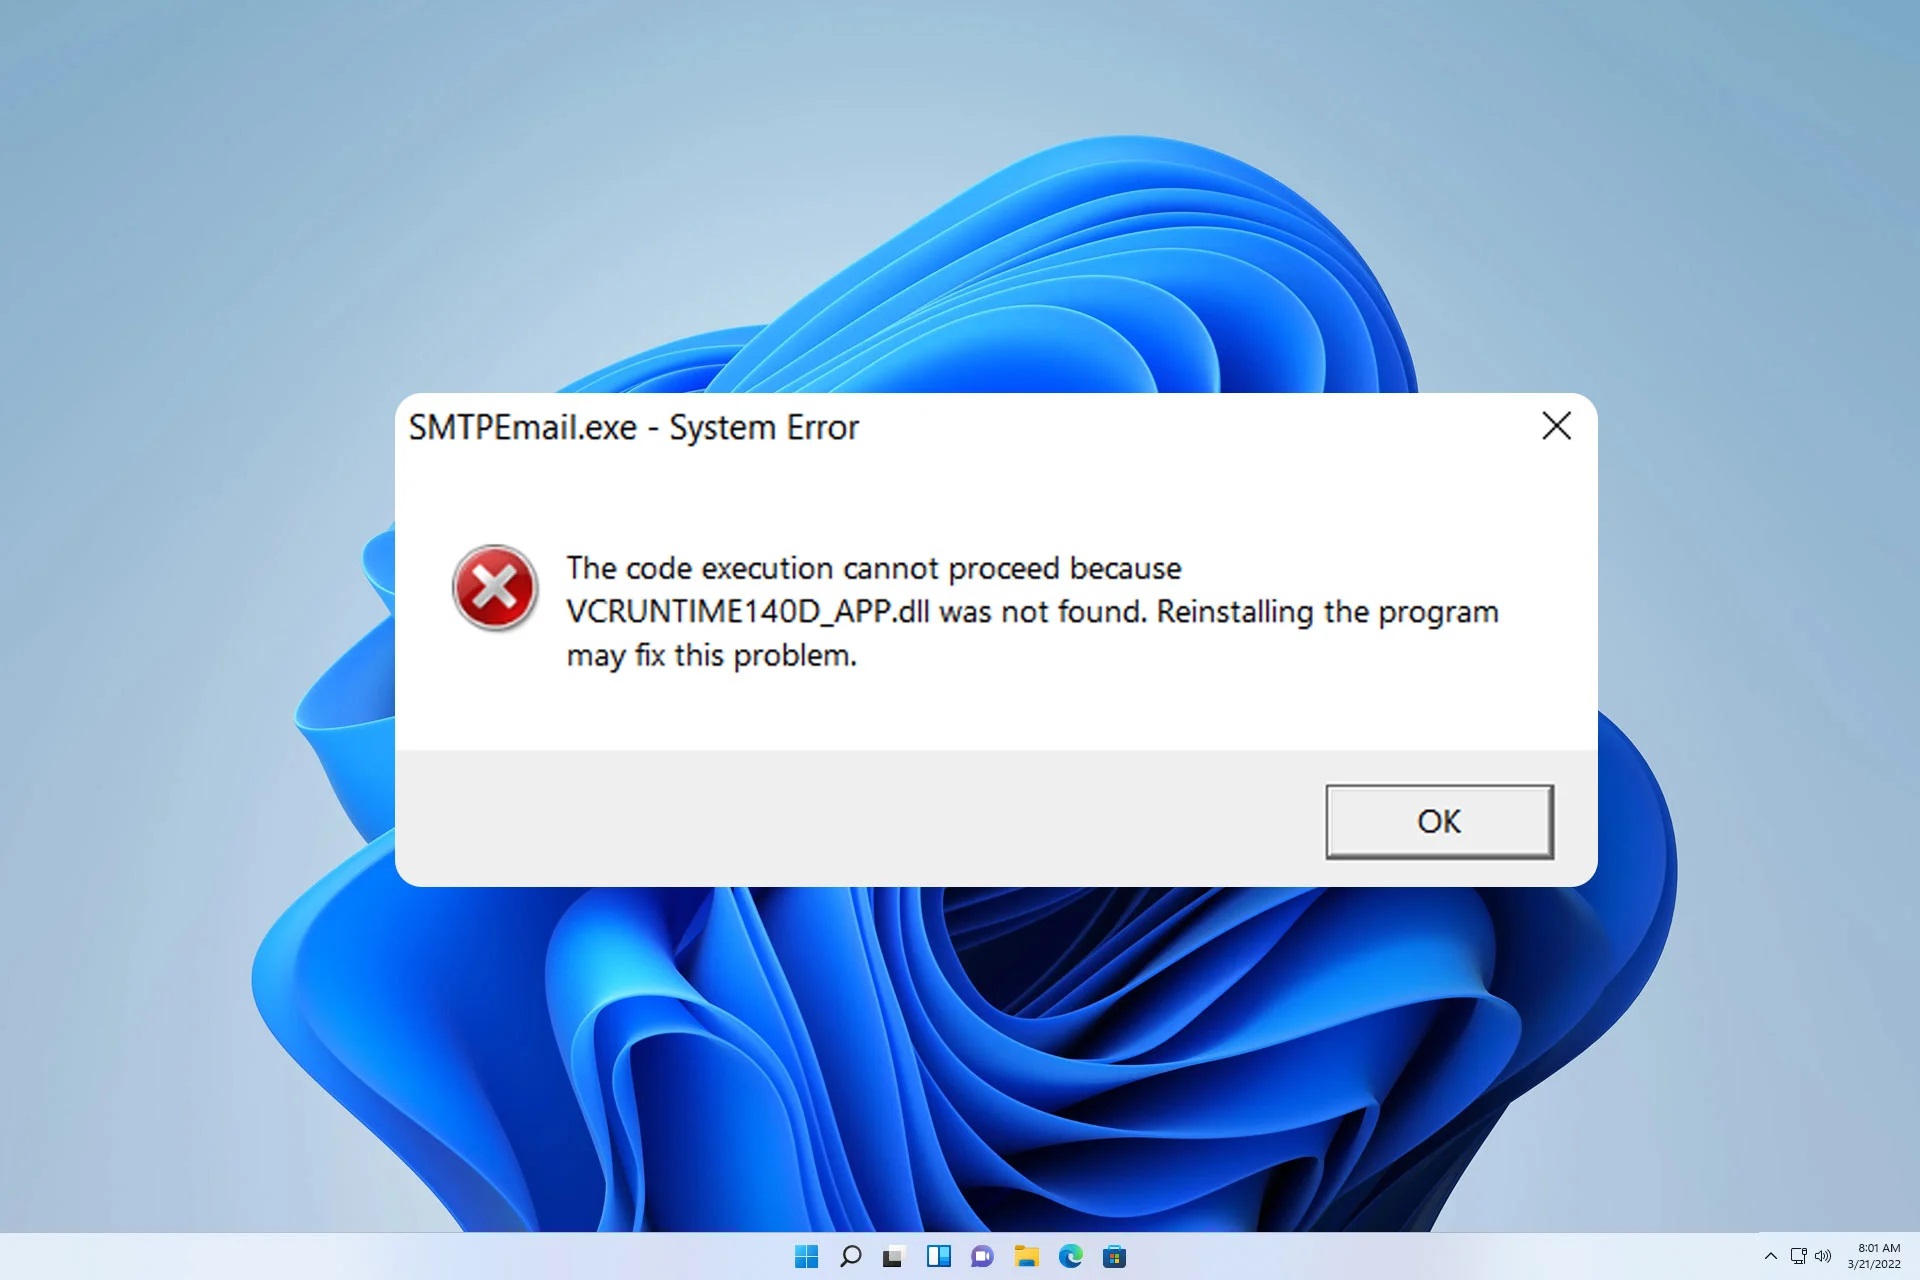
Common Causes of DLL Not Found or Missing Errors
DLL (Dynamic Link Library) files are essential components of a computer’s operating system and various software programs. DLL errors can occur when the system or a specific program fails to locate or load the required DLL file. This can lead to a range of issues, such as error messages, program crashes, and system instability. It’s important to identify the underlying cause of these errors to effectively resolve them. Here are some common causes of DLL not found or missing errors:
- Corrupted or deleted DLL files: One of the main causes of DLL errors is when the DLL files are corrupted due to malware infections or accidental deletion by the user or a faulty program uninstallation. Without the necessary DLL files, programs may fail to start or function properly.
- Outdated or incompatible software: DLL errors can occur if the software is outdated or incompatible with the current operating system or other installed programs. This can happen when you upgrade your operating system, install new software, or update existing programs.
- Registry issues: The Windows registry contains crucial information about DLL files and their locations. If the registry gets corrupted or contains incorrect information, it can lead to DLL errors. This can happen due to improper software installations, system crashes, or incomplete uninstallations.
- Hardware problems: In some cases, DLL errors can be caused by faulty hardware components, such as a failing hard drive or faulty RAM. These hardware issues can disrupt the proper functioning of the DLL files and result in errors.
- Software conflicts: Conflicts between different software programs or incompatible versions of DLL files used by different applications can also lead to DLL errors. This can occur if two or more programs try to access the same DLL file simultaneously or if one program overwrites the DLL file used by another program.
It is important to note that these are just some of the common causes of DLL errors. The specific cause of a DLL not found or missing error may vary depending on the system configuration and the software installed. By understanding the underlying cause, you can choose the appropriate solution to fix the error and ensure smooth functioning of your computer and software programs.
Solution 1: Restart Your Computer
Sometimes, a simple restart can resolve DLL not found or missing errors. Restarting your computer can help refresh the system and clear any temporary issues that may be causing the problem. Here’s how you can restart your computer:
- Save any unsaved work and close all open programs.
- Click on the “Start” button in the bottom left corner of the screen.
- From the Start menu, click on the “Power” option.
- Select “Restart” from the dropdown menu.
- Wait for your computer to shut down and restart.
Once your computer has restarted, check if the DLL error still persists. If the error message no longer appears and your programs are functioning properly, then the issue has been resolved. If the error continues to occur, proceed with the other solutions listed in this article.
Restarting your computer is a simple troubleshooting step that can resolve various software-related issues. It helps reset the system and clears any temporary glitches that might have affected the DLL files. By restarting your computer, you are giving it a fresh start and allowing the operating system to reload all the necessary components, including DLL files. This can often fix DLL not found or missing errors caused by minor software conflicts or temporary system issues.
It’s important to remember that restarting your computer should be the first step in troubleshooting DLL errors, but it may not always solve the issue. If the error persists, you can continue with the other solutions provided in this article to further diagnose and resolve the problem.
Solution 2: Restore the Deleted DLL File from Recycle Bin
If you have accidentally deleted a DLL file, it might still be recoverable from the Recycle Bin. The Recycle Bin acts as a temporary storage location for deleted files, allowing you to restore them if needed. Here’s how you can restore a deleted DLL file from the Recycle Bin:
- Open the Recycle Bin on your desktop by double-clicking its icon.
- Search for the deleted DLL file by scrolling through the list or using the search bar.
- Once you’ve located the DLL file, right-click on it and select “Restore”.
The restored DLL file will be placed back in its original location on your computer. After restoring the file, check if the DLL not found or missing error is resolved. If the error persists, you may need to explore other solutions.
It’s important to note that this solution only applies if you have deleted the DLL file recently and it is still present in the Recycle Bin. If you have emptied the Recycle Bin or permanently deleted the file, you won’t be able to recover it using this method. In such cases, you may need to consider alternative solutions, such as using a DLL recovery tool or reinstalling the program that relies on the DLL file.
Restoring a deleted DLL file from the Recycle Bin is a straightforward process that can help resolve DLL errors caused by accidental deletions. However, it is always recommended to exercise caution when deleting files and double-check their importance before permanently removing them from your system.
Solution 3: Run a Virus Scan
DLL not found or missing errors can sometimes be caused by malware or viruses infecting your computer. These malicious programs can corrupt or delete DLL files, leading to various system issues. Running a virus scan can help detect and remove any harmful threats that might be causing the DLL errors. Here’s how you can run a virus scan:
- Ensure that you have an up-to-date antivirus software installed on your computer. If you don’t, consider installing a reliable antivirus program.
- Open the antivirus software and navigate to the “Scan” or “Scan Now” option.
- Select the type of scan you want to perform. It is recommended to choose a full system scan for a thorough check of your computer.
- Start the scan and allow the antivirus program to scan all files, folders, and processes on your system.
- If any threats are detected, follow the instructions provided by the antivirus software to remove or quarantine them.
After the virus scan is complete, restart your computer and check if the DLL not found or missing errors persist. If the errors are resolved, it indicates that malware was causing the issue. However, if the errors persist, you may need to explore other solutions.
Running a virus scan is an essential step in maintaining the security and stability of your computer. It helps identify and eliminate any malicious programs that could be interfering with DLL files and causing errors. Regularly scanning your system for viruses can protect your DLL files and overall system integrity.
It’s worth noting that antivirus software should be regularly updated to ensure it can detect and handle the latest threats effectively. Additionally, exercising safe browsing habits and being cautious while downloading and installing programs can help prevent malware infections and subsequent DLL errors.
Solution 4: Perform a System File Check
Performing a system file check is a useful method to identify and repair corrupted or missing system files, including DLL files. This built-in Windows tool, known as System File Checker (SFC), scans your computer for any integrity violations and attempts to restore the affected files. Here’s how you can perform a system file check:
- Open the Command Prompt as an administrator. To do this, right-click on the Start button and select “Command Prompt (Admin)”.
- In the Command Prompt window, type the following command and press Enter:
sfc /scannow - Wait patiently as the system file check begins. The tool will scan your computer for corrupt files and attempt to repair them.
- Once the process is complete, check the scan results. If any errors or corrupted files are found, the system file check will attempt to fix them automatically.
- Restart your computer to complete the process.
After restarting your computer, check if the DLL not found or missing errors have been resolved. If the errors persist, you may need to explore other solutions.
The system file check is an effective way to repair corrupted or missing system files, including DLL files. It can help resolve DLL errors caused by file corruption, ensuring that your operating system functions properly. However, keep in mind that the system file check may not always be able to fix all issues, especially if the DLL files are severely damaged or overwritten by incompatible programs. In such cases, you may need to consider alternative solutions or seek further assistance.
It’s worth noting that running a system file check should be done periodically as part of your computer’s maintenance routine. This helps ensure the overall stability and integrity of your system files, reducing the risk of DLL errors and other system-related issues.
Solution 5: Reinstall the Program
If you are experiencing DLL not found or missing errors with a specific program, it may be necessary to reinstall the program. Reinstalling the program can fix any issues related to missing or corrupt DLL files associated with that particular software. Here’s how you can reinstall a program:
- First, uninstall the program from your computer. Go to the Control Panel and select “Programs” or “Programs and Features”. Find the program in the list of installed programs, right-click on it, and select “Uninstall” or “Remove”. Follow the prompts to complete the uninstallation process.
- After uninstalling the program, restart your computer to ensure that all related processes are terminated.
- Next, locate the installation file or setup executable for the program. This could be an installer you downloaded from the internet or a physical installation disk.
- Run the installer and follow the on-screen instructions to reinstall the program on your computer.
Once the program is successfully reinstalled, check if the DLL not found or missing errors have been resolved. If the errors persist, you may need to explore other solutions.
Reinstalling the program can fix DLL errors that are specific to that software. When you reinstall a program, it ensures that all necessary files, including DLL files, are properly installed and registered in your system. This can help resolve issues caused by corrupt or missing DLL files associated with the program.
It’s important to note that reinstalling the program will reset any custom settings or configurations you made, so you may need to reconfigure the program after reinstalling it. Additionally, make sure you have a valid license or activation code for the program before reinstalling it.
If the DLL not found or missing errors are not limited to a specific program and occur across multiple applications or the entire system, reinstalling individual programs may not be the solution. In such cases, you may need to explore other troubleshooting methods for a more comprehensive fix.
Solution 6: Update Your Drivers
Outdated or incompatible drivers can sometimes cause DLL not found or missing errors. Drivers are essential software components that allow hardware devices to communicate with the operating system and other software programs. If the drivers are outdated or not compatible with your system, it can lead to various issues, including DLL errors. Updating your drivers can help resolve these errors and ensure smooth functioning of your computer. Here’s how you can update your drivers:
- Identify the drivers that need to be updated. You can do this by checking the hardware devices in Device Manager. Right-click on the Start button, select “Device Manager,” and expand the categories to view the devices.
- Visit the manufacturer’s website for each device that requires an update. Look for the “Support” or “Downloads” section of the website.
- Search for the latest driver version for your specific hardware model and download it.
- Once the driver is downloaded, run the installer and follow the on-screen instructions to update the driver.
- Repeat the process for all the drivers that need updating.
After updating your drivers, restart your computer to complete the installation process and check if the DLL not found or missing errors have been resolved. If the errors persist, you may need to explore other solutions.
Updating your drivers is crucial to ensure optimal performance and compatibility of your hardware devices with the operating system and software programs. By installing the latest driver versions, you can fix compatibility issues that might be causing DLL errors. Outdated drivers can lead to crashes, system errors, and other performance issues, making it important to regularly update them.
It’s worth noting that manually updating drivers can be time-consuming, especially if you have multiple devices that require updates. Alternatively, you can use driver update software, which automatically scans your system for outdated drivers and installs the latest versions. These software tools can simplify the driver update process and ensure that you have the most up-to-date drivers for your hardware.
Solution 7: Reinstall Microsoft Visual C++ Redistributable Package
Microsoft Visual C++ Redistributable Package provides essential runtime components for running applications that are developed using Visual C++. If the DLL not found or missing errors are related to these runtime components, reinstalling the Microsoft Visual C++ Redistributable Package can help resolve the issue. Here’s how you can do it:
- Open the “Control Panel” on your computer.
- In the Control Panel, select “Programs” or “Programs and Features”.
- Look for Microsoft Visual C++ Redistributable Package in the list of installed programs.
- Right-click on the package and select “Uninstall” or “Remove” to remove it from your system.
- After uninstalling, visit the official Microsoft website and search for the latest version of the Microsoft Visual C++ Redistributable Package.
- Download the appropriate package that matches your system architecture (x86 or x64).
- Run the installer and follow the on-screen instructions to reinstall the package.
Once you have reinstalled the Microsoft Visual C++ Redistributable Package, restart your computer and check if the DLL not found or missing errors have been resolved. If the errors persist, you may need to explore other solutions.
The Microsoft Visual C++ Redistributable Package contains runtime components that are essential for running applications developed using Visual C++. These components include libraries and DLL files that applications rely on to function properly. By reinstalling the package, you ensure that all the necessary runtime components are installed and registered in your system.
It’s important to note that there are different versions of the Microsoft Visual C++ Redistributable Package, each corresponding to a specific version of Visual C++ and its associated runtime components. If you have multiple versions of the package installed on your system, it may be necessary to uninstall and reinstall each version that is causing DLL errors.
Reinstalling the Microsoft Visual C++ Redistributable Package is a recommended solution for DLL errors that are specific to these runtime components. However, if the DLL errors are not limited to applications developed using Visual C++, you may need to explore other troubleshooting methods to fix the issue.
Solution 8: Use System Restore
System Restore is a Windows feature that allows you to revert your computer’s settings to a previous state, effectively undoing any recent changes that might have caused DLL not found or missing errors. By using System Restore, you can restore your computer to a time when it was functioning without any issues. Here’s how you can use System Restore to fix DLL errors:
- Press the “Windows” key on your keyboard and search for “System Restore” in the search bar. Click on the “Create a restore point” option that appears in the search results.
- In the System Properties window, click on the “System Restore” button.
- Select the option to “Restore system files and settings” and click “Next”.
- Choose a restore point that predates the appearance of the DLL errors. You can select a specific restore point from the list or choose the recommended restore point.
- Follow the on-screen instructions to complete the System Restore process. Your computer will restart during the process, and any changes made after the selected restore point will be undone.
After the System Restore completes, check if the DLL not found or missing errors have been resolved. If the errors persist, you may need to explore other solutions.
System Restore is a valuable tool for troubleshooting DLL errors caused by recent changes or installations. It allows you to roll back your system to a previous state, effectively removing any problematic software installations, updates, or system changes that could be causing DLL errors. This can help restore your computer to a functional state before the errors occurred.
It’s important to note that using System Restore will undo any changes made to your computer since the selected restore point. This includes uninstalling recently installed programs, reverting system settings, and removing system updates. Therefore, it’s crucial to select a restore point that predates the appearance of the DLL errors but still ensures the system remains stable and functional.
System Restore is a powerful tool, but it may not always resolve DLL errors, especially if the errors are not directly related to recent changes or installations. In such cases, you may need to explore additional solutions or seek further assistance to fix the issue.
Solution 9: Use a DLL Fixer Tool
A DLL fixer tool is a specialized software designed to automatically detect and repair DLL errors on your computer. These tools can scan your system, identify missing or corrupted DLL files, and attempt to fix them. Using a DLL fixer tool can be a convenient solution, especially if you are not familiar with manually troubleshooting DLL errors. Here’s how you can use a DLL fixer tool:
- Research and select a reputable DLL fixer tool that suits your needs. There are several options available on the market, some of which are available for free while others require a purchase.
- Download and install the DLL fixer tool on your computer following the provided instructions.
- Launch the DLL fixer tool and initiate a system scan. The tool will search for DLL errors and identify any missing or corrupted files.
- Once the scan is complete, review the scan results to determine the DLL files that require fixing.
- Follow the instructions provided by the DLL fixer tool to repair the identified DLL errors. The tool may offer options to automatically replace or download the necessary DLL files.
- After the DLL fixer tool completes the repair process, restart your computer and check if the DLL not found or missing errors have been resolved.
It’s worth noting that while DLL fixer tools can be effective in resolving certain DLL errors, they may not always provide a guaranteed solution. The success of using a DLL fixer tool depends on factors such as the accuracy of the tool’s scan and the availability of the correct DLL files for replacement. Additionally, some DLL fixer tools may inadvertently cause further issues, so it’s important to choose a reputable and trusted tool.
DLL fixer tools can be a helpful option for users who prefer a more automated approach to fixing DLL errors. However, it’s important to exercise caution and research the tool you choose, ensuring that it is safe, reputable, and compatible with your system.
If the DLL not found or missing errors persist even after using a DLL fixer tool, you may need to explore alternative solutions or seek assistance from a professional technician who can provide more specialized troubleshooting.
Solution 10: Manually Replace the DLL File
If you have a backup copy or access to the correct DLL file, you can manually replace the missing or corrupted DLL file to fix DLL not found or missing errors. This process involves locating the correct DLL file and replacing the faulty one on your computer. Here’s how you can manually replace a DLL file:
- Identify the specific DLL file that is causing the error. You can usually find the name of the DLL file mentioned in the error message or by researching online.
- Search for a reliable source to download the correct version of the DLL file. It is important to obtain the file from a reputable and trusted source to ensure its authenticity and integrity.
- Once you have downloaded the DLL file, navigate to the folder that contains the DLL file on your computer. This location can vary depending on the application or system folder where the DLL file is expected to be present.
- Before replacing the DLL file, make a backup of the original by renaming it or moving it to a different folder. This step ensures that you can revert back to the original file if necessary.
- Copy the downloaded DLL file and paste it into the folder where the original DLL file was located. When prompted to replace the existing file, confirm the replacement.
After manually replacing the DLL file, restart your computer and check if the DLL not found or missing errors have been resolved. If the errors persist, you may need to explore other solutions.
Note that manually replacing DLL files should be done with caution, as using an incorrect or incompatible DLL file can cause further issues or system instability. It is crucial to verify the source and the version of the DLL file to ensure compatibility with your system and the program that relies on it.
Manually replacing DLL files can be an effective solution, especially when you have a trusted source for obtaining the correct DLL file. However, this solution may not be suitable for all users, as it requires technical knowledge and understanding of the system folder structure. If you are not confident or comfortable with replacing DLL files manually, it is recommended to seek assistance from a professional or explore alternative solutions.
Solution 11: Repair Your Windows Installation
If you are experiencing persistent DLL not found or missing errors, it may be necessary to repair your Windows installation. This process can help resolve system-related issues that are causing DLL errors. Repairing your Windows installation involves using built-in tools or installation media to repair or reinstall the operating system without losing your personal files. Here’s how you can repair your Windows installation:
- Create a backup of your important files to ensure they are protected during the repair process. You can use an external hard drive, cloud storage, or another computer to store your backups.
- Insert the Windows installation media, such as a CD or USB drive, into your computer.
- Restart your computer and boot from the installation media. You may need to change the boot order settings in your computer’s BIOS to prioritize the installation media over the hard drive.
- Follow the on-screen instructions to reach the Windows installation screen. Select your language preferences and click on the “Repair your computer” option.
- Choose the appropriate troubleshoot and repair options based on your specific situation. This can include options like “Startup Repair” or “System Restore”.
- Allow the repair process to complete, which may take some time. Follow any additional prompts or instructions provided by the repair tool.
After the repair process is finished, restart your computer and check if the DLL not found or missing errors have been resolved. If the errors persist, you may need to explore other solutions.
Repairing your Windows installation can help resolve DLL errors that are caused by system file corruption or other system-related issues. This process reinstalls essential system files while preserving your personal files, settings, and installed programs.
It’s important to note that the repair process can vary depending on your Windows version and the specific repair options available. The options mentioned here are general steps, and the actual steps may differ based on your situation. It is recommended to refer to the official Microsoft documentation or seek guidance from a professional if you are unsure about the repair process.
Repairing your Windows installation is a comprehensive solution, but it should be considered as a last resort. It is recommended to try other troubleshooting methods before opting for a repair, as it can be time-consuming and may require reinstallation of certain drivers or programs after the process is complete.
Solution 12: Seek Help from the Developer or Support Team
If you have tried various solutions and are still unable to resolve the DLL not found or missing errors, it may be time to seek help from the developer or support team of the software or application that is causing the issue. The developers or support teams are likely to have specific knowledge and resources to address the DLL errors related to their software. Here’s what you can do to seek help:
- Identify the software or application that is experiencing the DLL error. Check the error message or research online to find out the developer or support contact details.
- Visit the developer’s website or support portal to find relevant documentation, FAQs, or troubleshooting guides. They may provide specific instructions for resolving DLL errors or have a dedicated support forum.
- If you cannot find the necessary information on their website, try reaching out to their support team directly. Use the provided contact methods, such as phone, email, or live chat, to explain the issue and request assistance.
- Provide detailed information about the DLL error, including the error message, any recent changes or installations you made, and steps you have already taken to troubleshoot the issue. The more information you provide, the better equipped they will be to assist you.
- Follow any troubleshooting steps or recommendations provided by the developer or support team. They may ask for additional information or ask you to perform certain actions to diagnose and resolve the DLL errors.
Seek their guidance and follow their instructions to address the DLL errors specific to their software or application. They may be able to provide a customized solution or a patch specifically designed to fix DLL-related issues.
Seeking help from the developer or support team is especially crucial if the DLL error is specific to a particular software or application. They have the expertise and knowledge about their product and can guide you through the process of troubleshooting and resolving the DLL errors. They may also be able to provide insights and updates related to the compatibility or known issues of their software with certain DLL files.
It’s important to note that response times and support availability may vary depending on the software or application developer. Some developers offer free support while others may require a subscription or paid support package. Be patient and follow up as needed to ensure that the DLL error is addressed effectively.
If you are unable to get satisfactory assistance from the developer or support team, you can also consider reaching out to online communities or forums dedicated to the software or application. Sometimes, other users or enthusiasts can offer insights or workarounds based on their own experiences with similar DLL errors.