
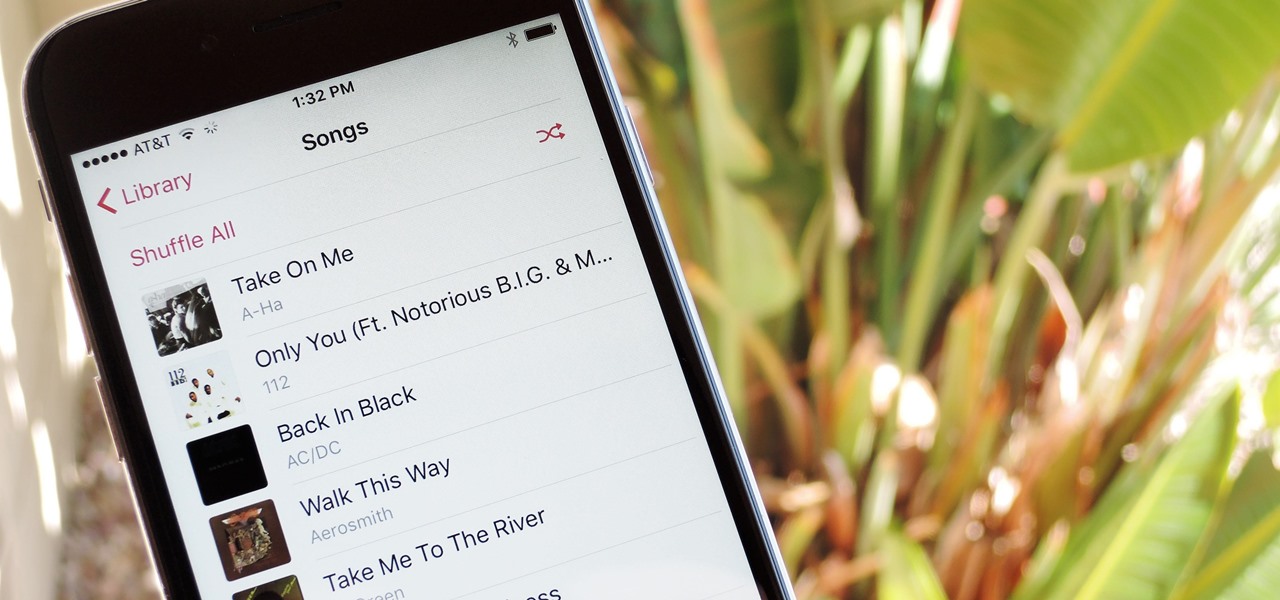
Overview
When it comes to downloading music on your iPhone, iTunes has long been the go-to option. However, it’s not the only way to get your favorite tracks onto your device. Whether you’re looking to expand your music library or save on data usage by downloading songs for offline listening, there are several alternative methods available.
In this article, we will explore ten different methods for downloading music on your iPhone without relying on iTunes. From using dedicated music download apps to transferring music from your computer, we will cover a range of options to suit different preferences and needs.
For those who prefer a streamlined experience, method 1 involves using a dedicated music download app. These apps offer a vast library of songs to choose from and allow you to download them directly to your iPhone. Method 2 involves downloading music from websites that offer free and legal music downloads. This method requires a bit more effort, but it gives you access to a wide variety of genres and artists.
If you already have your music collection stored in a cloud storage service like Dropbox or Google Drive, method 3 is for you. This method involves downloading the songs from your cloud storage and saving them directly to your iPhone. Method 4 is perfect for streaming music enthusiasts who want to listen to their favorite songs offline. By using streaming apps with an offline mode, you can download your favorite tracks to your device and listen to them without an internet connection.
For those who have their music library stored on a computer, method 5 provides a simple solution. You can transfer your music from your computer to your iPhone using iTunes alternative software. Method 6 involves using music downloading websites directly from the Safari browser on your iPhone. With this method, you can search for and download music files without the need for additional apps.
If you want more control over your downloaded music files, method 7 recommends using a file manager app. This allows you to easily organize and manage your downloaded music files on your iPhone. Method 8 is for those who enjoy listening to music on YouTube. By using a YouTube to MP3 converter app, you can convert and download YouTube videos as MP3 files directly to your iPhone.
Method 9 introduces music downloading apps with browser integration. These apps work as a browser within the app, allowing you to search for and save music files directly from various websites. Finally, method 10 suggests using free music download apps that offer a vast selection of songs available for download directly to your iPhone.
With these ten different methods at your disposal, you can easily download music on your iPhone without relying on iTunes. Whether you prefer using dedicated apps, websites, cloud storage, or browser integration, there is a method that suits your needs. So, let’s explore each method in detail and start building your offline music collection.
Method 1: Using a Music Download App
If you’re looking for a convenient and efficient way to download music on your iPhone, using a dedicated music download app is a great option. These apps provide a vast library of songs across different genres and allow you to download them directly to your device. Here’s how you can do it:
- Start by choosing a music download app from the App Store. Some popular options include Spotify, Amazon Music, and Soundcloud.
- Download and install the app on your iPhone.
- Open the app and create an account if required. Most apps offer a free version with limited features, while others require a subscription for full access.
- Once you’re logged in, you can start exploring the app’s music library. Browse through different genres, playlists, or search for specific songs or artists.
- When you find a song you want to download, look for the download or save button. This can vary depending on the app you’re using.
- Tap on the download button, and the app will start downloading the song directly to your iPhone. The downloaded music usually gets saved within the app’s library for easy access.
- Repeat the process for any other songs you want to download.
- Once the songs are downloaded, you can listen to them directly through the music download app, even without an internet connection.
Using a music download app offers the advantage of a user-friendly interface, a vast music library, and the ability to create and customize playlists. Some apps also offer additional features like curated playlists, recommendations based on your music preferences, and integration with other devices and platforms.
It’s important to note that the availability and functionality of music download apps may vary depending on your location and the specific app you choose. Additionally, some apps may require a subscription fee for access to certain features or an ad-supported free version.
By utilizing a music download app on your iPhone, you can easily build a personalized offline music collection and enjoy your favorite tunes anytime, anywhere.
Method 2: Downloading Music from Websites
If you’re looking for free and legal music downloads, downloading music from websites is a viable option. While this method requires a bit more effort compared to using dedicated music download apps, it provides access to a wide variety of genres and artists. Here’s how you can download music from websites directly to your iPhone:
- Open the Safari browser on your iPhone and navigate to a website that offers free and legal music downloads. Examples include Jamendo, SoundClick, and Free Music Archive.
- Search for the song or artist you want to download using the website’s search feature or browse through their music catalog.
- Once you find the song you want to download, look for a download button or link next to the track.
- Tap on the download button, and the website will start downloading the song to your iPhone. The downloaded music file will usually be saved in the Downloads folder or the default music folder of your phone.
- After the download is complete, you can locate the downloaded song using a file manager app or through the Files app on your iPhone.
- If you want to listen to the downloaded music using the native Apple Music app, you will need to transfer the songs from the Downloads folder to your Apple Music library.
- To transfer the downloaded songs to your Apple Music library, connect your iPhone to your computer using a USB cable and open iTunes or Finder (for macOS Catalina and later).
- Select your iPhone from the list of devices and navigate to the “Music” tab.
- Enable the “Sync Music” option and choose to sync your entire music library or select specific songs and playlists.
- Click on the “Apply” or “Sync” button to transfer the downloaded songs from your computer to your iPhone’s Apple Music library.
Downloading music from websites allows you to explore a wide range of independent artists, niche genres, and tracks that may not be available on mainstream music platforms. It’s important to ensure that the websites you use for downloading music are reputable and offer legal downloads to avoid any copyright infringements.
Keep in mind that the availability of downloadable music on websites can vary, and some songs may require permission or licensing for offline use. Additionally, the file format of the downloaded music may not be compatible with all music players on your iPhone, so it’s essential to check the compatibility before downloading.
By downloading music from websites directly to your iPhone, you can expand your music collection with unique and independent tracks, all while staying within the boundaries of legal and free music distribution.
Method 3: Using a Cloud Storage Service
If you already have a collection of music stored in a cloud storage service like Dropbox, Google Drive, or OneDrive, you can easily download those songs to your iPhone using the respective cloud storage app. This method is convenient if you want to have access to your existing music library on your iPhone without using iTunes. Here’s how you can use a cloud storage service to download music:
- Ensure that you have a cloud storage app installed on your iPhone. Popular options include Dropbox, Google Drive, and OneDrive.
- Open the cloud storage app and sign in to your account or create a new one if necessary.
- Upload your music files to the cloud storage service from your computer. You can do this by dragging and dropping the music files into the app’s interface or using the upload button provided.
- Once your music files are uploaded, open the cloud storage app on your iPhone and sign in to the same account.
- Navigate to the folder where your music files are stored within the app.
- Locate the music file you want to download and tap on it.
- The app will give you options to preview or download the file. Tap on the download option to save the music file to your iPhone.
- Repeat the process for each song you want to download.
- Once the download is complete, you can find the songs in the default music folder on your iPhone.
- You can further organize the downloaded music by transferring it to the Apple Music app or any other preferred music player.
Using a cloud storage service to download music on your iPhone offers the advantage of easy access to your existing music collection without the need for physical storage or transferring files from your computer. It also allows you to stream the music files directly from the cloud service if you prefer not to download them.
Keep in mind that the availability of cloud storage options may vary, and some services may have limitations on the amount of storage or file size. Additionally, ensure that you have a stable internet connection when downloading the music files to avoid interruptions.
By utilizing a cloud storage service, you can conveniently download and access your favorite music on your iPhone, regardless of where your music files are stored.
Method 4: Using Streaming Apps with Offline Mode
If you’re a fan of streaming music but still want to enjoy your favorite songs offline, using streaming apps with an offline mode is a convenient option. Many popular streaming platforms like Spotify, Apple Music, and YouTube Music offer the ability to download songs for offline listening. Here’s how you can use streaming apps with offline mode to download music on your iPhone:
- First, ensure that you have the streaming app of your choice installed on your iPhone. Examples of popular streaming apps include Spotify, Apple Music, and YouTube Music.
- Open the streaming app and sign in to your account or create a new one if necessary.
- Explore the app and find the songs or playlists you want to download for offline use. Most streaming apps provide a dedicated section for offline content.
- For Spotify and Apple Music, you can download songs or playlists by tapping the download button next to the desired content. On YouTube Music, you can download songs by tapping the download button while playing a song.
- Wait for the app to finish downloading the songs. The downloaded songs are usually stored within the app and can be accessed in the offline section of the app.
- Once the songs are downloaded, you can listen to them directly through the streaming app, even without an internet connection.
- Keep in mind that the availability of the offline mode feature may vary depending on your subscription plan. Some streaming apps offer this feature only for premium or paid subscriptions.
Using streaming apps with an offline mode provides access to a vast music library without the need for downloading individual songs or managing storage space on your iPhone. These apps also often offer personalized recommendations, curated playlists, and the ability to create and customize your own playlists.
It’s important to note that the songs downloaded from streaming apps are usually protected by digital rights management (DRM) to prevent unauthorized sharing or distribution. This means that you can only listen to the downloaded songs within the streaming app itself and cannot transfer them to other devices or platforms.
By utilizing the offline mode feature of streaming apps, you can enjoy your favorite songs even when you’re in an area with no internet connection. Whether you’re on a plane, commuting, or simply want to conserve data, downloading music from streaming apps for offline listening offers a convenient solution.
Method 5: Transferring Music from Computer to iPhone
If you have a collection of music stored on your computer and want to transfer it to your iPhone, you can do so without using iTunes. This method allows you to have full control over your music files and ensures that you can enjoy your favorite tunes on the go. Here’s how you can transfer music from your computer to your iPhone:
- Connect your iPhone to your computer using a USB cable. Ensure that both your iPhone and computer are unlocked.
- On your computer, open the File Explorer (Windows) or Finder (Mac).
- Navigate to the folder where your music files are stored.
- Select the music files you want to transfer to your iPhone. You can select multiple files by holding down the Shift or Command key while clicking on the files.
- Right-click on the selected files and choose the Copy option.
- In the File Explorer or Finder, navigate to the location on your iPhone where you want to transfer the music files. This can be the Music folder, a specific playlist, or any other location.
- Right-click on the destination location and choose the Paste option. This will transfer the music files from your computer to your iPhone.
- Wait for the transfer process to complete. The time taken will depend on the size of the music files and the speed of your USB connection.
- Once the transfer is finished, disconnect your iPhone from the computer.
- To access and listen to the transferred music on your iPhone, open the Apple Music app or any other music player app you prefer.
This method allows you to transfer music files directly from your computer to your iPhone without the need for iTunes. It’s ideal for those who want to maintain control over their music library and bypass the restrictions of using a media management software.
It’s important to note that the music files transferred from your computer should be in a compatible format supported by the music player app on your iPhone. Common formats like MP3, WAV, and AAC are widely accepted. If needed, you can convert your music files to a compatible format using a third-party media converter before transferring them to your iPhone.
By utilizing the simple process of transferring music files from your computer to your iPhone, you can have your entire music library at your fingertips and enjoy your favorite songs wherever you go.
Method 6: Using Music Downloading Websites with Safari
If you prefer to download music directly from websites without the need for additional apps, you can use Safari on your iPhone to access music downloading websites. This method allows you to search for and download music files without the hassle of installing and managing dedicated music download apps. Here’s how you can use Safari to download music on your iPhone:
- Launch the Safari browser on your iPhone.
- Search for a reputable music downloading website that offers free and legal music downloads. Websites like Soundcloud, Bandcamp, and Spinrilla are popular choices.
- Use the website’s search feature or browse through their library to find the song or artist you want to download.
- Tap on the song or the download button/link provided next to it.
- Safari may display a warning message indicating that the file may harm your device. Review the message and proceed if you trust the website and its content.
- The download will start automatically, and you can keep track of the progress at the top of the Safari browser.
- Once the download is complete, you can find the downloaded music file in the Downloads folder on your iPhone.
- To access and listen to the downloaded music, you can use the default Music app or any third-party music player app of your choice.
Using Safari to download music from websites provides a straightforward approach to expand your music library without relying on dedicated music download apps. It gives you the flexibility to explore a wide range of websites and discover new artists and genres.
It’s important to note that not all music downloading websites may offer legal downloads, so exercise caution and only download from reputable sources to respect copyright laws. Additionally, be mindful of any potential risks associated with downloading files from the internet, and make sure your iPhone’s security settings are adequate.
By utilizing Safari to download music from websites on your iPhone, you can expand your music collection with a diverse range of songs and artists while enjoying the simplicity and convenience of using your device’s built-in browser.
Method 7: Using a File Manager App
If you prefer to have more control over your downloaded music files, using a file manager app on your iPhone is a great option. A file manager app allows you to browse and manage the files on your device, including the music files you download. Here’s how you can use a file manager app to download and organize music on your iPhone:
- Search for a file manager app on the App Store that suits your preferences. Some popular options include Documents by Readdle, Files by Google, and FileApp.
- Download and install the file manager app on your iPhone.
- Open the file manager app and grant necessary permissions to access your device’s files.
- Navigate to a website or online platform that offers free and legal music downloads in Safari or any other browser on your iPhone.
- Search for the song or artist you want to download and find a direct download link.
- Tap and hold on the download link, then select the option to copy the download link.
- Switch back to the file manager app and tap on the browser icon or open the built-in browser within the app.
- Once in the browser, paste the copied download link into the address bar and press Go or Enter.
- The file manager app will start downloading the music file directly to your iPhone.
- After the download is complete, you can find the music file in the Downloads or Documents folder within the file manager app.
- From the file manager app, you can organize and manage your downloaded music files into folders, create playlists, or transfer them to other music player apps on your iPhone.
Using a file manager app provides you with more flexibility in managing your downloaded music files. You can easily organize your music library, create custom playlists, and have greater control over file management.
It’s important to note that the availability of download links on websites may vary, and some websites may contain copyrighted content. Ensure that you download music files from legal sources to respect copyright laws.
By utilizing a file manager app on your iPhone, you can download and organize your favorite music files, creating a personalized music library that suits your unique tastes and preferences.
Method 8: Using a YouTube to MP3 Converter App
If you enjoy listening to music on YouTube and want to download your favorite tracks as MP3 files on your iPhone, using a YouTube to MP3 converter app is a convenient solution. These apps allow you to convert and download YouTube videos as audio files directly to your device. Here’s how you can use a YouTube to MP3 converter app to download music on your iPhone:
- Search for a reputable YouTube to MP3 converter app on the App Store, such as Documents by Readdle, MyMP3, or Any Audio Converter.
- Download and install the chosen app on your iPhone.
- Open the YouTube app or go to the YouTube website in Safari and find the video that contains the music you want to download.
- Tap on the share button beneath the YouTube video.
- In the share options, select the option to copy the video’s URL or link.
- Switch back to the YouTube to MP3 converter app and paste the video URL into the app’s search or conversion field.
- Choose the desired audio format, typically MP3.
- Start the conversion process, which may take a few moments depending on the length of the video and the speed of your internet connection.
- Once the conversion is complete, you can download the converted audio file to your iPhone.
- Locate the downloaded MP3 file within the YouTube to MP3 converter app or in the designated downloads folder.
- To listen to the downloaded music, you can use the app’s built-in music player or transfer the file to another music player app on your iPhone.
Using a YouTube to MP3 converter app enables you to create an offline library of your favorite YouTube music content for on-the-go listening. It eliminates the need for an internet connection and gives you the flexibility to enjoy your preferred tracks even without access to YouTube or a streaming platform.
It’s important to note that downloading copyrighted content from YouTube without proper authorization may infringe upon rights holders’ copyrights. Always ensure that you download and use music legally and respect the intellectual property rights of artists and creators.
By utilizing a reliable YouTube to MP3 converter app on your iPhone, you can easily convert and download your favorite YouTube music videos into MP3 files, expanding your offline music collection and enhancing your listening experience.
Method 9: Using Music Downloading Apps with Browser Integration
If you want a seamless and integrated experience of downloading music directly from websites on your iPhone, using music downloading apps with browser integration is an excellent choice. These apps offer a built-in browser that allows you to search for and save music files from various websites without needing to switch between multiple apps. Here’s how you can use music downloading apps with browser integration to download music on your iPhone:
- Search for a music downloading app with browser integration on the App Store, such as iDownloader, iBolt Downloader, or UC Browser.
- Download and install the preferred app on your iPhone.
- Open the music downloading app and explore its features.
- Within the app, access the built-in browser by tapping on the browser icon or the URL field.
- Using the built-in browser, navigate to a website that offers free and legal music downloads.
- Search for the song or artist you want to download on the website.
- When you find the desired music file, tap on the download button/link next to it.
- The music downloading app will detect the download link and prompt you to confirm the download.
- Once you confirm, the app will start downloading the music file directly to your iPhone.
- After the download is complete, you can find the downloaded music file within the app or in the designated downloads folder.
- To listen to the downloaded music, you can use the app’s built-in music player or transfer the file to another music player app on your iPhone.
Using music downloading apps with browser integration streamlines the process of finding and downloading music directly from websites. It eliminates the need to switch between multiple apps and provides a cohesive experience within one application.
It’s important to note that while these apps simplify the process of downloading music, you should ensure that you download music from reputable sources offering legal and authorized downloads. Respect copyright laws and avoid websites that distribute copyrighted content without permission.
By utilizing a music downloading app with browser integration on your iPhone, you can enjoy a seamless experience of searching for and saving music files from various websites, expanding your offline music collection with ease.
Method 10: Using Free Music Download Apps
If you’re looking for a diverse selection of music that you can download directly to your iPhone, using free music download apps is an ideal option. These apps provide a wide range of songs across different genres, allowing you to grow your offline music library without spending a dime. Here’s how you can use free music download apps to download music on your iPhone:
- Search for a reputable free music download app on the App Store, such as Soundcloud, Audiomack, or Spinrilla.
- Download and install the chosen app on your iPhone.
- Open the app and sign in or create a new account if required.
- Browse through the app’s music library, explore different genres, or search for specific songs or artists.
- When you find a song you want to download, look for a download or save button next to it.
- Tap on the download button, and the app will start downloading the song directly to your iPhone.
- Repeat the process for any other songs you want to download and add to your offline music collection.
- Once the songs are downloaded, you can listen to them directly within the app or transfer them to another music player app on your iPhone.
Using free music download apps offers the advantage of an extensive music library that is constantly updated with new releases and trending songs. These apps often provide additional features such as curated playlists, favorite tracks, and the ability to follow and discover new artists.
It’s important to note that while these apps offer free music downloads, they may be ad-supported or offer premium paid versions with enhanced features. Make sure to review the terms and conditions of each app and respect any limitations or usage rights specified by the app developers.
By utilizing free music download apps on your iPhone, you can expand your music library with a diverse range of songs, create personalized playlists, and enjoy your favorite tunes without any cost.