
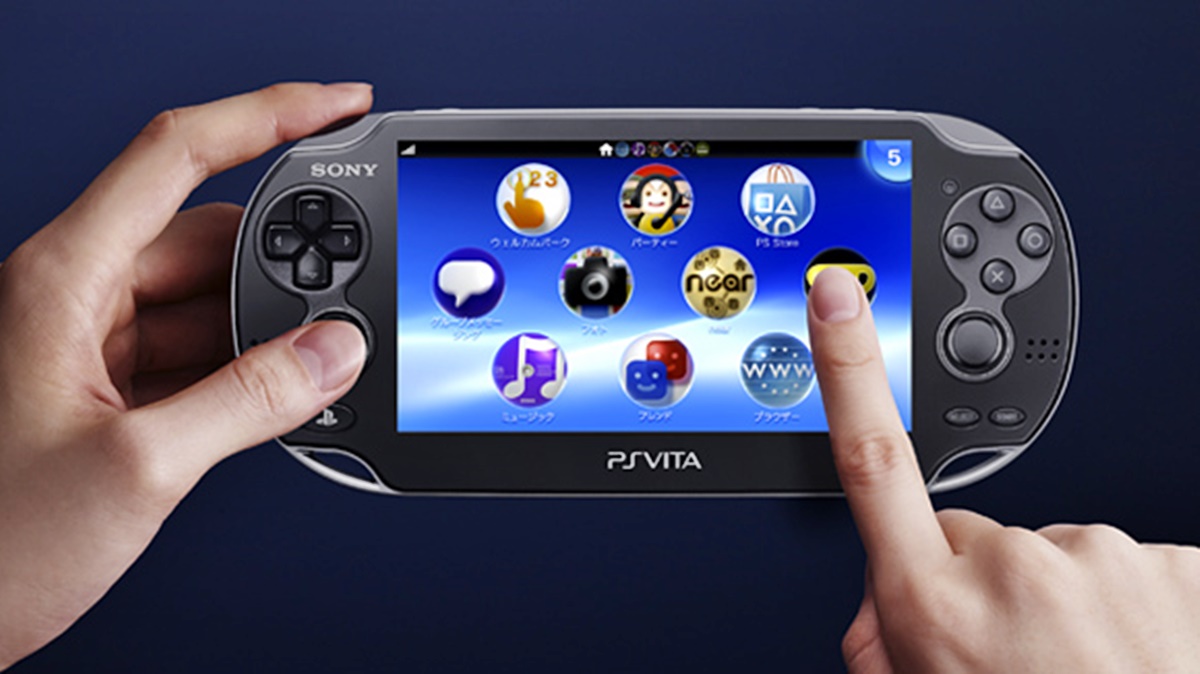
Changing the Background Image
One of the easiest ways to personalize your PS Vita’s home screen is by changing the background image. By selecting an image of your choice, you can give your device a unique and personal touch. Here’s how you can do it:
To change the background image on your PS Vita, simply follow these steps:
- Start by navigating to the home screen of your PS Vita. This is the screen you see when you turn on your device or exit an application.
- Next, locate and tap on the “Settings” icon, which looks like a gear. It is usually located at the top right corner of the home screen.
- In the Settings menu, scroll down until you find the “Theme & Background” option and tap on it.
- Under the “Theme & Background” menu, you’ll see the “Background” option. Tap on it to proceed.
- You will be presented with different background options, including pre-installed images and photos from your gallery. Browse through the available options and select the one that you want to set as your background image.
- Once you’ve chosen your desired background image, tap on it to confirm your selection.
After following these steps, the selected image will be set as the new background for your PS Vita’s home screen. You can change it anytime by repeating the same process and selecting a different image.
Changing the background image allows you to customize your PS Vita’s home screen to reflect your personal style or showcase your favorite image. Whether it’s a photo of loved ones, a breathtaking landscape, or fan art of your favorite game, having a personalized background image can make using your PS Vita a more enjoyable and visually appealing experience.
Adjusting the Screen Brightness
Being able to adjust the screen brightness is an essential feature that allows you to optimize the visual experience on your PS Vita. Whether you prefer a brighter screen for gaming in well-lit environments or a dimmer screen for nighttime use, here’s how you can easily adjust the screen brightness:
To adjust the screen brightness on your PS Vita, follow these simple steps:
- Begin by turning on your PS Vita and navigating to the home screen or exiting any open application.
- Next, locate and tap on the “Settings” icon, which resembles a gear, typically found at the top right corner of the home screen.
- In the Settings menu, scroll down to find the “Brightness” option and tap on it.
- You will be presented with a slider that allows you to adjust the screen brightness. Slide it to the right to increase the brightness or to the left to decrease it, based on your preference.
- As you adjust the slider, the screen brightness will change in real-time, allowing you to find the perfect level of brightness for your needs.
- Once you’re satisfied with the brightness level, simply exit the Settings menu by pressing the “Back” button or tapping outside the menu area.
By adjusting the screen brightness on your PS Vita, you can enhance your gaming experience, reduce eye strain, and conserve battery power. It enables you to adapt your device to different lighting conditions and ensures optimal visibility of the screen’s content.
Remember, it’s essential to find a balance between the brightness level and your surroundings to avoid eye discomfort and to prolong your device’s battery life. Experiment with different brightness levels to find the setting that works best for you in various gaming or viewing situations.
Adding or Removing App Icons
Customizing the app icons on your PS Vita’s home screen allows you to have quick access to your favorite games and applications. Here’s how you can easily add or remove app icons:
To add or remove app icons on your PS Vita, follow these steps:
- Begin by navigating to the home screen of your PS Vita. This is the main screen that you see when you turn on your device or exit an application.
- Identify the app icon that you want to add or remove. App icons are typically displayed as small squares or rectangles with the name of the game or application written on them.
- To add an app icon, locate the “Store” icon on your home screen. Tap on it to access the PlayStation Store.
- Once you’re in the PlayStation Store, use the search function or browse through the available categories to find the game or application you want to add. When you find it, tap on the icon to view its details.
- On the game or application details page, you’ll find an option to “Download” or “Purchase” the app. Tap on it to begin the download or purchase process.
- After the download or purchase is complete, the app icon will automatically appear on your home screen, ready to be accessed.
- To remove an app icon, locate the icon you want to remove on your home screen.
- Press and hold your finger on the app icon until the options menu appears. Depending on your PS Vita’s software version, you might see an “Options” button or an “X” button appearing near the icon.
- Tap on the “Options” button or the “X” button to access the removal options.
- Confirm the removal of the app icon by selecting the appropriate option.
Adding or removing app icons on your PS Vita allows you to customize your home screen according to your preferences and easily access your favorite games and applications. Whether you want to declutter your home screen or add new titles to your collection, these simple steps will help you achieve a personalized and organized home screen layout.
Organizing App Icons into Folders
As your collection of games and applications grows on your PS Vita, it’s essential to keep them organized for easy access. By organizing app icons into folders, you can categorize and group similar apps together. Here’s how you can efficiently organize your app icons:
To organize app icons into folders on your PS Vita, follow these simple steps:
- Begin by navigating to the home screen of your PS Vita. This is the main screen that appears when you turn on your device or exit an application.
- Identify the app icons you want to organize into a folder. These can be games, applications, or any other content that you wish to group together.
- Press and hold your finger on one of the app icons you want to include in the folder. After a moment, the icon will start to shake, indicating that you can now move it.
- While still holding your finger on the first app icon, drag it on top of another app icon that you want to include in the same folder. As you do this, a folder will be created, and both app icons will be placed inside it.
- You can continue adding more app icons to the folder by dragging and dropping them onto the folder. To remove an app icon from the folder, simply drag it out of the folder and onto the home screen.
- Once you have organized all the desired app icons into folders, you can customize the folders by giving them unique names. To do this, press and hold your finger on the folder, then select the “Rename” option from the menu that appears.
- Enter the desired name for the folder using the on-screen keyboard, then press “OK” or confirm to save the changes.
Organizing app icons into folders on your PS Vita helps keep your home screen tidy and allows for efficient navigation. By grouping similar apps together, you can quickly find what you’re looking for and streamline your gaming or application experience.
Remember to organize your app icons in a way that makes sense to you. You can create folders based on game genres, application categories, or any other criteria that suits your preferences. With a well-organized home screen, you’ll have a more enjoyable and organized PS Vita experience.
Changing App Icon Layout
Customizing the layout of app icons on your PS Vita’s home screen can help you create a personalized and organized interface. Whether you prefer a grid-style layout or a more free-form arrangement, here’s how you can change the app icon layout:
To change the app icon layout on your PS Vita, follow these steps:
- Start by navigating to the home screen of your PS Vita. This is the screen you see when you turn on your device or exit an application.
- Next, locate and tap on the “Settings” icon, which resembles a gear and is usually located at the top right corner of the home screen.
- In the Settings menu, scroll down until you find the “Home Screen” option and tap on it.
- Under the “Home Screen” menu, you’ll find the “Layout” option. Tap on it to access the available layout options.
- Choose the desired layout option from the available choices. The options may include grid-style layouts, list-style layouts, or other variations.
- Once you’ve selected the desired layout, exit the Settings menu, and return to the home screen to see the updated app icon layout.
Changing the app icon layout on your PS Vita allows you to customize the visual arrangement of your games and applications. You can choose a layout that suits your preferences and enables easy access to your most frequently used apps.
Experiment with different app icon layouts to find the one that suits your needs and enhances your gaming or application experience. You can always change the layout again in the future if you want to try a different arrangement.
Remember that the layout of app icons is a matter of personal preference, and the ability to customize it allows you to create a home screen that reflects your style and makes navigating your PS Vita more intuitive and efficient.
Changing the Wallpaper Theme
One of the great features of the PS Vita is the ability to change the wallpaper theme, which allows you to personalize the overall look and feel of your device. By selecting a different wallpaper theme, you can transform the appearance of your PS Vita’s home screen. Here’s how you can change the wallpaper theme:
To change the wallpaper theme on your PS Vita, follow these steps:
- Start by navigating to the home screen of your PS Vita. This is the screen you see when you turn on your device or exit an application.
- Next, locate and tap on the “Settings” icon. It resembles a gear and is usually found at the top-right corner of the home screen.
- In the Settings menu, scroll down until you find the “Theme & Background” option and tap on it.
- Under the “Theme & Background” menu, you’ll see the “Theme” option. Tap on it to access the available themes.
- You will be presented with a list of pre-installed themes. Browse through the options and select the one that you want to apply.
- Once you’ve chosen your desired theme, tap on it to apply it to your PS Vita’s home screen.
After following these steps, the wallpaper theme you selected will be applied to your PS Vita’s home screen. The new theme will update the background image, color scheme, and overall visual appearance of your device.
Changing the wallpaper theme is a fun and effective way to give your PS Vita a fresh, new look. Whether you prefer a bold and vibrant theme, a minimalist and sleek design, or something in between, the available themes offer a variety of options to suit your style.
Feel free to change the theme as often as you like to keep your PS Vita’s aesthetics up to date and in line with your preferences. With the ability to customize the wallpaper theme, you can make your PS Vita truly unique and tailored to your own personal taste.
Customizing the Lock Screen
The lock screen of your PS Vita is the first thing you see when you wake up the device or power it on. Customizing the lock screen not only adds a personal touch but also enhances the overall user experience. By following these steps, you can easily customize the lock screen on your PS Vita:
To customize the lock screen on your PS Vita, here’s what you need to do:
- Turn on your PS Vita and access the home screen or exit any active application to reach the lock screen.
- On the lock screen, tap on the “Settings” icon. This icon looks like a gear and is typically located at the top-right corner of the screen.
- In the Settings menu, scroll down until you find the “Lock Screen” option and tap on it.
- Under the “Lock Screen” menu, you’ll have several customization options. These may include changing the background image, adjusting the lock screen notification settings, or enabling lock screen widgets.
- To change the background image, tap on the “Background” option and select from the available options. You can choose from pre-installed images or use your own custom image.
- Explore other customization options as desired. You can enable or disable lock screen notifications for specific apps, configure an unlock pattern or PIN, or add widgets to the lock screen.
- Once you’ve finished customizing the lock screen, exit the Settings menu by pressing the “Back” button or tapping outside the menu area.
Customizing the lock screen allows you to personalize your PS Vita and make it unique to you. Whether it’s adding a favorite image, controlling the visibility of notifications, or adding widgets for quick access to apps or information, the customizations can enhance the functionality and style of your device.
Remember to choose a background image that reflects your taste or interests and ensure that it doesn’t compromise visibility or legibility of on-screen information. Additionally, consider the privacy and security aspects by using appropriate lock screen settings, such as a unique PIN or an unlock pattern.
With the ability to customize the lock screen on your PS Vita, you can make your device feel truly yours and enhance the overall user experience every time you wake it up.
Adding Widgets to the Home Screen
Widgets are a valuable feature that allows you to access app-specific information or perform quick actions directly from the home screen of your PS Vita. By adding widgets to your home screen, you can customize it to display important information at a glance. Here’s how you can add widgets to your PS Vita’s home screen:
To add widgets to the home screen on your PS Vita, follow these steps:
- Navigate to the home screen of your PS Vita. This is the main screen that appears when you turn on your device or exit an application.
- Press and hold your finger on an empty area of the home screen. After a moment, the screen will enter edit mode, and you’ll see various options at the bottom of the screen.
- Tap on the “Widgets” option from the available options. This will open the widgets panel, displaying a list of available widgets.
- Browse through the list of widgets and select the one you want to add. You can swipe left or right to see more widgets.
- Once you’ve chosen a widget, press and hold your finger on it, then drag it to the desired location on the home screen.
- Release your finger to drop the widget onto the home screen. You can also resize the widget by dragging its edges.
- To customize the widget, tap on it, if applicable. Some widgets may have additional options or settings that you can access.
- Exit edit mode by pressing the “Back” button or tapping outside the menu area.
Adding widgets to your home screen allows you to personalize it to display relevant information or provide quick access to certain functions. Widgets can include weather updates, calendar events, music controls, and more, depending on the available options and installed apps on your PS Vita.
Experiment with different widgets and their placement on the home screen to find a configuration that suits your needs and enhances your PS Vita experience.
Remember that not all apps will have widgets available, and the options may vary depending on the apps installed on your PS Vita. Explore the widget panel regularly to discover new widgets that can offer added convenience and functionality to your home screen.
Changing the System Font
The ability to change the system font on your PS Vita allows you to customize the visual style of your device and make it align with your personal taste. By selecting a different font, you can give your PS Vita a unique and personalized look. Here’s how you can change the system font:
To change the system font on your PS Vita, follow these steps:
- Start by navigating to the home screen of your PS Vita. This is the screen you see when you turn on your device or exit an application.
- Next, locate and tap on the “Settings” icon. It resembles a gear and is usually found at the top-right corner of the home screen.
- In the Settings menu, scroll down until you find the “Accessibility” option and tap on it.
- Under the “Accessibility” menu, you’ll find the “Customize System Font” option. Tap on it to access the available font options.
- You will be presented with a list of different fonts. Browse through the options and choose the font that you want to use on your PS Vita.
- Once you’ve selected the desired font, exit the Settings menu to apply the changes.
After following these steps, the chosen system font will be applied to your PS Vita. The new font style will be reflected in various system menus, text fields, and other system-related elements throughout the device.
Changing the system font allows you to personalize your PS Vita even further, giving it a distinct look and feel. Whether you prefer a bold and modern font or a traditional and elegant one, the available font options offer a range of choices to suit your preferences.
Keep in mind that changing the system font doesn’t affect the font used in games or applications. It only modifies the font within the PS Vita’s system interface. Additionally, some fonts might be larger or smaller in size, so it’s a good idea to choose a font that is easy to read and visually appealing for your specific needs.
With the ability to change the system font on your PS Vita, you can add a personal touch to your device and make it visually unique, enhancing your overall user experience.
Customizing the Notification Panel
The notification panel on your PS Vita provides quick access to important information and alerts, allowing you to stay up-to-date with notifications from various apps and services. Customizing the notification panel can help you tailor it to your preferences, ensuring that you only see the notifications that matter most to you. Here’s how you can customize the notification panel on your PS Vita:
To customize the notification panel on your PS Vita, follow these steps:
- Navigate to the home screen of your PS Vita. This is the main screen that appears when you turn on your device or exit an application.
- Swipe down from the top of the screen to access the notification panel.
- In the notification panel, locate and tap on the “Settings” icon. It resembles a gear and is usually found at the top-right corner of the panel.
- In the Settings menu, scroll down until you find the “Notifications” option and tap on it.
- Under the “Notifications” menu, you’ll have access to various customization options.
- You can enable or disable notifications for specific apps by toggling the switches next to their names.
- To further customize the display of notifications, tap on the “Advanced Settings” option.
- In the advanced settings, you can choose the order in which notifications are displayed, hide sensitive content from the lock screen, or adjust notification sounds and vibrations.
- Once you’ve made your desired customization changes, exit the Settings menu by pressing the “Back” button or tapping outside the menu area.
By customizing the notification panel on your PS Vita, you can control which notifications are displayed and how they are presented. This allows you to prioritize the information that is important to you and reduce any unnecessary distractions.
Take the time to review the notification settings for each app installed on your PS Vita and select the ones that matter most to you. By personalizing the notification panel, you can streamline your PS Vita experience and ensure that you receive timely and relevant alerts without feeling overwhelmed.
Remember to strike a balance between staying informed and avoiding excessive interruptions. Adjust the notification settings to align with your preferences and needs, so you can enjoy uninterrupted gaming or concentrate on other activities when desired.
With the ability to customize the notification panel on your PS Vita, you can create a tailored notification experience that enhances your usability and keeps you informed without overwhelming you with unnecessary distractions.