
Getting Started with the PS Vita
Welcome to the world of portable gaming with the PS Vita! Whether you’re a seasoned gamer or just starting out, the PS Vita offers a wide range of features and games to keep you entertained on the go. In this section, we’ll guide you through the essential steps to get started with your PS Vita.
The first thing you need to do is ensure that your PS Vita is fully charged. Connect it to a power source using the included USB cable and allow it to charge for a few hours. Once it’s charged, press and hold the power button located on the top-right of the PS Vita to turn it on.
After turning on the PS Vita, you’ll be taken through the initial setup process. Select your preferred language and region, and then choose a username for your PSN account. This username will be used for online multiplayer and other features. Make sure to create a strong password to keep your account secure.
Next, you’ll need to connect your PS Vita to a Wi-Fi network. In the settings menu, select “Network” and then “Wi-Fi Settings.” Choose your Wi-Fi network from the list and enter the password if prompted. Once connected, the PS Vita will automatically check for system updates. It’s important to keep your PS Vita updated to access new features and improvements.
Once you’re connected to Wi-Fi, you can start exploring the PS Vita home screen. From here, you’ll have access to your games, apps, and settings. Use the touch screen or the directional buttons to navigate through the various icons. To launch a game or app, simply tap on its icon.
When it comes to gaming on the PS Vita, you have multiple options. You can insert a physical game cartridge into the game slot located on the top of the device, or you can download games from the PlayStation Store. To download games, access the PlayStation Store app and search for the game you want. Once you find it, select “Download” and wait for the game to install.
That’s it! You’re now ready to start gaming on your PS Vita. Explore the vast library of games, connect with friends online, and discover all the amazing features this portable gaming system has to offer. Whether you’re on a long trip or just relaxing at home, the PS Vita will provide you with hours of entertainment.
Exploring the PS Vita Home Screen
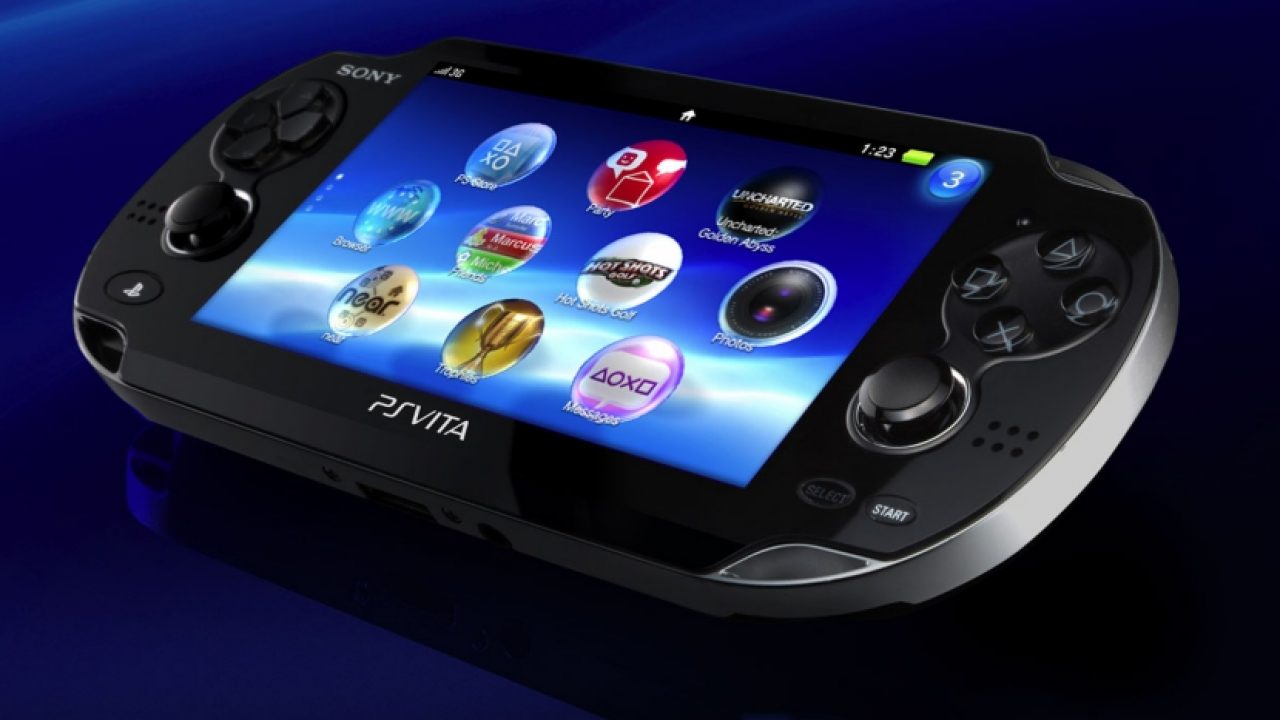
The PS Vita home screen is your gateway to a world of entertainment. Here, you’ll find a variety of icons that represent your games, apps, and system settings. Let’s take a closer look at how to navigate and make the most of your PS Vita’s home screen.
When you first power on your PS Vita, you’ll be greeted with the home screen. The main screen displays various icons in a grid layout. You can swipe left or right on the touch screen to scroll between pages if you have more icons than can fit on a single screen.
To select an icon on the home screen, simply tap on it with your finger or use the directional buttons. This will launch the selected game, app, or system setting. You can arrange the icons to your liking by dragging them around the screen. Press and hold an icon until it starts to shake, then drag it to a new position.
Customizing your home screen is easy. Simply press and hold any empty area on the home screen to enter editing mode. From here, you can change the wallpaper, add widgets, and create folders to organize your icons. To add a widget, tap the “+” icon and select the desired widget. Widgets provide quick access to information such as weather, notifications, and music playback.
If you have a large number of games and apps installed, it can become overwhelming to navigate through all the icons. To make things easier, you can create folders to group similar ones together. To create a folder, press and hold an icon until it starts to shake, then drag it onto another icon. This will create a folder containing both icons.
Another useful feature of the PS Vita home screen is LiveArea. LiveArea is an interactive space that provides access to additional content and updates for your games and apps. When you select a game or app icon, it will open in LiveArea mode, displaying news, updates, and downloadable content related to that specific title.
Don’t forget to explore the various system settings and customization options on the home screen. From changing the display brightness to adjusting sound settings, you can tailor your PS Vita experience to your preferences. You can access these settings by selecting the gear icon labeled “Settings” on the home screen.
That’s it! Now you know how to navigate and customize the PS Vita home screen. Take some time to organize your icons, add widgets, and explore the LiveArea features. The home screen is your central hub for accessing all the amazing games and apps available on the PS Vita.
Setting Up Wi-Fi on the PS Vita
Connecting your PS Vita to Wi-Fi is essential for accessing online features, multiplayer gaming, and downloading games and apps from the PlayStation Store. Setting up Wi-Fi on your PS Vita is a quick and straightforward process. Let’s walk through the steps to get your PS Vita connected to Wi-Fi.
First, start by turning on your PS Vita. Press and hold the power button located on the top-right corner of the device until the screen lights up. Once the PS Vita is powered on, you’ll be taken to the home screen.
On the PS Vita home screen, navigate to the “Settings” icon. It looks like a gear and can be found in the top-right corner of the screen. Tap on the “Settings” icon to access the settings menu.
In the settings menu, scroll down and select “Network” by tapping on it. This will bring up the network settings options.
Within the network settings, choose “Wi-Fi Settings” and tap on it. Your PS Vita will now scan for available Wi-Fi networks in your area.
A list of available Wi-Fi networks will be displayed. Select your desired Wi-Fi network by tapping on its name. If your network is password-protected, you will be prompted to enter the password. Use the on-screen keyboard to enter the correct password and press “OK” to proceed.
Once your PS Vita successfully connects to the Wi-Fi network, a confirmation message will be displayed on the screen. You are now connected to Wi-Fi, and you can start enjoying the online features of the PS Vita.
It’s important to note that you may need to enter the Wi-Fi password each time you connect to a different network. However, if you are connecting to the same network regularly, you can select the “Save Password” option during the initial setup process. This will save your Wi-Fi credentials, so you don’t have to enter the password every time you connect.
If you ever need to disconnect from a Wi-Fi network on your PS Vita, simply go back to the network settings and select the “Disconnect” option.
That’s it! You have successfully set up Wi-Fi on your PS Vita. You can now enjoy online multiplayer gaming, browse the web, and download games and apps from the PlayStation Store. Stay connected to access all the exciting features that the PS Vita has to offer.
Installing and Updating Games on the PS Vita
One of the great features of the PS Vita is the ability to install and play a wide variety of games. Whether you prefer physical game cartridges or digital downloads from the PlayStation Store, installing and updating games on your PS Vita is a breeze. Let’s explore the different methods of installing and updating games on the PS Vita.
If you have a physical game cartridge, simply insert it into the game slot located on the top of the PS Vita. The game will automatically start to install, and once the installation is complete, you can launch the game from the home screen. Physical game cartridges do not require an internet connection for installation, but some games may require an initial update to install additional content or bug fixes.
If you prefer digital downloads, you can purchase games from the PlayStation Store directly on your PS Vita. To do this, navigate to the PlayStation Store app on the home screen and sign in with your PlayStation Network (PSN) account. Once you find a game you want to download, select it and choose the “Download” option. The game will automatically start downloading to your PS Vita, and you can monitor the progress in the notification area.
It’s important to note that the download times of games can vary depending on their size and your internet connection speed. Make sure you have a stable Wi-Fi connection to ensure smooth and fast downloads. Also, ensure that your PS Vita has enough storage space available to accommodate the game. If necessary, you may need to delete other games or files to free up space.
Once the game is fully downloaded, it will automatically install on your PS Vita. After the installation is complete, you can find the game’s icon on the home screen, and you can launch it by tapping on the icon.
Updating games on the PS Vita is an important step to ensure you have the most recent version with the latest features and bug fixes. To check for game updates, go to the home screen and find the game’s icon. Press and hold the game’s icon until a menu appears, then select “Check for Updates.” Your PS Vita will connect to the internet and check if there are any available updates for the game. If there is an update, it will download and install automatically.
If you have automatic updates enabled on your PS Vita, the system will automatically download and install updates for all your games while you’re connected to Wi-Fi. This ensures that your games are always up to date without you having to manually check for updates.
That’s it! You now know how to install and update games on your PS Vita. Whether you prefer physical game cartridges or digital downloads, the PS Vita makes it easy to enjoy a wide range of gaming experiences. Keep your games up to date for the best performance and take advantage of the latest features offered by game updates.
Understanding PS Vita Controls and Buttons
The PS Vita features a variety of controls and buttons that allow you to navigate menus, play games, and access different functions. Understanding these controls and buttons is essential to fully enjoy your gaming experience on the PS Vita. Let’s dive into the details of each control and button on the PS Vita.
1. Front touchscreen: The front of the PS Vita has a 5-inch touchscreen display, allowing you to interact with games and apps by tapping, swiping, and pinching.
2. Rear touchpad: The back of the PS Vita has a touch-sensitive pad that complements the front touchscreen. Some games utilize this feature by allowing you to control certain actions or movements by touching the rear touchpad.
3. Directional buttons: Located on the left side of the PS Vita, below the touchscreen, are the directional buttons. These consist of the up, down, left, and right arrows and are used to navigate menus and control character movements in games.
4. Action buttons: On the right side of the PS Vita, below the touchscreen, are the action buttons. These include the circle, cross, square, and triangle buttons, commonly used for selecting options, confirming choices, and performing in-game actions.
5. Start and Select buttons: These buttons are located at the bottom right of the PS Vita, above the action buttons. The Start button is used to begin or pause a game, while the Select button is used for various in-game functions, such as bringing up a map or accessing additional options.
6. PlayStation button: Found at the center bottom of the PS Vita, the PlayStation button allows you to access the PS Vita home screen, where you can switch between games, apps, and settings.
7. Volume buttons: Located on the left side of the PS Vita, the volume buttons allow you to adjust the volume level of the device.
8. Power button: The power button is located at the top right of the PS Vita. Press and hold this button to turn the device on or off.
9. PS Vita card slot: This slot, located on the top of the PS Vita, is used to insert physical game cartridges into the device.
10. Headphone jack: The standard 3.5mm headphone jack is located at the bottom of the PS Vita, allowing you to connect headphones or external speakers for audio output.
11. Charging port: The charging port is located at the bottom of the PS Vita, where you can connect the included USB cable to charge the device or transfer data.
12. Memory card slot: The PS Vita uses proprietary memory cards for storing downloaded games, save data, and media. The memory card slot is located on the top of the device.
Understanding these controls and buttons will enable you to navigate through menus, control character movements, and interact with games and apps effectively. Whether you’re playing an action-packed game or exploring the PS Vita’s features, having a good grasp of the controls will enhance your overall gaming experience on the PS Vita.
Managing Storage on the PS Vita
Managing storage on your PS Vita is crucial to ensure you have enough space to download games, save data, and media. The PS Vita uses a combination of internal storage and removable memory cards to store all your content. Understanding how to manage storage will help you make the most of your PS Vita’s limited capacity. Let’s explore some tips for effectively managing storage on the PS Vita.
The PS Vita comes with internal storage, but it is limited in capacity. To expand storage, you can use proprietary PS Vita memory cards. These memory cards come in various sizes, ranging from 4GB to 64GB. It’s wise to choose a memory card with sufficient capacity to store your games and media.
To manage storage on your PS Vita, go to the home screen and locate the “Settings” icon, which resembles a gear. Tap on it to access the settings menu. Within the settings menu, scroll down and select “System.” From there, you can find “Format Memory Card” and “Format” options. Formatting your memory card will erase all data, so be careful not to do this accidentally.
Once you have a memory card inserted, you can choose where to store your games, save data, and other media. Go to the “Content Manager” app on the home screen and select either “System Storage” or “Memory Card.” From there, you can copy, move, or delete files between the two storage options.
It’s a good practice to regularly check your storage status to ensure you have enough space for new downloads. To do this, go to the home screen and find the “Settings” icon. Within the settings menu, select “System,” then “System Information.” This will display the available free space on both the system storage and the memory card.
If you’re running low on storage, you can manage your content by deleting games or media you no longer need. To do this, go to the home screen and find the game or app you want to delete. Press and hold the icon until a menu appears, then select “Delete.” This will remove the game or app from your system storage or memory card, freeing up space for new content.
It’s also worth noting that you can re-download games you’ve purchased from the PlayStation Store at any time, regardless of whether you’ve deleted them from your storage. This allows you to manage your game library freely, only keeping the games you actively play on your PS Vita.
By effectively managing your storage on the PS Vita, you can optimize the space available and ensure you have room for all the games and media you want to enjoy. Keep an eye on your storage status, regularly delete unused content, and consider upgrading to a larger memory card if needed. With proper storage management, you can make the most of your PS Vita’s capabilities and have an uninterrupted gaming experience.
Configuring PS Vita System Settings
Configuring the system settings on your PS Vita allows you to customize various aspects of your gaming experience. From adjusting display and sound settings to managing user accounts and network settings, understanding how to configure the PS Vita system settings will enhance your overall user experience. Let’s dive into the different options available for configuring the system settings on your PS Vita.
To access the system settings, go to the home screen and locate the “Settings” icon, represented by a gear. Tap on the icon to enter the settings menu.
One of the first settings to consider is the “Sound & Display” options. Here, you can adjust the volume level, screen brightness, and screen timeout settings. You can also enable or disable the automatic standby feature, which puts the device to sleep after a certain period of inactivity.
Next, explore the “Notifications” settings. You can enable or disable notifications for various events, such as game alerts, friend requests, and system messages. Adjusting these settings will help you control the type and frequency of notifications you receive on your PS Vita.
The “PlayStation Network/Account Management” settings allow you to manage your PSN account and linked services. Here, you can manage your account information, change your login details, and view your transaction history. You can also access features such as “Automatic Login” to streamline the sign-in process.
Network settings are important for online gameplay and internet connectivity. Within the settings menu, select “Network” to access options such as “Wi-Fi Settings” to connect to a wireless network, “Bluetooth Settings” to manage Bluetooth devices, and “PlayStation Network Settings” to manage your PSN account and online features.
The “Parental Controls” settings allow you to set restrictions and limits on content and applications. Use this feature to create a secure and child-friendly gaming environment. You can set age restrictions for games, restrict internet browsing, and enforce time limits on gameplay.
Under “System,” you’ll find additional settings such as “Date & Time,” where you can set the current date and time, as well as adjust time zones and daylight saving settings. You can also manage “Format” options to initialize or restore your PS Vita to factory settings.
Lastly, explore the “Accessibility” options, where you can customize accessibility features to suit your needs. These options include text-to-speech functionality, closed captions, and color inversion for improved visibility.
As you become familiar with the various system settings on your PS Vita, take the time to explore and customize them according to your preferences. Adjust sound and display settings for optimal gaming experiences, manage user accounts and network connectivity for seamless online interactions, and utilize parental controls to ensure a safe gaming environment. By configuring the system settings, you can personalize your PS Vita to enhance your overall gaming experience.
Using the PS Vita Web Browser
The PS Vita comes equipped with a built-in web browser, allowing you to surf the internet and access your favorite websites on the go. The web browser provides a convenient way to browse the web, check emails, and even watch videos. Here’s everything you need to know about using the PS Vita web browser.
To access the web browser, navigate to the PS Vita home screen and locate the “Browser” icon. It resembles a globe and can be found amidst the other app icons. Tap on the icon to launch the web browser.
Upon launching the web browser, you will be presented with a familiar interface similar to desktop or mobile browsing. The PS Vita web browser supports HTML5 and offers a seamless web browsing experience.
You can enter a website URL directly into the address bar or search using keywords in the search bar. The keyboard on the PS Vita screen allows you to type in URLs or search terms using the touch screen or the directional buttons.
Navigation in the web browser is similar to that of other browsers. You can navigate forward or backward through pages by using the “Page Forward” and “Page Back” buttons, which are indicated by arrow icons at the bottom of the screen. Additionally, you can zoom in or out of a webpage using the pinch and zoom gesture on the touch screen.
The PS Vita web browser supports multiple tabs, allowing you to have multiple webpages open simultaneously. To open a new tab, press the “Tabs” button, represented by stacked squares in the top-right corner of the screen. From there, you can switch between open tabs or close individual tabs as needed.
It’s worth noting that the PS Vita web browser may not support certain web technologies or plugins, resulting in limited functionality on some websites. JavaScript and cookies are generally supported, but more advanced features such as Flash may not be available.
In addition to general web browsing, the PS Vita web browser allows you to access web-based email services, participate in online forums, and even stream videos. You can watch videos on popular video-sharing platforms or access streaming services that support HTML5 playback.
One important consideration when using the PS Vita web browser is to be mindful of data usage. Streaming videos, downloading large files, or loading media-heavy websites may consume a significant amount of data, which can impact your overall data plan if you are using a mobile internet connection.
Overall, the PS Vita web browser offers a convenient way to stay connected and browse the internet while on the go. Whether you need to check emails, browse your favorite websites, or watch videos, the web browser on the PS Vita provides a user-friendly experience that allows you to stay connected no matter where you are.
Taking Screenshots and Recording Videos on the PS Vita
The PS Vita offers a built-in feature that allows you to capture screenshots and record videos of your gameplay or any other content on the device. Whether you want to capture a memorable moment in a game or share a tutorial video, the PS Vita provides a convenient way to capture and share your experiences. Here’s how to take screenshots and record videos on the PS Vita.
To take a screenshot, simply press the PS button and the Start button simultaneously. This will capture a screenshot of the current screen and save it to the PS Vita’s gallery. You can access the gallery by going to the home screen and finding the “Photos” app. From there, you can view, edit, and delete your captured screenshots.
If you want to record a video, the PS Vita offers a dedicated app called “Nearby” for capturing gameplay footage. Open the Nearby app and select the “Record” option. When you’re ready to start recording, press the PS button and the Start button simultaneously. A red recording indicator will appear in the top-right corner of the screen, indicating that the video recording is in progress.
To stop recording, press the PS button and the Start button again. The recorded video will be saved to the PS Vita’s gallery, which you can access through the “Photos” app. From there, you can view, edit, and delete your recorded videos.
It’s important to note that the Start button and Select button on the PS Vita can be used to control the recording settings while capturing gameplay footage. Pressing the Start button during recording will pause the video, allowing you to resume or stop the recording. Pressing the Select button will display a menu where you can adjust various recording settings, such as video quality and microphone settings.
Additionally, you can also use certain games and applications on the PS Vita that have built-in screenshot or video capture features. These games may have their own specific button combinations or settings to enable screenshot or video recording functions. Consult the game’s manual or in-game options for instructions on how to use these features.
Taking screenshots and recording videos on the PS Vita is a fun and easy way to capture and share your gaming moments. Whether you want to show off your high scores or create gaming content for sharing online, the PS Vita’s built-in features make it convenient and accessible. Explore the various options for capturing and sharing your experiences on the PS Vita to enhance your gaming journey.
Using Remote Play on the PS Vita
Remote Play is a powerful feature of the PS Vita that allows you to stream and play compatible PlayStation 4 (PS4) games on your PS Vita over a Wi-Fi network. This feature provides the flexibility to play your favorite PS4 games on your PS Vita, even when you’re away from your console. Here’s how to set up and use Remote Play on the PS Vita.
Before you can use Remote Play, make sure your PS Vita and PS4 are connected to the same Wi-Fi network. Also, ensure that your PS4 is powered on and in rest mode. To enable Remote Play on your PS4, go to the Settings menu, select Remote Play Connection Settings, and enable the Enable Remote Play option.
On your PS Vita, go to the home screen and find the PS4 Link app, represented by a blue PlayStation button icon. Tap on the app to launch it.
If this is your first time using Remote Play, you’ll need to pair your PS Vita with your PS4. Follow the on-screen instructions to link your devices. This usually involves entering a code displayed on your PS4 to your PS Vita.
Once your devices are paired, you can start using Remote Play. The PS Vita’s touchscreen and buttons will emulate the functions of the DualShock controller. You can use the front touchscreen to navigate menus and interact with games, while the rear touchpad can be used as additional controls in some games.
To connect to your PS4 via Remote Play, open the PS4 Link app on your PS Vita and select Connect to PS4. Your PS Vita will search for the nearby PS4 and establish a connection. Once connected, you can see your PS4’s screen on the PS Vita and play games as if you were using the console itself.
It’s important to note that Remote Play performance relies on the quality of your Wi-Fi network. For the best experience, ensure that both your PS Vita and PS4 are connected to a stable and fast Wi-Fi network. Avoid crowded networks and interference from other devices for optimal performance.
The Remote Play feature also allows you to access various PS4 features, such as party chat, messaging, and browsing the PlayStation Store while playing on your PS Vita. Simply use the PS Vita’s touchscreen and buttons to navigate these features.
Remote Play on the PS Vita extends the gaming experience beyond the confines of your TV and console. It offers the flexibility to play your favorite PS4 games from anywhere within your Wi-Fi network range. Whether you want to continue your game progress while on the move or enjoy gaming on a smaller screen, Remote Play on the PS Vita opens up new possibilities and enhances your gaming convenience.
Transferring Media to the PS Vita
The PS Vita allows you to enjoy various types of media, including music, photos, and videos, giving you a well-rounded entertainment experience. Transferring media files to your PS Vita is easy and enables you to enjoy your favorite content on the go. Here’s how to transfer media to your PS Vita.
To begin, you’ll need to connect your PS Vita to your computer using a USB cable. One end of the USB cable should be plugged into the PS Vita’s charging port located at the bottom of the device, and the other end should be connected to an available USB port on your computer.
On your PS Vita, go to the home screen and find the Content Manager app. It’s represented by an icon with an arrow pointing up. Tap on the app to launch it.
Within the Content Manager, select the PC option to connect the PS Vita to your computer. Follow the on-screen prompts to establish the connection.
Once your PS Vita is connected to your computer, your computer will recognize it as a removable storage device. Depending on your computer’s operating system, your PS Vita may show up as a drive letter or under the “Devices” section in File Explorer (Windows) or Finder (Mac).
Now, open the folder on your computer where your media files are stored, such as music, photos, or videos. If you have categorized your media into separate folders, it’s a good idea to keep that structure intact, for easier navigation on the PS Vita.
From your computer’s file explorer, locate the specific media files you want to transfer to your PS Vita. You can transfer individual files or entire folders by dragging and dropping them onto the PS Vita’s storage device in File Explorer or Finder.
After the transfer is complete, safely disconnect your PS Vita from your computer. On your PS Vita, go back to the Content Manager app and select the Disconnect from PC option. Ensure that all file transfers are complete before disconnecting your device to avoid any data loss or corruption.
Now, on your PS Vita, you can access and enjoy your transferred media files from the respective apps. For example, you can find and play your music files using the Music app, view and share your photos through the Photos app, or watch videos using the Video app.
It’s important to note that the PS Vita supports a variety of media file formats. However, there may be certain limitations and compatibility issues with specific codecs or file formats. For optimal playback, make sure your media files are in a format supported by the PS Vita. You can refer to the PS Vita’s user manual or support documentation for detailed information on supported media formats.
Transferring media files to your PS Vita allows you to enjoy your favorite music, photos, and videos wherever you go. With a simple USB connection and a few easy steps, you can keep yourself entertained with your own personal library of media on your PS Vita.
PlayStation Plus and PS Vita
If you’re a PS Vita owner, subscribing to PlayStation Plus can greatly enhance your gaming experience. PlayStation Plus is a premium subscription service offered by Sony that provides a range of benefits to its members. Let’s explore how PlayStation Plus benefits PS Vita users and why it’s worth considering.
One of the key benefits of PlayStation Plus is the ability to access free monthly games. As a subscriber, you’ll have access to a carefully curated selection of free games each month that you can download and play on your PS Vita. These games span various genres and provide endless hours of entertainment, ensuring that you always have something new to play.
Additionally, PlayStation Plus membership gives you access to exclusive discounts and deals on games and add-ons in the PlayStation Store. As a PS Vita owner, this means you can take advantage of these discounts and expand your gaming library at a reduced price. Whether it’s for digital downloads or additional content for your games, the savings from these exclusive deals can quickly add up.
Another significant benefit for PS Vita owners is the ability to back up your game saves to the cloud. PlayStation Plus allows you to upload your game saves to online storage, ensuring that your progress is always protected. This is especially useful for PS Vita users who want to switch between devices or if their PS Vita needs to be repaired or replaced. With PlayStation Plus, you can easily retrieve your game saves and continue playing where you left off.
Online multiplayer is a popular feature on the PS Vita, and PlayStation Plus membership is required to access it. By subscribing to PlayStation Plus, you can join multiplayer matches, connect with friends, and compete against players from around the world. Engaging in online multiplayer adds a new dimension to your gaming experience and allows you to test your skills against a wider player base.
PS Vita owners who are also PlayStation Plus members can benefit from the Instant Game Collection feature. This feature provides access to an extensive library of free games that you can download and play at any time, as long as you have an active PlayStation Plus membership. This ever-growing library of games caters to different tastes and preferences, ensuring that there’s always something for everyone to enjoy.
PlayStation Plus offers a range of benefits for PS Vita owners, including free monthly games, exclusive discounts, cloud game saves, online multiplayer access, and a vast selection of games in the Instant Game Collection. These benefits contribute to a more immersive and enjoyable gaming experience on the PS Vita. With its multitude of features and perks, PlayStation Plus is a valuable subscription service well worth considering for any PS Vita user.
Troubleshooting Common PS Vita Issues
While the PS Vita is a reliable and powerful handheld gaming device, there may be times when you encounter common issues that can disrupt your gaming experience. Understanding how to troubleshoot these issues can help you quickly resolve them and get back to enjoying your PS Vita. Let’s explore some common PS Vita issues and their troubleshooting solutions.
1. Frozen or unresponsive screen: If your PS Vita becomes frozen or unresponsive, try performing a soft reset by holding down the power button for about 15 seconds. This should force the device to turn off. After a few moments, press and hold the power button again to turn it back on.
2. Battery not charging: If you’re having trouble charging your PS Vita, try using a different USB cable and power source. Ensure that the USB cable is securely connected to both the PS Vita and the power source. If the issue persists, the battery or charging port may need to be checked by a technician.
3. Game or app crashes: If a game or app crashes or fails to load, try closing the application and restarting your PS Vita. Press and hold the PS button, and then select “Close Application” or “Quit” to exit the game or app. Relaunch the game or app to see if the issue is resolved.
4. No audio or distorted audio: If you’re experiencing issues with audio, check the volume settings on your PS Vita. Make sure the volume is turned up and that the mute option is not activated. If the issue persists, try using headphones or external speakers to determine if the problem lies with the device’s speakers.
5. Wi-Fi connection problems: If you’re having trouble connecting to Wi-Fi, ensure that your PS Vita is within range of the wireless network and that the Wi-Fi password is entered correctly. Try restarting your PS Vita and your Wi-Fi router. If the problem persists, resetting the network settings on your PS Vita or updating the system software may help resolve the issue.
6. Slow performance or lag: If your PS Vita is experiencing slow performance or lag, try closing any unused applications running in the background. Rebooting your PS Vita can also help refresh the system and improve performance. Additionally, make sure your PS Vita has sufficient storage space, as a full storage can impact performance.
7. Unresponsive buttons or controls: If the buttons or controls on your PS Vita are unresponsive, try cleaning the buttons and the surrounding areas with a soft cloth. Avoid using excessive force when pressing the buttons, as this may cause further damage. If the issue persists, the buttons or controls may need to be repaired or replaced.
If you’ve tried the troubleshooting steps mentioned above and the issue still persists, it may be helpful to consult the PS Vita’s user manual or contact the customer support team for further assistance. They can provide specific guidance tailored to your situation.
By familiarizing yourself with these common PS Vita issues and their troubleshooting solutions, you can quickly resolve any problems that may arise and ensure a smooth and enjoyable gaming experience on your PS Vita.
Upgrading Your PS Vita Storage
If you find that the storage capacity of your PS Vita is running low or you want to increase the amount of content you can store on your device, upgrading the storage is a viable solution. The PS Vita allows for storage upgrades through the use of proprietary memory cards. Here’s everything you need to know about upgrading your PS Vita storage.
The PS Vita uses dedicated memory cards for storing game data, save files, and other media. The memory card slot is located on the top of the device, and it supports a range of capacities, including 4GB, 8GB, 16GB, 32GB, and 64GB. To upgrade your PS Vita storage, you’ll need to purchase a new memory card with a larger capacity.
Before proceeding with the upgrade, it is essential to back up any data you have on your existing memory card. To do this, connect your PS Vita to your computer using a USB cable and transfer the files to your computer. Alternatively, you can use cloud storage services or the PS Vita’s Content Manager app to back up your data.
Once your data is safely backed up, power off your PS Vita and locate the memory card slot on the top of the device. Remove the existing memory card by pushing it in gently until it clicks and then releasing it. Slide the card out from the slot.
Insert the new memory card into the slot, making sure it is correctly aligned. Gently push the card in until it clicks into place. Ensure that the card is securely inserted to avoid any data errors or issues with the device recognizing the new storage.
Power on your PS Vita, and the device will prompt you to format the new memory card. Note that formatting will erase any existing data on the card, so it’s important to ensure that you have backed up your data before proceeding. Follow the on-screen instructions to format the new memory card.
Once the formatting is complete, you can start transferring your data back to the PS Vita. Connect your PS Vita to your computer or use the Content Manager app to transfer your backed-up data to the new storage card. Follow the instructions provided by the app or use File Explorer (Windows) or Finder (Mac) to transfer the files.
With the new memory card installed and your data transferred, you can now enjoy expanded storage capacity on your PS Vita. The increased storage allows you to download more games, store additional media files, and have a larger library of content to enjoy on your device.
It’s worth noting that PS Vita memory cards can be quite expensive, especially for larger capacities. However, investing in a higher-capacity memory card can provide the convenience of having more content readily available on your PS Vita, reducing the need to frequently delete and re-download games.
By upgrading your PS Vita storage, you can make the most of your gaming experience and have the flexibility to store a larger collection of games, media, and other content on your device. Take the time to research available memory card options and choose a capacity that suits your storage needs.