
Creating a Playlist on iPhone
Creating a playlist on your iPhone allows you to have personalized collections of songs for different moods, occasions, or preferences. Whether you want to create a workout playlist, a road trip mix, or simply a collection of your favorite songs, the process is quick and easy. Here’s how to do it:
1. Open the Music app on your iPhone. It is usually a red icon with a white music note.
2. Tap on the “Library” tab at the bottom of the screen to access your music library.
3. Browse through your library and find the songs you want to add to your playlist. You can search for specific songs, albums, or artists using the search bar at the top of the screen.
4. Once you have found a song you want to add, touch and hold the song title until a menu pops up.
5. From the pop-up menu, select “Add to Playlist.”
6. If you already have playlists created, you can choose an existing one to add the song to. Otherwise, tap on the “New Playlist” option.
7. A new screen will appear where you can enter the name of your playlist. Choose a catchy and descriptive name that represents the theme or purpose of your playlist.
8. After entering the playlist name, tap on the “Done” button to create the playlist.
Your playlist is now created, and you can start adding more songs to it by following the same process. Remember, playlists are not limited to songs from your own music library. You can also add songs from Apple Music or other streaming services if you have a subscription.
Creating playlists on your iPhone allows you to personalize your music listening experience and ensures that you always have the perfect selection of songs for any occasion.
Adding Songs to a Playlist
Now that you have created a playlist on your iPhone, it’s time to start adding songs to it. Whether you want to add your favorite tracks or discover new music, the process is straightforward. Here’s how to add songs to a playlist:
1. Open the Music app on your iPhone and navigate to the “Library” tab.
2. Select the playlist you want to add songs to from the list of playlists displayed.
3. Once you have opened the playlist, tap on the “Add Songs” button.
4. You will be presented with various options for adding songs to your playlist:
- Browse: You can browse through your music library and select songs individually to add to the playlist.
- Search: Use the search bar to find specific songs, albums, or artists to add to your playlist.
- Recently Added: This option shows the most recently added songs to your music library. You can quickly add them to your playlist.
- Top Charts: Explore the current popular songs and add them directly to your playlist.
- Genres & Moods: Discover songs based on different genres or moods and add them to your playlist.
- Curated Playlists: Apple Music offers a wide range of curated playlists for different tastes and occasions. You can browse through them and add songs to your playlist.
5. Select the songs you want to add by tapping the “+” icon next to their titles.
6. When you have finished selecting songs, tap on the “Done” button.
The selected songs will now be added to your playlist. You can always add more songs to your playlist using the same process. Remember to regularly update your playlist to keep it fresh and exciting.
By adding songs to your playlist, you can create a customized collection that reflects your musical preferences and sets the right mood for any occasion.
Rearranging Songs in a Playlist
Once you’ve added songs to your playlist on your iPhone, you may want to rearrange them to create a specific order or flow. Rearranging songs allows you to curate your playlist to match your desired listening experience. Here’s how you can rearrange songs in a playlist:
1. Open the Music app on your iPhone and navigate to the “Library” tab.
2. Select the playlist that contains the songs you want to rearrange.
3. Once you’ve opened the playlist, tap on the “Edit” button in the top-right corner of the screen.
4. The playlist will enter the editing mode, and you will see three horizontal lines next to each song.
5. Touch and hold the three horizontal lines next to a song title.
6. Drag the song to the desired position in the playlist.
7. While dragging, you’ll notice that the other songs will move around to make space for the song you’re moving.
8. Continue dragging and rearranging the songs until you’ve achieved the desired order.
9. After rearranging the songs, tap on the “Done” button in the top-right corner of the screen to save the changes.
The songs in your playlist will now be arranged according to the new order you’ve set. You can always go back and rearrange them again, depending on your preferences.
Rearranging songs in a playlist allows you to create a seamless listening experience, ensuring that the songs flow into each other naturally and enhance your overall enjoyment.
Deleting Songs from a Playlist
If you have songs in a playlist on your iPhone that you no longer want or that don’t fit the theme of the playlist, you can easily remove them. Deleting songs from a playlist allows you to refine and tailor your playlist to your liking. Here’s how to delete songs from a playlist:
1. Open the Music app on your iPhone and navigate to the “Library” tab.
2. Select the playlist from which you want to delete songs.
3. Once you’ve opened the playlist, tap on the “Edit” button in the top-right corner of the screen.
4. The playlist will enter the editing mode, and you’ll see a red “-” icon next to each song.
5. Tap the red “-” icon next to the song you want to delete.
6. A confirmation prompt will appear asking if you want to remove the song from the playlist. Tap “Delete from Playlist” to confirm.
7. Repeat steps 5 and 6 for each song you want to remove from the playlist.
8. After deleting the desired songs, tap on the “Done” button in the top-right corner of the screen to save the changes.
The songs you deleted will no longer appear in your playlist. It’s important to note that deleting a song from a playlist does not remove it from your overall music library.
Deleting songs from a playlist allows you to keep your playlist fresh and remove any songs that no longer resonate with your preferences or the theme of the playlist.
Renaming a Playlist
Renaming a playlist on your iPhone allows you to give it a more appropriate or descriptive name. Whether you want to change the name to better reflect the theme of the playlist or simply want to update it, the process is quick and easy. Here’s how to rename a playlist:
1. Open the Music app on your iPhone and navigate to the “Library” tab.
2. Select the playlist that you want to rename.
3. Once you’ve opened the playlist, tap on the “Edit” button in the top-right corner of the screen.
4. The playlist will enter the editing mode, and you’ll notice that the current playlist name becomes editable.
5. Tap on the playlist name to access the keyboard and edit the name.
6. Enter the new name for your playlist using the keyboard.
7. After entering the new name, tap on the “Done” button in the top-right corner of the screen to save the changes.
The playlist will now be renamed to the new name you’ve entered. Whenever you access the playlist in the future, it will display the updated name.
Renaming a playlist allows you to personalize and organize your music collection the way you want it. You can give your playlist a unique and meaningful name that aligns with its content or purpose.
Deleting a Playlist
If you have a playlist on your iPhone that you no longer need or want to remove, you can easily delete it. Deleting a playlist allows you to declutter your music library and keep it organized with only the playlists you actively use. Here’s how to delete a playlist:
1. Open the Music app on your iPhone and navigate to the “Library” tab.
2. Scroll down or use the search bar to find the playlist you want to delete.
3. Once you’ve located the playlist, swipe left on its name or icon.
4. A red “Delete” button will appear on the right side of the playlist.
5. Tap the “Delete” button to confirm the deletion.
6. If you have accidentally deleted the playlist, you can tap “Undo” to restore it.
After confirming the deletion, the playlist will be permanently removed from your iPhone. It’s important to note that deleting a playlist does not delete the individual songs or remove them from your music library. It simply removes the collection of songs that were grouped together as a playlist.
Deleting unnecessary playlists helps you stay organized and maintain a clutter-free music library. It allows you to have better control over the playlists you have and ensures that you only keep the ones you actually use and enjoy.
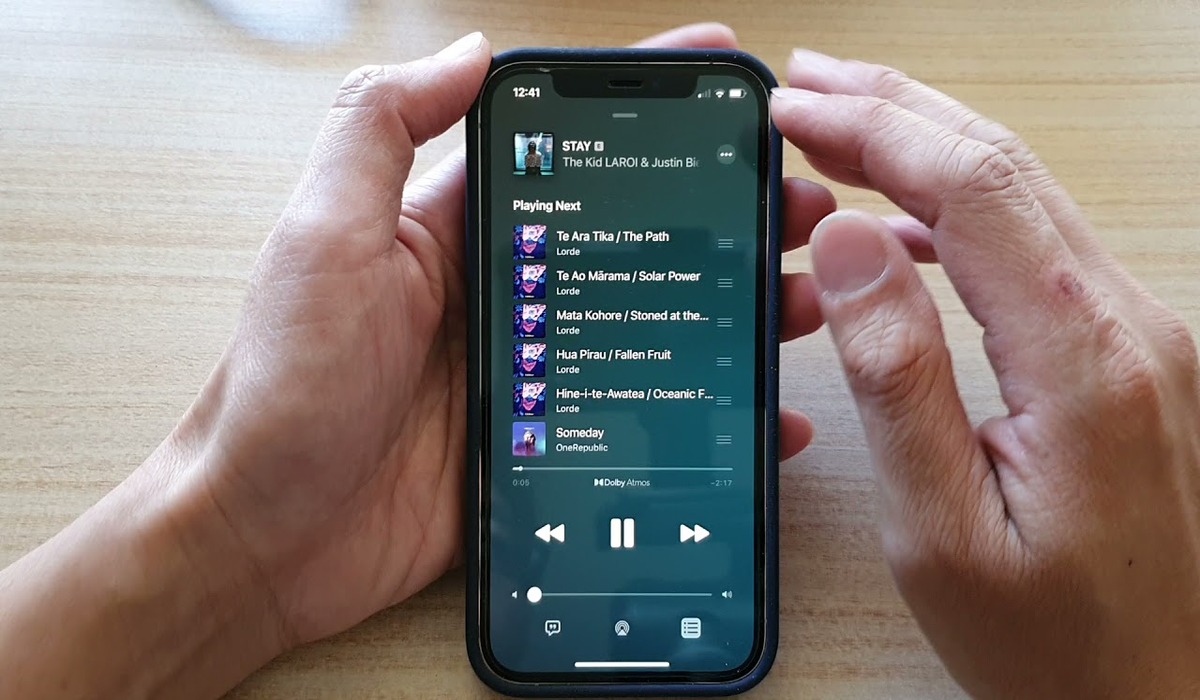
Playing a Playlist
Playing a playlist on your iPhone allows you to enjoy a curated collection of songs in a continuous and seamless manner. Whether you want to listen to your favorite tracks, set the mood for a gathering, or simply have background music while you work, playing a playlist is easy and convenient. Here’s how you can play a playlist:
1. Open the Music app on your iPhone and navigate to the “Library” tab.
2. Scroll down or use the search bar to locate the playlist you want to play.
3. Tap on the playlist to open it.
4. Once you’re in the playlist, you’ll see a list of songs arranged in the order you set.
5. Tap on the first song in the playlist to begin playing. The song will start, and the subsequent songs in the playlist will play automatically one after another in the set order.
6. You can control the playback of the playlist using the music controls at the bottom of the screen or through the Control Center.
7. When you’re finished listening to the playlist, you can tap the pause button to stop the playback.
Playing a playlist allows you to enjoy a collection of songs without having to manually select each song. It provides a convenient way to immerse yourself in a curated musical experience based on your preferences and mood.
Keep in mind that you can also shuffle or repeat the playlist to add variety or listen to your favorite songs on loop. Experiment with different playback options to tailor the listening experience to your liking.
Shuffling a Playlist
Shuffling a playlist on your iPhone provides a fun and spontaneous way to experience the songs in a different order every time you listen. Whether you want to discover new songs or add an element of surprise to your music session, shuffling a playlist is a great option. Here’s how you can shuffle a playlist:
1. Open the Music app on your iPhone and navigate to the “Library” tab.
2. Scroll down or use the search bar to find the playlist you want to shuffle.
3. Tap on the playlist to open it.
4. Once you’re in the playlist, tap on the “Shuffle” button. It usually appears as two intersecting arrows.
5. The playlist will now be shuffled, and the songs will play in a random order.
6. If you want to turn off shuffle and return to the original order of the playlist, you can tap on the “Shuffle” button again to disable it.
Shuffling a playlist adds an element of surprise and variety to your listening experience. It allows you to be pleasantly surprised by the next song and helps you discover new songs or rediscover old favorites in a different context.
Keep in mind that shuffling a playlist affects the playback order for that specific session only. If you exit the playlist or play a different playlist, the shuffle setting will reset, and the original order of the playlist will be restored.
Experiment with shuffling your playlists to add some excitement and unpredictability to your music listening sessions. It’s a great way to keep your musical journey fresh and engaging.
Repeating a Playlist
Repeating a playlist on your iPhone allows you to continuously listen to your favorite songs without the need for manual intervention. Whether you want to play a playlist on loop during a road trip or have a background music playlist that you want to keep playing throughout the day, the repeat function comes in handy. Here’s how you can repeat a playlist:
1. Open the Music app on your iPhone and navigate to the “Library” tab.
2. Scroll down or use the search bar to find the playlist you want to repeat.
3. Tap on the playlist to open it.
4. Once you’re in the playlist, start playing the first song.
5. While the song is playing, tap on the “Repeat” button. It usually appears as a circular arrow.
6. The playlist will now be set to repeat mode, and once it reaches the end, it will start playing from the beginning again.
7. If you want to turn off the repeat function and have the playlist play only once, you can tap on the “Repeat” button again to disable it.
Repeating a playlist allows you to set a continuous music loop tailored to your preferences. It’s especially useful when you want to create a specific ambiance or have a playlist of calming or instrumental tracks playing in the background.
Keep in mind that the repeat function only applies to the current playlist session. If you switch to a different playlist or exit the Music app, the repeat setting will reset.
Enjoy the convenience of repeating a playlist to keep your favorite songs playing without interruption. It’s a fantastic way to enjoy a continuous stream of music that sets the mood and keeps you engaged.
Sharing a Playlist with Friends
Sharing a playlist with friends on your iPhone is a great way to introduce them to new music, collaborate on a group playlist, or simply enjoy your favorite songs together. Whether you want to share a playlist for a specific event or recommend a collection of songs to a friend, there are various methods you can use. Here’s how you can share a playlist with friends:
1. Open the Music app on your iPhone and navigate to the “Library” tab.
2. Scroll down or use the search bar to find the playlist you want to share.
3. Tap on the playlist to open it.
4. Once you’re in the playlist, tap on the three dots (…) button near the top-right corner of the screen.
5. From the options that appear, select the “Share Playlist” button.
6. You’ll be presented with various sharing options, such as Messages, Mail, AirDrop, or through third-party apps like WhatsApp or social media platforms.
7. Choose the desired sharing method and follow the prompts to send the playlist to your friends.
Alternatively, you can also copy the link to the playlist and share it manually through text messages, emails, or any other communication method.
When your friends receive the shared playlist, they can open it directly in their Music app and start enjoying the songs. They can also add the playlist to their own library, allowing them to listen to it whenever they want.
Sharing a playlist with friends not only allows you to discover and appreciate music together but also opens up opportunities for musical discussions and bonding experiences. It’s a delightful way to connect through shared musical tastes and preferences.
Note that the availability of playlist sharing options may vary depending on your device’s settings and the apps installed on your iPhone.
Enjoy sharing the gift of music with your friends and spreading the joy of your favorite playlists!
Using Apple Music to Create and Manage Playlists
If you have an Apple Music subscription, you can take advantage of the powerful features within the app to create and manage your playlists. Apple Music provides access to a vast library of songs, curated playlists, and personalized recommendations. Here’s how you can use Apple Music to create and manage playlists on your iPhone:
1. Open the Apple Music app on your iPhone and navigate to the “Library” tab.
2. Tap on the “Playlists” option to access your existing playlists or create a new one.
3. To create a new playlist, tap on the “+” button or the “New Playlist” option.
4. Enter a catchy and descriptive name for your playlist.
5. Once you’ve created the playlist, you can start adding songs to it.
6. You have several options for adding songs:
- Browse: Explore the vast Apple Music library by searching for specific songs, albums, or artists to add to your playlist.
- For You: Discover personalized recommendations based on your listening habits and add recommended songs to your playlist.
- Charts: Explore the current popular songs or top charts in different genres and add them to your playlist.
- Curated Playlists: Apple Music offers a wide variety of expertly curated playlists for different moods, genres, and occasions. You can browse through them and add songs to your playlist.
7. Tap the “Add” button next to a song or an entire album to add them to your playlist.
8. After adding songs, you can rearrange their order by dragging and dropping them within the playlist.
9. To delete a song from the playlist, swipe left on the song and tap the “Delete” button.
10. To edit the details of the playlist such as name, description, or cover art, tap on the playlist and select the “Edit Playlist” option.
11. You can also make your playlist public or private and choose to share it with other Apple Music users.
Using Apple Music to create and manage playlists gives you access to a wide range of songs and resources. It allows you to explore new music, discover curated playlists, and personalize your playlists based on your preferences.
Take advantage of the rich features within Apple Music to create dynamic, engaging playlists that reflect your unique taste and enhance your music listening experience.
Using Third-Party Apps to Create and Manage Playlists
In addition to the native music apps on your iPhone, you can also use third-party apps to create and manage playlists. These apps offer unique features, customizable options, and integration with various music streaming services. Here’s how you can use third-party apps to create and manage playlists on your iPhone:
1. Install a third-party app that specializes in music streaming and playlist management. Some popular options include Spotify, Tidal, Deezer, SoundCloud, and many more. Go to the App Store, search for the app, and follow the installation instructions.
2. Open the app and create an account if prompted. Sign in with your credentials if you already have an account.
3. Explore the app’s interface, browse through playlists, and discover new music. Each app may have different methods for creating and managing playlists, so familiarize yourself with the app’s features and options.
4. To create a new playlist, look for an option that resembles a “+” or “New Playlist” button. Tap on it and give your playlist a name.
5. Start adding songs to your playlist by searching for specific songs, albums, artists, or browsing through curated playlists within the app. Each app may have different search and browsing features, so explore the app’s options to find the songs you want to add.
6. Tap on the song you want to add and look for an option to add it to your playlist. Some apps may use a “+” or “Add” button next to each song, while others may have a menu with additional options.
7. After adding songs, you can usually rearrange their order within the playlist by dragging and dropping them or using a specific “Reorder” feature within the app.
8. Most third-party apps also allow you to delete songs from your playlist. Look for an option to remove songs or swipe left on a song to reveal a delete button.
9. Explore additional features within the app, such as sharing playlists with friends, following other users’ playlists, or discovering new music based on your listening habits.
Using third-party apps to create and manage playlists provides you with a wide range of options and features beyond what native apps offer. These apps often have extensive catalogs, personalized recommendations, collaborative playlist capabilities, and social integration.
Experiment with different third-party apps to find the one that best suits your needs and preferences. Enjoy the enhanced playlist creation and management experience that these apps provide.
Tips and Tricks for Organizing and Enhancing Your Playlists
Organizing and enhancing your playlists can elevate your music listening experience and ensure that you have the perfect collection of songs for every mood and occasion. Here are some tips and tricks to help you optimize and personalize your playlists:
1. Create themed playlists: Consider creating playlists that cater to specific themes or genres. For example, you could have a workout playlist, a relaxing playlist, a road trip playlist, or a party playlist. This allows you to have curated collections of songs that suit a particular mood or activity.
2. Mix up the genres: Don’t be afraid to mix different genres within a playlist. Combining contrasting genres can create an interesting and dynamic listening experience. Experiment with different combinations to see what resonates with your musical preferences.
3. Use descriptive names: Give your playlists descriptive and catchy names that reflect their content or purpose. This makes it easier for you to find the right playlist and adds a personal touch to your music library.
4. Utilize playlists for discovery: Create playlists specifically for discovering new music. Add songs from various genres, artists, and recommendations. This allows you to expand your musical horizons and keeps your playlists fresh and exciting.
5. Collaborate with others: Collaborative playlists enable you to create shared collections with friends or family. They can add their favorite songs, and you can all contribute to a diverse and collaborative music experience.
6. Regularly update your playlists: Keep your playlists relevant and up-to-date by periodically adding new songs and removing ones that no longer resonate with you. This refreshes the playlist’s content and ensures that you are always listening to music you love.
7. Use the crossfade feature: Take advantage of the crossfade feature available on some music apps. This allows songs to smoothly transition into each other, providing a seamless and continuous listening experience.
8. Experiment with different moods and sequences: Play around with the order of songs in your playlist to create a specific mood or narrative. Arrange songs in such a way that they flow naturally and create a cohesive listening experience.
9. Explore smart playlists: Some music apps offer smart playlists that can automatically update based on criteria you set, such as recently added songs or top-rated tracks. Utilize these features to maintain dynamic and constantly evolving playlists.
10. Back up your playlists: If your music library is tied to a specific app or streaming service, consider exporting or backing up your playlists periodically. This ensures that you don’t lose your carefully curated collections if you switch devices or apps.
By implementing these tips and tricks, you can organize and enhance your playlists to match your preferences and create an immersive and enjoyable music listening experience. Get creative, discover new music, and make your playlists a reflection of your unique taste and personality.