
What is an Email Signature?
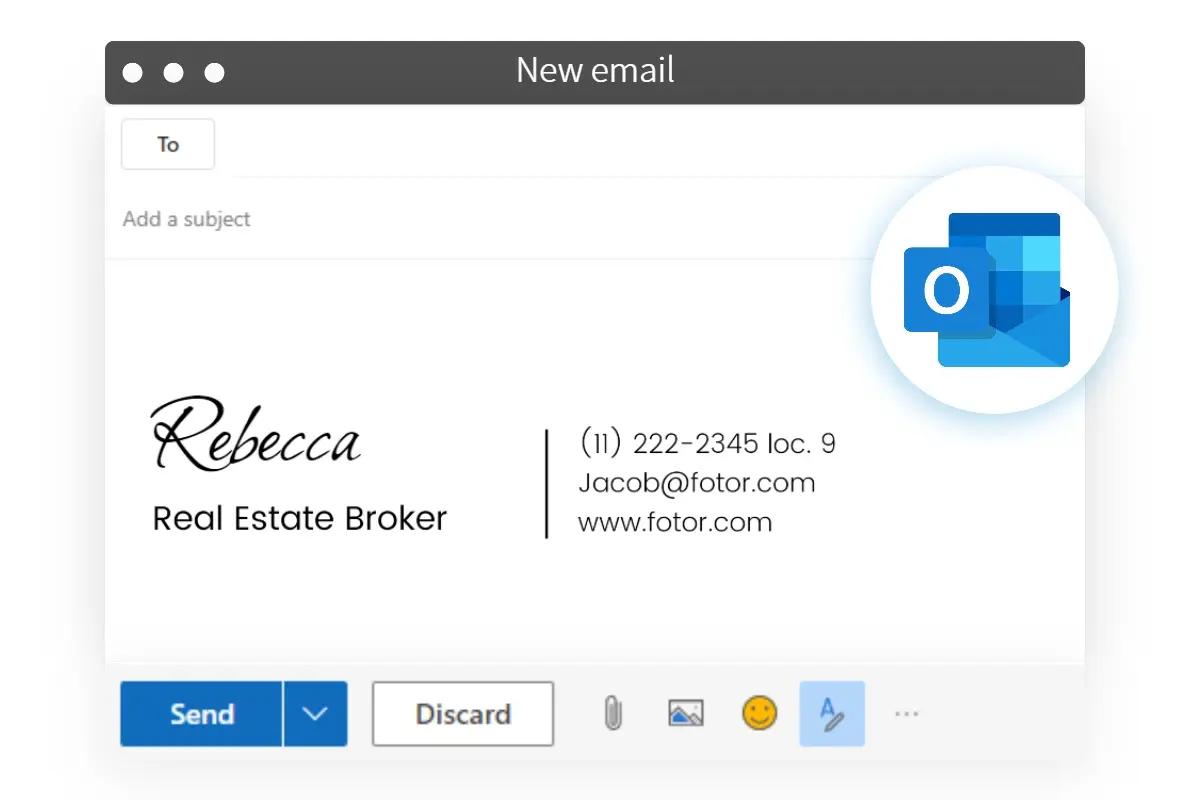
An email signature is a block of text, images, and links that is automatically appended to the end of your outgoing emails. It typically includes your name, title, contact information, and any other relevant details. Email signatures serve as a digital business card, allowing you to provide recipients with important information about yourself or your company without having to repeat it in every email.
Email signatures can vary in complexity, ranging from simple text-based signatures to more elaborate designs with company logos, social media icons, and promotional banners. The purpose of an email signature is to provide recipients with a professional and consistent way to identify and contact you.
By including an email signature, you can make a lasting impression on the recipients of your emails. A well-designed and informative signature can enhance your professionalism, build trust, and reinforce your personal or brand identity. It also saves you time and effort since you don’t have to manually type or copy and paste your contact information each time you send an email.
Moreover, an email signature can help improve your email marketing efforts. By including links to your website, blog, or social media profiles, you can drive traffic and increase engagement with your online presence. You can also use your email signature to promote special offers, events, or updates, providing valuable information to your recipients that may lead to conversions or further interactions.
In today’s digital age, having an email signature is essential for professionals and businesses alike. It adds a touch of professionalism to your emails, reinforces your brand, and allows recipients to easily contact you or find additional information about you or your company. It is an effective and efficient way to showcase your identity and provide valuable resources to your recipients.
Benefits of Using an Email Signature
Using an email signature offers a multitude of benefits that can enhance your professional image and improve communication with your recipients. Here are some key advantages:
- Promotes professionalism: An email signature gives a cohesive and professional appearance to your emails. It showcases your contact information and reinforces your credibility in the eyes of your recipients.
- Consistency: Having a standardized email signature ensures that all your outgoing emails contain the same essential information, such as your name, title, and contact details. This consistency makes it easier for recipients to find the relevant information they need.
- Brand recognition: Including your company logo or brand elements in your email signature helps reinforce brand recognition. This can be especially valuable for businesses looking to establish a strong and consistent brand presence.
- Efficiency: By automating the inclusion of your contact information, you save time and effort. You no longer have to manually input your details in each email you send, allowing you to focus more on the content of your message.
- Increased professionalism: A well-designed email signature adds a professional touch to your correspondence. It demonstrates that you pay attention to detail and are committed to providing a professional experience for your recipients.
- Enhanced communication: Including links to your website, social media profiles, or other relevant resources in your email signature allows recipients to easily access more information about you or your company. This can facilitate communication and promote further engagement.
- Promotional opportunities: An email signature provides space to promote special offers, events, or new product/service launches. By strategically adding promotional banners or links, you can drive traffic to your website or generate interest in your offerings.
- Contact information accessibility: Your email signature ensures that your contact information is readily available to recipients. It enables them to easily reach out to you via phone, email, or other preferred communication methods.
- Legal compliance (if applicable): For certain industries or jurisdictions, including a legal disclaimer in your email signature helps ensure compliance with relevant regulations.
By leveraging the benefits of an email signature, you can improve your professional image, streamline communication, and create valuable opportunities for engagement with your recipients. It’s a small yet powerful tool that can make a significant impact on your email correspondence.
Step 1: Open Outlook and Go to Settings
To create an email signature in Outlook, follow these simple steps:
- Open Outlook: Launch the Outlook application on your computer. If you have multiple email accounts, make sure you are logged in to the account for which you want to create the signature.
- Go to Settings: Once Outlook is open, navigate to the settings menu. The location of the settings may vary depending on the version of Outlook you are using. In most cases, you can find the settings option by clicking on the “File” tab located in the top-left corner of the Outlook window.
- Select the “Mail” Tab: In the settings menu, you will see different tabs such as “General,” “Mail,” “Calendar,” etc. Click on the “Mail” tab to access the email-specific settings.
- Click on “Signatures”: Within the “Mail” settings, you will find an option called “Signatures.” Click on this option to access the signature management tool.
Now that you have successfully navigated to the signature settings in Outlook, you are ready to proceed with creating your email signature. This process allows you to customize the appearance and content of your signature to reflect your personal or company branding.
Remember, the exact steps and options within the signature settings may vary slightly depending on the version of Outlook you are using. However, the overall process should remain similar.
By opening Outlook and accessing the settings menu, you have taken the first step in creating an email signature. The next steps will guide you through the process of designing and customizing your signature to make it informative, visually appealing, and consistent with your brand or personal style.
Step 2: Select the “Mail” Tab
After opening Outlook and accessing the settings menu, the next step in creating an email signature is to select the “Mail” tab. This tab is where you will find the email-specific settings that allow you to customize your email signature.
Here’s how you can select the “Mail” tab in Outlook:
- On the settings menu: Once you are in the settings menu, look for a row of tabs at the top of the window. These tabs typically include options like “General,” “Mail,” “Calendar,” etc. Click on the “Mail” tab to access the email settings.
- Navigation pane: In some versions of Outlook, the settings menu may have a navigation pane on the left side of the window. Look for the “Mail” option within this navigation pane and click on it.
- Drop-down menu: In certain versions of Outlook, you may find a drop-down menu within the settings menu. Click on the drop-down menu and choose the “Mail” option from the available choices.
Once you have successfully selected the “Mail” tab, you will gain access to various email settings and customization options. These settings allow you to specify how your emails are composed, how they appear, and, most importantly, how your email signature is managed.
Remember, the exact location and appearance of the “Mail” tab may vary depending on the version of Outlook you are using. However, it is typically located within the settings menu and easy to find.
Selecting the “Mail” tab is a crucial step as it directs you to the specific settings related to your email account and allows you to proceed with the creation, editing, or management of your email signature. In the next step, you will discover how to access the signature settings within the “Mail” tab to further customize your email signature.
Step 3: Click on “Signatures”
Once you have selected the “Mail” tab in the settings menu of Outlook, the next step in creating an email signature is to click on the “Signatures” option. This option allows you to access the signature management tool, where you can create, edit, and manage your email signatures.
Here’s how you can click on “Signatures” in Outlook:
- In the “Mail” settings: Within the “Mail” tab, look for a section or group labeled “Create or modify signatures for messages.” In this section, you will find a button or link labeled “Signatures.” Click on this button or link to access the signature management tool.
- Under the “Compose Messages” section: In some versions of Outlook, you may need to scroll down within the “Mail” settings to find the “Compose messages” section. Within this section, you should see a button or link labeled “Signatures.” Click on it to proceed.
- Additional options: Depending on the version of Outlook you are using, you may find additional options such as “New messages,” “Replies/forwards,” or “Business cards.” These options allow you to specify different signatures for different types of email messages. Click on the appropriate option to access the signature management tool for that specific scenario.
Once you have successfully clicked on “Signatures,” a new window or dialogue box will open, displaying the available signatures and giving you the ability to create new ones, edit existing ones, and manage the settings related to your email signatures.
Remember, the exact location and appearance of the “Signatures” option may differ depending on the version of Outlook you are using. However, it is typically located within the “Mail” settings and clearly labeled.
Clicking on “Signatures” is a crucial step as it allows you to access the signature management tool, where you can design and customize your email signatures according to your preferences and needs. In the next step, you will learn how to create a new email signature within the signature management tool.
Step 4: Choose the Email Account and Click “New”
After opening the signature management tool by clicking on “Signatures” in Outlook, the next step is to choose the email account for which you want to create a new email signature. Once you have selected the account, you can proceed to create a new signature by clicking on the “New” button.
Follow these steps to choose the email account and create a new email signature:
- In the signature management tool: The signature management tool will display a list of email accounts associated with your Outlook application. Look for the email account for which you want to create a new signature.
- Select the email account: Click on the email account to highlight it. This will determine the specific email account to which the new signature will be assigned.
- Click “New”: Once you have selected the desired email account, locate the “New” button within the signature management tool and click on it. This will create a new blank signature that you can customize.
By choosing the email account and clicking on “New,” you are ready to begin creating a new email signature. This step ensures that the signature is associated with the correct email account in Outlook.
Depending on the version of Outlook you are using, you may have the option to create multiple signatures for different purposes or scenarios. In that case, you can choose a different email account and click “New” to create additional signatures.
Remember to give your new signature a descriptive name to easily identify it later. This will enable you to assign the signature to specific email accounts and select it when composing new messages or replies.
In the next step, you will learn how to enter a name for the signature and proceed with designing and customizing the content of your new email signature.
Step 5: Enter a Name for the Signature and Click “OK”
Once you have clicked on “New” to create a new email signature in Outlook, the next step is to enter a name for the signature. This name will help you identify and manage your signatures within the signature management tool. After entering the name, click “OK” to proceed.
Follow these steps to enter a name for the signature and proceed with creating your email signature:
- In the new signature window: Once you click on “New,” a new window or dialogue box will open, displaying a blank signature template. In this window, you will find a field for entering the name of your signature.
- Enter a name: In the name field, provide a descriptive name for your signature. This name can be anything that helps you identify the signature later, such as “Work Signature,” “Personal Signature,” or a name related to a specific campaign or project.
- Click “OK”: After entering the name for your signature, locate the “OK” button within the new signature window and click on it. This action will save your signature with the specified name and allow you to proceed with designing and customizing its content.
Entering a name for your signature is an important step as it helps you manage multiple signatures and select the appropriate one when composing new emails or replies. The name should be meaningful and easily distinguishable from other signatures you may have created.
Once you have clicked “OK,” you have successfully entered a name for your signature and can now move on to the next step of designing and customizing the content of your email signature.
In the upcoming steps, you will learn how to design your email signature, format your text, add links, and incorporate other elements to create a visually appealing and informative signature in Outlook.
Step 6: Design Your Email Signature
After entering a name for your email signature and clicking “OK,” the next step is to design your signature. This involves customizing the appearance, layout, and visual elements to create a signature that aligns with your personal or brand identity.
Follow these steps to design your email signature in Outlook:
- In the signature editor: Once you have created a new signature and entered its name, you will be directed to the signature editor, where you can design the content of your signature.
- Choose a layout: Begin by deciding on the layout of your signature. You can opt for a simple one-column design or explore more complex layouts with multiple columns or sections. It’s important to choose a layout that allows your signature elements to be displayed legibly and clearly.
- Add text: Enter your name, job title, and other relevant contact information. Use headings, subheadings, and paragraphs to organize the content and make it easy to read. Consider using a consistent and legible font that matches your personal or brand style.
- Include your logo: If you have a company logo or personal branding logo, add it to your email signature. This helps with brand recognition and reinforces your professional image. Resize the logo if needed to ensure it fits well within the signature.
- Add contact details: Include your email address, phone number, and physical address if necessary. Make sure to use the appropriate formatting, such as clickable links for email addresses and phone numbers.
- Consider social media icons: If you want to promote your social media presence, add icons and links to relevant social media platforms. This allows recipients to connect with you on social media directly from your email signature.
- Incorporate a call-to-action: If you have a specific goal in mind, such as encouraging recipients to visit your website, sign up for a newsletter, or attend an event, include a call-to-action button or link in your signature.
- Choose colors and formatting: Use colors that complement your personal or brand palette. Select appropriate font styles, sizes, and formatting options to make your signature visually appealing and easy to read.
- Review and refine: After designing your signature, review it for any errors or inconsistencies. Ensure that all links are working correctly and that the overall design is visually pleasing and aligned with your desired image.
By following these steps, you can design an email signature that showcases your professionalism, provides key information, and visually represents your personal or brand identity.
In the next steps, you will learn how to format your text, add links, incorporate social media icons, and potentially include a legal disclaimer in your email signature.
Step 7: Format Your Text and Add Links
Once you have designed the layout and structure of your email signature, the next step is to format your text and add relevant links. This step allows you to enhance the readability and functionality of your signature, making it easier for recipients to engage with your contact information and navigate to additional resources.
Follow these steps to format your text and add links in your email signature:
- Select and format text: Highlight the text elements in your email signature that you want to format. Choose appropriate font styles, sizes, and colors to ensure readability and consistency. Use bold or italic formatting sparingly to emphasize important information.
- Add clickable email addresses: If you want recipients to be able to email you directly from your signature, turn your email address into a clickable link. Simply select the email address, click on the “Insert Hyperlink” button, and enter your email address as the hyperlink.
- Create clickable phone numbers: Similarly, you can make phone numbers in your signature clickable so that recipients can easily call you with one click. Select the phone number, click on the “Insert Hyperlink” button, and enter the phone number as the hyperlink.
- Include website and social media links: If you want to direct recipients to your website or social media profiles, insert hyperlinks to these resources. Highlight the desired text (e.g., “Visit our website,” “Follow us on Twitter”) and click on the “Insert Hyperlink” button. Enter the appropriate URL as the hyperlink.
- Test the links: After adding all the links, test them by clicking on each one to ensure they are functioning correctly. This is important to ensure that recipients can easily access the intended destinations without any issues.
By formatting your text and adding links, you enhance the functionality and interactivity of your email signature. Recipients can easily email you, call you, visit your website, or connect with you on social media with just a click or tap.
In the next step, you will learn how to incorporate social media icons and logos into your email signature to further enhance its visual appeal and improve engagement.
Step 8: Add Social Media Icons and Logos
To further enhance your email signature and promote your presence on social media platforms, you can add social media icons and logos. These icons provide a visually appealing way for recipients to connect with you and follow your social media accounts directly from your email signature.
Follow these steps to add social media icons and logos to your email signature:
- Select appropriate social media icons: Choose icons that represent the social media platforms you want to showcase in your email signature. You can find a variety of free social media icon sets available online.
- Save the icon images: Once you have chosen your desired social media icons, save the corresponding image files to your computer. Make sure to keep them organized in a dedicated folder for easy access.
- Upload the icons to a hosting service: In order for the social media icons to display properly in your email signature, you need to upload them to a hosting service. This ensures that the icons are hosted and accessible on the internet.
- Create hyperlinks to your social media profiles: In your email signature, select the text or image where you want to place the social media icon. Click on the “Insert Hyperlink” button and enter the URL of your social media profile as the hyperlink.
- Insert the social media icon image: Within the hyperlink dialog box, click on the “Image” button and enter the URL of the corresponding social media icon image that you uploaded to the hosting service. This will insert the image and make it clickable.
- Repeat for each social media platform: Repeat the previous two steps for each social media platform you want to include in your email signature. This allows recipients to access your various social media profiles with just a click on the corresponding icon.
- Test the social media icons: After adding the social media icons, test each one by clicking on them to ensure they are linking to the correct social media profiles. This is crucial for a seamless user experience.
By adding social media icons and logos to your email signature, you provide recipients with a convenient way to connect with you on different social platforms. This can further promote your online presence and encourage engagement with your brand or personal profile.
In the next step, you will learn how to include a legal disclaimer in your email signature, if necessary.
Step 9: Add a Legal Disclaimer (Optional)
Depending on your industry or specific circumstances, you may want to include a legal disclaimer in your email signature. A legal disclaimer is a statement that clarifies the legal rights, limitations, or liabilities associated with the information contained in your email or any attachments.
Follow these steps to add a legal disclaimer to your email signature:
- Create the legal disclaimer: Compose a concise and clear legal disclaimer that accurately reflects any legal obligations, protections, or terms relevant to your specific situation. Consult with legal professionals if necessary to ensure compliance with applicable laws or regulations.
- Position the disclaimer: Decide where in your email signature you want to place the legal disclaimer. Common positions include at the end of the email signature, below all other content, or in a separate section.
- Add the disclaimer text: Select the appropriate location and insert the text of the legal disclaimer in that position. Use a legible font and formatting that matches the rest of your email signature.
- Format the disclaimer: Adjust the formatting of the legal disclaimer to ensure it stands out and is easily distinguishable from the rest of your email signature. Consider using italics or a different color to make it visually distinct.
- Revise as necessary: Regularly review and update the legal disclaimer to ensure it remains relevant and compliant with any changes in laws or regulations. Stay informed and seek legal advice if there are any updates or modifications required.
Including a legal disclaimer in your email signature is optional but can be beneficial in certain situations, especially if you are in a regulated industry or dealing with sensitive information. It can help protect your rights, limit liability, or address any legal obligations specific to your circumstances.
Remember that legal disclaimers should be carefully tailored to your situation and reviewed by legal professionals to ensure accuracy and compliance.
In the next step, you will learn how to assign the signature to your email account, allowing it to be automatically added to your outgoing messages.
Step 10: Assign the Signature to Your Email Account
Once you have designed and customized your email signature, the next step is to assign it to your email account in Outlook. Assigning the signature ensures that it will be automatically added to your outgoing messages, saving you time and effort in manually appending it to each email.
Follow these steps to assign the signature to your email account in Outlook:
- In the signature editor: If you are still in the signature editor window, make sure the signature you want to assign is selected.
- Select the email account: Look for the drop-down menu or selection options that allow you to choose the email account to which you want to assign the signature. This option ensures that the signature will only be added to emails sent from that specific account.
- Assign the signature: Once you have selected the appropriate email account, click on the “OK” or “Apply” button to assign the signature. This action saves the signature settings and associates it with the selected email account.
- Assign additional signatures (if necessary): If you have multiple email accounts and want to assign different signatures to each account, repeat steps 2 and 3 for each email account. This allows you to ensure that the correct signature is added to each outgoing email.
Assigning the signature to your email account ensures that the signature will be automatically added to all outgoing messages sent from that account. This saves you the hassle of manually inserting the signature each time you compose a new email.
It’s worth mentioning that the process of assigning signatures may vary depending on the version of Outlook you are using. However, the concept remains the same, allowing you to designate an email signature for each specific email account you have set up.
In the final step, you will learn how to test your email signature to ensure its functionality and appearance in actual email communications.
Step 11: Test Your Signature
After assigning your email signature to your account in Outlook, the final step is to test your signature to ensure that it appears as intended and functions correctly in actual email communications. Testing your signature helps you identify any formatting issues, broken links, or other potential problems that may affect how your signature is received by recipients.
Follow these steps to test your email signature in Outlook:
- Create a test message: Open a new email compose window in Outlook.
- Check signature selection: Verify that the correct email signature is selected or set as the default for the account you are using to send the test email.
- Compose the email: Write a short test message to yourself or a colleague, including any necessary formatting, links, or attachments.
- Preview the signature: Before sending the email, use the preview feature in Outlook to review how your signature appears at the end of the message. Pay attention to the layout, design, and overall appearance.
- Test hyperlinks and functionality: Test all the links in your signature to ensure they are clickable and direct recipients to the intended destinations. Double-check email addresses and phone numbers to verify their accuracy.
- Send the test email: Once you are satisfied with your signature and have tested its functionality, send the test email to yourself or a trusted contact.
- Review the received email: Check your inbox for the received test email. Open it and verify that your signature appears correctly, with all formatting, links, and other elements functioning as expected.
By thoroughly testing your email signature, you can ensure that it represents you or your brand effectively, maintains a professional appearance, and provides recipients with the information and functionality you intended.
If you detect any issues or errors during the testing phase, return to the appropriate steps to make any necessary revisions and repeat the testing process until you are satisfied with the final result.
Congratulations! You have successfully created, customized, and tested your email signature in Outlook. Your signature is now ready to make a positive impression on your recipients and provide them with all the necessary information to connect with you efficiently.