
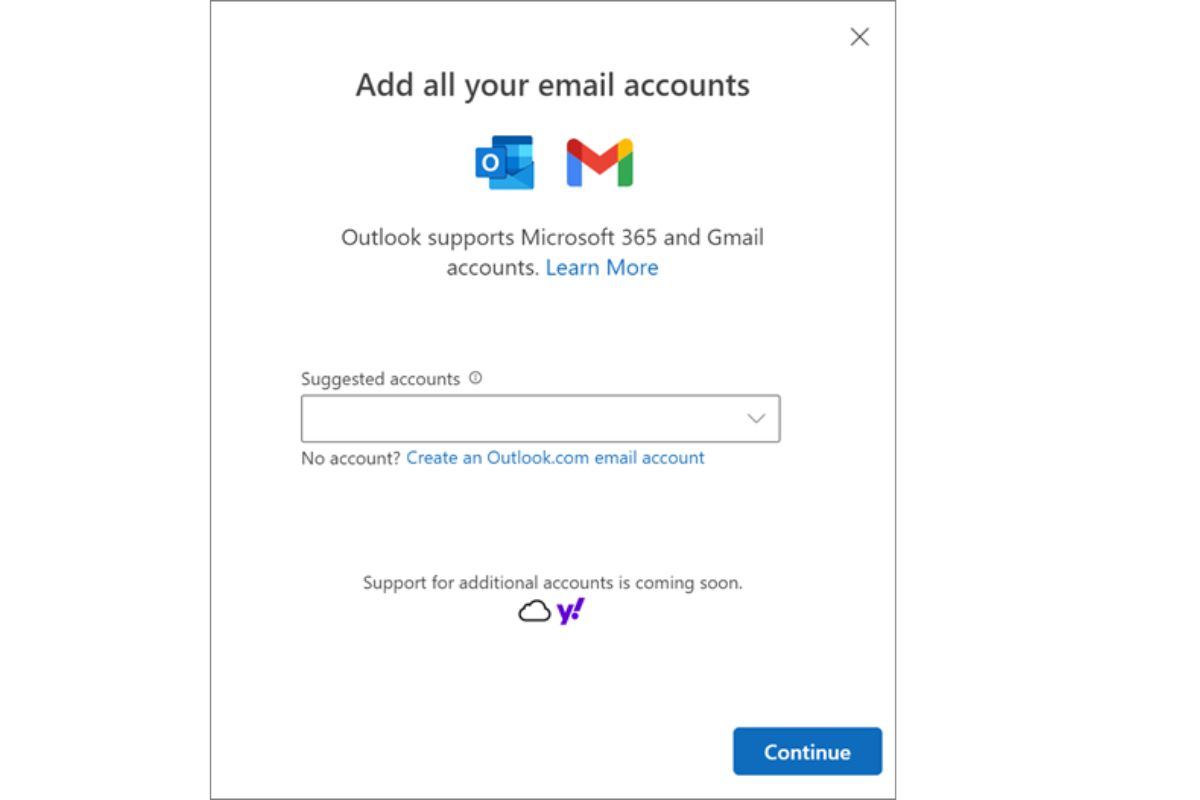
Choosing a Username
When creating a new Outlook.com email account, the first step is choosing a username that reflects your identity and is easy for others to remember. Here are some tips to help you select the perfect username:
1. Use a combination of your name and a unique identifier: Incorporate your name or initials into the username, along with a distinguishing element such as a number or a word that represents your profession or hobby. For example, if your name is John Smith and you love photography, you might choose a username like “JohnSmithPhoto” or “PhotoJohnSmith.”
2. Keep it simple and concise: Opt for a username that is easy to type and remember. Avoid using complicated or lengthy combinations of numbers, symbols, or special characters that could confuse others.
3. Avoid using personal information: Steer clear of including personal details such as your date of birth, address, or phone number in your username. This will help protect your privacy and reduce the risk of identity theft.
4. Consider your email’s purpose: Think about how you plan to use your Outlook.com email account. If it’s for professional purposes, opt for a username that reflects your profession or company. If it’s for personal use, you can let your creativity shine by choosing a fun and unique username.
5. Check for availability: Before finalizing your username, make sure it’s not already taken by someone else. Outlook.com will inform you if a username is already in use, and you’ll have to choose an alternative.
6. Don’t rush: Take your time to find the right username. It’s a reflection of your online identity and may be associated with your email for a long time.
Remember, once you’ve chosen your username, it becomes an essential part of your email address (e.g., username@outlook.com). So select a username that you’re comfortable sharing with others and that represents you in the best way possible.
Setting Up a Password
When creating a new Outlook.com email account, setting up a strong and secure password is crucial for protecting your personal information. Here are some important steps to follow when choosing a password:
1. Length and complexity: Your password should be at least 8 characters long, but longer is generally better. Use a combination of uppercase and lowercase letters, numbers, and symbols to increase its complexity. Avoid using easily guessable information like your name, birthdate, or common words.
2. Unique password: It’s essential to use a different password for your Outlook.com email account than for any other online accounts you have. Reusing passwords can put all of your accounts at risk if one of them gets compromised.
3. Avoid dictionary words: Hackers often use automated programs that can quickly guess common dictionary words as passwords. Instead, try creating a memorable phrase and using the first letter of each word, along with numbers and symbols.
4. Two-factor authentication: Enable two-factor authentication for an extra layer of security. This adds an additional step, such as a verification code sent to your mobile device, when logging into your account.
5. Regularly update your password: It’s important to change your password periodically to minimize the risk of unauthorized access. Aim to update it every 3 to 6 months, or if you suspect any security breaches.
6. Password manager: Consider using a password manager application to securely store and generate strong passwords for all your accounts. This can help you keep track of complex passwords without the risk of forgetting them.
7. Avoid sharing your password: Never share your password with anyone, including friends or family members. Outlook.com will never ask for your password via email or other messages. Be cautious of phishing attempts and only provide your password on the official Outlook.com login page.
Remember, a strong password is your first line of defense against unauthorized access to your Outlook.com email account. By following these guidelines and implementing additional security measures, you can help ensure the safety and privacy of your personal information.
Providing Recovery Information
When creating a new Outlook.com email account, it’s important to provide recovery information to help secure your account and regain access if you ever forget your password. Here are some key steps to follow when setting up recovery information:
1. Alternate Email Address: Provide an alternate email address that you have access to. This can be used to send account recovery instructions or notifications if you ever lose access to your Outlook.com email account.
2. Phone Number: Enter your mobile phone number, which can be used to receive security codes or account recovery instructions via SMS. Ensure that the phone number you provide is up-to-date and easily accessible.
3. Security Questions: Set up security questions and provide answers that are easy for you to remember but difficult for others to guess. Make sure to choose questions with answers that are not easily found online or on your social media profiles.
4. Additional Recovery Email: Consider providing an additional email address as a backup recovery option. This can be helpful if you no longer have access to your primary email address or mobile phone number.
5. Keep Recovery Information Updated: It is crucial to regularly review and update your recovery information as needed. This ensures that you can access your account even if your contact details change over time.
6. Privacy and Security: Be cautious when providing recovery information and ensure that you are sharing it on trusted and secure platforms. Avoid using public computers or unsecured networks to enter sensitive data.
By providing accurate and up-to-date recovery information, you can safeguard your Outlook.com email account and minimize the risk of being locked out. Take the time to set up these recovery options, so you can regain access to your account quickly and easily if the need arises.
Agreeing to the Terms and Conditions
When creating a new Outlook.com email account, it is essential to carefully read and agree to the terms and conditions set forth by Microsoft. These terms outline the rights and responsibilities of both the user and the service provider. Here are some key points to consider when reviewing and agreeing to the terms and conditions:
1. Understand your rights: Take the time to familiarize yourself with the rights granted to you as a user of Outlook.com. This includes the ownership of your data, the ability to control your privacy settings, and the right to terminate the account if desired.
2. Comply with usage policies: The terms and conditions outline the acceptable use of the Outlook.com email service. Ensure that you understand and adhere to the policies regarding spam, illegal activities, and prohibited content.
3. Data collection and privacy: Microsoft may collect certain data to provide and improve their email service. Be sure to review the privacy policy to understand how your personal information is handled, stored, and shared.
4. User responsibilities: The terms and conditions often state the responsibilities of the user, such as providing accurate information, protecting login credentials, and refraining from unauthorized access or sharing of accounts.
5. Updates and changes: Service providers may periodically update their terms and conditions. Stay informed about any changes that may affect your use of the Outlook.com email service and your rights as a user.
6. Legal jurisdiction: Understand the legal jurisdiction under which the terms and conditions are governed. This information may be useful in case of any legal disputes or issues that may arise.
Reviewing and agreeing to the terms and conditions of Outlook.com is an important step in creating your email account. It ensures that you are aware of your rights and responsibilities as a user and establishes a clear understanding between you and the service provider. Take the time to read and comprehend the terms and conditions to make informed decisions about your email usage and data privacy.
Entering the Captcha Code
When creating a new Outlook.com email account, you will likely encounter a Captcha code verification step. Captcha codes are designed to distinguish between human users and automated bots, ensuring the security and integrity of the registration process. Here’s what you need to know about entering the Captcha code:
1. Purpose of Captcha: Captcha codes are used to prevent spam, fraudulent activities, and unauthorized access to the email service. They verify that the user is a real person and not a computer program attempting to exploit the system.
2. Captcha types: There are various types of Captcha codes, including image-based challenges, audio prompts, or a combination of both. Follow the instructions on the screen to determine the required action for completing the Captcha verification.
3. Pay attention to case sensitivity: Captcha codes are often case-sensitive, so be mindful of entering uppercase and lowercase letters correctly. Mistakes or inconsistencies in the case of the letters can result in the verification process being unsuccessful.
4. Refresh or request a new Captcha: If you find that the displayed Captcha code is difficult to read or understand, most platforms offer the option to refresh or request a new code. This allows you to get a different Captcha to make the verification process more manageable.
5. Audio Captcha alternative: If you have difficulty reading the visual Captcha code, many platforms provide an audio option. This alternative presents the code as an audio prompt, allowing users with visual impairments or reading difficulties to successfully complete the verification.
6. Be patient and persistent: Sometimes Captcha codes can be challenging to decipher, especially if the images or audio prompts are distorted or unclear. Take your time to carefully read or listen to the code and enter it accurately. If unsuccessful on your first attempt, don’t get discouraged; simply try again.
The Captcha code verification step is an important security measure to ensure the integrity and safety of the registration process. By entering the required code accurately, you are helping to maintain the authenticity and reliability of your Outlook.com email account.
Verifying Your Phone Number
Verifying your phone number is an important step when creating a new Outlook.com email account. This verification process adds an extra layer of security to your account and ensures that only you have access to it. Here’s what you need to know about verifying your phone number:
1. Why verify: Verifying your phone number helps to confirm your identity and serves as a means of contact if there are any security concerns or password recovery needs. It adds an additional level of protection to your Outlook.com email account.
2. Provide a valid phone number: When prompted, enter your valid and functioning mobile phone number. Make sure to double-check the number for accuracy as any mistakes could prevent successful verification.
3. Receive a verification code: After entering your phone number, you will receive a verification code via SMS or a phone call. This code is typically a series of numbers that you need to enter into the verification prompt.
4. Enter the verification code: Follow the instructions on the screen and enter the verification code exactly as it was received. Pay attention to case sensitivity, if applicable, and enter the numbers carefully to avoid any errors.
5. Code expiration: Verification codes have a limited validity period. If you don’t enter the code within the given timeframe, you may need to request a new code or start the verification process again.
6. Check for SMS charges: Depending on your mobile plan, you may incur SMS charges for receiving the verification code. It’s a good idea to be aware of any potential costs associated with receiving the code on your phone.
7. Troubleshooting: If you encounter any issues during the verification process, ensure that your phone has a stable network connection and that your phone number is valid and accessible. If problems persist, consult the support resources provided by Outlook.com for further assistance.
Verifying your phone number is an essential step to enhance the security and protection of your Outlook.com email account. By successfully completing this process, you can be confident that your account is secure and that you are the only person with access to it.
Customizing Your Display Name
When creating a new Outlook.com email account, you have the option to customize your display name. The display name is the name that recipients see when they receive emails from you. Here’s how you can personalize your display name:
1. Choose a professional or personal name: Consider whether you want to use your full name, just your first name, or a combination of your first name and last initial. If this email account is for professional use, using your full name can help establish credibility. For personal use, you have more flexibility to choose a creative or fun display name.
2. Consistency across platforms: If you have multiple email accounts or use other online platforms, it can be beneficial to use a consistent display name across all of them. This helps people easily recognize and associate your name with your online presence.
3. Avoid using inappropriate or offensive names: It’s crucial to use a display name that is appropriate and respectful. Offensive or vulgar names could lead to recipients disregarding your emails or negatively impacting your reputation.
4. Consider including additional information: Depending on your personal or professional preferences, you can include additional information in your display name, such as your job title, company name, or any relevant affiliations. This can help recipients quickly recognize your role or association.
5. Check for uniqueness and availability: Before finalizing your display name, ensure it is unique and not already in use by someone else. Outlook.com will notify you if the chosen display name is available, or you may have to try different variations or combinations.
6. Update your display name: If you already have an existing Outlook.com email account and want to update your display name, you can do so by accessing your account settings. Look for the option to edit your profile and change your display name accordingly.
7. Be mindful of online identity: Remember that your display name becomes a part of your online identity. Choose a name that you are comfortable using for professional communications and that aligns with your personal brand, if applicable.
Customizing your display name allows you to personalize and make your Outlook.com email account reflect your identity. By choosing an appropriate and recognizable display name, you can make a positive impression on recipients and establish your online presence in a way that represents you accurately.
Setting Up Auto Reply
Setting up an auto reply is a useful feature when creating a new Outlook.com email account, especially when you anticipate being away or unable to respond to emails promptly. An auto reply sends an automated message to those who send you emails, letting them know that you are unavailable and when they can expect a response. Here’s how you can set up an auto reply:
1. Accessing settings: Log in to your Outlook.com email account and navigate to the settings or options menu, usually located in the top-right corner of the screen. Look for the “Automatic Replies” or “Out of Office” option.
2. Enable automatic replies: Once you’ve accessed the settings, toggle on the option to enable automatic replies. Some platforms may have different options for internal and external email replies, giving you the flexibility to choose who receives your automated response.
3. Craft your auto reply message: Type the message you want to be sent as an auto reply. Be concise and informative, including essential details such as the duration of your absence, alternative contact methods, or any emergency instructions if applicable. You can also personalize your message according to your preferences or include any relevant information such as the reason for your absence.
4. Start and end date: If you have a specific time frame for when you will be away, set the start and end dates accordingly in the auto reply settings. This ensures that the automated response is only sent during the specified period and stops once you are back.
5. Customizing auto reply rules: Some platforms allow you to customize auto reply rules further. For instance, you can set different messages for different groups or filter auto replies based on specific conditions such as subject lines or recipient email addresses.
6. Test and review: Before enabling the auto reply, send a test email to yourself or ask a colleague or friend to send you a message. Check that the auto reply message is received as intended and ensure that it provides the necessary information.
7. Disable auto reply after your return: Once you are back and no longer need the auto reply, remember to turn it off in the settings. This prevents unnecessary automated responses from being sent and ensures that you can resume regular email communication.
Setting up an auto reply can help manage expectations and communicate your unavailability effectively. By utilizing this feature, you can ensure that important correspondences receive a timely response, even when you are away from your Outlook.com email account.
Adding a Signature to Your Emails
Adding a signature to your emails is a simple yet effective way to personalize your communication and provide essential contact information. A signature typically includes your name, job title, contact details, and any other relevant information you want to include. Here’s how you can add a signature to your Outlook.com emails:
1. Accessing email settings: Log in to your Outlook.com email account and navigate to the settings or options menu, usually located in the top-right corner of the screen. Look for the “Email Signature” or “Signature” option.
2. Customize your signature: In the signature settings, you will find a text box or editor where you can craft your signature. Start by entering your name as you want it to appear in the emails.
3. Include additional information: Add your job title, company name, and any other professional details you want to include. This can help recipients quickly identify who you are and your role in the organization.
4. Contact information: Include relevant contact details such as your email address, phone number, and professional website. This allows recipients to easily reach out to you through different channels if needed.
5. Formatting options: Outlook.com provides formatting options such as font styles, sizes, and colors. Customize your signature’s appearance to align with your personal or professional preferences. However, ensure that the text remains readable and professional-looking.
6. Image or logo: If desired, you can also add an image or logo to your signature for a more visually appealing presentation. Keep in mind that images should be properly sized, optimized, and relate to your personal or professional brand.
7. Test your signature: Before saving your signature, send a test email to yourself or a colleague to ensure that it appears correctly and the formatting is preserved across different email clients. Make adjustments as needed.
8. Multiple signatures: Outlook.com allows you to create multiple signatures if you require different signatures for different purposes or occasions. For example, you can have a professional signature for work-related emails and a more casual signature for personal emails.
9. Update your signature as needed: Regularly review and update your signature to ensure that it reflects any changes in your contact information, job title, or other relevant details. This helps keep your signature accurate and up to date.
Adding a signature to your Outlook.com emails adds a professional touch and provides recipients with quick access to your contact information. Take advantage of this feature to create a signature that represents your personal or professional brand and enhances your email communication.
Managing Your Inbox Settings
Managing your inbox settings is essential when using Outlook.com email to stay organized and efficient in handling your emails. By customizing your inbox settings, you can optimize your email management experience. Here are some key features and settings you can utilize:
1. Sorting and filtering: Outlook.com allows you to sort emails by date, sender, or subject, making it easier to locate specific messages. You can also create filters to automatically sort incoming emails into specific folders based on criteria such as sender, subject, or keywords.
2. Reading pane options: Customize how emails are displayed in the reading pane by choosing between right, bottom, or off. This allows you to view email contents without opening them, helping you quickly scan and prioritize your messages.
3. Conversation view: Enable conversation view to group related emails together. This feature helps you consolidate and manage email threads, making it easier to follow discussions and reducing inbox clutter.
4. Marking emails as read/unread: Configure your settings to automatically mark emails as read when opened or allow manual control to mark them as read or unread as needed. This helps you keep track of unread messages that require your attention.
5. Flagging and categorizing: Utilize flags or categories to mark emails for follow-up, prioritize important messages, or visually categorize emails based on specific criteria. This allows you to easily identify and address important tasks or messages.
6. Message rules and notifications: Customize rules to automatically take actions on emails, such as moving them to specific folders, forwarding them, or applying certain actions based on predefined conditions. Set up email notifications to receive alerts when specific contacts or keywords are mentioned in incoming emails.
7. Archiving and deleting: Create a system for archiving or deleting emails to declutter your inbox regularly. You can manually move emails to specific folders or use auto-archiving rules to organize and manage your email storage more efficiently.
8. Junk email and spam filters: Enable spam filters to automatically identify and move unwanted or suspicious emails to your junk or spam folder. Regularly review these folders to ensure no legitimate emails have been incorrectly marked as spam.
9. Sync settings: Customize sync settings to determine how often your Outlook.com email syncs with other devices. Adjusting sync intervals can help balance email access and optimize device battery usage.
By managing your inbox settings effectively, you can streamline your email management process, enhance productivity, and maintain an efficient workflow. Take advantage of these features to tailor your Outlook.com email experience to suit your needs and preferences.
Organizing Your Emails with Folders
Organizing your emails with folders is a practical way to keep your Outlook.com inbox tidy and efficiently manage your messages. By creating folders and assigning emails to specific categories, you can easily locate and navigate through your emails. Here’s how you can organize your emails with folders:
1. Assess your email categories: Determine the different types or categories of emails you receive regularly. These may include work-related emails, personal communications, newsletters, invoices, or specific projects. Having a clear idea of your email categories will help you create the appropriate folders.
2. Create folders: In Outlook.com, you can create folders to organize your emails. Access the folder management options, typically located in the sidebar or settings menu. Create folders with names that reflect your email categories. For example, “Work,” “Personal,” “Travel,” or “Finance.”
3. Move emails to folders: To organize your emails, select the messages that belong to a particular category and move them to the corresponding folder. You can do this by dragging and dropping the emails onto the folder or using the “Move to” or “Move” options available in your email application.
4. Set up rules: Automate the email organization process by setting up rules. Rules allow you to define specific conditions or criteria, such as sender, subject, or keywords, and automatically move incoming emails to specific folders. This helps ensure that future emails are automatically sorted and organized as they arrive.
5. Prioritize folders: Arrange your folders in order of importance or frequency of use. This way, the folders that you access most frequently will be easily accessible and visible in your email application’s sidebar or navigation menu.
6. Archive old emails: As time goes on, your inbox can become cluttered with old emails. Consider moving non-essential or outdated emails to an archive folder or a separate folder designated for storing past communications. This helps keep your inbox streamlined and focused on current and relevant messages.
7. Regularly review and declutter: Set aside dedicated time to review and declutter your folders. Delete or archive emails that are no longer needed, update folder structures as necessary, and ensure that email categories align with your current needs and priorities.
8. Use subfolders: If you have a specific category with multiple subcategories, consider creating subfolders within the main folder. For instance, under the “Work” folder, you can create subfolders for different projects or departments, making it easier to navigate and locate specific emails within a broader category.
Organizing your emails with folders provides structure, simplifies email management, and helps you find important messages more efficiently. By implementing a consistent folder system and regularly maintaining your email organization, you can stay organized, save time, and maximize productivity in managing your Outlook.com inbox.
Adding Contacts to Your Address Book
Adding contacts to your address book is essential for easy access to important email addresses and efficient communication in Outlook.com. By maintaining an organized and up-to-date address book, you can quickly find and reach out to your contacts. Here’s how you can add contacts to your address book:
1. Access the Contacts section: In Outlook.com, navigate to the Contacts section, usually located in the sidebar or navigation menu. Click on the “New Contact” or “+” button to begin adding a new contact.
2. Enter contact information: Fill in the necessary details for the contact you want to add. This typically includes their full name, email address, phone number, and any other relevant information you want to save, such as their company name, job title, or physical address.
3. Include additional fields: Take advantage of additional fields offered by Outlook.com to provide more context or personalized details. These may include a photograph, birthday, anniversary, notes, or any other information that helps you better identify and connect with the contact.
4. Organize contacts into folders or categories: Outlook.com allows you to create folders or categories within your address book to further categorize your contacts. This can be helpful for differentiating personal and professional contacts, organizing by industry, or arranging them based on your specific needs.
5. Import contacts from other sources: If you have existing contacts saved in other email providers or applications, you can import them into your Outlook.com address book. Look for the import or sync options provided in the Contacts section to integrate and consolidate your contact information.
6. Edit and update contact details: Regularly review and update contact details to ensure accuracy and relevance. If a contact changes their email address or phone number, make the necessary updates to keep your address book current.
7. Utilize contact groups: Create contact groups to organize contacts with similar characteristics or for specific purposes, such as a team at work, a social club, or a project team. Contact groups make it easier to send emails to multiple recipients simultaneously.
8. Search and utilize autofill: Once your contacts are added to your address book, you can conveniently search for specific contacts using the search bar. Outlook.com also offers autofill suggestions when composing emails based on the contacts in your address book.
By adding contacts to your address book in Outlook.com, you streamline your email experience and make it easier to stay connected with important individuals. Take the time to regularly update and organize your address book to ensure its accuracy and leverage the convenience it provides in your email communications.
Importing Contacts from Other Email Accounts
Importing contacts from other email accounts to your Outlook.com address book can save you time and effort by consolidating all your contacts in one place. Whether you’ve switched email providers or want to centralize your contact management, Outlook.com provides an easy way to import contacts. Here’s how you can import contacts from other email accounts:
1. Access the Contacts section: Log in to your Outlook.com email account and navigate to the Contacts section. Look for the import or sync options, usually found in the menu or settings.
2. Export contacts from the source account: Access your old email account and look for the option to export or download contacts. Different email providers may have varying export options, such as CSV (Comma Separated Values) or vCard formats.
3. Save the exported contacts file: Save the exported contacts file to your computer or a location from which you can easily access it later. Remember the file’s location and name as you’ll need it for the import process in Outlook.com.
4. Import contacts to Outlook.com: In the Contacts section of Outlook.com, select the import option and choose the file format that matches the one you exported from your old email account. Follow the prompts to locate and upload the contacts file to Outlook.com.
5. Map the contact fields: During the import process, you may need to map the fields in the contacts file to the corresponding fields in your Outlook.com address book. This ensures that the contact information is correctly organized and stored.
6. Review and clean up: After the import process is complete, review your contacts to ensure accuracy and make any necessary edits or updates. Remove any duplicate or obsolete contacts to keep your address book organized.
7. Repeat the process for multiple accounts: If you have contacts in multiple email accounts, repeat the import process for each account. This allows you to consolidate all your contacts into your Outlook.com address book.
8. Sync with other devices: Once your contacts are imported into your Outlook.com account, ensure that your other devices, such as smartphones or tablets, sync with Outlook.com to access the updated contact list across all your devices.
Importing contacts from other email accounts to Outlook.com simplifies your contact management and saves you the hassle of manually reentering all your contacts. With a few simple steps, you can have all your contacts centralized and readily available in your Outlook.com address book.
Blocking Unwanted Email Addresses
Blocking unwanted email addresses is an effective way to protect yourself from spam, phishing attempts, and other unwanted communications in your Outlook.com email account. By adding email addresses to your block list, you can prevent them from appearing in your inbox. Here’s how you can block unwanted email addresses:
1. Identify unwanted email addresses: Review your emails and identify the addresses that you want to block. These may include persistent spammers, unknown senders, or any email address from which you receive unwanted or suspicious messages.
2. Access email settings: Log in to your Outlook.com email account and navigate to the settings or options menu. Look for the “Junk Email” or “Blocked Senders” option.
3. Add email addresses to block list: Enter the email addresses you want to block in the provided field or add them to your blocked senders list. Some platforms allow you to block entire domains or specific email addresses.
4. Save blocked email addresses: Once you’ve added the unwanted email addresses to the block list, save the changes. Outlook.com will then automatically filter emails from these addresses, preventing them from appearing in your inbox.
5. Review blocked email addresses periodically: Regularly review your blocked senders list to ensure that it still reflects your preferences and needs. Remove any email addresses that are no longer unwanted or add new ones as necessary.
6. Use spam filters: Enable spam filters in Outlook.com to automatically identify and redirect spam emails to your junk or spam folder. This helps keep your inbox clutter-free and reduces the chances of unwanted emails reaching your main inbox.
7. Be cautious with unsubscribe links: When dealing with unwanted email addresses, be cautious when using unsubscribe links. Some spam emails may include deceptive or malicious links that can lead to further issues. Instead, rely on the blocking features provided by your email provider for better protection.
8. Report phishing attempts: If you receive phishing emails or suspicious messages, report them to your email provider. These reports help to strengthen security measures and protect other users from such scams.
Blocking unwanted email addresses enhances your email experience by reducing the distractions and potential risks associated with unwanted or fraudulent messages. Take advantage of the blocking features provided by Outlook.com to maintain a clean and secure email environment.
Creating Filters and Rules for Incoming Emails
Creating filters and rules for incoming emails is a powerful feature that can help you organize and manage your Outlook.com inbox more effectively. By setting up rules based on specific conditions, you can automate actions such as sorting emails into folders, marking them as important, or forwarding them to other recipients. Here’s how you can create filters and rules for incoming emails:
1. Access email settings: Log in to your Outlook.com email account and navigate to the settings or options menu. Look for the “Rules” or “Filters” option, which will allow you to configure email management rules.
2. Define the condition: Choose the condition that the incoming email should match for the rule to be triggered. Conditions can include specific senders, recipients, subject lines, keywords, or other criteria that you want to use as filters.
3. Choose the action: Determine the action you want to be taken when an email matches the specified condition. Actions can include moving emails to specific folders, marking them as read or important, forwarding them, or deleting them. You can apply multiple actions to a single rule.
4. Configure additional settings: Some email providers offer additional settings that you can configure for each rule. These may include options to stop processing other rules once a match is found, adjust the order of rule execution, or create exceptions for specific scenarios.
5. Test and refine: After setting up a rule, send test emails or wait for incoming emails that match the conditions to see if the rule behaves as expected. Make adjustments as necessary to ensure the desired outcome.
6. Review and manage rules: Regularly review your email management rules to ensure they align with your current needs. Remove or modify rules that are no longer necessary, and create new rules as your email organization requirements evolve.
7. Prioritize rules: If you have multiple rules, consider the order in which they are applied. Rules are typically executed in the order they appear in the list. Adjust the order as needed to prioritize certain rules over others when conflicts arise.
8. Fine-tune rules over time: As you become more accustomed to managing your emails with rules, you may discover additional conditions or actions that can better streamline your workflow. Take advantage of the flexibility of email management rules to optimize your email organization process.
Creating filters and rules for incoming emails empowers you to automate email management tasks, resulting in a more organized and streamlined Outlook.com inbox. By leveraging these features, you can spend less time manually sorting emails and more time focusing on what matters most.
Setting Up Email Forwarding
Setting up email forwarding in your Outlook.com account allows you to automatically redirect incoming emails from one account to another. Whether you want to consolidate your email accounts or ensure that all messages are sent to a single inbox, email forwarding is a convenient feature to use. Here’s how you can set up email forwarding:
1. Access email settings: Log in to your Outlook.com email account and navigate to the settings or options menu. Look for the “Email Forwarding” or “Forwarding” option.
2. Choose the forwarding option: Select the forwarding option that suits your needs. You can choose to forward all incoming emails, only forward emails that meet specific criteria, or set up forwarding for a designated period.
3. Enter the forwarding address: Specify the email address to which you want your incoming emails to be forwarded. Make sure to enter the address accurately to ensure that emails are redirected correctly.
4. Verify the forwarding address: In some cases, you may need to verify the forwarding address by confirming a verification code or by clicking on a verification link sent to that email address.
5. Customize additional settings: Some email forwarding options allow you to customize additional settings. For example, you may choose to keep a copy of forwarded emails in your Outlook.com inbox or set an automatic reply notification to inform senders about the email forwarding.
6. Test forwarding settings: To ensure that emails are being forwarded correctly, send yourself a test email or ask someone to send you a message. Check the specified forwarding address to confirm that the message was successfully forwarded.
7. Adjust or remove forwarding: If you need to make changes to your forwarding settings, such as updating the forwarding address or disabling forwarding, revisit the email forwarding settings and make the necessary adjustments.
8. Be cautious with forwarded emails: It’s important to note that forwarded emails retain the original sender’s information, which may include sensitive or personal details. Ensure that the forwarded emails are treated with the same privacy and security measures as your primary email account.
Email forwarding provides flexibility and convenience by consolidating your emails into a single inbox. By setting up email forwarding in your Outlook.com account, you can streamline your email management and ensure that all your messages reach the appropriate destination.
Configuring Email Notifications
Configuring email notifications in your Outlook.com account allows you to stay informed and promptly respond to incoming emails. By customizing your notification settings, you can choose how and when you receive notifications for new messages. Here’s how you can configure email notifications to suit your preferences:
1. Access email notification settings: Log in to your Outlook.com email account and navigate to the settings or options menu. Look for the “Notification” or “Notifications and Sounds” option.
2. Choose notification preferences: Select the notification preferences that align with your needs. Options usually include receiving notifications for all incoming emails, important emails only, or disabling notifications altogether.
3. Select the notification method: Choose how you want to receive notifications for new emails. Options may include a sound alert, desktop notifications, email previews, or app notifications on your mobile device.
4. Set a priority inbox or focused inbox: Some email providers offer options to prioritize certain emails and provide separate notifications for high-priority or important messages. Set up a priority inbox or focused inbox to receive notifications for the emails that matter most to you.
5. Customize notification sounds: If you choose audible alerts for new emails, you may have the option to customize the notification sound. Select a sound that grabs your attention without being disruptive or choose a sound that reflects your personal preference.
6. Specify quiet hours or Do Not Disturb: If you prefer not to be disturbed by email notifications during specific times, such as while you’re sleeping or during meetings, enable quiet hours or set a Do Not Disturb schedule. This helps prevent unnecessary interruptions and allows you to focus on other tasks.
7. Test the notification settings: After configuring your email notification preferences, send a test email to yourself or ask someone to send you an email to ensure that the notification preferences are working as intended. Make adjustments as needed.
8. Remember privacy and security: When enabling email notifications, be mindful of your privacy and security. Ensure that your device and email account are protected with strong passwords and consider disabling email previews or detailed notifications if you share your device or receive sensitive information.
By configuring email notifications according to your preferences, you can stay updated on incoming emails and respond promptly when necessary. Take the time to customize your email notification settings to optimize your email management and maximize your productivity.
Using Keyboard Shortcuts
Using keyboard shortcuts in your Outlook.com email account can greatly enhance your productivity and efficiency. These shortcuts allow you to perform various actions with just a few keystrokes, eliminating the need to navigate through menus or use the mouse. Here’s how you can utilize keyboard shortcuts in Outlook.com:
1. Accessing the list of shortcuts: In Outlook.com, navigate to the settings or options menu. Look for the “Keyboard shortcuts” or “Shortcuts” option. This will provide you with a list of available keyboard shortcuts.
2. Familiarize yourself with common shortcuts: Start by learning the most commonly used keyboard shortcuts. These may include reply, forward, delete, mark as read/unread, archive, or navigate between emails. These shortcuts allow you to perform essential actions quickly.
3. Use navigation shortcuts: Outlook.com offers shortcuts to navigate within your inbox and other sections. For example, you can use shortcuts to move to the next or previous email, switch between folders, or move to the search bar.
4. Learn formatting shortcuts: When composing or replying to emails, keyboard shortcuts for formatting can save you time. Learn shortcuts for bold, italics, underline, bullet points, and other common formatting options.
5. Customize or enable shortcuts: Some email clients allow you to customize or enable additional keyboard shortcuts. Check the settings or options menu to see if there are options to create your own shortcuts or enable advanced shortcut features.
6. Practice and memorize shortcuts: To truly benefit from keyboard shortcuts, practice using them regularly. The more you use and repeat the shortcuts, the more familiar they become, making them second nature in your email workflow.
7. Consult the comprehensive list: Outlook.com provides a comprehensive list of keyboard shortcuts that you can refer to if you want to explore more advanced or specialized actions. Take the time to review the list and identify shortcuts that can further streamline your email management.
8. Stay aware of platform compatibility: Keep in mind that keyboard shortcuts may vary depending on the device or operating system you are using. Ensure that the shortcuts you intend to use are compatible with your specific platform.
By utilizing keyboard shortcuts in Outlook.com, you can navigate through your emails, perform actions, and compose messages more efficiently. Incorporate these shortcuts into your daily email routine to save time and increase productivity.
Syncing Your Outlook.com Email with Other Devices
Syncing your Outlook.com email with other devices allows you to access your emails, contacts, and calendar events seamlessly across multiple devices. Whether you use a smartphone, tablet, or computer, syncing ensures that your email data is up to date and accessible whenever and wherever you need it. Here’s how you can sync your Outlook.com email with other devices:
1. Use the same Outlook.com account: Ensure that you are using the same Outlook.com email account on all of your devices. This allows you to sync your data, including emails, contacts, and calendar events.
2. Enable automatic syncing: In the settings or options menu on your devices, look for the synchronization or account settings. Enable automatic syncing for email, contacts, and calendar data to ensure that updates are reflected across all devices.
3. Check sync settings: Verify that your sync settings are configured the way you prefer. Determine the frequency of syncing intervals to balance the need for immediate updates and device battery usage.
4. Activate push notifications: Enable push notifications on your devices to receive real-time alerts for incoming emails, calendar events, and other updates. This ensures that you stay informed and can respond promptly to important communications.
5. Install dedicated apps or configure email clients: Install the Outlook app or configure email clients on your devices to streamline access to your Outlook.com email account. Dedicated apps often offer additional features and a more tailored experience.
6. Set up two-step verification: Consider enabling two-step verification for added security when syncing your Outlook.com email account across devices. This provides an extra layer of protection by requiring a verification code in addition to your password when signing in on new devices.
7. Regularly update your devices: Keep your devices up to date with the latest operating system versions and software updates. This ensures compatibility with Outlook.com services and helps prevent any syncing issues.
8. Troubleshoot syncing problems: If you encounter any syncing problems or inconsistencies across devices, consult support resources provided by Outlook.com or your device manufacturer. Troubleshooting steps may involve checking account settings, rebooting devices, or reinstalling apps.
Syncing your Outlook.com email with other devices ensures that you have uninterrupted access to your emails and other data. By following these steps, you can seamlessly integrate your Outlook.com email account into your device ecosystem, enhancing your productivity and keeping you connected wherever you go.
Troubleshooting Common Issues
While using Outlook.com email, you may encounter common issues that can disrupt your email experience. Fortunately, many of these issues can be resolved with simple troubleshooting steps. Here are some common issues you may face and how to troubleshoot them:
1. Login problems: If you’re unable to log in to your Outlook.com email account, double-check your username and password for accuracy. Consider resetting your password if needed. Clearing your browser cache or using a different web browser can also resolve login issues.
2. Slow loading or performance issues: Slow loading or performance issues can be caused by a variety of factors. Ensure that you have a stable internet connection. Clear your browser cache and disable any browser extensions or add-ons that may be causing conflicts. Try accessing your email on a different device or browser to determine if the issue is specific to one device.
3. Email not sending or receiving: If you’re experiencing issues with sending or receiving emails, check your internet connection and ensure that you’re not exceeding your email storage limit. Verify that your email account settings are correct and double-check any spam or filtering settings that may be blocking incoming emails. Contact your email provider if the issue persists.
4. Missing or deleted emails: If you’ve accidentally deleted an email or if emails are missing from your inbox, check your trash or deleted items folder and recover any mistakenly deleted emails. Review your email filters or rules to ensure they are not automatically moving emails to specific folders.
5. Syncing problems across devices: If emails, contacts, or calendar events are not syncing properly across devices, verify that you’re using the same Outlook.com account on all devices. Check your sync settings and ensure that automatic syncing is enabled. Reboot your devices and manually initiate a sync to refresh the data.
6. Email formatting issues: If you’re experiencing formatting issues when composing or receiving emails, ensure that you’re using a compatible email client or web browser. Double-check the email client settings to ensure HTML formatting is enabled. Try sending test emails to different email accounts and devices to identify if the issue is specific to certain recipients or devices.
7. Blocked or flagged emails: If you suspect certain emails are being blocked or flagged incorrectly, review your spam or junk email folders and adjust the filtering settings as needed. Add trusted senders to your contacts or whitelist to ensure their emails are not mistakenly filtered or blocked.
8. Contacting customer support: If you’ve exhausted all troubleshooting options, it may be necessary to contact customer support for additional assistance. Provide details about the specific issue you’re facing, including any error messages, and be prepared to follow any instructions provided by the support team.
By troubleshooting common issues, you can resolve minor setbacks and ensure a smooth experience while using Outlook.com email. Use these troubleshooting steps as a guide to resolve issues promptly and get back to managing your emails efficiently.