
Supplies Needed
Before you can start creating a soft fade vignette effect in Adobe Photoshop CC, there are a few supplies you’ll need:
- 1. Computer or laptop with Adobe Photoshop CC installed
- 2. High-resolution image to work with
- 3. Basic knowledge of Adobe Photoshop CC
- 4. Creativity and imagination
The software and hardware requirements are pretty straightforward. Adobe Photoshop CC is a powerful image editing software that is widely used by professionals and enthusiasts alike. It provides you with the necessary tools and features to bring your creative ideas to life.
Having a high-resolution image is crucial for a more detailed and visually appealing result. Higher resolution images contain more pixels, allowing you to work with more intricate details during the editing process.
While you don’t need to be an expert in Adobe Photoshop CC, having a basic understanding of the software’s interface and tools will help you navigate through the process more smoothly. If you’re new to Photoshop, don’t worry! This guide will walk you through the steps.
Finally, don’t forget the most important supply: your own creativity and imagination. The soft fade vignette effect can be customized and adjusted based on your artistic vision. Feel free to experiment and add your unique touch to make the final result truly your own.
Now that you have all the supplies you need, let’s dive into the step-by-step process of creating a soft fade vignette effect in Adobe Photoshop CC.
Step 1: Open Your Image in Adobe Photoshop CC
The first step in creating a soft fade vignette effect is to open your desired image in Adobe Photoshop CC. Here’s how to do it:
- Launch Adobe Photoshop CC on your computer.
- Go to the “File” menu at the top left corner of the interface and select “Open.” Alternatively, you can use the keyboard shortcut “Ctrl+O” (Windows) or “Cmd+O” (Mac).
- Navigate to the location where your image is stored and select it. Click “Open” to import the image into Photoshop.
Once you’ve successfully opened your image in Adobe Photoshop CC, it will appear as a new tab in the workspace. You can now proceed to the next step to start creating the soft fade vignette effect.
It’s important to choose the right image for this effect. Consider selecting a photo with a subject or focal point that you want to draw attention to, as the vignette effect will naturally emphasize the center of the image.
If your image is not already in the ideal size or format for your project, you can use Photoshop’s resizing and cropping tools to adjust it accordingly. However, be careful to maintain the image’s aspect ratio to avoid distortion.
Remember, the open image serves as the canvas for your creative process. Take your time to choose an image that appeals to you and aligns with the overall vision you have in mind for your project.
With your image open in Adobe Photoshop CC, you can now move on to the next step to create a duplicate of the background layer, which will be the foundation for applying the soft fade vignette effect.
Step 2: Duplicate the Background Layer
After opening your image in Adobe Photoshop CC, the next step in creating a soft fade vignette effect is to duplicate the background layer. This duplicate layer will serve as the foundation for applying the effect while preserving the original image. Follow these steps to duplicate the background layer:
- Make sure the Layers panel is visible. If it’s not, go to the “Window” menu at the top and select “Layers” to open it.
- In the Layers panel, you’ll see the background layer listed as “Background” by default. Right-click on the background layer.
- A context menu will appear. Select “Duplicate Layer” from the options.
- A dialog box will pop up, allowing you to rename the duplicated layer if desired. You can leave the name as is or give it a more descriptive title. Click “OK” to create the duplicate layer.
Once you’ve duplicated the background layer, you’ll notice that the Layers panel now contains two layers: the original background layer and the newly created duplicate layer.
The duplicate layer serves as a non-destructive way to apply the soft fade vignette effect. By working on a separate layer, you can easily make adjustments and maintain the integrity of the original image.
Throughout the editing process, it’s always a good practice to preserve the original image, especially if you need to make further changes or revert back to the original version. Duplicating the background layer ensures that you have a backup to refer to when needed.
After duplicating the background layer, you’re ready to proceed to the next step, which involves creating a layer mask to begin applying the soft fade vignette effect.
Step 3: Create a Layer Mask
Once you have duplicated the background layer in Adobe Photoshop CC, the next step in creating a soft fade vignette effect is to create a layer mask. A layer mask will enable you to control the visibility and opacity of certain areas of the image. Follow these steps to create a layer mask:
- Make sure the duplicate layer is selected in the Layers panel.
- At the bottom of the Layers panel, you’ll see a row of icons. Click on the “Add Layer Mask” icon. It looks like a square with a circle inside.
After creating the layer mask, you’ll notice that a white thumbnail appears next to the duplicate layer’s thumbnail in the Layers panel. This white thumbnail represents the layer mask.
A layer mask works by using shades of gray to determine the visibility of the underlying layer. White areas in the layer mask reveal the layer, while black areas hide the layer. By painting with shades of gray on the layer mask, you can control the opacity and blending of the soft fade vignette effect.
If you accidentally paint too much or make a mistake on the layer mask, don’t worry! You can easily fix it by switching to the Brush tool and painting with black to hide or white to reveal the effect. This gives you the flexibility to fine-tune the vignette and make adjustments as needed.
Creating a layer mask allows you to maintain a non-destructive editing workflow, keeping the original image intact. It also gives you the freedom to experiment and refine the soft fade vignette effect without permanently altering the image underneath.
Now that you have created a layer mask, you’re ready to move on to the next step, where you’ll select the Gradient tool to apply the soft fade to the vignette effect.
Step 4: Select the Gradient Tool
After creating a layer mask in Adobe Photoshop CC for the duplicatd layer, it’s time to select the Gradient tool. The Gradient tool will allow you to apply the soft fade effect to the vignette. Follow these steps to select the Gradient tool:
- Make sure the duplicate layer with the layer mask is selected in the Layers panel.
- In the Tools panel on the left side of the interface, locate the Gradient tool. It is represented by a rectangle with a gradient of colors.
- If the Paint Bucket tool is currently selected instead of the Gradient tool, click and hold on the Paint Bucket tool icon to reveal a dropdown menu. From the menu, select the Gradient tool.
Once you have selected the Gradient tool, you’re ready to start applying the soft fade vignette effect to your image. The Gradient tool allows you to create smooth transitions between colors, making it the ideal tool for achieving a gradual fade from the center to the edges of your image.
Before proceeding to apply the gradient, it is essential to choose the appropriate gradient type. In the next step, you’ll learn how to select the Foreground to Transparent gradient, which is perfect for creating a soft fade vignette effect.

Illustration: The Gradient tool icon in Photoshop CC
Now that you’ve selected the Gradient tool, you’re ready to move on to the next step and choose the Foreground to Transparent gradient to apply the soft fade vignette effect.
Step 5: Choose the Foreground to Transparent Gradient
After selecting the Gradient tool in Adobe Photoshop CC, the next step in creating a soft fade vignette effect is to choose the Foreground to Transparent gradient. This gradient allows you to smoothly blend the center of the image with the transparent edges, creating a gradual fade effect. Follow these steps to choose the Foreground to Transparent gradient:
- Make sure the Gradient tool is still selected in the Tools panel on the left side of the interface.
- In the Options bar at the top of the interface, you’ll see a dropdown menu that contains various gradient presets. Click on the dropdown menu to expand it.
- From the dropdown menu, select the “Foreground to Transparent” gradient.
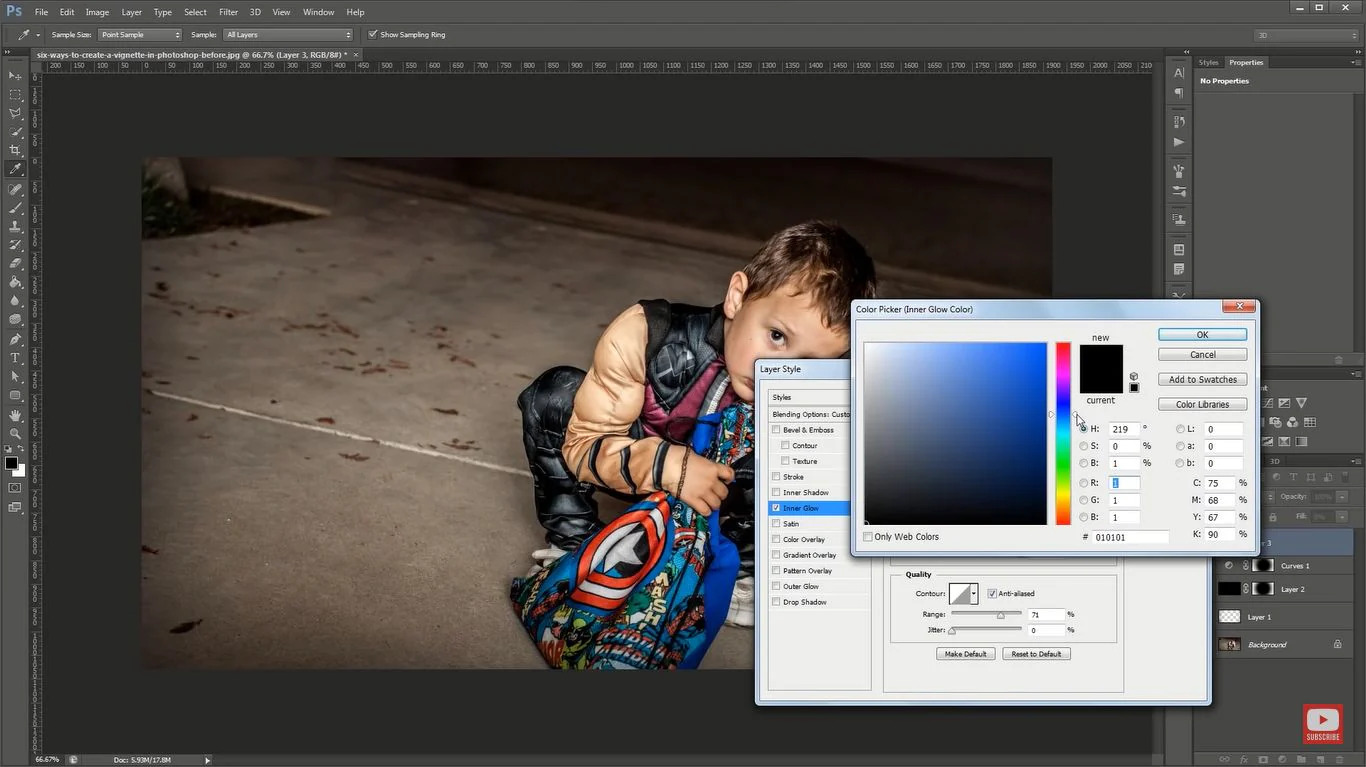
By choosing the Foreground to Transparent gradient, you enable the software to create a smooth transition from the foreground color to transparency. The foreground color is determined by the color currently selected in the Foreground color swatch located at the bottom of the Tools panel. You can modify the foreground color by clicking on the swatch and selecting a color from the Color Picker dialog box.
The Foreground to Transparent gradient is perfect for creating a soft fade vignette effect because it seamlessly blends the center of the image with the transparent edges, creating a gradual and natural-looking fade.
Choosing the right gradient is crucial for achieving the desired effect. Feel free to experiment with different gradient presets and colors to customize the vignette according to your creative vision and the overall tone of your image.
Now that you’ve selected the Foreground to Transparent gradient, you’re ready to move on to the next step and apply the gradient to the layer mask, thus creating the soft fade vignette effect.
Step 6: Apply the Gradient to the Layer Mask
With the Foreground to Transparent gradient selected in Adobe Photoshop CC, it’s time to apply the gradient to the layer mask. This step is crucial as it creates the soft fade vignette effect by blending the center of the image with the transparent edges. Follow these steps to apply the gradient to the layer mask:
- Ensure that the duplicate layer with the layer mask is selected in the Layers panel.
- Make sure that the Gradient tool is still selected in the Tools panel on the left side of the interface.
- Position the Gradient tool at the center of the image where you want the soft fade effect to be the strongest.
- Click and drag the Gradient tool towards the edges of the image. This will create a gradient that gradually fades from the center to the edges.
As you apply the gradient, you’ll notice that the image starts to blend smoothly from the center outward, creating a soft and subtle fade. The layer mask controls the visibility and opacity of the gradient, allowing you to dictate the strength and intensity of the vignette effect.
Experiment with different directions and lengths of the gradient to achieve the desired effect. You can also try varying the starting point or adjusting the angle of the gradient to create unique and customized vignette effects.
If the initial result is too strong or too subtle, don’t worry! You can always make adjustments by painting on the layer mask with a soft brush or modifying the opacity of the layer. This flexibility allows you to refine the vignette effect to match your artistic vision.
Applying the gradient to the layer mask is a crucial step in the process of creating a soft fade vignette effect. Now that you’ve successfully applied the gradient, you’re ready to fine-tune the vignette effect in the next step.
Step 7: Adjust the Opacity of the Layer
After applying the gradient to the layer mask in Adobe Photoshop CC, it’s time to adjust the opacity of the duplicate layer to further refine the soft fade vignette effect. This step allows you to control the overall intensity and visibility of the vignette effect. Follow these steps to adjust the opacity of the layer:
- Make sure the duplicate layer with the layer mask is selected in the Layers panel.
- In the Layers panel, you’ll find the Opacity slider located at the top. It is represented by a percentage value.
- Click and drag the Opacity slider to adjust the opacity of the duplicate layer.
By adjusting the opacity, you can make the vignette effect more subtle or more pronounced, depending on your preference and the overall aesthetic you’re trying to achieve. Lowering the opacity will reduce the strength of the vignette, while increasing it will make the effect more noticeable.
You can also use the Opacity slider to create a gradual fade-in or fade-out effect for the vignette. For example, if you want the vignette to be stronger towards the edges and gradually fade towards the center, you can lower the opacity at the center of the image and increase it towards the edges.
It’s essential to strike a balance with the opacity adjustment. The goal is to enhance the focal point or subject of the image while maintaining a natural and pleasing visual outcome. Be sure to preview your adjustments and experiment with different opacity levels until you’re satisfied with the final result.
Remember, adjusting the opacity works in conjunction with the layer mask. If you find that certain areas of the vignette effect need more or less opacity, you can paint on the layer mask with a soft brush using black or white to further refine the visibility.
With the opacity of the duplicate layer adjusted to your liking, you’re ready to move on to the next step and fine-tune the soft fade vignette effect for a polished and professional result.
Step 8: Fine-tune the Vignette Effect
After adjusting the opacity of the duplicate layer in Adobe Photoshop CC, the next step is to fine-tune the vignette effect. This step allows you to make precise adjustments to ensure that the soft fade vignette effect complements your image perfectly. Follow these steps to fine-tune the vignette effect:
- Make sure the duplicate layer with the layer mask is selected in the Layers panel.
- Examine the vignette effect on your image and identify any areas that may need further adjustment.
- To refine the vignette effect, you have several options:
– Adjust the position of the gradient: If you want to reposition the center of the vignette, you can click and drag the Gradient tool on the layer mask to define a new starting point for the gradient.
– Modify the gradient type: Switch between different gradient types to experiment with alternative vignette styles. You can choose from Radial, Linear, Angle, Reflected, or Diamond gradients, among others.
– Paint on the layer mask: Use a soft brush with black or white selected as the foreground color to paint directly on the layer mask. Painting with black will hide the vignette effect, while painting with white will reveal it. This allows you to selectively adjust the visibility of the vignette effect in specific areas of the image.
– Adjust the opacity further: If you find that the vignette effect is still too strong or too subtle, you can go back to the Opacity slider in the Layers panel and fine-tune it to your desired level of intensity.
The key to fine-tuning the vignette effect is to have a discerning eye and make adjustments according to your artistic vision. It’s a process that requires experimentation and iteration, so don’t be afraid to make multiple adjustments until you achieve the desired outcome.
Remember to save your progress periodically to avoid losing any changes you’ve made along the way. You can also create a duplicate of the edited image as a backup before making further adjustments.
Once you’re satisfied with the fine-tuning of the soft fade vignette effect, you’re ready to move on to the next step and add a Levels Adjustment Layer to enhance the overall tonality of your image.
Step 9: Add a Levels Adjustment Layer
After fine-tuning the vignette effect, it’s time to further enhance the tonality and contrast of your image by adding a Levels Adjustment Layer in Adobe Photoshop CC. This step allows you to fine-tune the brightness, highlights, and shadows to make your image visually compelling. Follow these steps to add a Levels Adjustment Layer:
- Make sure the duplicate layer is selected in the Layers panel.
- In the Layers panel, click on the “Create new fill or adjustment layer” icon located at the bottom. It looks like a half-white, half-black circle.
- From the dropdown menu, choose “Levels” to add a new Levels Adjustment Layer.
Once you’ve added the Levels Adjustment Layer, a new layer will appear in the Layers panel, directly above the duplicate layer. This new layer contains adjustment controls that allow you to modify the tonal range of the image.
In the Levels dialog box, you’ll find three sliders – the black point, gray point, and white point. These sliders control the brightness levels of the shadows, midtones, and highlights, respectively. By adjusting these sliders, you can fine-tune the overall tonality and contrast of your image.
Experiment with moving the sliders to the left or right and observe how it affects the image. Moving the black point slider to the right increases the darkness in the shadows, while moving the white point slider to the left increases the brightness in the highlights. Adjusting the gray point slider can increase or decrease the overall midtone brightness.
While making adjustments, keep an eye on the image and aim for a balanced result. Avoid pushing the sliders too far to extreme values, as it may result in loss of detail or unnatural tonality. Instead, make subtle and gradual adjustments until you achieve the desired tonal balance and contrast.
The Levels Adjustment Layer allows for non-destructive editing, meaning you can go back and modify the adjustment at any time. If you’re unhappy with any of the changes made, you can simply double-click on the Levels Adjustment Layer in the Layers panel to reopen the dialog box and make further adjustments.
Adding the Levels Adjustment Layer is an essential step in improving the overall tonality and contrast of your image. With this adjustment in place, your image is now ready for the final step – adjusting the levels for a softer fade.
Step 10: Adjust the Levels for a Softer Fade
After adding the Levels Adjustment Layer in Adobe Photoshop CC, it’s time to adjust the levels to achieve a softer and more seamless fade in your image. This step involves refining the tonal range, highlights, and shadows to ensure a harmonious transition from the center to the edges. Follow these steps to adjust the levels for a softer fade:
- Make sure the Levels Adjustment Layer is selected in the Layers panel.
- In the Levels dialog box, you’ll see three input sliders representing the black point, gray point, and white point.
- Adjust the black point slider by clicking and dragging it slightly towards the right. This will darken the shadows, creating a subtler fade.
- Similarly, adjust the white point slider by clicking and dragging it slightly towards the left. This will lighten the highlights, contributing to a smoother transition.
- Observe the effect on your image as you make these adjustments. Aim for a balanced and visually pleasing result.
By fine-tuning the levels, you are refining the tonal range of your image, making the soft fade vignette effect more subtle and seamless. Moving the black point closer to the center darkens the shadows, minimizing any abrupt transitions. Conversely, moving the white point towards the center lightens the highlights, ensuring a smoother fade at the edges.
Throughout the adjustment process, keep the overall aesthetics of your image in mind. Avoid pushing the sliders too far, as it may lead to loss of detail or an unrealistic effect. Work with small adjustments and evaluate the impact on the image as you go.
Remember, these adjustments can be modified at any time since you’re working with an Adjustment Layer. If you’re not satisfied with the initial adjustments or want to make further refinements down the line, you can simply double-click on the Levels Adjustment Layer in the Layers panel and make the necessary changes.
With the levels adjusted for a softer fade, your image now boasts a beautifully enhanced tonal range and transition. It’s time to move on to the final step and save your final image.
Step 11: Save Your Final Image
Congratulations! You have successfully created a soft fade vignette effect in Adobe Photoshop CC. Now it’s time to save your final image. Follow these steps to ensure your masterpiece is preserved:
- Make sure you are satisfied with the result and all the adjustments you’ve made.
- Go to the “File” menu at the top left corner of the interface and select “Save As” or “Save for Web” (depending on your intended use).
- In the Save As dialog box, choose the desired format for your final image. JPEG is commonly used for web and digital purposes, while TIFF or PNG provide higher quality for printing.
- Select the destination folder where you want to save your image, and give it a meaningful name.
- Choose the appropriate settings for the selected file format, such as quality, resolution, and color space. Consider the purpose and requirements of your image when making these choices.
- Click “Save” to save your final image with the specified settings.
It’s always a good practice to save your image in a high-quality format with the original layers intact. This allows you to make further edits or adjustments in the future, if needed. You can retain the layered PSD file format or save a copy in a flattened format for sharing or printing.
Additionally, consider resizing your image to the desired dimensions for its intended use. This is particularly important if you’re planning to showcase your work on the web or print it in a specific size.
Remember to keep a backup copy of your final image in a separate location, such as an external hard drive or cloud storage. This ensures the preservation of your hard work and allows you to access it anytime in the future.
Now that you’ve saved your final image, you can proudly share it with the world or continue your creative journey with new projects. Enjoy the satisfaction of creating a visually stunning soft fade vignette effect in Adobe Photoshop CC!