
Reasons to Convert a Picture to PDF
Converting a picture to PDF format offers numerous benefits that go beyond the simplicity of file conversion. Whether you are a student, a professional, or an individual looking for an efficient way to store and share images, converting pictures to PDF can streamline your workflow and enhance your digital experience. Here are some compelling reasons why you should consider converting your pictures to PDF:
1. Universally Compatible Format: PDF files can be opened and viewed on any device or operating system without the need for specific software or plugins. This ensures seamless access to your pictures across different platforms.
2. Preserves Image Quality: Unlike other image formats that may experience quality loss or distortion during file conversion, PDF maintains the original image quality, including resolution, color accuracy, and sharpness.
3. Secure and Tamper-proof: PDF files can be secured with passwords, making them an ideal format for preserving the confidentiality of sensitive images. Additionally, PDF files can prevent unauthorized editing or alterations, ensuring the integrity of your pictures.
4. Efficient Compression: PDF files can compress images without compromising quality, resulting in reduced file size. This makes it easier to store, share, and transfer pictures without consuming excessive storage space.
5. Multi-page Support: PDF allows you to combine multiple pictures into a single file, creating a convenient and organized collection. This is particularly useful for creating albums, portfolios, or presentations.
6. Enhanced Accessibility: PDF files support text-based metadata, enabling you to add captions, descriptions, or alt text to your pictures. This enhances accessibility for visually impaired users and improves searchability.
7. Print-ready Format: PDF files ensure that your pictures are displayed exactly as intended when printed. This is especially beneficial for photographers, designers, or artists who rely on accurate color representation and layout.
8. Easy Annotation and Markup: PDF files provide built-in annotation tools, allowing you to add comments, highlights, and drawings directly onto your pictures. This is particularly useful for collaborative projects or design reviews.
9. Long-term File Preservation: PDF is a reliable format for archiving your pictures. It ensures the longevity of your images, preventing degradation or compatibility issues that may arise with other file formats over time.
10. Versatile Sharing and Distribution: PDF files can be easily shared via email, cloud storage, or online platforms. They retain their format and can be viewed by recipients as intended, regardless of their device or software.
Converting your pictures to PDF not only simplifies file management but also enhances the accessibility, security, and usability of your images. Consider incorporating PDF conversion into your digital workflow to leverage the many advantages it offers.
How to Convert a Picture to PDF on Windows
Converting a picture to PDF on Windows is a straightforward process that can be accomplished using built-in or third-party software. Here are the steps to convert a picture to PDF on Windows:
1. Using Microsoft Print to PDF:
- Open the picture you want to convert in an image viewer or editor.
- Click on the “Print” or “Print Preview” option in the File menu.
- Select “Microsoft Print to PDF” as the printer choice.
- Choose the desired page size and orientation for the PDF.
- Click on the “Print” button and choose a location to save the PDF file.
- Provide a name for the PDF file and click on the “Save” button.
- The picture will be converted to PDF format and saved at the selected location.
2. Using Adobe Acrobat:
- Open Adobe Acrobat on your Windows computer.
- Click on the “Create PDF” option in the toolbar.
- Select “From File” and choose the picture you want to convert.
- Click on the “Create” button to start the conversion process.
- Specify the output location and provide a name for the PDF file.
- Click on the “Save” button to convert the picture to PDF.
3. Using Third-Party Software:
There are several third-party software options available for converting pictures to PDF on Windows. These include popular applications like Nitro PDF, Foxit PhantomPDF, and PDFelement. Here is a general process for using third-party software:
- Download and install the preferred software on your Windows computer.
- Open the software and select the option to create a new PDF.
- Choose the picture you want to convert from your computer.
- Select the desired settings, such as page size and image compression.
- Click on the “Convert” or “Create” button to initiate the conversion.
- Specify the output location and provide a name for the PDF file.
- Save the PDF file to complete the conversion process.
Converting a picture to PDF on Windows is a quick and convenient way to preserve the image quality, compatibility, and security of your files. Whether you use the built-in Microsoft Print to PDF feature or opt for third-party software, converting pictures to PDF format can greatly benefit your digital workflow.
How to Convert a Picture to PDF on Mac
Converting a picture to PDF on a Mac is a straightforward process that can be done using built-in tools like Preview or with the help of third-party software. Here are the steps to convert a picture to PDF on a Mac:
1. Using Preview:
- Open the picture you want to convert in the Preview app.
- In the menu bar, click on “File” and select “Export as PDF”.
- Choose the location where you want to save the PDF file.
- Provide a name for the PDF file and click on the “Save” button.
- The picture will be converted to PDF format and saved at the selected location.
2. Using Adobe Acrobat:
- If you have Adobe Acrobat installed on your Mac, open the program.
- In the menu bar, click on “File” and select “Create PDF”.
- Choose the picture you want to convert and click on “Create”.
- Specify the output location and provide a name for the PDF file.
- Click on the “Save” button to convert the picture to PDF.
3. Using Third-Party Software:
Alternatively, you can use third-party software specifically designed for PDF conversion on Mac, such as PDFelement, PDF Expert, or Adobe Acrobat DC. Here is a general process for using third-party software:
- Download and install the preferred PDF conversion software on your Mac.
- Open the software and select the option to create a new PDF.
- Choose the picture you want to convert from your computer.
- Customize the settings, such as page size and image compression if desired.
- Click on the “Convert” or “Create” button to start the conversion process.
- Specify the output location and provide a name for the PDF file.
- Save the PDF file to complete the conversion process.
Converting a picture to PDF on a Mac can be achieved with the built-in Preview app or by using third-party software. Whether you choose the simplicity of Preview or the advanced features of dedicated PDF conversion software, converting pictures to PDF format enables you to enhance file compatibility, security, and accessibility.
How to Convert a Picture to PDF on Android
Converting a picture to PDF on an Android device can be done using various apps available on the Google Play Store. These apps offer easy-to-use interfaces and powerful features that allow you to convert pictures to PDF format. Here are the steps to convert a picture to PDF on Android:
1. Using Adobe Scan:
- Download and install the Adobe Scan app from the Google Play Store.
- Open the app and grant the necessary permissions.
- Tap on the camera icon to take a picture or select an existing photo from your gallery.
- Select the image you want to convert to PDF and tap on “Save PDF”.
- Choose the output location and provide a name for the PDF file.
- Tap on the “Save” button to convert the picture to PDF.
2. Using CamScanner:
- Download and install the CamScanner app from the Google Play Store.
- Open the app and grant the necessary permissions.
- Tap on the camera icon to take a picture or select an existing photo from your gallery.
- After selecting the image, tap on the “PDF” icon to convert it to PDF.
- Choose the output location and provide a name for the PDF file.
- Tap on the “Save” button to convert the picture to PDF.
3. Using Image to PDF Converter:
- Download and install the Image to PDF Converter app from the Google Play Store.
- Open the app and grant the necessary permissions.
- Select the image you want to convert to PDF by tapping on the plus icon or camera icon.
- After selecting the image, tap on the “Convert” or “Create PDF” button.
- Choose the output location and provide a name for the PDF file.
- Tap on the “Save” button to convert the picture to PDF.
Converting a picture to PDF on Android is made easy with dedicated apps like Adobe Scan, CamScanner, or Image to PDF Converter. These apps provide a user-friendly interface and convenient features to convert pictures to PDF format effortlessly.
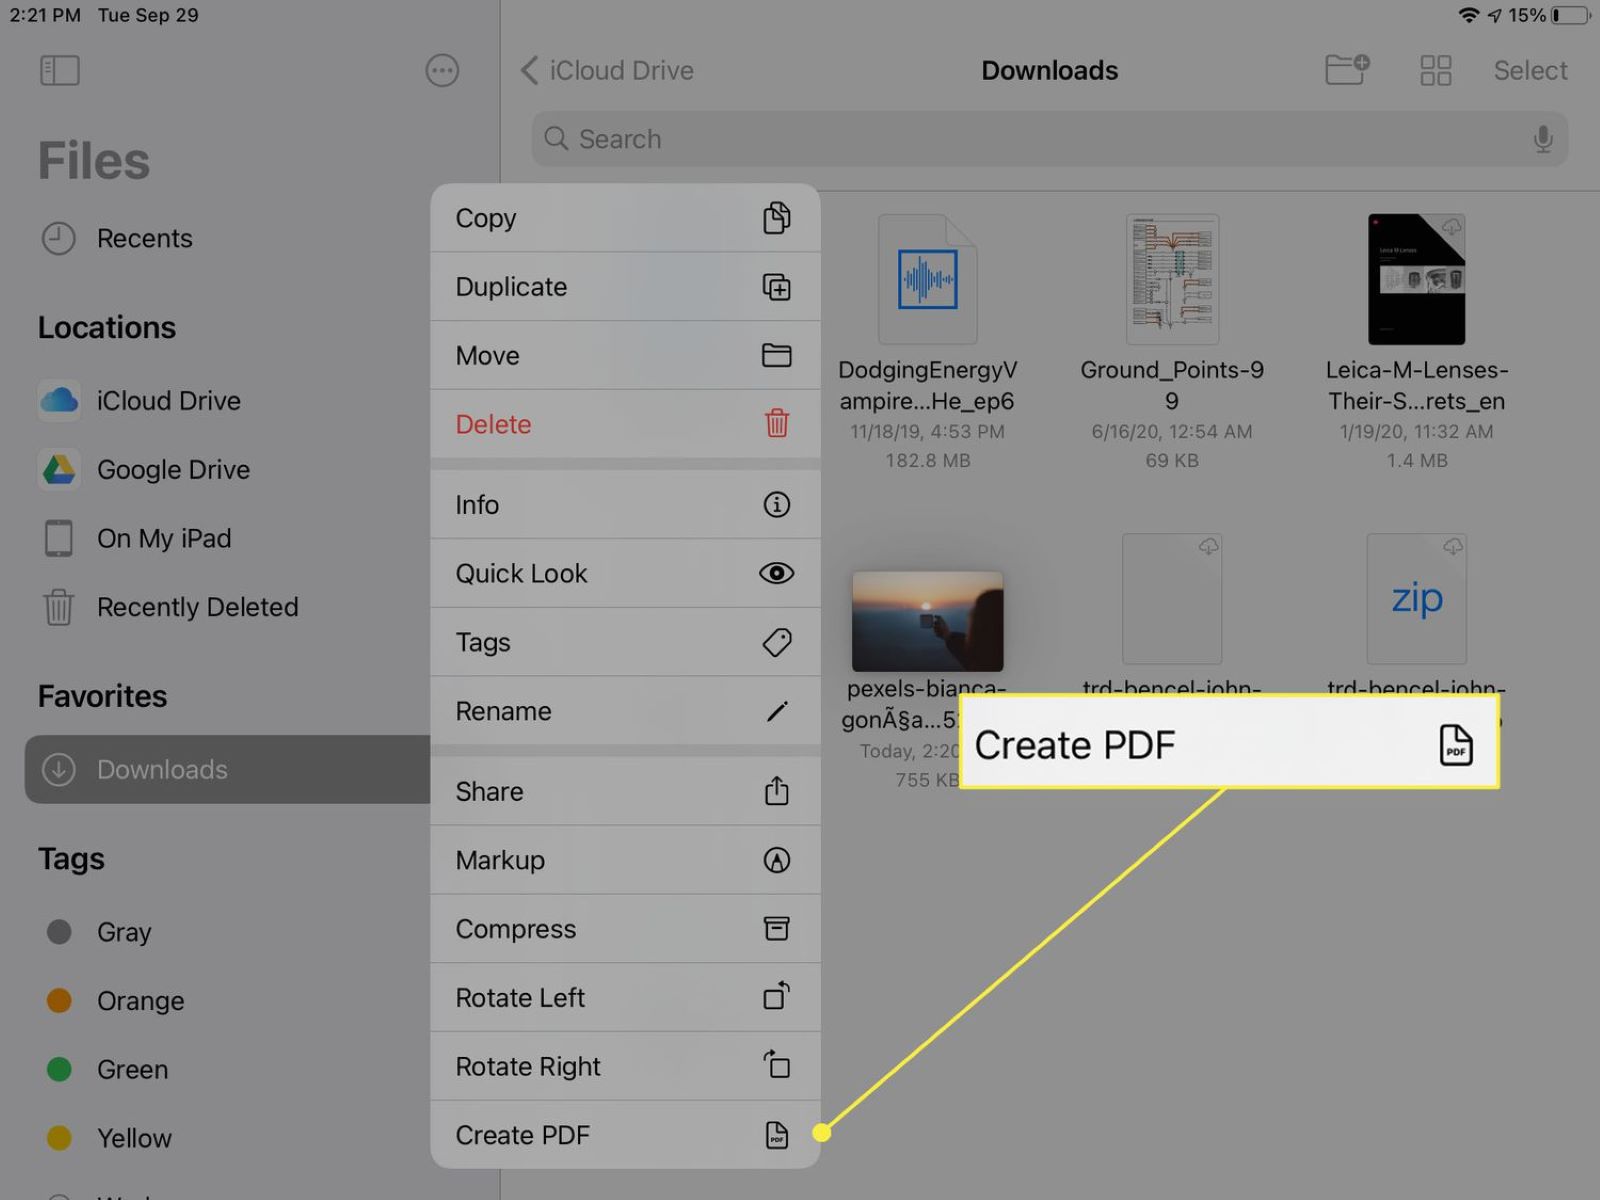
How to Convert a Picture to PDF on iPhone
Converting a picture to PDF on an iPhone can be done using various apps available on the App Store. These apps offer powerful features and intuitive interfaces that allow you to easily convert your pictures to PDF format. Here are the steps to convert a picture to PDF on an iPhone:
1. Using Adobe Scan:
- Download and install the Adobe Scan app from the App Store.
- Open the app and grant the necessary permissions.
- Tap on the camera icon to take a picture or select an existing photo from your photo library.
- Select the image you want to convert to PDF and tap on “Save PDF”.
- Choose the output location and provide a name for the PDF file.
- Tap on the “Save” button to convert the picture to PDF.
2. Using Tiny Scanner:
- Download and install the Tiny Scanner app from the App Store.
- Open the app and grant the necessary permissions.
- Tap on the camera icon to take a picture or select an existing photo from your photo library.
- After selecting the image, tap on the “PDF” icon to convert it to PDF.
- Choose the output location and provide a name for the PDF file.
- Tap on the “Save” button to convert the picture to PDF.
3. Using Scanner Pro:
- Download and install the Scanner Pro app from the App Store.
- Open the app and grant the necessary permissions.
- Tap on the camera icon to take a picture or select an existing photo from your photo library.
- After selecting the image, tap on the “PDF” icon to convert it to PDF.
- Choose the output location and provide a name for the PDF file.
- Tap on the “Save” button to convert the picture to PDF.
Converting a picture to PDF on an iPhone is easily accomplished using dedicated apps like Adobe Scan, Tiny Scanner, or Scanner Pro. These apps provide a seamless conversion process, allowing you to convert your pictures to PDF format hassle-free.
How to Convert Multiple Pictures to a Single PDF
Converting multiple pictures into a single PDF file can be a convenient way to organize and share a collection of images. Whether you have a series of scanned documents, a collection of photographs, or a portfolio of artwork, creating a single PDF file allows for easy viewing and distribution. Here are some methods to convert multiple pictures to a single PDF:
1. Using Adobe Acrobat:
- Open Adobe Acrobat on your computer.
- In the menu bar, click on “File” and select “Create PDF”.
- In the Create PDF dialog box, select “Combine Files into a Single PDF”.
- Click on the “Add Files” button and select the desired pictures.
- Arrange the order of the pictures if needed.
- Click on the “Create” button to convert the pictures to a single PDF.
- Specify the output location and provide a name for the PDF file.
- Click on the “Save” button to complete the conversion process.
2. Using Online Converters:
- Search for online converters that allow you to combine multiple pictures into a single PDF file.
- Select a reliable converter and follow the instructions on the website.
- Upload the pictures you want to convert.
- Arrange the order of the pictures if necessary.
- Start the conversion process and wait for the website to generate the PDF file.
- Download the generated PDF file to your computer or device.
3. Using Dedicated Software:
- Search for dedicated software that allows you to merge pictures into a single PDF file, such as Adobe Acrobat, PDFelement, or third-party applications.
- Download and install the software on your computer.
- Open the software and select the option to create a new PDF or combine files.
- Add the pictures you want to convert to the PDF file.
- Arrange the order of the pictures if desired.
- Click on the “Create” or “Convert” button to start the merging process.
- Specify the output location and provide a name for the PDF file.
- Save the PDF file to complete the conversion process.
Converting multiple pictures into a single PDF file provides a convenient and organized way to store, share, and present a collection of images. Whether you use Adobe Acrobat, online converters, or dedicated software, merging pictures into a single PDF ensures easy access and seamless distribution of your visual content.
How to Convert a Picture to PDF Online
If you need to convert a picture to PDF but don’t want to download or install any additional software, online converters can be a convenient solution. These web-based tools allow you to convert your images to PDF format with just a few clicks. Here’s how to convert a picture to PDF online:
1. Choose a reliable online converter:
There are numerous online converters available, so it’s important to choose a trusted and reliable one. Popular options include Smallpdf, Zamzar, and PDF24. Visit their websites to get started.
2. Upload your picture:
Once you’re on the online converter’s website, look for the option to upload or select the image you want to convert. This can usually be done by clicking on a button or dragging and dropping the image into the designated area.
3. Configure the conversion settings:
Depending on the online converter you’re using, you may have the option to configure certain settings before converting the picture to PDF. This can include adjusting the page size, orientation, image quality, or even adding watermarks or page numbers. Follow the instructions provided by the converter to make any desired changes.
4. Initiate the conversion:
Once you’ve uploaded your picture and customized the settings (if applicable), look for the button or option to start the conversion process. This is usually labeled as “Convert” or “Create PDF.” Click on it to begin the conversion. Be patient, as the speed of the conversion will depend on the size and complexity of the image.
5. Download the converted PDF:
After the conversion process is complete, you’ll be provided with a link to download the converted PDF file. Click on the download link and specify the location where you want to save the PDF on your computer or device.
6. Verify the PDF:
Before finalizing the conversion, it’s recommended to open and verify the PDF file to ensure that the picture was accurately converted and the quality was maintained. Open the PDF using a PDF viewer to confirm that the image appears as intended.
Converting a picture to PDF online provides a quick and accessible method for converting your images without installing any additional software. Online converters offer convenience and flexibility, making them a popular choice when you need to convert a picture to PDF on the go.
How to Edit a Picture before Converting it to PDF
Before converting a picture to PDF, you may want to make some edits or adjustments to enhance the quality or appearance of the image. Fortunately, there are various tools and software available that allow you to edit pictures easily. Here are the steps to edit a picture before converting it to PDF:
1. Choose a photo editing software:
There are several photo editing software options available, both free and paid. Popular choices include Adobe Photoshop, GIMP, Pixlr, and Canva. Choose the one that suits your needs and familiarity.
2. Open the picture in the editing software:
Launch the photo editing software and open the picture you want to edit. This can usually be done by selecting “File” > “Open” and navigating to the location of the image on your computer.
3. Make desired edits:
Depending on the software you’re using, you’ll have a range of editing tools and features at your disposal. Some common edits you may want to consider before converting to PDF include adjusting brightness, contrast, saturation, cropping, resizing, removing red-eye, sharpening, or applying filters and effects. Explore the editing features of the software and make the necessary adjustments to enhance the image.
4. Save the edited image:
Once you’re satisfied with the edits, save the image in its original format, such as JPEG or PNG. This will ensure that the edits are preserved when you convert the picture to PDF in the next step.
5. Convert the edited picture to PDF:
Now that you have the edited image, it’s time to convert it to PDF. Follow the steps outlined earlier in this article based on your operating system or online converter of choice. Open the picture in the respective software or upload it to the online converter, configure any necessary settings, and initiate the conversion process.
6. Verify the converted PDF:
Once the picture is successfully converted to PDF, open the PDF file using a PDF viewer and verify that the edits you made to the picture are accurately reflected in the PDF. This is to ensure that the final PDF matches your intended edits before sharing or using it.
By following these steps, you can edit your picture to enhance its appearance or make necessary adjustments before converting it to PDF. This enables you to have better control over the final version of your image within the PDF document.
How to Compress a Picture in a PDF
When dealing with PDF files that contain high-resolution images, file size can become a concern, especially if you need to share or upload the PDF online. To optimize the file size and reduce loading times, it’s helpful to compress the pictures within the PDF. Here are the steps to compress a picture in a PDF:
1. Using Adobe Acrobat:
- Open the PDF file in Adobe Acrobat on your computer.
- In the menu bar, click on “File” and select “Optimize PDF”.
- In the “Optimize PDF” dialog box, select “Images” from the left-hand menu.
- Choose the level of compression you desire. Options typically include low, medium, or high quality.
- Click on the “Audit Space Usage” button to see the potential file size reduction.
- Click on the “OK” button to compress the pictures in the PDF.
- Specify the output location and provide a name for the compressed PDF file.
- Click on the “Save” button to complete the compression process.
2. Using Online PDF Compressors:
- Search for reputable online PDF compressors that offer picture compression features.
- Select a suitable online compressor and visit their website.
- Upload the PDF file containing the picture you want to compress.
- Follow the instructions provided by the online compressor to initiate the compression process.
- Choose the desired compression settings, such as image quality or resolution.
- Start the compression process and wait for the website to generate the compressed PDF file.
- Download the compressed PDF file to your computer or device.
3. Using Dedicated Software:
- Look for dedicated software designed specifically for PDF compression, such as Adobe Acrobat, PDFelement, or other third-party applications.
- Download and install the software on your computer.
- Open the software and select the option to compress PDF or optimize file size.
- Upload the PDF file containing the picture you want to compress.
- Select the compression options, such as image quality or resolution.
- Start the compression process and wait for the software to generate the compressed PDF file.
- Specify the output location and provide a name for the compressed PDF file.
- Save the compressed PDF file to complete the compression process.
Compressing pictures within a PDF can significantly reduce file size without compromising image quality. Whether you use Adobe Acrobat, online compressors, or dedicated software, following these steps ensures a more efficient and streamlined document that is easier to share and manage.
Best Practices for Converting Pictures to PDF
Converting pictures to PDF format involves more than just the technical process of file conversion. To ensure the best possible output and a seamless user experience, it is essential to follow some best practices. Here are some guidelines to consider when converting pictures to PDF:
1. Choose the Right Picture Resolution:
Before converting a picture to PDF, ensure that the resolution is appropriate for the intended use. High-resolution images are ideal for printing, but they can significantly increase file size. For digital viewing, consider resizing the picture to a smaller resolution to optimize file size and loading times.
2. Maintain Picture Quality:
While file compression can be useful to reduce file size, be cautious not to compromise picture quality. Ensure that the compression settings strike a balance between reducing size and preserving image details and clarity.
3. Organize and Label Pictures:
If you plan to convert multiple pictures to a single PDF, it is important to organize them in a logical order beforehand. Labeling or renaming the pictures in sequential order can make it easier to maintain the intended order when converting them to PDF.
4. Consider File Size and Loading Times:
Large PDF files can take longer to open and load. Before converting pictures to PDF, consider the file size and its impact on the user experience. Compressing the images, especially if they are of high resolution, can help reduce file size and improve loading times.
5. Verify Color and Formatting:
After the picture is converted to PDF, it is important to verify that the colors and formatting remain intact. Check if the PDF displays the picture accurately, especially if color accuracy is crucial, such as in photography or design projects.
6. Secure Confidential Pictures:
If you are converting pictures that contain sensitive or confidential information, consider adding password protection to the resulting PDF file. This will help ensure that the pictures are securely protected and can only be accessed by authorized individuals.
7. Test Accessibility and Searchability:
For business or professional purposes, consider adding metadata or tags to the PDF file to improve accessibility and searchability. This can include adding alt text descriptions for images or including relevant keywords in the document properties.
8. Choose the Right Software or Online Converter:
There are numerous software options and online converters available for converting pictures to PDF. It is important to choose a reliable and reputable tool that offers the features and functionalities you require. Read reviews, consider the user interface, and test the compatibility before settling on a suitable converter.
By following these best practices, you can ensure the successful conversion of pictures to PDF while maintaining image quality, optimizing file size, and enhancing the overall user experience.