
Benefits of Connecting Your TV to an External Audio System
When it comes to home entertainment, the audio experience is just as important as the visual quality. While modern TVs offer built-in speakers, they often lack the depth and immersive experience of an external audio system. Connecting your TV to an external audio system can greatly enhance your overall viewing experience. Here are some key benefits of making this connection:
1. Improved Sound Quality
External audio systems, such as soundbars or home theater systems, are designed specifically to deliver high-quality audio. They have dedicated speakers, subwoofers, and amplifiers that offer a broader frequency response range, resulting in clearer dialogue, more realistic sound effects, and immersive surround sound.
2. Enhanced Viewing Experience
Pairing your TV with an external audio system can create a more immersive viewing experience. The enhanced sound quality and surround sound capabilities make you feel as if you’re right in the middle of the action. Whether you’re watching a thrilling movie or cheering for your favorite sports team, the audio system adds a new dimension to your entertainment.
3. Clearer Dialogue
One common issue with TV speakers is the difficulty in hearing dialogue, especially when the background noise is high. External audio systems often have voice enhancement features that intelligently amplify dialogue, making it easier to follow the plot without straining your ears.
4. Versatile Audio Options
Connecting your TV to an external audio system opens up a range of audio options. You can choose from different presets, sound modes, or adjust the equalizer settings to match your preferences. Some systems also offer wireless connectivity, allowing you to stream music or podcasts from your phone or other devices.
5. Easy Installation and Setup
Setting up an external audio system with your TV is usually straightforward. Most modern TVs have various audio output options, such as HDMI ARC (Audio Return Channel), optical audio, or RCA cables. Once connected, you can easily switch between the TV’s built-in speakers and the external audio system with just a few button presses on your remote control.
6. Space Saving
Another advantage of connecting your TV to an external audio system is the space-saving aspect. Soundbars, for example, are compact and can be mounted on the wall or placed in front of the TV without occupying much space. This allows you to enjoy enhanced sound quality without cluttering your living room with additional speakers and cables.
By connecting your TV to an external audio system, you can transform your living room into a mini home theater. The improved sound quality, enhanced viewing experience, and versatile audio options will elevate your entertainment to a whole new level. So, why settle for mediocre sound when you can immerse yourself in a world of premium audio quality?
Types of External Audio Systems
When it comes to choosing an external audio system for your TV, you have several options to consider. Each type offers its own unique features and advantages. Here are the most common types of external audio systems available:
1. Soundbars
Soundbars are sleek and compact speaker systems that are designed to enhance the sound quality of your TV. They are typically placed in front of or below the TV. Soundbars can deliver clear dialogue, improved bass, and enhanced overall audio experience. Some soundbars also come with subwoofers or rear speakers for a more immersive surround sound experience.
2. Home Theater Systems
A home theater system, also known as a surround sound system, is a complete audio setup that includes multiple speakers and a receiver. It provides immersive surround sound with speakers placed strategically around the room. Home theater systems can deliver a truly cinematic experience, making you feel like you’re in a movie theater.
3. Soundbases
Similar to soundbars, soundbases are designed to sit underneath the TV. However, they are larger in size and offer more space for speakers and amplifiers. Soundbases often provide better sound quality and deeper bass compared to soundbars. They can also support the weight of the TV, serving as a stable base.
4. Bookshelf Speakers
If you prefer a more traditional setup, bookshelf speakers are a great choice. These compact speakers can be placed on bookshelves, stands, or mounted on the wall. Bookshelf speakers are known for delivering high-quality sound and accurate audio reproduction, making them ideal for audiophiles and those who want a customizable audio setup.
5. Wireless Speakers
Wireless speakers offer the convenience of no cables, allowing you to place them anywhere in the room. These speakers connect to your TV via Bluetooth or Wi-Fi, eliminating the need for physical connections. Wireless speakers come in various sizes and designs, from portable options to larger speakers that can deliver powerful sound.
6. Soundbases
Similar to soundbars, soundbases are designed to sit underneath the TV. However, they are larger in size and offer more space for speakers and amplifiers. Soundbases often provide better sound quality and deeper bass compared to soundbars. They can also support the weight of the TV, serving as a stable base.
When selecting an external audio system, consider the size and layout of your room, your budget, and your personal preferences for sound quality and convenience. Whether you opt for a soundbar, home theater system, bookshelf speakers, wireless speakers, or a combination of these, connecting an external audio system to your TV will greatly enhance your audio experience and make your entertainment more immersive and enjoyable.
Choosing the Right Audio System for Your TV
When it comes to selecting an audio system for your TV, there are several factors to consider to ensure that you choose the right one that meets your needs and preferences. Here are some key factors to keep in mind:
1. Sound Quality
The primary reason for connecting an external audio system to your TV is to improve the sound quality. Consider the audio system’s wattage, frequency response range, and the presence of features like virtual surround sound or equalizer settings. Look for systems that offer clear, balanced sound reproduction and have the ability to handle a wide range of frequencies.
2. Size and Design
The size and design of the audio system should complement your TV and the room’s aesthetics. Soundbars and soundbases are popular choices for their sleek and minimalist design, ideal for smaller spaces. Home theater systems and bookshelf speakers may require more space, so ensure they fit comfortably in your room while adding to its overall decor.
3. Connectivity Options
Consider the available connectivity options and ensure they are compatible with your TV. Many audio systems offer HDMI ARC (Audio Return Channel), optical audio, and RCA connections. If you prefer wireless connectivity, look for systems with Bluetooth or Wi-Fi capabilities so you can easily stream audio from your smartphone or other devices.
4. Budget
Set a budget range before looking for an audio system, as prices can vary significantly depending on the brand, features, and overall quality. Keep in mind that higher-priced systems often offer superior sound quality and additional features, but there are also budget-friendly options available that can still deliver a satisfying audio experience. Determine your spending capacity and find the best balance between quality and affordability.
5. Room Size and Layout
The size and layout of your room can influence the audio system you choose. Consider the acoustics of the room, whether it’s an open-concept space or a smaller, enclosed room. Some audio systems are better suited for larger rooms, while others are designed to provide optimal sound in smaller spaces. Take measurements and consider the speaker placement options that will work best within your specific room.
6. Reviews and Recommendations
Before making a final decision, read reviews and seek recommendations from trusted sources. Online reviews can provide valuable insights into the quality and performance of different audio systems. You can also consult with friends, family, or audio enthusiasts who may have experience with specific brands or models.
Ultimately, the right audio system for your TV is the one that meets your sound quality expectations, fits your budget, and seamlessly integrates with your viewing experience. Consider the factors mentioned above, as well as your personal preferences, and take the time to research and compare different options. By selecting the right audio system, you’ll be able to enjoy a superior audio experience that enhances your TV viewing pleasure.
Connecting an Audio System via HDMI ARC
HDMI ARC (Audio Return Channel) is a convenient and commonly used method for connecting an audio system to your TV. It allows you to transmit audio from the TV to the audio system using a single HDMI cable. Here’s a step-by-step guide on how to connect your audio system via HDMI ARC:
1. Check TV and Audio System Compatibility
Ensure that both your TV and audio system have HDMI ARC support. Look for HDMI ports labeled with “ARC” on both devices. If your TV or audio system doesn’t have an HDMI ARC port, you can’t use this method and should consider other connection options like optical audio or RCA cables.
2. Connect the HDMI Cable
Using a high-quality HDMI cable, connect one end to the HDMI ARC port on the TV, and the other end to the HDMI ARC input on the audio system. This will establish the audio connection between the two devices. Make sure the cables are securely plugged in to avoid any signal loss or interruptions.
3. Enable HDMI ARC on Your TV
Access your TV’s settings menu and navigate to the audio settings. Look for options related to HDMI ARC and ensure that it is enabled. The specific steps may vary depending on the TV brand and model. Consult your TV’s user manual for detailed instructions if needed.
4. Select the Correct Audio Input
On your audio system, select the appropriate HDMI ARC input. This is usually labeled as “ARC” or “HDMI ARC” on the audio system’s input selection menu. Adjust the audio system’s volume to a moderate level for initial testing.
5. Test the Connection
Play a video or audio file on your TV to test the audio connection. The sound should now be routed through the audio system rather than the TV’s built-in speakers. Adjust the volume on the audio system to achieve your desired sound level.
6. Additional Configuration (Optional)
Depending on your audio system, you may need to configure some additional settings or calibrate the audio output. Consult the user manual of your audio system for instructions on adjusting equalizer settings, sound modes, or any other audio enhancements.
Connecting your audio system via HDMI ARC simplifies the setup process and allows for seamless audio transmission between your TV and audio system. It eliminates the need for multiple cables and provides high-quality digital audio. Enjoy the enhanced sound experience and immerse yourself in the audio while enjoying your favorite movies, shows, or music.
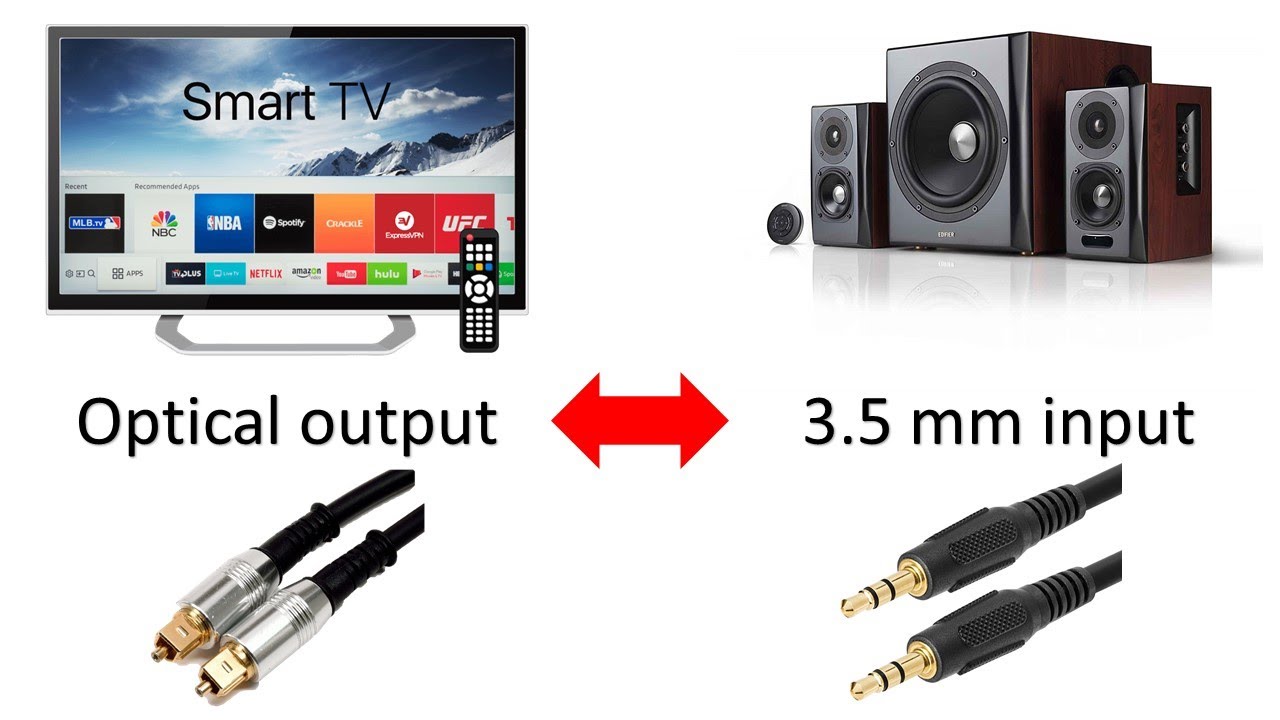
Connecting an Audio System via Optical Audio Cable
Connecting an audio system to your TV via an optical audio cable is a straightforward and commonly used method. Optical audio cables utilize fiber optic technology to transmit high-quality digital audio signals. Follow these steps to connect your audio system using an optical audio cable:
1. Check TV and Audio System Compatibility
Ensure that both your TV and audio system have optical audio ports. The optical audio port on the TV may be labeled as “optical out” or “digital audio out,” while the audio system may have a corresponding “optical in” or “digital audio in” port. If your devices don’t have optical audio ports, consider alternative connection options such as HDMI ARC or RCA cables.
2. Prepare the Optical Audio Cable
Obtain a high-quality optical audio cable that is long enough to span the distance between your TV and audio system. Remove the protective caps from both ends of the cable, being careful not to bend or damage the fragile fiber optic cable inside.
3. Connect the Optical Audio Cable
Insert one end of the optical audio cable into the optical audio output port on the TV and ensure a secure connection by aligning the plug with the port and gently pushing it in. Insert the other end of the cable into the optical audio input port on the audio system and secure the connection.
4. Select the Optical Audio Input
Using your audio system’s remote control, select the appropriate input source. Look for a button or menu option labeled “optical” or “digital audio” to switch to the optical audio input. This tells the audio system to route the sound from the TV through the optical connection.
5. Test the Connection
Play an audio or video file on your TV to test the audio connection. The sound should now be transmitted through the optical audio cable to your audio system. Adjust the volume on the audio system to your desired level.
6. Additional Configuration (Optional)
Depending on your audio system, you may want to adjust additional settings to enhance the audio experience. Explore options such as sound modes, equalizer settings, or audio enhancements offered by your audio system to customize the sound to your preferences.
Connecting your audio system to your TV using an optical audio cable provides a reliable and high-quality audio connection. It is a versatile option that works with most modern TVs and audio systems. Enjoy the enhanced sound experience and immerse yourself in your favorite movies, TV shows, or music with crystal-clear audio.
Connecting an Audio System via RCA Cables
If your TV and audio system do not have HDMI ARC or optical audio capabilities, you can still connect them using RCA cables. RCA cables, also known as composite cables, are a classic analog connection option that can transmit stereo audio signals. Follow these steps to connect your audio system using RCA cables:
1. Check TV and Audio System Compatibility
Ensure that both your TV and audio system have RCA audio ports available. The RCA ports are typically color-coded: red for the right audio channel and white (or black) for the left audio channel. These ports may be located on the back or side of the TV and audio system.
2. Prepare the RCA Cables
Obtain a set of RCA audio cables that are long enough to reach between your TV and audio system. RCA cables have two connectors at each end, one for the left audio channel (white) and another for the right audio channel (red). Remove any protective covers or caps from the cable ends.
3. Connect the RCA Cables
Insert the red connector of the RCA cable into the corresponding red audio output port on the TV. Likewise, insert the white (or black) connector of the cable into the corresponding white (or black) audio output port on the TV. Ensure a secure connection by pushing the connectors in gently.
Next, connect the other end of the RCA cables to the audio system. Match the red connector to the red audio input port and the white (or black) connector to the white (or black) audio input port. Again, ensure a secure connection by gently pushing the connectors in.
4. Select the RCA Audio Input
Using your audio system’s remote control or front panel controls, select the appropriate input source. This might be labeled as “AUX,” “Line In,” or something similar. Switch to the input that corresponds to the RCA audio connection you made from the TV.
5. Test the Connection
Play an audio or video file on your TV to test the audio connection. The sound should now be transmitted from the TV to your audio system via the RCA cables. Adjust the volume on your audio system to your desired level.
6. Additional Configuration (Optional)
Depending on your audio system, you may want to adjust additional settings such as sound modes, EQ settings, or audio enhancements to further optimize your listening experience. Refer to your audio system’s manual for instructions on how to access and adjust these settings.
Connecting your audio system to your TV using RCA cables provides a basic analog audio connection. While not as advanced as HDMI ARC or optical audio, RCA cables still deliver audio fidelity and can be a suitable option for older TVs and audio systems. Enjoy the enhanced audio experience and immerse yourself in your favorite content with the improved sound quality through your connected audio system.
Connecting an Audio System via Bluetooth
Connecting an audio system to your TV via Bluetooth offers the convenience of wireless connectivity and eliminates the need for physical cables. Follow these steps to connect your audio system to your TV using Bluetooth:
1. Check TV and Audio System Compatibility
Ensure that both your TV and audio system support Bluetooth connectivity. Check the user manuals or specifications of your devices to confirm Bluetooth compatibility. If either device does not have Bluetooth capability, you may need to consider alternative connection methods.
2. Enable Bluetooth on Your Audio System
Activate the Bluetooth function on your audio system. This step may involve pressing a dedicated Bluetooth button or going into the settings menu of your audio system. Consult the user manual of your audio system if you need assistance with this step.
3. Enable Bluetooth on Your TV
Access your TV’s settings menu and navigate to the Bluetooth settings. Enable Bluetooth on your TV and set it to “Discoverable” mode so that it can be detected by your audio system. The specific steps may vary depending on the TV brand and model. Refer to your TV’s user manual for detailed instructions if needed.
4. Pair Your Audio System with Your TV
On your audio system, initiate the scanning or pairing process to search for available Bluetooth devices. Your TV’s Bluetooth name should appear on the audio system’s list of discoverable devices. Select your TV’s Bluetooth name on the audio system to establish the pairing.
5. Confirm Pairing on Your TV
Back on your TV, a prompt or notification may appear confirming the pairing request from your audio system. Accept the pairing request to establish a Bluetooth connection between your TV and audio system. The connection may take a few moments to establish.
6. Test the Connection
Play an audio or video file on your TV to test the Bluetooth connection. The sound should now be wirelessly transmitted from your TV to the audio system. Adjust the volume on your audio system to your desired level.
7. Additional Configuration (Optional)
Depending on your audio system, you may want to adjust additional settings such as sound modes, equalizer settings, or audio enhancements. Consult your audio system’s user manual for instructions on accessing and adjusting these settings.
Connecting your audio system to your TV via Bluetooth provides wireless convenience and eliminates the need for physical cables. Enjoy the freedom of a clutter-free setup while immersing yourself in high-quality sound. Whether you’re watching a movie, playing music, or enjoying your favorite TV shows, the Bluetooth connection will enhance your audio experience.
Adjusting Audio Settings on Your TV
To optimize your audio experience when using an external audio system with your TV, it’s essential to adjust the audio settings on your TV. Here are some key settings you can tweak to enhance the sound quality:
1. Sound Mode
Most TVs offer different sound modes, such as Standard, Movie, Music, or Sports. These modes are designed to enhance specific types of content. Experiment with different modes to find the one that best suits your preferences and the content you’re watching.
2. Equalizer Settings
Adjusting the equalizer settings allows you to fine-tune the audio frequencies to match your personal preference. You can boost or reduce specific frequency ranges like bass or treble to achieve a more balanced sound output. Play around with the equalizer settings to find the optimal audio mix for your audio system and the type of content you’re watching.
3. Surround Sound Settings
If you have a surround sound system or a soundbar that supports virtual surround sound, make sure to enable the appropriate setting on your TV. This setting enhances the spatial audio experience, making you feel immersed in the sound environment of movies, games, or other content that supports surround sound.
4. Volume Leveling
Volume leveling, also known as automatic volume control, helps normalize the sound output to prevent sudden volume changes between different channels or programs. Enabling volume leveling can provide a more consistent audio experience, especially when switching between channels or streaming services that may vary in their audio levels.
5. Dialogue Enhancement
If you find it challenging to hear dialogue clearly, look for a dialogue enhancement or speech clarity feature in your TV’s audio settings. This feature boosts the audio frequencies associated with dialogue, making it more distinct and easier to understand, even during scenes with background noise or low volume.
6. Audio Delay Adjustment
In some cases, you may experience a slight delay between the audio and video when using an external audio system. This delay can be distracting and affect your viewing experience. Look for the audio delay adjustment setting in your TV’s audio settings and adjust it accordingly to synchronize the audio and video signals.
Remember to refer to your TV’s user manual for specific instructions on accessing and adjusting these audio settings, as the menu navigation and terminology may vary between TV models and brands. Take the time to experiment and fine-tune these settings to match your preferences and elevate your audio experience when using an external audio system with your TV.
Troubleshooting Common Issues
While connecting and setting up an external audio system with your TV can greatly enhance your audio experience, you may encounter some common issues along the way. Here are some troubleshooting tips to help you overcome these issues:
1. No Sound From Audio System
If you’re not hearing any sound from your audio system, check the following:
- Make sure the audio system is powered on and properly connected to the TV.
- Ensure that the correct input source is selected on the audio system.
- Adjust the volume on both the TV and audio system to an audible level.
- Verify that the audio cables or wireless connection are securely connected.
- Check if the audio system has any mute or audio output settings that may be affecting the sound.
2. Audio Lag or Delay
If you notice a delay between the audio and video, try the following:
- Check if there are any audio delay settings available in your TV’s audio settings and adjust them to synchronize the audio and video signals.
- If using a wireless audio connection, move the audio system closer to the TV to reduce any potential interference or latency.
3. Poor Sound Quality
If you’re experiencing poor sound quality, consider the following:
- Ensure that the audio cables are in good condition and not damaged. Replace cables if necessary.
- Check the audio settings on both the TV and audio system, such as sound mode and equalizer settings, and adjust them to improve the sound quality.
- Disconnect and reconnect the audio cables to ensure a secure connection.
- If using wireless audio, ensure that there are no obstacles or interference between the TV and audio system that may degrade the signal quality.
4. Bluetooth Connection Issues
If you’re having trouble connecting your audio system via Bluetooth, try the following:
- Ensure that Bluetooth is enabled and discoverable on both the TV and audio system.
- Make sure you’re within the effective range of the Bluetooth connection, as excessive distance can weaken the signal.
- Disable and re-enable Bluetooth on both devices to refresh the connection.
- Pair the devices again from scratch if the connection fails or is unstable.
5. Unresponsive Remote Control
If your remote control is not responding or controlling the audio system, try the following:
- Replace the batteries in the remote control.
- Check for any physical obstructions or interference between the remote control and the audio system.
- Confirm that you’re pointing the remote control directly at the audio system and within its effective range.
- If using an infrared (IR) remote, ensure that there is a clear line of sight between the remote and the audio system’s IR sensor.
If you continue to experience issues after troubleshooting, refer to the user manuals for your TV and audio system or contact the manufacturer’s technical support for further assistance. Remember that each TV and audio system may have unique features and settings, so specific troubleshooting steps may vary.
Final Thoughts on Connecting Your TV to an External Audio System
Connecting your TV to an external audio system is a game-changer when it comes to enhancing your overall entertainment experience. The benefits of improved sound quality, enhanced immersion, and versatile audio options cannot be overstated. Here are some final thoughts to consider:
First and foremost, selecting the right audio system for your TV is crucial. Take into account factors such as sound quality, size, connectivity options, budget, and room layout when making your decision. Each audio system type has its own unique advantages, so choose one that best suits your preferences and requirements.
When it comes to the actual connection process, HDMI ARC, optical audio cables, RCA cables, and Bluetooth offer different options to suit your needs. HDMI ARC provides a convenient and high-quality digital connection, while optical audio cables and RCA cables offer reliable analog connections. Bluetooth, on the other hand, provides wireless convenience, eliminating the need for physical cables altogether.
Once connected, don’t forget to adjust the audio settings on your TV to maximize the potential of your external audio system. Sound modes, equalizer settings, and surround sound options can significantly enhance your audio experience and let you customize the sound to your liking.
You may experience some common issues along the way, such as no sound, audio lag, or poor sound quality. However, with some troubleshooting and adjustments, you can overcome these challenges and enjoy the full benefits of your external audio system. If needed, consult the user manuals or contact technical support for further assistance.
Finally, take the time to appreciate the transformation in your audio and viewing experience. Whether you’re watching movies, sports events, playing games, or simply listening to music, the immersive sound quality will immerse you in the content and elevate your overall entertainment enjoyment.
By connecting your TV to an external audio system, you’re taking a significant step in creating a true home theater experience. The combination of high-quality visuals and exceptional audio will transport you into a world of cinematic immersion. So, go ahead, connect your TV to an external audio system, sit back, and let the sound envelop you in a whole new level of entertainment pleasure.