
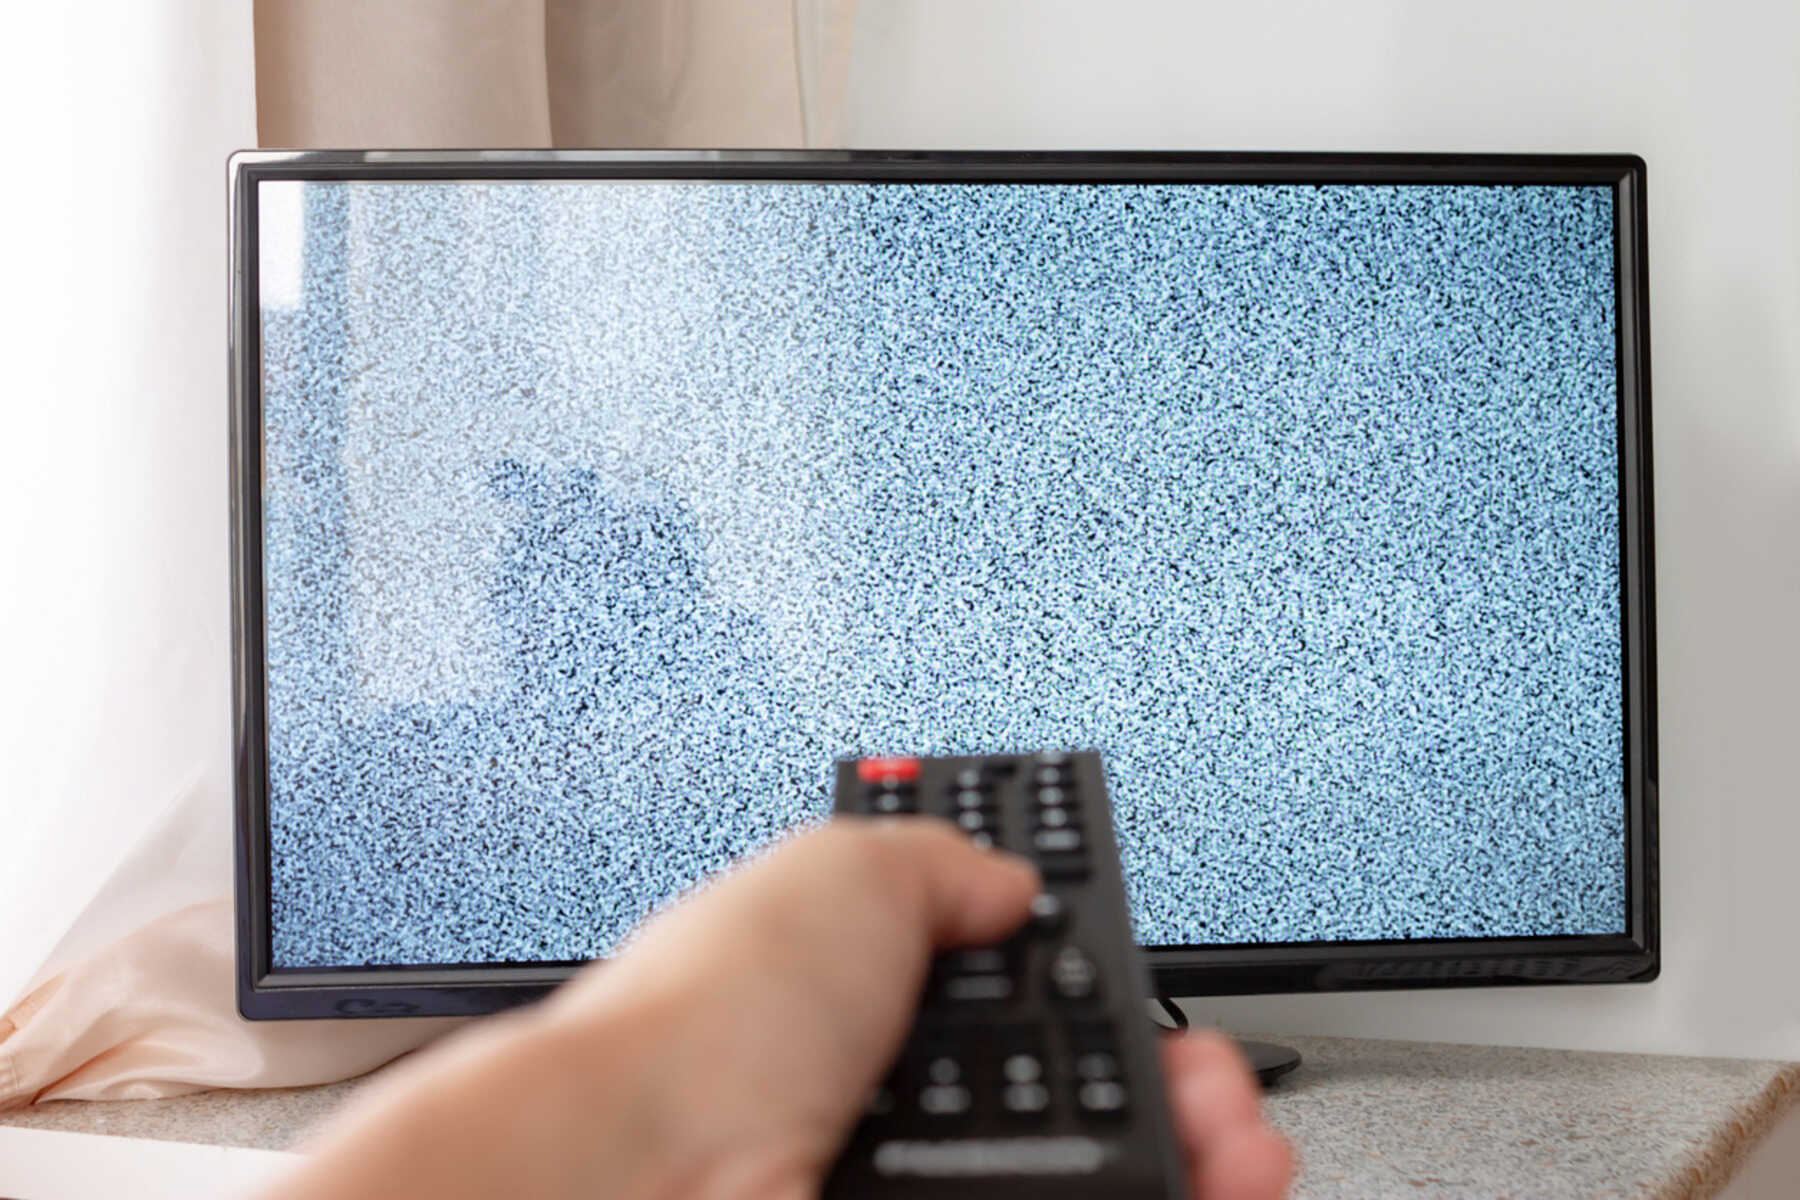
No Picture or Black Screen
One of the most frustrating problems you can encounter with your TV is the absence of a picture or a completely black screen. Here are some troubleshooting steps to help you resolve this issue:
- Check the power source: Ensure that your TV is properly plugged into a working power outlet. Make sure the power cord is securely connected to both the TV and the outlet.
- Verify the input source: Confirm that the correct input source is selected on your TV. Press the “Input” or “Source” button on the remote control to cycle through the available options.
- Inspect the cables: Examine the connection cables between the TV and any external devices such as cable/satellite boxes, DVD players, or gaming consoles. Ensure that they are firmly connected and not damaged.
- Reset the TV: Try resetting the TV to its factory settings. Refer to your TV’s user manual for instructions on how to perform a reset.
- Check for software updates: Sometimes, a software glitch can cause the display to go black. Check if there are any available firmware updates for your TV and install them if necessary.
- Inspect the backlight: If your TV has a backlight panel, make sure it is functioning properly. Shine a flashlight at the screen and look for any faint images. If you can see them, it may indicate a backlight issue.
- Contact professional help: If none of the above steps resolve the issue, it may be time to seek assistance from a professional TV repair service or the manufacturer’s support team.
Remember, diagnosing and fixing TV display issues can vary depending on the brand and model. Always consult your TV’s user manual or contact the manufacturer for specific troubleshooting steps.
Poor or Distorted Picture Quality
Having a TV with poor or distorted picture quality can greatly hamper your viewing experience. Here are some steps you can take to improve the picture quality:
- Check the picture settings: Start by adjusting the picture settings on your TV. Look for options like brightness, contrast, sharpness, and color saturation. Experiment with different settings to find the optimal balance.
- Clean the screen: Over time, dust and smudges can accumulate on the TV screen, affecting the picture quality. Use a soft, lint-free cloth to gently clean the screen, avoiding harsh cleaning agents.
- Ensure a proper signal: If you are using an external device such as a cable box or antenna, make sure it is providing a good quality signal. Check the cables and connectors for any damages or loose connections.
- Adjust the aspect ratio: If you notice stretched or distorted images, adjust the aspect ratio settings to match the content you are watching. Most TVs offer options like “16:9”, “Wide”, or “Zoom” to fit different aspect ratios.
- Eliminate interference: Electronic devices like speakers, routers, or other TVs placed too close to your TV can cause signal interference, leading to picture distortion. Move these devices away from your TV or try using shielded cables.
- Upgrade your cables: Older or low-quality HDMI or AV cables may not be capable of delivering high-definition signals. Consider upgrading to higher-quality cables to ensure a clear and crisp picture.
- Consult the user manual: If you are unsure about specific picture settings or advanced features on your TV, refer to the user manual. It will provide detailed instructions on optimizing the picture quality.
If your TV continues to have poor picture quality despite trying these steps, it is recommended to contact the manufacturer’s support team for further assistance.
No Sound
Experiencing a lack of sound from your TV can be frustrating, but there are several troubleshooting steps you can take to address the issue:
- Check the volume settings: Ensure that the volume on your TV is turned up and not muted. Use the volume buttons on the remote control or the TV itself to adjust the volume.
- Confirm the audio source: Check if the audio is coming from the correct source. For example, if you’re using an external device like a cable box or a DVD player, make sure the TV is set to the corresponding input source.
- Inspect the cable connections: Ensure that the audio cables are securely connected to both the TV and the external audio device. If you’re using HDMI, make sure the cable is properly inserted into both devices.
- Test with alternate audio sources: Try connecting a different audio source, such as a different cable box or DVD player, to your TV to check if the issue lies with the original audio source.
- Restart or reset audio devices: If you’re using external audio devices like soundbars or speakers, try restarting or resetting them. Unplug them from power, wait for a few moments, and then plug them back in.
- Check audio settings on external devices: Ensure that the audio settings on your external devices are correctly configured. For example, verify that the audio is not set to “mute” or that the volume is turned up.
- Perform a factory reset: If none of the above steps resolve the issue, you can try performing a factory reset on your TV. Refer to your TV’s user manual for instructions on how to do this.
- Contact technical support: If the problem persists, it’s advisable to contact the manufacturer’s technical support or seek assistance from a professional TV repair service.
Remember to check the audio settings on both the TV and any external devices to ensure they are properly configured and connected.
Remote Control Not Working
When your TV remote control stops functioning, it can be quite inconvenient. Here’s what you can do to troubleshoot and fix the issue:
- Check the batteries: First, make sure the batteries in the remote control are not depleted. Replace them with fresh batteries and see if that resolves the problem.
- Remove obstacles: Ensure that there are no objects blocking the line of sight between the remote control and the TV. Sometimes, obstructions can interfere with the signal transmission.
- Clean the remote control: Remove the batteries and gently clean the remote control, removing any dust or debris that may be obstructing the buttons or IR sensors.
- Try different angles: Experiment with different angles and distances when pointing the remote control at the TV. Sometimes, adjusting the angle may improve the signal reception.
- Reset the remote control: If your remote control has a reset button, press it to reset the remote’s settings. Alternatively, remove the batteries and press each button on the remote control multiple times to discharge any remaining power.
- Pair the remote control: Some TVs require the remote control to be paired with the TV. Refer to your TV’s user manual for instructions on how to pair the remote control.
- Use a universal remote control: If the original remote control still doesn’t work, consider using a universal remote control compatible with your TV. Follow the instructions provided with the universal remote to set it up.
- Check for firmware updates: In some cases, the TV’s firmware may need to be updated to ensure compatibility with the remote control. Check for any available firmware updates and install them if necessary.
- Contact manufacturer support: If none of the above steps resolve the issue, it’s advised to contact the manufacturer’s support team for further assistance or consider getting a replacement remote control.
Remember to always double-check the batteries, clean the remote control, and ensure there are no obstructions before seeking further assistance.
TV Won’t Turn On
It can be frustrating when your TV refuses to power on. Here are some troubleshooting steps you can take to resolve this issue:
- Check the power source: Ensure that your TV is plugged into a working power outlet. Try plugging another device, such as a lamp or phone charger, into the same outlet to verify if it is functioning properly.
- Inspect the power cord: Examine the power cord for any signs of damage, such as frayed wires or broken connectors. If you find any issues, replace the power cord with a new one.
- Try a different power outlet: Plug the TV into a different power outlet to rule out any problems with the original outlet. Make sure to use a known working outlet.
- Check for power indicator lights: Look for any power indicator lights on your TV. If the light is not illuminated or blinking, it may indicate a power supply issue. Refer to your TV’s user manual for instructions on interpreting the indicator lights.
- Perform a power cycle: Unplug the TV from the power outlet, wait for about 1-2 minutes, and then plug it back in. This can help reset the TV’s internal system and resolve power-related issues.
- Inspect for remote control issues: In some cases, a malfunctioning remote control can prevent the TV from turning on. Try turning on the TV using the power button directly on the TV or using a different working remote control.
- Contact technical support: If none of the above steps resolve the issue, it is recommended to contact the TV manufacturer’s technical support team or seek assistance from a professional repair service.
Remember to try different power outlets, check the power cord for damage, and perform a power cycle before considering further assistance.
TV Turns Off On Its Own
If your TV keeps turning off unexpectedly, it can be both frustrating and disruptive. Here are some troubleshooting steps to help you resolve this issue:
- Check the sleep timer: Ensure that the sleep timer settings on your TV are turned off or set to a longer duration. The sleep timer automatically turns off the TV after a specified period of inactivity.
- Verify the power-saving mode: Some TVs have power-saving modes that automatically shut off the TV to conserve energy. Access the settings menu on your TV and disable or adjust the power-saving mode settings.
- Examine the remote control and buttons: Check if any buttons on the TV or the remote control are stuck or constantly pressed. Sometimes, a stuck button can trigger the TV to turn off unexpectedly.
- Remove any external devices: Disconnect all external devices, such as gaming consoles or DVD players, from the TV. Sometimes, incompatible or faulty devices can cause the TV to shut off or enter standby mode.
- Check the power source: Ensure that the power source is stable and not experiencing fluctuations. Use a surge protector to protect your TV from electrical surges, which can cause it to turn off abruptly.
- Update the TV firmware: Check if there are any available firmware updates for your TV model. Outdated firmware can cause various issues, including automatic power-offs. Follow the instructions provided by the manufacturer to update the firmware.
- Reset the TV to factory settings: Performing a factory reset can help resolve software-related issues that may be causing the TV to turn off unexpectedly. Refer to your TV’s user manual for instructions on how to perform a factory reset.
- Contact technical support: If the issue persists after trying the above steps, it is recommended to contact the manufacturer’s technical support team for further assistance. They may be able to provide specific troubleshooting steps or recommend a repair service.
By following these troubleshooting steps, you can hopefully identify and resolve the issue that is causing your TV to turn off unexpectedly. Remember to check the sleep timer, examine the remote control and buttons, and update the TV firmware before seeking further assistance.
TV Flickering or Flashing
Experiencing flickering or flashing on your TV screen can be distracting and annoying. Here are some troubleshooting steps to help you address this issue:
- Check the cable connections: Inspect all the cables connecting your TV to external devices, such as cable/satellite boxes or DVD players. Ensure that they are securely plugged in and not damaged.
- Adjust the picture settings: Access the picture settings menu on your TV and adjust the brightness, contrast, and sharpness settings. Sometimes, incorrect settings can cause flickering or flashing on the screen.
- Check for interference: Electronic devices like cordless phones, Wi-Fi routers, or microwave ovens can interfere with the TV’s signal, leading to flickering or flashing. Move these devices away from the TV or try using shielded cables.
- Try a different power outlet: Plug your TV into a different power outlet to rule out any potential electrical issues that may be causing the screen to flicker. Make sure to use a known working outlet.
- Reset video settings on external devices: If you’re experiencing flickering or flashing while using an external device, such as a gaming console or DVD player, try resetting the video settings on that device to default.
- Update the TV firmware: Check if there are any available firmware updates for your TV model. Outdated firmware can sometimes cause display issues. Follow the manufacturer’s instructions to update the firmware.
- Test with different content: Examine if the flickering or flashing occurs with specific content or across all sources. Try playing different video sources or switching to a different channel to see if the issue persists.
- Adjust the refresh rate: Some TVs allow you to adjust the refresh rate. Experiment with different refresh rate settings to see if it reduces or eliminates the flickering or flashing.
- Contact technical support: If the issue continues after trying the above steps, it’s advisable to contact the manufacturer’s technical support team for further assistance or consult with a professional TV repair service.
By following these troubleshooting steps, you can hopefully identify and resolve the issue causing flickering or flashing on your TV. Remember to check cable connections, adjust picture settings, and update the TV firmware before seeking further assistance.
Vertical or Horizontal Lines on the Screen
Having vertical or horizontal lines appear on your TV screen can be a frustrating issue that affects your viewing experience. Here are some troubleshooting steps to help you address this problem:
- Check the cable connections: Ensure that all cables connecting your TV to external devices are securely plugged in and not loose or damaged. Faulty or loose cables can cause display issues, including lines on the screen.
- Inspect the HDMI or AV cables: If you’re using HDMI or AV cables, examine them for any visible damages, such as bent pins or frayed wires. Replace them if necessary.
- Disconnect and reconnect external devices: Sometimes, a faulty external device connected to the TV can cause display issues. Disconnect all external devices, such as cable/satellite boxes or gaming consoles, and reconnect them one by one to identify if a particular device is causing the lines.
- Adjust the screen resolution: Access the display settings on your TV and adjust the screen resolution. Try different resolutions to see if it resolves the issue. Consult your TV’s user manual for instructions on how to change the screen resolution.
- Perform a power cycle: Turn off the TV and unplug it from the power outlet. Wait for about 1-2 minutes, and then plug it back in and turn it on. Performing a power cycle can sometimes fix display issues caused by temporary glitches.
- Check for interference: Electronic devices or appliances positioned near your TV can cause signal interference, leading to lines on the screen. Move these devices away from the TV or turn them off to see if it improves the display quality.
- Test with different content and inputs: Check if the lines appear on all sources, such as cable, satellite, or streaming. Try playing different content or using different inputs to determine if it is a specific source causing the issue.
- Reset the TV: Consult your TV’s user manual for instructions on how to perform a factory reset. Resetting the TV can restore the default settings and potentially fix display problems.
- Contact technical support: If the lines on the screen persist after trying the above steps, it is recommended to contact the manufacturer’s technical support or consult with a professional TV repair service for further assistance.
By following these troubleshooting steps, you can hopefully identify and resolve the issue causing vertical or horizontal lines on your TV screen. Remember to check cable connections, adjust the screen resolution, and test with different content before seeking further assistance.
TV Freezing or Rebooting
Experiencing your TV freezing or constantly rebooting can be frustrating, disrupting your entertainment. Here are some troubleshooting steps you can take to address this issue:
- Check the power source: Ensure that the power source supplying electricity to your TV is stable. Fluctuations in power can cause freezing or unexpected reboots. Use a surge protector to protect your TV from power surges.
- Inspect cables and connections: Check the cables connecting your TV to external devices, such as cable/satellite boxes or gaming consoles. Ensure that they are securely plugged in and not damaged.
- Update the TV firmware: Check if there are any available firmware updates for your TV model. Outdated firmware can sometimes cause freezing or rebooting issues. Follow the manufacturer’s instructions to update the firmware.
- Remove external devices: Disconnect all external devices connected to your TV, such as USB drives, HDMI devices, or gaming consoles. Check if the freezing or rebooting issue persists without these devices connected.
- Perform a power cycle: Turn off your TV, unplug it from the power source, and wait for about 1-2 minutes. Then, plug it back in and turn it on. Performing a power cycle can help refresh the system and resolve temporary glitches.
- Reset the TV to factory settings: Consult your TV’s user manual for instructions on how to perform a factory reset. Keep in mind that this will erase any customized settings, so take note of your preferred settings beforehand.
- Check for overheating: Overheating can lead to freezing or rebooting issues. Ensure that your TV is well-ventilated and not placed in an enclosed space. Clean any dust or debris from the vents or internal components.
- Monitor usage of external devices: If the freezing or rebooting issue occurs when specific external devices are connected, monitor their usage. It’s possible that these devices are causing compatibility or performance issues.
- Contact technical support: If the issue persists after trying the above steps, it’s advisable to contact the manufacturer’s technical support team or consult with a professional TV repair service. They can provide further guidance or recommend appropriate solutions.
By following these troubleshooting steps, you can hopefully identify and resolve the issue causing your TV to freeze or constantly reboot. Remember to check power sources, update firmware, and monitor external devices before seeking further assistance.
Poor Wi-Fi or Internet Connection
Having a poor Wi-Fi or internet connection can greatly impact your streaming and online experience on your TV. Here are some troubleshooting steps to improve your connection:
- Check other devices: Test the Wi-Fi connection on other devices, such as smartphones or laptops, to see if the issue is specific to your TV or the entire network. This will help determine if the problem lies with the TV or the network.
- Restart the router and modem: Power off your router and modem, unplug them from the power source, wait for about 30 seconds, and then plug them back in. Allow them to restart and reconnect to the network.
- Reposition the router: Ensure that your TV is within range of the Wi-Fi signal. Move the router to a central location in your home or closer to the TV to improve the signal strength.
- Reduce interference: Keep the router away from other electronic devices that may cause interference, such as microwave ovens, cordless phones, or baby monitors. Additionally, avoid placing the router near thick walls or large obstacles that can block the Wi-Fi signal.
- Update router firmware: Check if there are any available firmware updates for your router. Outdated firmware can sometimes cause connectivity issues. Refer to the manufacturer’s instructions to update the router firmware.
- Perform a network reset: On your TV, navigate to the network settings and perform a network reset. This will remove any saved network configurations and allow you to set up the network connection again.
- Switch to a wired connection: If possible, connect your TV to the router using an Ethernet cable. Wired connections are generally more stable and provide a better internet connection compared to Wi-Fi.
- Check for bandwidth congestion: If multiple devices are using the internet connection simultaneously, it can lead to poor performance. Limit the number of active devices or prioritize the TV’s access to the network through Quality of Service (QoS) settings in your router.
- Consider a Wi-Fi extender or mesh network: If your TV is far from the router and you’re unable to improve the Wi-Fi signal strength, consider using a Wi-Fi extender or a mesh network system to extend the range and improve coverage in your home.
- Contact your internet service provider (ISP): If the issue persists, it may be necessary to contact your ISP to troubleshoot any potential issues with your internet connection or request assistance in optimizing your Wi-Fi network.
By following these troubleshooting steps, you can hopefully improve your Wi-Fi or internet connection for a smoother streaming and online experience on your TV. Remember to restart your router, check for firmware updates, and reduce interference before seeking further assistance.
Overheating Issues
Overheating is a common problem that can affect the performance and longevity of your TV. Here are some troubleshooting steps to tackle overheating issues:
- Ensure proper ventilation: Make sure your TV is placed in a well-ventilated area with sufficient space around it. Avoid placing it inside an enclosed cabinet or near heat-generating devices.
- Clean the vents: Dust and debris can accumulate on the vents of your TV, restricting airflow and leading to overheating. Regularly clean the vents using a soft brush or compressed air to remove any buildup.
- Use a cooling fan or stand: Consider using a cooling fan or stand specifically designed for TVs. These accessories can help improve airflow and dissipate heat, reducing the risk of overheating.
- Do not obstruct vents: Ensure that there are no objects blocking the vents of your TV. Keep curtains, drapes, or other items away from the back of the TV to allow for proper ventilation.
- Reduce brightness and backlight settings: Decrease the brightness and backlight settings on your TV. Higher brightness levels generate more heat, so lowering these settings can help prevent overheating.
- Avoid prolonged usage: If you consistently use your TV for extended periods, consider taking breaks to allow the TV to cool down. Turning it off when not in use can also help prevent overheating.
- Inspect the power supply: Check the power supply for any potential issues. Ensure that the power cord is not damaged and is firmly connected. Consider using a surge protector to protect against power fluctuations.
- Update the TV firmware: Check for any available firmware updates for your TV model. Firmware updates often include bug fixes and performance improvements that can help address overheating issues.
- Consider professional help: If the overheating problem persists and none of the above steps resolve the issue, it may be necessary to consult with a professional TV repair service or contact the manufacturer’s support team for further assistance.
By following these troubleshooting steps, you can effectively address overheating issues and help prolong the lifespan of your TV. Remember to ensure proper ventilation, clean the vents, and reduce brightness settings before seeking professional help, if needed.
Audio and Video Out of Sync
Experiencing audio and video that are out of sync can be frustrating, making your TV watching experience less enjoyable. Here are some troubleshooting steps to help resolve this issue:
- Check the input source: Ensure that the audio and video inputs are correctly matched. If you’re using multiple devices or inputs, make sure they are all set to the same audio and video settings.
- Restart the TV and external devices: Power off your TV, as well as any external devices like cable/satellite boxes or gaming consoles. Wait for a few seconds, then power them back on. Sometimes, a simple restart can fix synchronization issues.
- Adjust audio and video settings: Access the audio and video settings on your TV. Look for options such as audio delay or sync, video sync, or lip sync. Experiment with different settings to align the audio and video properly.
- Update firmware and drivers: Check for any available firmware updates for your TV and updates for external devices connected to your TV, such as soundbars or speakers. Outdated firmware or drivers can sometimes cause synchronization issues.
- Use audio/video synchronization tools: Some TVs offer built-in audio/video synchronization tools. Check your TV’s user manual or settings menu to see if this feature is available. Run the synchronization tool to automatically adjust the audio and video sync.
- Check for signal delays: If you’re using a cable or satellite box, there may be signal delays caused by the service provider. Contact your service provider for assistance in identifying and resolving any signal delay issues.
- Try different audio output settings: If you’re using external audio devices, such as soundbars or speakers, try different audio output settings on your TV. For example, switch between HDMI ARC and optical audio connections to see if it improves synchronization.
- Perform a power cycle: Turn off your TV and all connected devices. Unplug them from the power source and wait for about 1-2 minutes. Then, plug them back in and power them on. This can help refresh the system and potentially resolve synchronization issues.
- Contact technical support: If none of the above steps fix the synchronization problem, it’s advisable to contact the manufacturer’s technical support team or seek assistance from a professional TV repair service. They can provide further guidance or recommend appropriate solutions.
By following these troubleshooting steps, you can hopefully resolve the audio and video synchronization issues on your TV. Remember to check input sources, adjust settings, and update firmware before seeking further assistance.
Guide or Menu Not Displaying Properly
Encountering issues with your TV’s guide or menu display can make it difficult to navigate and access desired features. Here are some troubleshooting steps to resolve this problem:
- Restart the TV: Begin by restarting your TV. Power it off, unplug it from the power source, wait for about 30 seconds, and then plug it back in and turn it on. This simple step can often resolve minor software glitches.
- Check the signal source: Verify that you are on the correct signal source for accessing the guide or menu. Use the input or source button on your remote control to cycle through the available options and select the appropriate one.
- Check the cable connections: Examine the cables connecting your TV to external devices, such as cable/satellite boxes or streaming devices. Ensure that they are securely plugged in and not damaged or loose.
- Reset the TV’s settings: If the guide or menu issue persists, try resetting the TV’s settings to default. Look for the reset or restore option in the settings menu and follow the instructions to restore the TV to its original settings.
- Check for firmware updates: Make sure your TV’s firmware is up to date. Check the manufacturer’s website or consult the user manual to find instructions on how to check for and install any available firmware updates.
- Ensure sufficient network connectivity: If the guide or menu relies on an internet connection, ensure that your TV is properly connected to the network. Check the Wi-Fi settings, test the network connection, or consider using a wired connection for a more stable connection.
- Perform a factory reset: As a last resort, you can try performing a factory reset on your TV. This will restore the TV to its original factory settings. However, be aware that this will erase all personalized settings and stored data, so backup any important information before proceeding.
- Contact manufacturer support: If none of the above steps resolve the issue, it is recommended to contact the manufacturer’s support team for further assistance. They can provide specific troubleshooting steps or advise you on potential hardware issues that may require repair or replacement.
By following these troubleshooting steps, you can hopefully resolve the guide or menu display issues on your TV. Remember to restart the TV, check cable connections, and ensure updated firmware before seeking further assistance.
HDMI or Other Connection Issues
Encountering HDMI or other connection issues can prevent your TV from properly displaying content from external devices. Here are some troubleshooting steps to address these problems:
- Check the cables: Inspect the HDMI or other connection cables for any signs of damage, such as frayed wires or bent pins. Replace any faulty cables with new ones to ensure a proper connection.
- Ensure proper connections: Double-check that the cables are securely plugged into both the TV and the external device, such as a gaming console or cable box. Make sure they are inserted into the correct ports.
- Try a different HDMI port: If you’re experiencing issues with a specific HDMI port, try connecting the device to a different HDMI port on your TV. This can help determine if the port itself is the problem.
- Enable HDMI-CEC: Check if your TV supports HDMI-CEC (Consumer Electronics Control) and ensure it is enabled in the settings menu. HDMI-CEC allows devices to control each other over HDMI, improving compatibility and ease of use.
- Reset the connected devices: Power off both your TV and the external device, then unplug them from the power source. Wait for about 30 seconds, plug them back in, and turn them on. This can help reset both devices and resolve compatibility issues.
- Update firmware: Check for any available firmware updates for your TV and the external devices. Outdated firmware can sometimes cause compatibility issues. Follow the manufacturer’s instructions to update the firmware.
- Check resolution settings: Ensure that the resolution setting on your TV matches the capabilities of the connected device. If a device is set to output a higher resolution than your TV supports, it may cause display issues.
- Try a different device or cable: Test the problem device with a different TV or try a different cable with the same device. This can help identify whether the issue lies with the device or the TV.
- Consult the user manual: Refer to the user manuals for both your TV and the external device for specific troubleshooting steps and compatibility requirements. Follow any instructions provided to resolve the connection issues.
- Contact manufacturer support: If none of the above steps resolve the issue, it is recommended to contact the manufacturer’s support team for further assistance. They can provide specific troubleshooting steps or offer guidance on potential hardware issues that may require repair or replacement.
By following these troubleshooting steps, you can hopefully resolve HDMI or other connection issues on your TV. Remember to check cables, enable HDMI-CEC, and update firmware before seeking further assistance.
TV Displaying Error Codes
Encountering error codes on your TV can indicate underlying issues that need to be addressed. Here are some troubleshooting steps to help you understand and resolve these error codes:
- Identify the error code: Take note of the specific error code displayed on your TV screen. Error codes can vary depending on the TV brand and model, and they often provide valuable information about the nature of the problem.
- Refer to the user manual: Consult the user manual or documentation provided with your TV. Look for a dedicated section on error codes, which may outline the common error codes and their corresponding solutions.
- Perform a power cycle: Power off your TV completely and unplug it from the power source. Wait for about 1-2 minutes, then plug it back in and power it on. This simple step can sometimes resolve temporary glitches that trigger error codes.
- Check for firmware updates: Visit the manufacturer’s website to check if there are any available firmware updates for your TV. Outdated firmware can sometimes cause errors, and updating it may resolve the issue.
- Perform a factory reset: If the error code persists, you can try performing a factory reset on your TV. Keep in mind that this will erase all personalized settings and stored data, so backup any important information before proceeding.
- Contact manufacturer support: If you are unable to resolve the error code using the above steps, it is advisable to reach out to the manufacturer’s support team. Provide them with the specific error code and describe the issue in detail. They can offer specific troubleshooting advice or recommend further action, such as professional repair services if necessary.
By following these troubleshooting steps, you can hopefully make progress in understanding and resolving the error codes displayed on your TV. Remember to consult the user manual, update firmware, and perform a power cycle before seeking further assistance.
Poor Reception or Channel Problems
Experiencing poor reception or channel problems can hinder your ability to watch TV smoothly. Here are some troubleshooting steps to help improve reception and resolve channel issues:
- Check the antenna or cable connection: Ensure that your antenna or cable is properly connected to your TV. Make sure the cable is securely connected and, if using an antenna, ensure that it is positioned correctly for optimal reception.
- Rescan for channels: Perform a channel scan on your TV to ensure you are receiving all available channels. Access the settings menu on your TV and look for the option to scan for channels. Follow the on-screen instructions to complete the process.
- Check signal strength: Use your TV’s signal strength or signal quality indicator to determine the signal strength of the channels. If the indicator shows a weak signal, consider repositioning the antenna or contacting your cable provider for assistance.
- Consider an antenna amplifier or signal booster: If you are using an antenna, you may benefit from using an antenna amplifier or signal booster. These devices can enhance the signal strength, allowing for better reception and improved channel quality.
- Contact your cable or satellite provider: If you are experiencing channel problems with a cable or satellite service, contact your provider for assistance. They can check for any service outages or signal issues in your area and provide appropriate solutions.
- Check for interference: Eliminate any potential sources of interference that may affect your TV reception. Keep electronic devices such as cordless phones, routers, or microwave ovens away from your TV and antenna to reduce interference.
- Update TV firmware: Ensure that your TV has the latest firmware installed. Check the manufacturer’s website or the TV’s settings menu for available firmware updates. Updating the firmware can address software-related issues that may impact reception or channel problems.
- Reset the TV: Performing a factory reset on your TV can help resolve some reception or channel issues. Refer to your TV’s user manual for instructions on how to perform a factory reset. Note that this will erase all personalized settings, so backup any important data beforehand.
- Consider professional assistance: If none of the above steps resolve the poor reception or channel problems, it may be necessary to consult with a professional TV repair service or contact the manufacturer’s support team for further assistance.
By following these troubleshooting steps, you can hopefully improve reception and resolve channel problems on your TV. Remember to check antenna or cable connections, rescan for channels, and eliminate interference before seeking further assistance.