
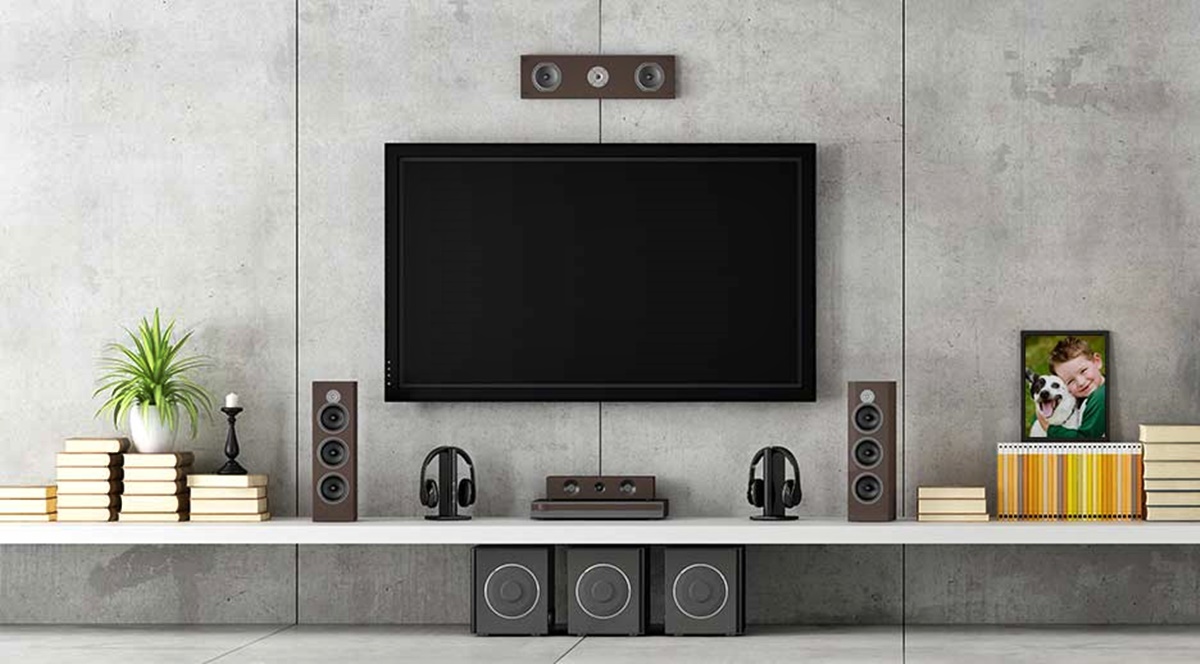
Choose the Right Spot for Your TV
Choosing the ideal spot for your TV is crucial for an optimal viewing experience. Here are a few key considerations to keep in mind when deciding where to place your TV:
- Room Lighting: Take note of the natural and artificial lighting in the room. Avoid placing the TV opposite bright windows or strong light sources, as this can create glare and affect the picture quality.
- Viewing Distance: Determine the ideal viewing distance based on the size of your TV. As a general rule, the distance between you and the TV should be approximately 1.5 to 2.5 times the diagonal size of the screen. This ensures a comfortable and immersive viewing experience.
- Room Layout: Consider the layout of your room and the placement of other furniture. Position the TV at a height and angle that allows for easy viewing from various seating areas, while also ensuring it doesn’t obstruct other furniture or become a safety hazard.
- Wall Mount or Stand: Decide whether you want to mount your TV on the wall or use a stand. Wall mounting can save space and provide a sleek, modern look. If you opt for a stand, ensure it is stable and can support the weight of your TV.
- Cable Management: Plan for cable management to keep your setup neat and organized. Use cable clips, cable covers, or even wall channels to conceal and route cables effectively.
Remember, the best spot for your TV may vary depending on your individual preferences and the layout of your room. Take your time to find the perfect location that provides optimal viewing angles, minimizes glare, and blends seamlessly with your overall room design.
Connect the Power Cord
Before you can start enjoying your new TV, you need to connect the power cord. Follow these steps to ensure a proper and safe connection:
- Locate the Power Input: Look for the power input on the back or side of your TV. It is usually labeled as “AC In” or “Power”.
- Plug in the Power Cord: Take the power cord and insert it into the power input of your TV firmly. Make sure it is securely connected.
- Plug into a Power Outlet: Locate a nearby power outlet and plug the other end of the power cord into it. Ensure that the outlet is easily accessible and not overloaded with other devices.
- Power on the TV: Once the power cord is connected, locate the power button either on the front or side of your TV or on the remote control. Press the power button to turn on your TV.
It is important to note that some TVs may have a power switch on the back that needs to be turned on before you can power up the TV using the remote or the front power button. Refer to the user manual for specific instructions if you encounter any difficulties.
Ensure that the power cord is not damaged or frayed. If you notice any signs of damage, it is essential to replace it with a new one to avoid any potential electrical hazards.
Once the power cord is connected and your TV is powered on, you are now ready to move on to the next step of setting up your new TV.
Choose the Right HDMI Port
When setting up your new TV, it’s important to choose the right HDMI port to ensure proper connectivity and optimal performance for your external devices. Here’s how you can determine the right HDMI port for your setup:
- Identify the HDMI Ports: Take a look at the back or side of your TV to locate the HDMI ports. They are usually labeled as HDMI 1, HDMI 2, and so on.
- Check the HDMI Specifications: Take note of the HDMI specifications required by your devices. For example, if you’re connecting a 4K Blu-ray player, you’ll need an HDMI 2.0 or higher port to support the 4K resolution and other advanced features.
- Check the HDMI ARC Port: If you have a soundbar or AV receiver that supports Audio Return Channel (ARC), you should connect it to the HDMI ARC port on your TV. This allows for bidirectional audio transfer and simplifies the setup.
- Consider HDMI CEC: If you want to control multiple devices with a single remote, ensure that your TV and external devices support HDMI CEC (Consumer Electronics Control). This allows for seamless communication between devices and enables features like turning on/off devices with the TV remote.
- Connect the Device to the HDMI Port: Once you’ve determined the appropriate HDMI port, connect your external device, such as a game console or streaming device, to the selected HDMI port using a high-quality HDMI cable. Ensure a secure connection.
Keep in mind that some TVs may have specific HDMI ports that are optimized for certain features, such as gaming or HDR content. Refer to the TV’s user manual or manufacturer’s website for more information on any specific HDMI port recommendations or limitations.
By choosing the right HDMI port for your devices, you can ensure a reliable and high-quality connection that delivers the best audio and video performance on your new TV.
Connect External Devices
Connecting external devices to your new TV allows you to expand its functionality and enjoy a wide range of entertainment options. Follow these steps to connect your preferred devices:
- Gather Your Devices: Identify the external devices you want to connect to your TV. Common examples include gaming consoles, Blu-ray players, streaming devices, and cable/satellite boxes.
- Identify the Input Ports: Look for the corresponding input ports on your TV for each device. These input ports are typically labeled, such as HDMI 1, HDMI 2, AV Input, or Component Video Input.
- Connect Using HDMI: For devices with HDMI output, such as gaming consoles and Blu-ray players, use HDMI cables to connect them to the HDMI input ports on your TV. Ensure a secure and snug connection.
- Connect Using Other Cables: If your devices do not have HDMI output, use the appropriate cables (such as component, composite, or VGA cables) to connect them to the corresponding input ports on your TV.
- Consider Audio Connections: If your external devices require audio connections, such as a soundbar or external speakers, ensure that you connect the audio output of the device to the audio input of the respective audio device or directly to the TV.
- Power On the Devices: Once all the cables are securely connected, plug in the power cords of your external devices and turn them on. Make sure to follow the specific instructions for each device.
- Select the Input Source: Use your TV’s remote control or on-screen menu to select the input source corresponding to the device you want to use. This will allow the TV to receive and display the content from the connected device.
Remember to refer to the user manuals of your external devices and your TV to ensure proper compatibility and connection procedures. This will ensure the best possible performance and functionality for your new TV and connected devices.
Set Up Your TV’s Wi-Fi or Ethernet Connection
To access online streaming services, browse the internet, and enjoy smart features on your new TV, you’ll need to set up the Wi-Fi or Ethernet connection. Here’s how to do it:
- Wi-Fi Connection: If you prefer to connect your TV to your home Wi-Fi network, follow these steps. Using your TV’s remote control, navigate to the settings menu and locate the Network or Wi-Fi settings. Select your Wi-Fi network from the list of available networks and enter the password when prompted. Once connected, your TV will have access to the internet.
- Ethernet Connection: If you have a stable internet connection and an available Ethernet port near your TV, you can connect your TV directly to the router using an Ethernet cable. Simply plug one end of the cable into the Ethernet port on the back of your TV and the other end into an available port on your router.
- Verify the Connection: After setting up the Wi-Fi or Ethernet connection, your TV will perform a network connection test to ensure a successful connection. This test usually checks for internet connectivity and speed. If the test passes, your TV is ready to use online applications and services.
It is worth noting that Wi-Fi offers the convenience of a wireless connection, allowing you to place your TV anywhere within the range of your wireless network. However, Ethernet connections usually provide a more stable and reliable connection, which is important for streaming high-quality content or gaming.
If you experience any issues with your network connection, ensure that your Wi-Fi router or modem is in range, properly configured, and functioning correctly. You may need to consult your router’s manual or contact your internet service provider for assistance.
By setting up your TV’s Wi-Fi or Ethernet connection, you can unlock a world of online content and enjoy the full range of smart features available on your new TV.
Run the Initial Setup
Running the initial setup is an essential step in getting your new TV up and running. It ensures that your TV is configured to your preferences and enables you to access its full range of features. Follow these steps to complete the initial setup:
- Select your Language: When you power on your TV for the first time, you will be prompted to select a language. Choose your preferred language using the on-screen instructions or navigation buttons on your remote control.
- Choose your Country/Region: Next, you will need to select your country or region from the provided list. This setting helps your TV configure appropriate broadcast standards and services specific to your location.
- Agree to Terms and Conditions: Review and agree to the terms and conditions presented on the screen. These terms outline the terms of use, privacy policies, and any applicable warranties or agreements regarding your TV usage.
- Connect to a Network: If you haven’t already set up your TV’s Wi-Fi or Ethernet connection (covered in the previous section), you will be prompted to do so now. Follow the on-screen instructions to connect to your preferred network.
- Scan for Channels (antenna or cable connection): If you are using an antenna or cable connection to access broadcast channels, you will need to perform a channel scan. This scan allows your TV to detect and store available channels for you to access later.
- Set the Time and Date: Use the on-screen prompts to set the correct time and date. This information is important for accurate scheduling and display functions on your TV.
- Enable or Disable Automatic Updates: Some TVs offer the option to enable automatic updates, which ensure that your TV’s firmware and software stay up-to-date with the latest features and improvements. Decide whether you want to enable this feature based on your preferences.
- Personalize Settings (optional): Depending on your TV model, you may have the option to personalize settings such as picture mode, sound settings, closed captioning, and more. Take the time to adjust these settings to your liking.
Following these steps will help you complete the initial setup of your new TV. Make sure to read and understand each prompt and setting to ensure a smooth and personalized experience with your TV.
Adjust the Display Settings
Adjusting the display settings of your new TV is vital to optimize the visual quality and ensure an immersive viewing experience. Here are some essential display settings you should consider:
- Brightness: Adjust the brightness level to ensure that the images displayed on your TV are visible and clear. Avoid setting it too high, as it can lead to eye strain, or too low, as it can make the picture appear dim.
- Contrast: Adjust the contrast to achieve a balance between the dark and light areas of the screen. Higher contrast levels can enhance color vibrancy and improve picture detail.
- Color Temperature: The color temperature setting determines the overall warmth or coolness of the colors on the screen. Experiment with different temperature options, such as “Warm,” “Neutral,” or “Cool,” and choose the one that suits your preference.
- Sharpness: The sharpness setting controls the level of detail and edge enhancement. It is recommended to keep the sharpness setting at a moderate level to avoid artificial-looking pictures.
- Aspect Ratio: Set the aspect ratio based on the content you are watching. Options may include “16:9” for widescreen content, “4:3” for standard definition content, or “Auto” to automatically adjust the aspect ratio based on the incoming signal.
- Motion Enhancement: Depending on your TV model, you may have motion enhancement options such as motion smoothing or motion blur reduction. Experiment with these settings to minimize motion blur while maintaining a natural-looking image.
- Picture Mode: Most TVs offer preset picture modes like “Standard,” “Cinema,” “Sports,” or “Game.” Each mode is optimized for specific content types. Choose the mode that best suits your viewing preferences or customize the settings within each mode.
- Backlight: Adjust the backlight level to control the brightness of the TV’s screen. Increasing the backlight can improve visibility in well-lit rooms, while lowering it can reduce eye strain in darker environments.
Take your time to experiment with these display settings and find the combination that delivers the most pleasing and accurate visuals for your viewing experience. Keep in mind that the optimal settings can vary based on personal preferences, the content being watched, and the lighting conditions in your viewing environment.
Lastly, make sure to periodically revisit and readjust the display settings as necessary, especially when switching between different sources or content types, to ensure consistent and optimal picture quality on your new TV.
Set Up a Universal Remote Control
Setting up a universal remote control allows you to conveniently operate multiple devices with a single remote. Here’s how you can set up a universal remote control for your new TV:
- Check Compatibility: Ensure that the universal remote control you have supports your specific TV model. Read the user manual or check the manufacturer’s website for a list of compatible devices.
- Insert Batteries: Open the battery compartment of the universal remote control and insert the batteries according to the polarity markings. Ensure a secure fit and close the compartment.
- Find the Set-Up Button: Locate the “Set-Up” or “Code Search” button on the universal remote control. This button is usually indicated with a gear or wrench icon.
- Enter Programming Mode: Press and hold the “Set-Up” button until the indicator light on the remote control turns on. This indicates that the remote control is in programming mode.
- Enter the TV Code: Use the number pad on the remote control to enter the preassigned code for your TV brand. Refer to the universal remote control’s user manual or manufacturer’s website for the correct code.
- Test the Remote Control: Press the power button on the remote control to test if it successfully turns on your TV. If it does, test other buttons to ensure full functionality, including volume control, input selection, and menu navigation.
- Program Additional Devices (optional): If your universal remote control supports multiple devices, you can program other devices such as your cable/satellite box, DVD player, or audio system using the same process. Repeat steps 4-6 for each additional device.
In case the preassigned code doesn’t work for your TV, you may need to try different codes provided in the user manual or use the manual code search method. Refer to the instructions specific to your universal remote control for guidance.
Keep in mind that not all functions of your TV or other devices may be accessible through the universal remote control. In such cases, you may need to use the original remote control or consider purchasing a more advanced universal remote control that offers more extensive device compatibility.
A properly set up universal remote control can significantly simplify your TV-watching experience by eliminating the need for multiple remotes and providing convenient control over all your devices from a single device.
Tune in to Your Favorite Channels
Once you’ve set up your new TV, it’s time to tune in to your favorite channels and start enjoying your preferred TV shows, movies, and live broadcasts. Here’s how you can easily tune in to your favorite channels:
- Channel Auto Scan: If you’re using an antenna to receive over-the-air broadcasts, perform a channel auto scan. This scans for available channels in your area and saves them to your TV’s channel list. Navigate to the TV menu or settings, locate the channel setup options, and choose the auto scan or auto-tune function. Follow the on-screen prompts to start the scan and allow it to complete.
- Cable/Satellite Box Setup: If you subscribe to cable or satellite TV, connect your cable/satellite box to your TV using an HDMI cable or other appropriate connection. Power on your cable/satellite box and your TV. Using your TV’s remote control, press the input or source button to select the appropriate HDMI port or input source that is connected to your cable/satellite box. Follow any on-screen prompts to complete the setup process for your specific cable/satellite provider.
- Favorite Channel List: Many modern TVs allow you to create a favorite channel list for quick and easy access to your preferred channels. Navigate to your TV’s settings or channel list options and select the channels you want to add to your favorites. Once added, you can easily access your favorite channels with the press of a dedicated button or through the on-screen menu.
- Smart TV Apps: If your TV offers smart features and built-in streaming apps, you can access a wide variety of content directly through those apps. Look for popular streaming apps such as Netflix, Hulu, Disney+, and more in your TV’s app store or pre-installed apps menu. Sign in to your accounts or create new ones to enjoy your favorite shows and movies on-demand.
- Explore Additional Streaming Devices: Consider using additional streaming devices such as Roku, Apple TV, or Amazon Fire TV Stick, which provide access to a plethora of streaming services and channels. Connect the streaming device to your TV using an HDMI cable, follow the setup instructions provided, and explore the vast library of channels and content available.
Remember, the available channels and options may vary depending on your location, TV model, and subscription services. It’s also a good idea to periodically rescan for channels to ensure you are receiving the most up-to-date channel lineup available.
With these simple steps, you can easily tune in to your favorite channels and enjoy a wide range of entertainment options right from the comfort of your new TV.
Connect to a Sound System
Enhance your audio experience and immerse yourself in high-quality sound by connecting your new TV to a sound system. Here’s how to connect your TV to a sound system:
- Identify the Audio Output: Check your TV for available audio output ports. Common options include optical audio output (TOSLINK), HDMI ARC (Audio Return Channel), or analog audio output (RCA or 3.5mm headphone jack).
- Select the Sound System: Determine the type of sound system you wish to connect. This can range from a simple soundbar to a full home theater system with surround sound speakers.
- Choose the Connection Method: Depending on your sound system and available ports on both the TV and the sound system, choose the appropriate connection method. Common options include:
- HDMI ARC: If your TV and sound system both support HDMI ARC, connect an HDMI cable from the TV’s HDMI ARC port to the sound system’s HDMI ARC port. This allows for audio transfer in both directions and simplifies the setup.
- Optical Audio: If your TV and sound system have optical audio ports, connect an optical audio cable from the TV’s optical audio output to the sound system’s corresponding input.
- Analog Connection: For older sound systems that lack digital audio inputs, use analog connections. Connect RCA cables or a 3.5mm audio cable from the TV’s audio output to the sound system’s analog input.
- Wireless Connection: Some sound systems offer wireless connectivity options, such as Bluetooth or Wi-Fi. Check your sound system’s manual for instructions on connecting wirelessly to your TV.
- Configure Audio Settings: After connecting the TV to the sound system, configure the audio settings on your TV. Navigate to the TV’s settings menu and adjust the audio output settings to ensure that the sound is redirected to the connected sound system instead of the TV’s built-in speakers.
- Test the Sound System: Play a sample audio or video file to test the connection and ensure that the audio is coming through the sound system. Adjust the sound system’s volume levels and settings to achieve the desired audio quality.
It’s important to note that some modern TVs may have advanced audio settings, such as Dolby Atmos or Surround Sound. If your sound system supports these features, make sure to enable them in your TV’s audio settings for an immersive audio experience.
By connecting your TV to a sound system, you can enjoy enhanced audio quality and take your viewing experience to the next level, whether you’re watching movies, TV shows, or playing games.
Calibrate and Fine-Tune the Audio Settings
To ensure the best possible audio experience with your sound system and new TV, it’s essential to calibrate and fine-tune the audio settings. Here’s how to optimize the audio settings for optimal performance:
- Access Audio Settings: Using your TV’s remote control, navigate to the settings menu, and locate the audio or sound settings. This is where you can adjust various audio parameters.
- Speaker Configuration: If your sound system has multiple speakers, such as a surround sound setup, ensure that the speaker configuration settings in your TV’s audio settings match the physical setup of your sound system. This ensures proper sound distribution and channel mapping.
- Audio Presets: Many TVs offer pre-defined audio presets like “Standard,” “Movie,” “Music,” or “Sports.” Experiment with these presets to find a setting that suits your listening preferences. You can also customize the settings within each preset to further refine the audio output.
- Equalizer Settings: Some TVs provide options to adjust the equalizer settings manually. This allows you to fine-tune the bass, midrange, and treble frequencies according to your personal preferences. It’s best to start with a balanced setting and make gradual adjustments to achieve the desired audio quality.
- Volume Leveling: Some TVs offer volume leveling or dynamic range compression options. Turning this feature on can help normalize the volume levels between different TV channels, programs, or streaming content, reducing sudden volume fluctuations.
- Virtual Surround or 3D Audio: If your sound system supports virtual surround sound or 3D audio technologies, look for options to enable these features in your TV’s audio settings. They can create a more immersive audio experience, enhancing spatial sound effects.
- Audio Delay Correction: If you notice an audio delay or lip-sync issue, your TV may have options to adjust the audio delay. This feature allows you to synchronize the audio with the video, ensuring that the sound is in perfect harmony with the visuals.
- Test Audio with Content: While adjusting the audio settings, play different types of content, such as movies, music, or sports, to get a comprehensive idea of how the changes affect the audio quality. Make fine adjustments as necessary to create a balanced and immersive audio experience.
Calibrating and fine-tuning the audio settings may require some experimentation to achieve the desired sound quality. Take your time, listen critically, and adjust the settings based on your preferences and the capabilities of your sound system.
Lastly, it’s a good idea to revisit the audio settings periodically as you encounter different content or make hardware changes to ensure that your audio setup is consistently optimized for the best possible audio experience.
Activate the Smart Features
One of the key advantages of your new TV is its smart features, which allow you to access a whole range of online streaming services, apps, and internet connectivity. Here’s how to activate the smart features on your TV:
- Connect to the Internet: Ensure that your TV is connected to your home Wi-Fi network or Ethernet connection, as covered in the previous sections. A stable internet connection is essential for accessing and enjoying the smart features of your TV.
- Launch the Smart Hub or App Store: Depending on your TV’s brand and operating system, locate and launch the smart hub or app store on your TV. This is usually accessible through a dedicated button on the remote control or through the main menu.
- Create or Sign In to Your Account: Some smart features and apps may require you to create an account or sign in using an existing account. If needed, follow the on-screen instructions to create or sign in to your respective accounts, such as your Samsung, LG, or Google account.
- Explore Available Apps: Once you’ve accessed the smart hub or app store, browse through the available apps and services. Popular options may include streaming services like Netflix, Amazon Prime Video, Hulu, YouTube, and more. You may also find apps for news, sports, music, or social media.
- Download and Install Apps: Select the apps you want to install and follow the on-screen prompts to download and install them on your TV. Depending on your TV’s storage capacity, you may need to manage the installed apps to free up space for new ones, if necessary.
- Sign in to App Accounts: Once the apps are installed, sign in to your respective app accounts if required. This will allow you to personalize your streaming experience, access your watchlists, and enjoy content recommendations based on your preferences.
- Organize and Customize Apps: Rearrange the apps in your smart hub’s layout according to your preference. You can usually do this by highlighting an app, pressing the options or edit button on your remote control, and moving the app to a new position.
- Update Smart Features: Periodically check for software updates for your TV’s smart features. These updates may introduce new apps, features, or improvements to the existing functionality. Refer to your TV’s settings menu to check for updates and perform any necessary updates.
Activate the smart features on your new TV to enjoy a vast world of streaming and online entertainment. With a wide selection of apps and services at your fingertips, you can tailor your TV experience to suit your preferences and stay connected with the digital world.
Install Essential Apps and Services
Installing essential apps and services on your new TV allows you to access a variety of content and maximize your viewing experience. Here’s how you can install essential apps and services:
- Identify Must-Have Apps: Determine the essential apps and services you want to install on your TV based on your preferences and needs. This can include popular streaming services, news apps, music apps, and more.
- Access the App Store: Open the app store on your TV—usually accessible via a dedicated button on the remote or through the TV’s main menu. The app store may be called something like “LG Content Store,” “Samsung Smart Hub,” or “Google Play Store.”
- Search and Browse: Use the search function or browse through the app store to find the apps and services you want to install. You can search by name or category.
- Select and Install: Once you find the desired app, select it, and choose the install or download option. Follow the on-screen prompts to complete the installation process. Repeat this step for each app you want to install.
- Sign In to App Accounts: After installation, launch each app and sign in using your account credentials if necessary. This step is crucial for accessing personalized content, recommendations, and saved preferences.
- Customize and Organize: Rearrange the apps in a convenient order on your TV’s home screen or app launcher. This allows for quick access to your most frequently used apps. You can usually do this by highlighting an app and dragging it to a new position.
- Update Apps: Periodically check for updates for installed apps. Updates often bring bug fixes, performance improvements, and new features. Navigate to the app store or app settings to check for app updates and install them.
- Explore Additional Services: Aside from apps, explore additional services your TV may offer, such as built-in web browsers, screen mirroring capabilities, or integration with smart home devices. Familiarize yourself with these features to make the most out of your TV.
Installing essential apps and services enhances the versatility of your new TV and provides a wide range of entertainment options at your fingertips. From streaming your favorite shows and movies to exploring the latest news and music, personalizing your TV with essential apps and services ensures a tailored entertainment experience.
Customize Your TV’s Menu and Settings
Customizing your TV’s menu and settings allows you to personalize your viewing experience and optimize the functionality of your new TV. Here’s how you can customize your TV’s menu and settings:
- Access the Settings Menu: Using your TV’s remote control, navigate to the settings menu. This menu is typically accessible through a dedicated button on the remote control or through the TV’s main menu.
- Display Settings: Adjust the display settings, such as brightness, contrast, color temperature, and sharpness, to suit your preferences. Experiment with these settings to achieve the most visually pleasing picture quality for your TV’s display.
- Sound Settings: Customize the sound settings to optimize the audio output. Adjust parameters like equalizer settings, balance, and volume levels to enhance the sound quality according to your preference.
- Network and Connectivity: Explore the network and connectivity settings to manage your TV’s Wi-Fi or Ethernet connection, set up network sharing options, or enable features like screen mirroring or Bluetooth pairing.
- Accessibility Options: If you have specific accessibility needs, look for accessibility options in the settings menu. These can include closed captioning, audio descriptions, high-contrast displays, and more, allowing you to customize your TV for a more inclusive experience.
- Parental Controls: Set up parental controls to restrict certain content or features based on age ratings or specific blocking criteria. This ensures that family members can enjoy the TV while adhering to preferred viewing guidelines.
- Time and Clock: Adjust the time and clock settings to ensure accurate time display and enable features like automatic time updates or sleep timers.
- Input and Output Settings: Customize the input and output settings to optimize your TV’s compatibility with external devices. Adjust aspects like HDMI settings, audio output formats, or aspect ratio options to accommodate your specific setup.
- Personalize the Menu: Customize the menu layout and appearance to suit your preferences. Some TVs allow you to rearrange icons, change colors, or enable shortcuts for quick access to your most-used settings.
- Reset or Restore: If needed, there may be options to reset or restore your TV’s settings to their default state. This can be helpful if you encounter issues or want to start fresh with a clean slate.
By customizing your TV’s menu and settings, you can tailor it to your preferences, ensuring that it meets your specific needs and offers a personalized viewing experience.
Learn the Basic Remote Control Functions
Familiarizing yourself with the basic remote control functions is essential to navigate your new TV’s features and enjoy a seamless viewing experience. Here are the key functions to know:
- Power Button: The power button turns the TV on and off. It is usually represented by a symbol resembling a circle with a line through it or a power symbol.
- Input/Source Button: The input or source button allows you to switch between different input sources, such as HDMI, AV, or other connected devices. It is often labeled “Input,” “Source,” or indicated by an icon with arrows pointing into a box.
- Navigation Buttons: These buttons, usually arrow keys (up, down, left, right), allow you to navigate through menus, select options, and adjust settings on the screen.
- OK/Enter Button: The OK or Enter button is used to confirm selections or make choices when navigating menus or selecting options.
- Volume Buttons: The volume buttons, usually represented by (+) and (-) symbols, increase or decrease the volume level of the TV’s speakers or connected audio devices.
- Channel Buttons: The channel buttons, typically labeled with numbers or channel up/down symbols (▲/▼), allow you to switch between different TV channels or scroll through your favorite channel list.
- Menu Button: The menu button opens the TV’s settings menu, allowing you to access and adjust various settings and preferences.
- Exit/Button: The exit or back button allows you to exit from menus, go back to the previous screen, or cancel current actions.
- Shortcut Buttons: Some remote controls have dedicated buttons for quick access to specific features. These may include buttons for apps like Netflix, Amazon Prime Video, or a smart hub button to launch the TV’s smart features.
- Playback Controls: If your TV supports media playback, there may be additional buttons for functions like play, pause, rewind, fast-forward, or stop. These buttons are commonly found on remotes that include smart TV or multimedia features.
- Mute Button: The mute button allows you to instantly turn off or restore the audio output, muting or unmuting the TV’s speakers.
Refer to your TV’s user manual to identify the functions and buttons specific to your remote control model. Take some time to explore and practice using the remote control to familiarize yourself with its layout and functions. This will enable you to effortlessly navigate your TV’s features and make the most out of your viewing experience.
Set Up Parental Controls
Setting up parental controls on your new TV allows you to manage and restrict content access, ensuring a safe viewing experience for children and preventing unauthorized access to inappropriate content. Here’s how you can set up parental controls:
- Access the Parental Controls: Using your TV’s remote control, navigate to the settings menu. Look for the parental controls or child lock options. The location of these settings may vary depending on the TV model and brand.
- Select Lock Method: Choose the lock method you prefer. This can include setting up a PIN code, pattern lock, or even restricting access based on content ratings or specific criteria.
- Choose Content Restrictions: Select the content categories or ratings you want to restrict. This can range from blocking explicit or adult content to limiting access to specific TV channels or app categories.
- Set Time Restrictions: If you want to limit TV usage, you can set up time restrictions, such as controlling the hours during which the TV can be used or setting a daily time limit for viewing.
- Customize Settings for Each User: Some TVs allow you to create multiple user profiles and customize parental control settings for each profile. This allows you to tailor the restrictions based on individual preferences and age groups.
- Lock Specific Apps or Features: If certain apps or features need additional restrictions, explore options to lock or password-protect them individually. This can be useful for preventing unauthorized purchases or access to social media apps.
- Test and Adjust Settings: After configuring the parental control settings, test them by attempting to access restricted content. Make adjustments if necessary to ensure the desired level of restriction and usability.
- Review and Monitor Settings: Periodically review and monitor the parental control settings to ensure they remain appropriate for the age and maturity of the intended viewers. Consider adjusting the settings as children grow older and their needs change.
Remember to keep your PIN or lock method secure and avoid sharing it with unauthorized users. This helps maintain the effectiveness of the parental controls and prevents children from bypassing the restrictions.
By setting up parental controls on your new TV, you can have peace of mind, knowing that your children can safely explore TV content while adhering to your preferred guidelines and restrictions.
Keep Your TV Updated with the Latest Firmware
Regularly updating the firmware of your new TV is crucial for ensuring optimal performance, enhancing security, and accessing new features or improvements. Here’s why and how to keep your TV updated with the latest firmware:
- Benefits of Firmware Updates: Firmware updates provide several advantages, including bug fixes, stability improvements, enhanced performance, and compatibility with new devices or technologies. Updates often introduce new features, user interface enhancements, and security patches to protect against vulnerabilities.
- Check for Updates: Navigate to your TV’s settings menu and look for the system or software updates section. Depending on your TV, you may find an option to check for updates automatically or manually. Select the appropriate option to initiate the update process.
- Automatic Updates: Some TVs support automatic updates, where the TV connects to the manufacturer’s server and downloads and installs updates in the background. If available, enable automatic updates to ensure your TV stays up-to-date without manual intervention.
- Internet Connection: To download and install firmware updates, ensure that your TV is connected to the internet. Use a stable Wi-Fi or Ethernet connection to prevent interruption during the update process.
- Patience during Update: Firmware updates may take some time to download and install, depending on the size of the update and the speed of your internet connection. Exercise patience and avoid turning off or disconnecting the TV during the update process.
- Keep TV Powered On: To receive and install firmware updates, keep your TV powered on, especially if you have enabled automatic updates. Some TVs may have an option to schedule updates during periods of low usage, such as overnight, to minimize disruption.
- Read Release Notes: If release notes or update descriptions are available, read them to understand the improvements, new features, or bug fixes introduced by the firmware update. This gives you insight into what to expect after installing the update.
- Regularly Check for Updates: Firmware updates are typically released periodically. Make it a habit to regularly check for updates to ensure your TV remains up-to-date with the latest improvements and enhancements.
Keeping your TV’s firmware updated is essential for optimizing performance, staying protected against vulnerabilities, and accessing new features. By staying proactive and regularly updating your TV’s firmware, you can enjoy an enhanced and up-to-date television experience.
Troubleshoot Common Issues
Encountering issues with your new TV can be frustrating, but troubleshooting common problems can help you resolve them quickly. Here are some common issues and troubleshooting steps to try:
- No Power: If your TV doesn’t turn on, first ensure that it’s properly plugged into a working power outlet. Check the power cord for any damage or loose connections. Try using a different power outlet or a different power cord if possible.
- No Picture: If the TV has power but no picture, make sure all input cables are securely connected. Try changing the input source or channel to see if the issue is with the current input. Adjust the brightness and contrast settings on the TV. If the issue persists, power cycle the TV by unplugging it for a few minutes and then plugging it back in.
- No Sound: If there is no sound, ensure that the volume is not muted and that the TV speakers or external sound system are not set to a very low volume level. Check the audio cables for secure connections to the TV and sound system. Test the sound with different content sources to eliminate the possibility of an issue with a specific source.
- Remote Control Not Working: If the remote control is not functioning, replace the batteries with fresh ones and ensure they are inserted correctly. Check for any obstacles or obstructions between the remote and the TV. If necessary, clean the remote control’s infrared sensor with a soft, dry cloth. If the issue persists, try resetting the remote control or contacting the TV manufacturer for further assistance.
- Internet Connectivity Issues: If your TV has internet connectivity issues, first check the network connections and ensure that your Wi-Fi or Ethernet connection is stable. Restart your router and modem to refresh the internet connection. If using Wi-Fi, check the signal strength and consider moving the TV closer to the router or using a Wi-Fi extender. If the problem persists, consult your internet service provider for further assistance.
- App or Streaming Issues: If you’re experiencing problems with specific apps or streaming services, ensure that the app is up-to-date. Restart the TV and try reinstalling the app if necessary. Check your internet connection speed and stability, as slow or unstable internet may cause streaming issues. Consider clearing the app’s cache or contacting the app’s support for further troubleshooting steps.
- Unresponsive TV: If the TV becomes unresponsive or freezes, try power cycling it by unplugging it for a few minutes and then plugging it back in. If the issue persists, refer to the TV’s user manual for instructions on performing a factory reset or contacting the manufacturer’s support for further assistance.
If these troubleshooting steps do not resolve the issue, it’s recommended to consult the TV’s user manual, visit the manufacturer’s support website, or contact their customer support for specific guidance on troubleshooting and resolving the problem.
Enjoy Your New TV!
Now that you’ve set up and resolved any potential issues with your new TV, it’s time to sit back, relax, and enjoy the incredible entertainment experience it offers. Here are a few tips to enhance your enjoyment:
- Explore the Content: Take advantage of the vast range of content available on your TV. Explore different genres, discover new shows, and enjoy movies, documentaries, sports, and more. With streaming services, live broadcasts, and on-demand content, the entertainment possibilities are endless.
- Optimize Picture and Sound Quality: Fine-tune the picture and sound settings to suit your preferences. Experiment with different settings to find the perfect balance and achieve the best possible visual and audio experience for your viewing environment.
- Take Advantage of Smart Features: Make the most of the smart features on your TV. Utilize apps, streaming services, and online content to expand your entertainment options. Stay updated with news, explore music and podcasts, and enjoy the convenience of a connected smart home experience.
- Discover Gaming Options: If you’re a gamer, consider connecting your gaming console or exploring gaming apps on your TV. Immerse yourself in stunning graphics and sound, and enjoy a thrilling gaming experience right from the comfort of your living room.
- Consider Additional Accessories: Enhance your TV setup further with additional accessories. Consider a soundbar or surround sound system for an immersive audio experience, a streaming device for added streaming options, or a universal remote control for seamless control over multiple devices.
- Maintain your TV: Keep your TV clean by regularly dusting the screen and ensuring proper ventilation around the TV. Follow the care instructions in your TV’s user manual to maintain its longevity and performance.
- Adjust for Lighting Conditions: Adjust the TV’s settings, tilt or position the screen, or utilize curtains or blinds to minimize glare or optimize visibility based on the lighting conditions in your room. This will ensure a comfortable viewing experience.
- Invite Friends and Family: Share the joy of your new TV with friends and family. Host movie nights, game competitions, or watch your favorite shows together for a memorable and enjoyable time.
With your new TV, you have a gateway to endless entertainment, information, and relaxation. Make the most of its features, customize your settings, and create the perfect viewing environment to immerse yourself in your favorite content. Enjoy the incredible experience that your new TV brings to your home!