
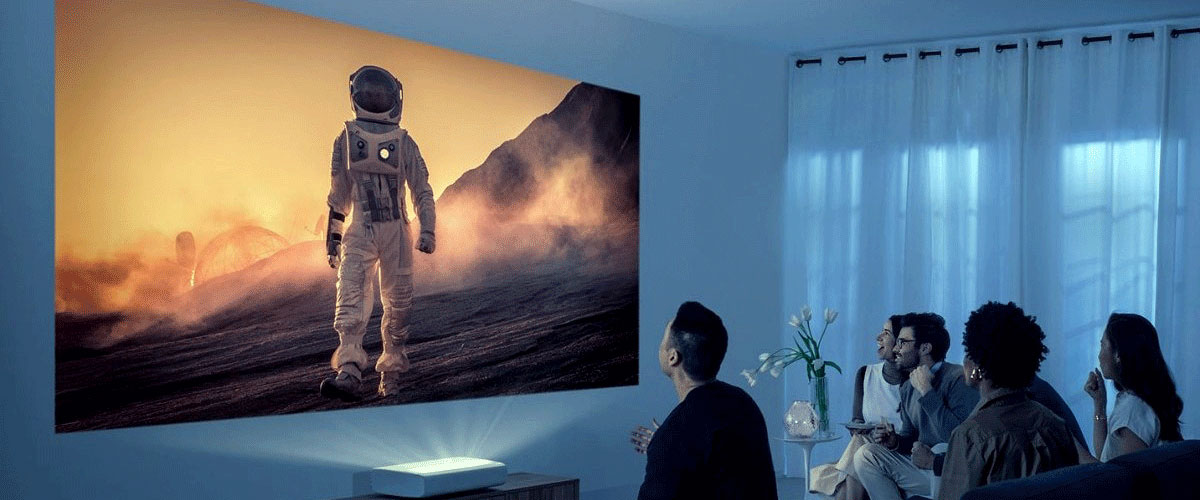
Choosing the Right Projector
When it comes to watching TV on a projector, selecting the right projector is crucial for an optimal viewing experience. With a wide range of options available in the market, here are some key factors to consider when choosing a projector:
- Resolution: The resolution of the projector determines the level of detail and clarity in the image. High definition (HD) projectors with a resolution of 1080p or higher are recommended for a crisp and immersive TV-watching experience.
- Brightness: The brightness of the projector is measured in lumens and determines how well the image is displayed in various lighting conditions. For a dedicated home theater room with controlled lighting, a projector with a higher brightness rating (e.g., 2000 lumens or more) is suitable. However, if your viewing area is not fully darkened, a higher brightness level will be necessary.
- Contrast Ratio: The contrast ratio refers to the difference between the blackest blacks and the whitest whites in an image. A higher contrast ratio enhances the depth and richness of colors, resulting in a more vibrant and lifelike picture.
- Throw Ratio: The throw ratio is the ratio of the distance between the projector and the screen to the width of the projected image. It determines how large or small the image will be based on the available space. Consider the throw distance and desired screen size to ensure the projector fits appropriately in your viewing area.
- Connectivity: Ensure that the projector has the necessary inputs to connect to your TV and other devices, such as HDMI ports, USB ports, and audio outputs. This will allow you to easily connect your TV or streaming devices for seamless viewing.
- Brand and Reliability: Opt for reputable projector brands that have a proven track record of reliability and good customer support. Reading reviews and seeking recommendations can help you make an informed decision.
By considering these important factors, you can make an informed choice and select a projector that suits your specific TV-watching needs. Remember, choosing the right projector is the foundation for a superior home theater experience.
Selecting the Right Projection Screen
While choosing the right projector is essential, selecting the right projection screen is equally important to maximize your TV viewing experience. Here are some key factors to consider when selecting a projection screen:
- Screen Material: Projection screens come in various materials, such as matte white, gray, and ambient light rejecting (ALR) screens. Matte white screens are commonly used and provide good picture quality in standard lighting conditions. Gray screens enhance contrast and black levels, making them ideal for rooms with some ambient light. ALR screens are designed to combat high ambient light conditions, ensuring a brighter and more vibrant image.
- Gain: The gain of a screen refers to its reflectivity. A higher gain screen reflects more light and is suitable for rooms with controlled lighting, while a lower-gain screen provides wider viewing angles and is better for rooms with ambient light.
- Aspect Ratio: The aspect ratio of the screen determines the shape of the image. The most common aspect ratio for TVs is 16:9, which is ideal for watching widescreen content. However, if you prefer a more cinematic experience, you may opt for a 2.35:1 or 2.40:1 aspect ratio screen.
- Screen Size: Consider the size of your viewing area and the throw distance of your projector when determining the screen size. A larger screen provides a more immersive experience, but ensure that it fits within your space without compromising image quality.
- Installation: Decide whether you want a fixed, retractable, or motorized screen based on your preference and space availability. Fixed screens offer a permanent installation, while retractable and motorized screens provide flexibility and can be rolled up or hidden when not in use.
- Price: Set a budget for your projection screen, considering factors like size, material, and features. It’s important to strike a balance between quality and cost-effectiveness.
By considering these factors, you can select a projection screen that complements your projector and viewing environment, resulting in a visually stunning and immersive TV-watching experience. Experimenting with different screen options and seeking expert advice can help you make the right choice.
Connecting Your TV to the Projector
Once you have chosen the right projector and projection screen, the next step is to connect your TV to the projector. Here’s a step-by-step guide to help you with the process:
- Check the available ports: Identify the available ports on both your TV and projector. The most common connection option is HDMI, but some projectors may also have VGA or component inputs.
- Prepare the necessary cables: Ensure you have the appropriate cables to connect your TV to the projector. For HDMI connection, use an HDMI cable. If your projector only has VGA or component inputs, you will need the corresponding cables.
- Power off all devices: Before making any connections, power off both your TV and projector to avoid any potential damage.
- Connect the cables: Plug one end of the HDMI, VGA, or component cable into the corresponding port on your TV and the other end into the respective port on the projector. Ensure the cables are securely connected.
- Power on the devices: Power on your TV and projector. Set the input source on the projector to the correct port (e.g., HDMI, VGA) where the TV is connected.
- Adjust the display settings: On your TV, navigate to the display settings and configure it to output to an external display. This may require selecting the appropriate HDMI input or adjusting the display settings for VGA output.
- Fine-tune the image: Use the projector’s control panel or remote to make any necessary adjustments to the image, such as focus, keystone correction, and aspect ratio, until you achieve a clear and well-aligned picture.
- Test the audio: If your projector has built-in speakers, you should be able to hear the audio through them. However, for a better audio experience, consider connecting external speakers or a soundbar to the audio output of the projector.
- Enjoy your TV on the projector: With the TV successfully connected to the projector, you can now enjoy your favorite shows and movies on the big screen!
Remember to refer to the user manuals of your TV and projector for specific instructions and troubleshooting tips. Once you’ve successfully connected your TV to the projector, you can sit back and immerse yourself in a truly cinematic TV-watching experience.
Adjusting the Projector Settings
After connecting your TV to the projector, it’s important to adjust the projector settings to optimize the picture quality and ensure a comfortable viewing experience. Here are some key settings to consider:
- Brightness and Contrast: Adjust the brightness and contrast settings of the projector to achieve a well-balanced image. Increase the brightness if the picture appears dim and decrease it if the image is too bright. Adjust the contrast level to enhance the difference between dark and light areas.
- Color Temperature: Set the color temperature according to your preference. Some projectors offer preset color temperature modes like warm, cool, or neutral. Experiment with different modes to find the one that suits your viewing preference.
- Sharpness: Fine-tune the sharpness settings to enhance image details without introducing excessive artifacts. Avoid setting the sharpness too high, as it can make the image appear unnatural and overly processed.
- Aspect Ratio: Ensure that the projector’s aspect ratio matches the content you’re watching. If the content is in a widescreen format, select the appropriate aspect ratio (e.g., 16:9) to prevent image distortion.
- Keystone Correction: If the projector isn’t positioned perfectly perpendicular to the screen, use the keystone correction feature to adjust the image and eliminate the trapezoidal effect. However, it’s best to position the projector correctly to maintain optimal image quality.
- Image Size and Position: Use the zoom and focus controls to adjust the image size and ensure it fits perfectly on the screen. Additionally, adjust the horizontal and vertical lens shift or screen position settings to properly align the image.
- Noise Reduction: Most projectors offer noise reduction settings to minimize image artifacts caused by poor signal quality or compression. Use these settings sparingly to maintain a clean and clear image without sacrificing detail.
- Auto Power Off: Enable the auto power off feature to automatically turn off the projector after a specified period of inactivity. This can help prolong the life of the projector’s lamp and save energy.
- Save and Recall Settings: Some projectors allow you to save your preferred settings as presets, making it convenient to switch between different modes or sources with optimized settings.
Remember that the optimal projector settings may vary based on the ambient lighting conditions, room setup, and personal preference. Take the time to experiment and fine-tune the settings until you achieve the desired picture quality. Refer to the projector’s user manual for detailed instructions specific to your model.
Optimizing the Lighting in Your Viewing Area
Creating the perfect viewing environment involves optimizing the lighting conditions in your viewing area. Proper lighting can significantly enhance the overall TV-watching experience. Here are some tips to help you optimize the lighting in your viewing area:
- Avoid direct light on the screen: Position the projector and projection screen away from any direct light sources, such as windows or bright lamps. Direct light can cause glare and wash out the image, leading to decreased picture quality. Use blackout curtains or blinds to block out natural light during daytime viewing.
- Use indirect lighting: Instead of harsh overhead lighting, opt for indirect lighting options to create a more ambient and cozy atmosphere. Use floor or table lamps with adjustable brightness to provide soft and diffused lighting around the viewing area.
- Dim the lights: Lower the overall lighting level in the room to create a darker and more immersive environment. This will help enhance the contrast and color accuracy of the projected image, resulting in a better overall viewing experience.
- Avoid highly reflective surfaces: Minimize the presence of highly reflective surfaces, such as glossy walls or metallic furniture, near the projection screen. These surfaces can cause unwanted reflections and decrease the perceived image quality.
- Consider bias lighting: Bias lighting involves adding a soft glow of light behind the projection screen. This helps reduce eye strain and enhances the perceived contrast of the image. You can use LED light strips or bias lighting kits specifically designed for this purpose.
- Control lighting with smart home technology: If you have smart home automation systems, consider integrating your lighting controls. This allows you to conveniently adjust the lighting levels in your viewing area with voice commands or through a mobile app.
- Create a dedicated viewing space: If possible, designate a separate room or area solely for TV viewing. This will give you better control over the lighting conditions and provide a more immersive experience.
- Experiment and personalize: Lighting preferences can vary from person to person. Experiment with different lighting setups and find the combination of ambient and accent lighting that best suits your preferences and enhances your viewing experience.
By optimizing the lighting in your viewing area, you can create a more immersive and enjoyable atmosphere for watching TV on your projector. Remember, finding the right balance between darkness and ambient lighting is key to achieving the best possible picture quality.
Connecting External Devices to Your Projector
Aside from connecting your TV, projectors offer the flexibility to connect various external devices, expanding your entertainment options. Here’s a guide on how to connect external devices to your projector:
- Streaming Devices: Connect streaming devices, such as Apple TV, Chromecast, or Roku, to the projector’s HDMI or USB port. This allows you to access popular streaming platforms like Netflix, Hulu, or Amazon Prime Video directly on the big screen.
- Blu-ray/DVD Players: Connect your Blu-ray or DVD player to the projector using an HDMI or component cable. This enables you to enjoy your favorite movies and TV series with enhanced picture quality.
- Game Consoles: Connect your gaming console, such as Xbox, PlayStation, or Nintendo Switch, to the projector via HDMI. This provides a larger gaming experience, immersing you in the action-packed visuals on the big screen.
- Laptop/PC: Connect your laptop or PC to the projector using an HDMI or VGA cable. This allows you to stream online content, watch downloaded movies, or even use the projector as a second monitor for presentations or work purposes.
- External Sound Systems: For a more immersive audio experience, connect external sound systems, such as home theater speakers or soundbars, to the audio output of the projector. This enhances the quality of the audio, complementing the stunning visuals.
- Cameras and Camcorders: Connect your camera or camcorder to the projector using an HDMI, USB, or AV cable. This allows you to share captured photos and videos on the big screen, perfect for showcasing your memories to friends and family.
- External Hard Drives or USB Drives: Some projectors have USB ports that can play multimedia content directly from external hard drives or USB drives. Simply plug in the USB device and navigate through the projector’s media player to access your desired content.
- Wireless Connectivity: Some projectors support wireless connectivity options like Wi-Fi or Bluetooth. This allows you to wirelessly connect devices, such as smartphones or tablets, for screen mirroring or streaming content from compatible apps.
- Document Cameras: Connect document cameras to the projector to display documents or objects in real-time during presentations or educational purposes.
- Media Players: Connect media players, such as the Amazon Fire TV Stick or Google Chromecast, to the projector to stream content from various online platforms.
By connecting external devices to your projector, you can access a wider range of content and personalize your entertainment experience. Ensure that you have the necessary cables and adapters to connect your specific devices to the projector. Refer to the user manuals of your projector and external devices for detailed instructions on how to make the connections.
Accessing TV Channels and Streaming Services
One of the great advantages of using a projector for TV viewing is the ability to access a wide range of TV channels and streaming services. Here’s how you can enjoy your favorite content through your projector:
- Cable or Satellite TV: If you have a cable or satellite TV subscription, connect the set-top box or receiver to your projector using an HDMI cable. Switch the input on your projector to the appropriate HDMI port and use the remote control of the set-top box to navigate through the channels.
- Over-the-Air Antenna: Connect an over-the-air antenna to your TV tuner or digital converter box. Attach the HDMI output of the tuner or converter box to the projector. With the correct input selected on the projector, you can watch free-to-air TV channels without the need for a cable or satellite subscription.
- Streaming Devices: Connect popular streaming devices like Amazon Fire TV Stick, Apple TV, or Chromecast to your projector’s HDMI port. Use the streaming device’s interface to access streaming services like Netflix, Hulu, Disney+, and many more. Browse their libraries and stream content directly onto your projector.
- Smart TVs: If your projector has built-in smart TV capabilities, connect it to your Wi-Fi network and access popular streaming apps directly from the projector. These apps may include Netflix, YouTube, Amazon Prime Video, and more, depending on the projector’s capabilities.
- Mobile Devices: Connect your smartphone or tablet to the projector either wirelessly or with an HDMI adapter. Use streaming apps on your mobile device, such as Netflix or YouTube, and cast the content to the projector for larger-than-life viewing.
- TV Streaming Services: Some projectors offer built-in streaming services, allowing you to access popular platforms directly without the need for external devices. Examples of such projectors include those with Android TV or Roku operating systems.
- PC/Mac: Connect your computer to the projector using an HDMI or VGA cable. Access TV channels or streaming services via a web browser or dedicated apps available for your computer.
Take advantage of these various methods to access TV channels and streaming services on your projector. Keep in mind that the availability and functionality of certain streaming services and apps may vary depending on the region and the specific projector model. Refer to the user manual of your projector or the instructions provided by the streaming service providers for further guidance on accessing their content.
Adjusting the Picture Quality
When using a projector for TV viewing, adjusting the picture quality ensures a visually satisfying experience. Here are some tips on how to optimize the picture quality of your projector:
- Image Calibration: Most projectors offer image calibration settings to fine-tune the picture quality. Use features like color temperature, gamma, and color space to adjust the overall image appearance to your liking.
- Color Settings: Experiment with color settings to achieve accurate and vibrant colors. Adjust the saturation, hue, and color balance to enhance the richness and realism of the image.
- Brightness and Contrast: Adjust the brightness and contrast settings to optimize the overall picture quality. Increase the brightness if the image appears too dim, and decrease it if it appears too bright. Fine-tune the contrast level to achieve a balanced and dynamic image.
- Sharpness: Adjust the sharpness setting to enhance the image details without introducing excessive artifacts. Ensure that the sharpness is set at a level that produces crisp and clear visuals without any visible distortion.
- Aspect Ratio: Ensure the projector’s aspect ratio matches the content being displayed. Select the appropriate aspect ratio, such as 16:9 for widescreen content, to prevent image distortion or black bars.
- Noise Reduction: Use the noise reduction feature to minimize any visual noise or artifacts in the image. Adjust the noise reduction level to balance image clarity and smoothness, depending on the content being viewed.
- Frame Interpolation: Some projectors have a frame interpolation feature that can reduce motion blur and provide smoother movement in fast-paced scenes. Experiment with this feature to see if it enhances the overall viewing experience for you.
- Screen Uniformity: Ensure that the projected image appears evenly lit across the entire screen. If you notice any hotspots or uneven lighting, adjust the projector’s position or make use of screen adjustment options available in the projector settings.
- Image Presets: Many projectors come with pre-defined image presets for different scenarios, such as cinema, gaming, or sports. Explore these presets to see if they improve the picture quality for your specific content.
- Regular Maintenance: Regularly clean the projector lens and vents to ensure optimal image quality. Dust or dirt on the lens can impact image sharpness and clarity.
By adjusting these picture quality settings, you can personalize the viewing experience and ensure that the projected image meets your preferences. Experiment with different settings, but remember to strike a balance between vibrant colors, sharpness, and natural-looking visuals. Each projector model may have slightly different options and naming conventions for these settings, so refer to the user manual for specific instructions relevant to your device.
Enhancing the Audio Experience
While projectors provide stunning visuals, pairing them with a quality audio setup can take your TV-watching experience to the next level. Here are some tips to enhance the audio experience when using a projector:
- External Speakers: Connect external speakers to your projector to enjoy enhanced audio quality. Depending on your setup and preferences, you can choose from various options such as soundbars, home theater systems, or bookshelf speakers.
- Soundbar: A soundbar is a popular choice as it offers a streamlined solution for improved audio. It delivers higher quality sound compared to built-in projector speakers and is relatively easy to install and set up. Place the soundbar in front of or beneath the projector screen for optimal audio performance.
- Home Theater System: For a more immersive audio experience, consider setting up a home theater system with dedicated speakers, including a center speaker, front speakers, rear speakers, and a subwoofer. This setup provides surround sound, enveloping you in a truly cinematic audio environment.
- Wireless Speakers: If you prefer a clutter-free setup, opt for wireless speakers that can be connected to your projector via Bluetooth or Wi-Fi. This allows for flexible speaker placement without the need for physical connections.
- Audio Outputs: Ensure your projector has audio output options, such as an audio jack or HDMI ARC (Audio Return Channel), to connect external audio devices. This allows the projector to pass audio signals to external speakers or a sound system.
- Sound Modes and Equalization: Many projectors offer sound modes or equalization options to customize the audio output based on your preferences and content type. Experiment with these settings to find the balance between dialogue clarity, bass response, and overall sound quality.
- Positioning of Speakers: Place your speakers strategically for optimal sound distribution. Position front speakers at ear level, center speaker above or below the projector screen, and rear speakers behind the viewing area. Experiment with speaker placement to achieve the best audio imaging and surround sound effects.
- Audio Calibration: Some projectors have built-in audio calibration features that automatically optimize the sound settings based on the acoustics of your viewing area. Consult the user manual or on-screen menus to access these calibration options.
- Testing and Adjusting: Play different types of content, such as movies, TV shows, and music, to test the audio performance. Adjust the volume, balance, and equalization settings to achieve the desired audio quality for each type of content.
- Subwoofer: Consider adding a subwoofer to your audio setup if you desire deeper bass response and a more immersive audio experience. A well-placed subwoofer can greatly enhance the impact of sound effects and low-frequency sounds in movies and games.
By implementing these tips, you can create an immersive and cinematic audio experience to complement the stunning visuals of your projector. Each audio setup may require specific adjustments and configurations, so consult the user manuals of your projector and external audio devices for optimal settings and instructions.
Troubleshooting Common Issues
While using a projector for TV viewing, you may encounter some common issues that can be resolved with simple troubleshooting techniques. Here are some tips to help you troubleshoot and address these issues:
- No Power or No Image: Check the power connection of the projector and ensure it is securely plugged in. If the projector has a standby mode, make sure it is turned on. Additionally, check the input source and ensure that the correct input is selected on the projector.
- Image Quality Issues: If you notice a blurry or distorted image, check the focus settings on the projector to ensure the image is sharp. Adjust the keystone correction settings to align the image properly. If the issue persists, ensure that the projector lens is clean and free from any smudges or dust particles.
- Color Issues: If you experience color inaccuracies or a washed-out image, check the color settings on the projector. Adjust the color temperature, saturation, and color balance settings to achieve more accurate and vibrant colors. If necessary, consult the user manual for specific instructions on color calibration.
- No Sound or Low Volume: Verify that the audio cables are properly connected and that the volume on the projector and external speakers is turned up. Ensure that the audio source is selected correctly on both the projector and the audio device. If using external speakers, verify that they are powered on, properly connected, and the volume is adjusted appropriately.
- Remote Control Issues: If the projector remote control is not functioning, ensure that the batteries are properly inserted and have sufficient power. Check for any obstructions between the remote control and the projector’s IR sensor. If necessary, replace the batteries or consider using a universal remote control compatible with your projector.
- Overheating: If the projector becomes hot or automatically shuts off due to overheating, check that the ventilation vents are not obstructed. Ensure proper airflow around the projector by providing adequate space and avoiding enclosed cabinets or crowded shelves. Clean the projector’s air filter regularly to prevent dust buildup and improve heat dissipation.
- Input Signal Issues: If you are experiencing issues with the input signal, ensure that the cables connecting the devices are securely plugged in. Check the source device for any connectivity or compatibility issues. Test the cables with different devices or try using alternative input ports on the projector to diagnose and resolve the problem.
- Firmware Updates: Check if there are any firmware updates available for your projector. Visit the manufacturer’s website and follow the instructions to download and install the latest firmware version. Firmware updates can often address known issues, improve performance, and introduce new features.
If you encounter persistent issues that cannot be resolved through troubleshooting, consult the user manual of your projector or contact the manufacturer’s customer support for further assistance. They will be able to help you address specific issues related to your projector model.
Final Thoughts and Recommendations
Watching TV on a projector can provide a truly immersive and cinematic experience right in the comfort of your own home. By following the steps outlined in this guide, you can optimize your TV viewing setup and enhance the overall enjoyment of your projector. Here are some final thoughts and recommendations:
First and foremost, invest in a high-quality projector that suits your specific needs and preferences. Consider factors such as resolution, brightness, contrast ratio, and connectivity options to ensure you choose the right projector for your viewing area.
Pair your projector with a suitable projection screen that complements the projector’s capabilities and enhances the image quality. Select a screen material, size, and aspect ratio that best suits your viewing preferences and space limitations.
Take the time to properly connect your TV, external devices, and audio equipment to the projector. Ensure that all cables and connections are secure and functioning correctly. Experiment with different settings and optimizations to achieve the best possible picture and audio quality.
Optimizing the lighting in your viewing area is crucial for an immersive TV-watching experience on a projector. Minimize direct light on the screen, use indirect lighting, and avoid highly reflective surfaces to enhance the projected image quality.
Take advantage of the different options available to access TV channels and streaming services. Connect cable or satellite TV, use over-the-air antennas, or leverage streaming devices to enjoy a wide range of entertainment content on your projector.
Regularly maintain and clean your projector to ensure optimal performance and longevity. Clean the lens and vents to prevent dust buildup, and replace the projector’s air filter as recommended by the manufacturer.
Finally, remember that every home theater setup is unique, and your personal preferences may vary. Experiment with different settings and configurations to find what works best for you.
With the right projector, projector screen, audio setup, and lighting conditions, you can create a truly immersive and enjoyable TV-watching experience in your own home. Whether you’re enjoying movies, TV shows, sports events, or gaming sessions, a well-optimized projector setup can bring your entertainment to life like never before.