
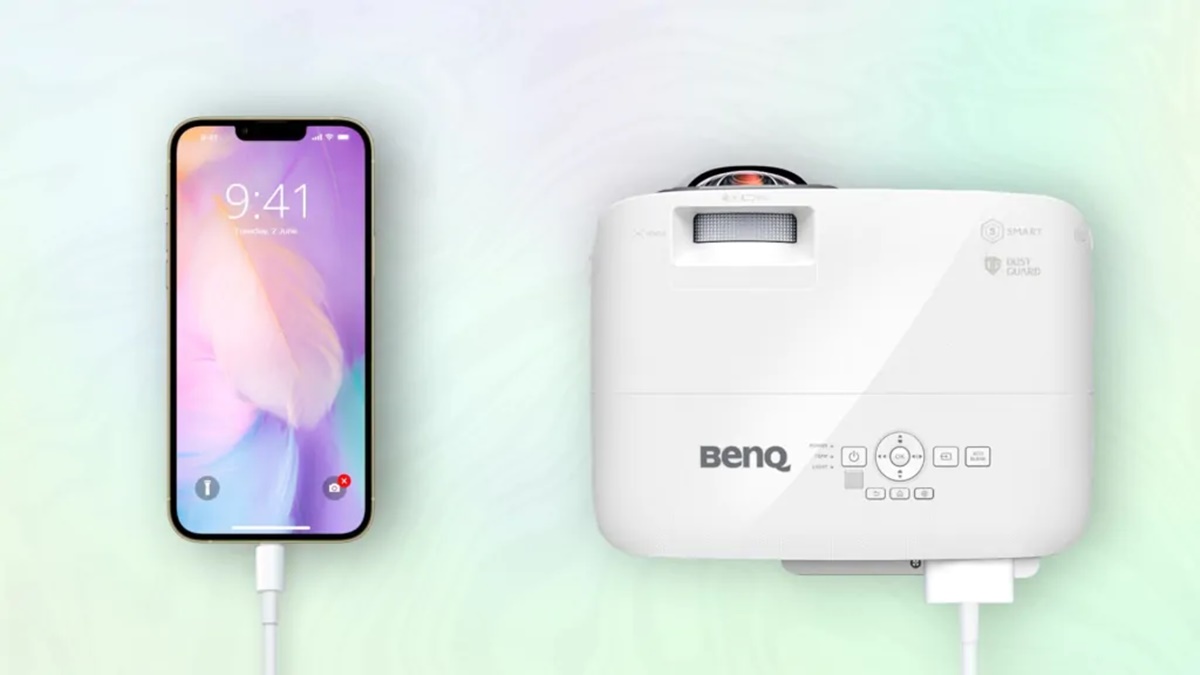
Connecting your iPhone to the projector
Watching Netflix on a projector can give you a larger-than-life cinematic experience right in the comfort of your own home. To enjoy your favorite movies and TV shows on a projector from your iPhone, you’ll need to follow a few simple steps. Here’s how to get started:
1. Check the projector’s input ports: Before connecting your iPhone, make sure that your projector has the necessary input ports. Most projectors have HDMI or VGA ports, which are compatible with iPhones.
2. Gather the required cables: Depending on the type of projector and your iPhone’s model, you will need either an HDMI to Lightning cable or a VGA to Lightning cable. These cables can be purchased online or at electronics stores.
3. Connect the cables: Once you have the appropriate cable, connect one end to the HDMI or VGA port on the projector and the other end to the Lightning port on your iPhone. Ensure that the connections are inserted firmly.
4. Switch the projector to the correct input source: Use the projector’s remote control or control panel to select the input source corresponding to the port you connected your iPhone to (e.g. HDMI or VGA).
5. Unlock your iPhone: To establish a connection between your iPhone and the projector, make sure your iPhone is unlocked. If prompted, enter your passcode or use Touch ID or Face ID to unlock your device.
6. Configure the display settings: By default, your iPhone should mirror the display to the projector. If not, go to the “Settings” app on your iPhone, tap on “Display & Brightness”, and select “Mirror” or “Duplicate” display.
7. Adjust the projector focus and zoom: Use the projector’s focus and zoom controls to achieve a clear and properly sized image on the screen or wall. Follow the projector’s user manual for instructions on adjusting these settings.
8. Launch the Netflix app: On your iPhone’s home screen, find the Netflix app and tap on it to launch the application.
9. Sign in to your Netflix account: If you already have a Netflix account, enter your email and password to sign in. If you don’t have an account, you can sign up for a new one directly from the app.
10. Select and play a movie or TV show: Browse through the available content on Netflix and choose the movie or TV show you want to watch. Tap on the play button to start streaming on the projector.
Now you can sit back, relax, and enjoy your favorite Netflix content on the big screen. Remember to keep your iPhone connected to the projector throughout the playback to avoid interruptions. Happy streaming!
Setting up your home Wi-Fi network
Before you can stream Netflix on your projector from your iPhone, you need to ensure that your home Wi-Fi network is properly set up. Here are the steps to get your network ready:
1. Choose a reliable internet service provider (ISP): To have a stable and fast Wi-Fi connection, select a reputable ISP that offers high-speed internet in your area.
2. Select an appropriate Wi-Fi router: Invest in a reliable Wi-Fi router that can provide sufficient coverage for your home. Look for a router with good range and multiple antennas to ensure optimal signal strength.
3. Position the Wi-Fi router correctly: Place your Wi-Fi router in a central location of your home, away from obstructions like walls and electronic devices that could interfere with the signal. Ideally, position it at a higher elevation to reduce signal interference from below.
4. Connect the router to your modem: Using an Ethernet cable, connect the router’s WAN (Wide Area Network) port to the Ethernet port of your modem. This establishes the connection between your home network and the internet.
5. Power on the router and modem: Plug in the power cables for both the router and modem and turn them on. Wait for them to fully boot up and establish a connection.
6. Access the router’s settings: Open a web browser on your computer or iPhone and enter the router’s default IP address in the address bar. This will typically be something like “192.168.1.1” or “192.168.0.1.” Check the router’s manual or manufacturer’s website for the exact address.
7. Set up your Wi-Fi network: Once you access the router’s settings, follow the instructions provided to set up your Wi-Fi network. Assign a unique name (SSID) for your network and choose a strong password to secure it.
8. Configure additional settings: In the router settings, you may have the option to customize additional settings, such as enabling guest networks, setting up parental controls, or optimizing the network for streaming.
9. Connect your iPhone to the Wi-Fi network: On your iPhone, go to the “Settings” app and tap on “Wi-Fi.” Select your Wi-Fi network from the list and enter the password when prompted. Your iPhone will now be connected to your home Wi-Fi network.
Ensure that your Wi-Fi network is stable and you have a strong signal before attempting to stream Netflix on your projector. You can test the connection by browsing the internet or running a speed test. With a properly set up Wi-Fi network, you’ll be ready to enjoy seamless streaming on your projector.
Installing the Netflix app on your iPhone
In order to watch Netflix on your projector from your iPhone, you’ll need to have the Netflix app installed on your device. Here’s a step-by-step guide to help you install the Netflix app:
1. Open the App Store: On your iPhone, locate and tap on the App Store icon. It is usually found on the home screen.
2. Search for the Netflix app: Once you’re in the App Store, tap on the search bar at the bottom of the screen and type “Netflix” into the search field. A list of relevant apps will appear as you type.
3. Select the Netflix app: From the list of search results, look for the official Netflix app. The app icon should display the familiar red Netflix logo. Tap on it to open the Netflix app page.
4. Check the app details: Before proceeding with the installation, review the app details including the app size, compatibility, and user reviews. It’s a good idea to make sure that your iPhone meets the requirements and that the app has positive feedback from other users.
5. Initiate the installation: To install the Netflix app, tap on the “Get” or “Install” button on the app page. You may be prompted to enter your Apple ID password or use Touch ID or Face ID authentication to authorize the installation.
6. Wait for the installation to complete: The app will begin downloading and installing on your iPhone. The progress will be displayed on the app icon on your home screen. Depending on your internet connection and the app’s size, the installation process may take a few minutes.
7. Launch the Netflix app: Once the installation is complete, the Netflix app icon will appear on your home screen. Tap on it to open the app.
8. Sign in or create a new account: If you already have a Netflix account, enter your email and password to sign in. If you’re new to Netflix, you can sign up for a new account directly within the app. Follow the on-screen instructions to complete the process.
9. Keep the Netflix app updated: To ensure you have the latest features and bug fixes, it’s important to keep the Netflix app updated. The App Store will notify you when updates are available, or you can enable automatic updates for all apps in your device settings.
With the Netflix app successfully installed on your iPhone, you’re now ready to stream your favorite movies and TV shows on your projector. Just make sure your iPhone is connected to the projector using the appropriate cable or adapter, and follow the steps to play your desired content on the big screen.
Launching the Netflix app and signing in
Once you’ve installed the Netflix app on your iPhone, you can launch the app and sign in to your Netflix account. Here’s how:
1. Locate the Netflix app: On your iPhone’s home screen, find the Netflix app icon. It is typically represented by the red Netflix logo. Tap on the app icon to launch the Netflix app.
2. Wait for the app to load: After tapping on the Netflix app icon, the app will load and display the Netflix home screen. This screen is where you can browse and search for movies and TV shows.
3. Tap “Sign In”: On the Netflix home screen, you will see a “Sign In” button. Tap on it to access the sign-in screen.
4. Enter your Netflix email and password: On the sign-in screen, enter the email address associated with your Netflix account in the provided field. Then, enter your Netflix password in the corresponding field. Make sure to double-check that the information is correct before proceeding.
5. Select “Sign In”: After entering your email and password, tap on the “Sign In” button to proceed. The Netflix app will attempt to sign you into your account using the provided information.
6. Choose the profile (if applicable): If your Netflix account has multiple profiles set up, the app will display a screen where you can select your preferred profile. Tap on your profile to continue.
7. Explore the Netflix app: Once signed in, you will be taken to the Netflix home screen. From here, you can browse through the available content, view recommendations, search for specific movies or TV shows, and access your account settings.
8. Access your watchlist (if applicable): If you have previously added movies or TV shows to your Netflix watchlist, you can access it by tapping on the “My List” tab or icon within the app. This allows you to quickly find and play the content you have saved for later.
9. Keep your account secure: It is important to protect your Netflix account from unauthorized access. Set up a strong and unique password, and consider enabling two-factor authentication for an added layer of security.
Now that you have successfully launched the Netflix app on your iPhone and signed in to your account, you can start enjoying a wide range of movies and TV shows. Browse the app, find something you want to watch, and get ready to stream it on your projector for an immersive viewing experience.
Connecting the iPhone to the projector using a cable
If you want to connect your iPhone to a projector for streaming Netflix, using a cable is a reliable and straightforward option. Follow these steps to connect your iPhone to the projector using a cable:
1. Check the projector’s input ports: Before connecting your iPhone, ensure that the projector has compatible input ports. Most projectors have HDMI or VGA ports, which can be used with iPhones.
2. Get the right cable: Depending on the projector and your iPhone model, you’ll need either an HDMI to Lightning cable or a VGA to Lightning cable. These cables are available for purchase online or at electronics stores.
3. Connect the cable to the projector: Plug one end of the cable into the corresponding HDMI or VGA port on the projector. Make sure to connect it securely to ensure a stable connection.
4. Connect the cable to your iPhone: Take the other end of the cable and connect it to the Lightning port on your iPhone. Ensure that the connection is firm, as a loose connection may result in intermittent display or audio issues.
5. Switch the projector to the correct input source: On the projector’s remote control or control panel, select the input source that matches the port you connected your iPhone to (e.g., HDMI or VGA).
6. Unlock your iPhone: To establish a connection between your iPhone and the projector, unlock your iPhone using your passcode, Touch ID, or Face ID. This will allow the output to be displayed on the projector.
7. Configure display settings (if needed): Your iPhone should automatically mirror the display to the projector. If not, go to the “Settings” app on your iPhone, tap “Display & Brightness,” and select “Mirror” or “Duplicate Display” to enable mirroring.
8. Adjust the projector settings: Use the projector’s focus and zoom controls to adjust the image for optimal display on the screen or wall. Refer to the projector’s user manual for instructions on adjusting these settings.
9. Launch the Netflix app on your iPhone: On your iPhone’s home screen, locate the Netflix app and tap on it to open the application.
10. Sign in to your Netflix account: If you have an existing Netflix account, enter your email and password to sign in. For new users, you can sign up for a new account directly from the Netflix app.
Now, you can enjoy streaming movies and TV shows from Netflix on the big screen of your projector. Keep your iPhone connected to the projector throughout the viewing session to ensure uninterrupted playback.
Connecting the iPhone to the projector using a wireless adapter
If you prefer a wireless connection, you can connect your iPhone to a projector using a wireless adapter. Follow these steps to set up the connection:
1. Check the projector’s compatibility: Before proceeding, verify that your projector supports wireless connectivity. Some projectors have built-in Wi-Fi capabilities, while others may require the use of a wireless adapter.
2. Get a compatible wireless adapter: Purchase a wireless adapter that is compatible with your projector and iPhone. Look for adapters that support screen mirroring or AirPlay functionality.
3. Connect the wireless adapter to the projector: Plug the wireless adapter into the appropriate port on the projector. For projectors with HDMI ports, an HDMI wireless adapter is usually the preferred choice.
4. Switch the projector to the correct input source: Use the projector’s remote control or control panel to select the input source associated with the wireless adapter (e.g., HDMI).
5. Connect your iPhone to the wireless adapter: On your iPhone, open the “Settings” app and tap on “Wi-Fi.” Look for the Wi-Fi network name (SSID) being broadcasted by the wireless adapter. Tap on it to connect your iPhone to the adapter.
6. Configure the wireless adapter: Follow the instructions provided with your wireless adapter to complete the setup process. This may involve entering specific settings or passwords to establish a connection between your iPhone and the adapter.
7. Enable screen mirroring or AirPlay: Once the wireless adapter is connected to your iPhone, enable the screen mirroring or AirPlay feature. On your iPhone, swipe up from the bottom of the screen (or down from the top-right on iPhone X or later models) to access the Control Center. Tap on the screen mirroring (or AirPlay) icon and select the wireless adapter from the list of available devices.
8. Adjust the projector settings: Use the projector’s focus and zoom controls to adjust the projected image for optimal display on the screen or wall. Refer to the projector’s user manual for instructions on adjusting these settings.
9. Launch the Netflix app on your iPhone: From your iPhone’s home screen, open the Netflix app by tapping on its icon.
10. Sign in to your Netflix account: If you have an existing Netflix account, enter your email and password to sign in. If you’re a new user, you can sign up for a new account directly from the Netflix app.
Now you can enjoy streaming Netflix content on your projector without the need for cables. Simply make sure that your iPhone stays connected to the wireless adapter throughout your viewing session to avoid any interruptions.
Adjusting the projector settings for optimal display
To ensure that you have the best possible viewing experience, it’s important to adjust the projector settings for optimal display when connecting your iPhone. Here’s how you can make the necessary adjustments:
1. Focusing the image: Use the focus ring located on the lens of the projector to sharpen the image. Rotate the focus ring clockwise or counterclockwise until the image becomes clear and well-defined.
2. Zooming in or out: If necessary, adjust the zoom control to enlarge or reduce the size of the projected image. This can be useful if you want to fill the entire screen or wall with the image or if you need to adjust the aspect ratio to match the content.
3. Keystone correction: If the projector is positioned at an angle or the projection surface is not perfectly aligned, the image may appear distorted. Use the keystone correction feature on the projector to correct this distortion and ensure a straight and proportional image.
4. Brightness and contrast: Adjust the brightness and contrast settings on the projector to achieve the desired level of image brightness and contrast. This will help enhance the clarity and visibility of the projected content, depending on the ambient lighting conditions in the room.
5. Color settings: Calibrate the color settings on the projector to accurately reproduce the colors in the content being displayed. Use the projector’s built-in color options and settings to adjust the color temperature, saturation, and hue until the colors appear vibrant and true to life.
6. Aspect ratio: Set the appropriate aspect ratio on the projector to match the content you are watching. Most projectors offer options such as 4:3 (standard), 16:9 (widescreen), and other aspect ratio settings. Select the one that best fits the content and projection surface.
7. Noise reduction: If you notice any unwanted visual noise or artifacts in the projected image, utilize the projector’s noise reduction feature to minimize these imperfections. Adjust the noise reduction settings to strike a balance between reducing noise and preserving image sharpness.
8. Projection distance and screen size: Consider the distance between the projector and the projection surface, as well as the desired screen size. Refer to the projector’s manual to determine the optimal projection distance and screen size for the best image quality.
9. Test and refine: After making adjustments, take the time to review the projected image and make any necessary refinements. Pay attention to details such as text clarity, color accuracy, and overall image quality. Fine-tune the settings until you are satisfied with the projected display.
Keep in mind that the specific options and settings available may vary depending on the model and brand of the projector. Consult the projector’s user manual or online documentation for detailed instructions on adjusting the settings for your particular device. With proper adjustment, you can optimize the projector display and enjoy a stunning visual experience while streaming Netflix content from your iPhone.
Selecting and playing a movie or TV show on Netflix
Once you have connected your iPhone to the projector and configured the settings, it’s time to select and play a movie or TV show on Netflix. Follow these steps to start streaming:
1. Launch the Netflix app: On your iPhone’s home screen, locate the Netflix app icon and tap on it to open the application.
2. Sign in to your Netflix account: If you’re not already signed in, enter your email and password to log in to your Netflix account. If you don’t have an account, you will be prompted to create one.
3. Browse or search for content: On the Netflix home screen, you will find a selection of recommended movies and TV shows. You can browse through these suggestions, or use the search feature to find specific content by title, genre, or actor.
4. Select a movie or TV show: When you find a movie or TV show you want to watch, tap on its thumbnail or title to open the content details page.
5. Read the description and reviews: On the content details page, you’ll find a brief description of the movie or TV show, as well as user ratings and reviews. This can help you decide if the content is something you’re interested in.
6. Play the content: To start streaming the selected movie or TV show, tap on the play button or icon. Wait a few seconds for the content to buffer, and it will start playing on the projector screen.
7. Control playback: While the content is playing, you can control the playback using the options available on the Netflix app. Tap on the screen to reveal the playback controls, such as play/pause, volume, and progress bar. You can also adjust the subtitles, audio language, or toggle the full-screen mode.
8. Explore additional features: Netflix offers various additional features to enhance your viewing experience. These include options to add content to your watchlist, access to personalized recommendations, and the ability to create multiple user profiles. Explore these features to make the most of your Netflix experience.
9. Enjoy your content on the projector: Sit back, relax, and enjoy the movie or TV show on the big screen of your projector. Make sure to remain connected to the projector and keep your iPhone nearby for easy control of playback options.
10. Switch to different content: If you want to switch to a different movie or TV show, simply go back to the Netflix app and repeat the process of browsing or searching for new content. The selection is vast, so you can explore and enjoy Netflix’s extensive library of movies and TV shows to your heart’s content.
With these steps, you can easily select and play your favorite movies and TV shows on Netflix, delivering an immersive viewing experience on your projector.
Remaining connected to Wi-Fi during playback
When streaming Netflix on your projector from your iPhone, it is essential to remain connected to a stable Wi-Fi network throughout the playback. Here are some tips to help you stay connected:
1. Ensure a strong Wi-Fi signal: Place your iPhone and projector within range of your Wi-Fi router to maintain a strong and steady signal. Avoid obstructions such as walls or large objects that could potentially interfere with the Wi-Fi connection.
2. Avoid network congestion: Be aware of other devices connected to your Wi-Fi network that might consume a significant amount of bandwidth. Streaming Netflix in high-definition can be data-intensive, so minimize simultaneous downloads, uploads, or online gaming activities that could impact your network performance.
3. Use a dual-band Wi-Fi router: If possible, consider using a dual-band Wi-Fi router that supports both 2.4 GHz and 5 GHz frequency bands. The 5 GHz band typically offers faster speeds and better performance, especially if there are multiple devices connected to the network.
4. Restart your Wi-Fi router: If you experience any connectivity issues or if the network becomes sluggish, try rebooting your Wi-Fi router. Simply unplug it from the power source, wait for a few seconds, then plug it back in. This can help refresh the Wi-Fi connection and resolve any temporary issues.
5. Disable background app refresh and notifications: To optimize network performance and prevent interruptions, consider disabling background app refresh and unnecessary notifications. This will reduce the amount of network resources utilized by other apps on your iPhone, allowing a smoother streaming experience on Netflix.
6. Close unused apps: Close any unused apps running in the background on your iPhone, as they may consume network resources. This will free up bandwidth for Netflix, leading to better streaming quality and minimizing the chance of buffering or lagging during playback.
7. Regularly update your iPhone and Netflix app: Keep your iPhone’s software and the Netflix app up to date. Updating the software ensures that you have the latest features, bug fixes, and security enhancements. Periodically check for updates in the App Store and install them as needed.
8. Periodically check your internet speed: Run an internet speed test to verify that your Wi-Fi network is delivering the necessary speed for seamless streaming. If you notice consistently slow speeds, contact your internet service provider to troubleshoot and resolve any connectivity issues.
By following these tips, you can maintain a reliable and uninterrupted Wi-Fi connection while streaming Netflix on your projector. A stable connection will ensure smooth playback and an enjoyable viewing experience on the big screen.
Troubleshooting common issues
While streaming Netflix on your projector from your iPhone, you may encounter some common issues that can affect your viewing experience. Here are some troubleshooting tips to help you resolve these issues:
1. No display on the projector: If you’re not seeing any display on the projector, ensure that it is powered on and connected correctly to your iPhone. Double-check the cable connections and make sure the projector is set to the correct input source. Also, verify that your iPhone’s screen mirroring or AirPlay settings are properly configured.
2. Intermittent or buffering playback: If your Netflix playback is buffering or experiencing intermittent playback, it may be due to a slow or unstable internet connection. Check your Wi-Fi signal strength and consider moving your iPhone and projector closer to the Wi-Fi router. You can also try restarting your router and clearing the cache within the Netflix app to improve streaming performance.
3. Poor video quality: If the video quality is poor or pixelated, it could be due to a slow internet connection or a low-quality streaming setting in the Netflix app. Verify that your internet speed meets Netflix’s recommended requirements and adjust the video quality settings in the app to ensure a better streaming experience.
4. No sound on the projector: If you have no sound coming from the projector, check if the projector or external speakers are properly connected. Verify that the volume is not muted on both your iPhone and the projector. Also, ensure that the audio output settings on your iPhone are correctly configured to play through the projector or external speakers.
5. App freezing or crashing: If the Netflix app freezes or crashes on your iPhone, force close the app by double-clicking the home button (or swiping up from the bottom of the screen on iPhone X or later models) to access the app switcher. Swipe left or right to locate the Netflix app preview, and swipe it up or off the screen to close it. Then, relaunch the app to see if the issue is resolved. If the problem persists, try updating the Netflix app or reinstalling it on your iPhone.
6. No subtitles or captions: If you’re unable to see subtitles or captions while streaming Netflix, ensure that the content you’re watching has subtitles available. On the Netflix app, try enabling subtitles manually by tapping on the screen during playback, selecting the speech bubble icon, and choosing the desired language for subtitles. If the issue persists, check the subtitle settings in the app and on your iPhone for any adjustments.
7. Incompatible projector or cable: If you’re experiencing persistent connectivity issues or display problems, it’s possible that your projector or cable is not fully compatible with your iPhone. Confirm the compatibility of your devices and cables, and consider trying a different cable or a wireless adapter that is specifically designed for your iPhone and projector.
8. Reach out for support: If you have exhausted all troubleshooting options and the issue persists, it may be necessary to contact customer support for assistance. Reach out to the manufacturer of your projector, the Netflix support team, or consult online forums for further help and guidance.
By implementing these troubleshooting tips, you can effectively address common issues that may arise while streaming Netflix on your projector from your iPhone. Enjoy a seamless viewing experience with the help of these troubleshooting techniques.
Tips for enhancing your viewing experience on a projector
Streaming Netflix on a projector can elevate your viewing experience to new heights. To make the most out of your projector setup, here are some tips to enhance your viewing experience:
1. Create a dedicated viewing environment: Set up a dedicated viewing area to provide an immersive experience. Choose a room with minimal ambient lighting and control the light sources to minimize glare on the projection surface. Consider using blackout curtains or blinds to darken the room effectively.
2. Optimize the screen or wall surface: Invest in a high-quality projection screen or use a smooth, light-colored wall as a projection surface. Ensure that the surface is clean and free from any imperfections or textures that may affect the image quality. A properly optimized surface can enhance the sharpness and clarity of the projected image.
3. Position the projector correctly: Place the projector at the proper distance and angle to achieve the desired screen size and aspect ratio. Refer to the projector’s user manual for recommended projection distances and screen dimension calculations. Ensuring proper positioning will result in a well-focused and uniform image.
4. Calibrate color and contrast settings: Adjust the color, contrast, brightness, and other picture settings on the projector to achieve accurate and vibrant colors. Use calibration tools or a calibration disc to fine-tune the settings. This will help deliver a more realistic and immersive viewing experience.
5. Invest in quality audio equipment: Enhance your viewing experience by connecting your projector to a separate audio system, such as a home theater surround sound setup or external speakers. This will provide immersive and dynamic audio that complements the large-screen visuals.
6. Consider ambient lighting: Manage ambient lighting appropriately to enhance contrast and image perception. Dim or turn off any lights in the viewing area to minimize distractions and improve the clarity of the projected image. Soft, indirect lighting, such as backlights behind the screen or wall, can create a pleasant viewing atmosphere.
7. Take breaks and stay comfortable: Remember to take short breaks during extended viewing sessions to rest your eyes. Sitting in a comfortable position and using ergonomic seating arrangements will contribute to your overall viewing enjoyment.
8. Utilize streaming quality options: Adjust the streaming quality settings within the Netflix app to match the capabilities of your internet connection and projector setup. If you have a slower connection, select a lower quality option to ensure smooth playback without buffering.
9. Explore additional streaming devices: Consider using external media streaming devices, such as a Chromecast or Apple TV, to enhance your streaming capabilities and add additional features. These devices can offer enhanced compatibility and ease of use with your projector setup.
10. Discover a variety of content: Netflix offers a vast library of movies, TV shows, and documentaries. Explore various genres, languages, and styles to broaden your viewing horizons and discover new favorites.
By following these tips, you can elevate your viewing experience on a projector and immerse yourself in the world of movies and TV shows with Netflix. Enjoy the immersive visuals and captivating audio that a projector setup can provide.