
Step 1: Check the Compatibility of Your iPad
Before attempting to connect your iPad to a wired Ethernet internet port, it is important to ensure that your device is compatible with this type of connection. While most newer iPad models come with built-in support for Ethernet connectivity, it is always advisable to double-check to avoid any compatibility issues. Here’s what you need to do:
1. Check your iPad model: Begin by identifying the iPad model you own. The easiest way to do this is by going to the “Settings” app on your iPad, then tapping on “General” and selecting “About”. Look for the “Model” number, which should be something like “A1876” or “A1980”.
2. Verify Ethernet compatibility: Once you have your iPad model number, search online to confirm if the specific model you own supports Ethernet connectivity. Apple’s official support website or user forums can be great resources for this information. Alternatively, you can consult the user manual that came with your iPad.
3. Check for Lightning port: Another important factor to consider is the presence of a Lightning port on your iPad. The Lightning port is a small, reversible, and commonly used connector on newer iPad models. It allows for the connection of various accessories, including Ethernet adapters.
4. Consult with Apple Support: If you are unsure about the Ethernet compatibility of your iPad model or need further assistance, it is best to reach out to the official Apple support team. They can provide you with accurate information based on your specific iPad model and guide you through the process of connecting to a wired Ethernet internet port.
By ensuring the compatibility of your iPad with a wired Ethernet connection upfront, you can avoid any frustrating issues and make the setup process much smoother. With this information in hand, you are now ready to move on to the next step of connecting your iPad to a wired Ethernet internet port.
Step 2: Get a Lightning to USB Camera Adapter
To connect your iPad to a wired Ethernet internet port, you will need a Lightning to USB Camera Adapter. This adapter serves as a bridge between your iPad and the Ethernet connection. Here is how you can obtain the necessary adapter:
1. Determine the correct adapter: There are different variations of the Lightning to USB Camera Adapter, so it is essential to choose the right one for your iPad model. Apple offers a few options, including a USB 3.0 version and a USB 2.0 version. Refer to your iPad model number and consult Apple’s official website or authorized retailers to ensure you purchase the appropriate adapter.
2. Purchase the adapter: Once you have identified the correct Lightning to USB Camera Adapter, you can purchase it directly from the Apple Store, both online and offline. Additionally, you can find it at authorized retailers that sell Apple products.
3. Consider third-party options: If you prefer, you can explore third-party options for the Lightning to USB Camera Adapter. These adapters may be more affordable or offer additional features, but it is crucial to ensure compatibility and reliability before purchasing. Read reviews and check compatibility specifications to make an informed decision.
4. Verify authenticity: When purchasing the Lightning to USB Camera Adapter, make sure to verify its authenticity. Counterfeit adapters may not function properly, and they could potentially damage your iPad. Stick to reputable sources such as the Apple Store or authorized retailers to ensure you are getting a genuine product.
Once you have obtained the Lightning to USB Camera Adapter, you are one step closer to connecting your iPad to a wired Ethernet internet port. In the next step, we will guide you on how to connect the Lightning to USB Camera Adapter to your iPad.
Step 3: Connect the Lightning to USB Camera Adapter to Your iPad
Now that you have the Lightning to USB Camera Adapter, it’s time to connect it to your iPad. Follow these steps to establish the connection:
1. Locate the Lightning port: Look for the Lightning port on your iPad. It is usually located at the bottom of the device. The Lightning port is a small rectangular connector.
2. Remove any protective covers or cases: If you have a protective cover or case on your iPad, you may need to temporarily remove it to access the Lightning port. Ensure that your iPad is clean and free from any debris that could hinder the connection.
3. Connect the Lightning to USB Camera Adapter: Take the Lightning to USB Camera Adapter and insert the USB end into the Lightning port on your iPad. Make sure to insert it firmly but gently to avoid any damage to the connector or your iPad.
4. Safely secure the connection: Once the adapter is connected to the Lightning port, ensure that it is securely in place. Check for any wobbling or loose connections. A secure connection is crucial for the successful transmission of data.
5. Verify the connection: To confirm that the Lightning to USB Camera Adapter is properly connected, look for the pop-up message on your iPad. It may display a prompt asking for permission to use the connected device. Tap “Allow” or “Trust” to proceed.
With the Lightning to USB Camera Adapter successfully connected to your iPad, you have the physical bridge that enables you to connect your iPad to a wired Ethernet internet port. In the next step, we will guide you through connecting an Ethernet cable to the USB Camera Adapter.
Step 4: Connect an Ethernet Cable to the USB Camera Adapter
Now that you have the Lightning to USB Camera Adapter connected to your iPad, it’s time to connect an Ethernet cable to the adapter. Follow these steps to establish the connection:
1. Identify the USB port on the Lightning to USB Camera Adapter: The Lightning to USB Camera Adapter has a USB port where you will connect your Ethernet cable. Locate the USB port on the adapter, which is usually located on one end of the adapter.
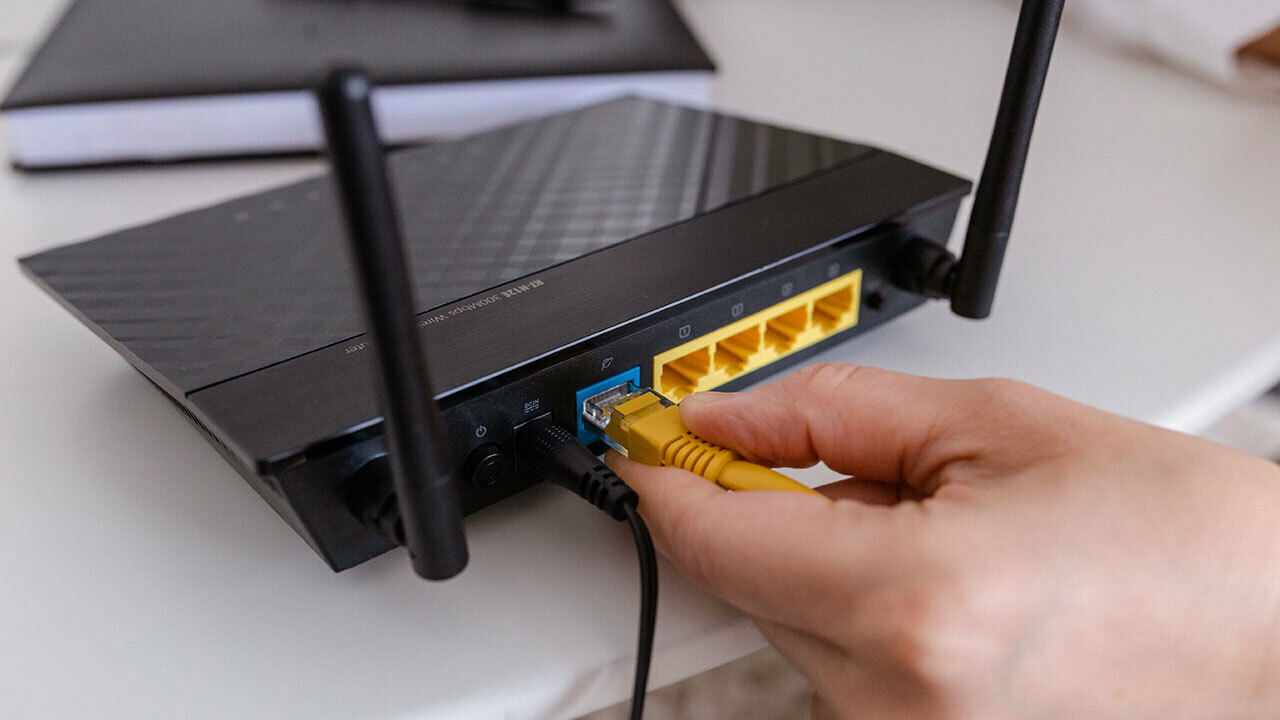
2. Obtain an Ethernet cable: You will need an Ethernet cable to establish the wired connection. Ensure that you have a standard Ethernet cable with the appropriate length for your needs. The Ethernet cable typically has a square or rectangular connector on both ends.
3. Connect one end of the Ethernet cable to the USB port: Take one end of the Ethernet cable and insert it into the USB port on the Lightning to USB Camera Adapter. Make sure the connector is inserted securely, and you feel a click or firm connection.
4. Secure the connection: Once the Ethernet cable is connected to the USB port, make sure it is firmly secured. Avoid any loose connections that can lead to intermittent or unstable network connectivity.
5. Check the Ethernet cable connection: Look for the indicator lights on the Ethernet cable and the USB Camera Adapter to ensure a proper connection. The lights should indicate a successful link and activity, confirming that the Ethernet cable is properly connected.
With the Ethernet cable now connected to the USB Camera Adapter, you are one step away from accessing a wired internet connection on your iPad. In the next step, we will guide you through connecting the other end of the Ethernet cable to a wired Ethernet internet port.
Step 5: Connect the Other End of the Ethernet Cable to the Wired Ethernet Internet Port
Now that you have the Ethernet cable connected to the USB Camera Adapter, it’s time to complete the wired connection by connecting the other end of the Ethernet cable to a wired Ethernet internet port. Follow these steps to establish the connection:
1. Locate the wired Ethernet internet port: Look for the wired Ethernet internet port, also known as an RJ-45 port, on your modem, router, or Ethernet wall socket. It is a rectangular port with a small opening for the Ethernet cable connector.
2. Strip any protective cover from the Ethernet cable connector: If your Ethernet cable has a protective cover or cap on the connector end, remove it to expose the connector pins. Ensure that the connector is clean and free from any dust or debris.
3. Align the connector: Take the other end of the Ethernet cable and align the connector with the Ethernet internet port. The connector has a clip on the top side, so make sure to align it correctly for a smooth insertion.
4. Insert the connector into the Ethernet internet port: Insert the connector firmly into the Ethernet internet port. Apply gentle pressure and push until you hear a click or feel a secure connection. The connector should be inserted all the way into the port.
5. Secure the connection: Once the Ethernet cable is connected to the Ethernet internet port, ensure that the connection is secure. Check for any wobbling or loose connection. A stable connection is essential for a reliable network connection.
6. Verify the connection: To confirm that the connection is established, check the indicator lights on the modem, router, or Ethernet wall socket. The lights should indicate a successful link and activity, indicating that the wired Ethernet internet connection is established.
With the Ethernet cable connected to the wired Ethernet internet port, you have completed the physical connection. In the next step, we will guide you through configuring the network settings on your iPad to utilize the wired internet connection.
Step 6: Configure the Network Settings on Your iPad
Now that you have established the physical connection between your iPad and the wired Ethernet internet port, it’s time to configure the network settings on your iPad to utilize the wired internet connection. Follow these steps to configure the network settings:
1. Open the Settings app: Tap on the Settings app on your iPad’s home screen. The Settings app is represented by a gear icon and is typically located on the first page of your home screen.
2. Go to Wi-Fi settings: In the Settings app, locate and tap on the “Wi-Fi” option. This will take you to the Wi-Fi settings page on your iPad.
3. Disable Wi-Fi: On the Wi-Fi settings page, toggle off the Wi-Fi option. This is essential to prioritize the wired Ethernet connection over Wi-Fi.
4. Configure Ethernet settings: Below the Wi-Fi options, you should see an “Ethernet” section. Tap on the Ethernet option to access the Ethernet settings.
5. Enable Ethernet: In the Ethernet settings, toggle on the “Ethernet” option to enable it. This allows your iPad to use the wired Ethernet connection for internet access.
6. Obtain IP address automatically (DHCP): By default, your iPad should be set up to obtain the IP address automatically through DHCP. Ensure that the “Configure IP” option is set to “Automatic”.
7. Verify the connection status: After enabling Ethernet and confirming the IP configuration, your iPad will attempt to establish a connection using the wired Ethernet internet port. Check the status under the “Status” section in the Ethernet settings to ensure that it says “Connected”.
With the network settings appropriately configured, your iPad is now ready to leverage the wired Ethernet internet connection. In the next step, we will guide you through testing the wired internet connection on your iPad.
Step 7: Test the Wired Internet Connection on Your iPad
After configuring the network settings on your iPad to utilize the wired Ethernet connection, it’s important to test the connection to ensure that it is working properly. Follow these steps to test the wired internet connection on your iPad:
1. Open a web browser: Launch a web browser on your iPad, such as Safari or Google Chrome. Tap on the browser icon on your home screen to open it.
2. Visit a website: In the address bar of the web browser, enter the URL of a website you wish to visit. This can be any website that you normally use to browse the internet, such as www.google.com.
3. Check for internet access: Once you have entered the website URL, tap the “Go” or “Enter” button on the keyboard. The web browser will attempt to load the website. Check if the web page loads successfully.
4. Test multiple web pages: To further validate the wired internet connection, try visiting a few different web pages. Ensure that all pages load without any issues and that you can navigate through different websites smoothly.
5. Verify connection stability: As you browse through various web pages, pay attention to the stability of the wired internet connection. Ensure that the pages load quickly, without any interruptions, buffering, or error messages. A stable connection is vital for a seamless internet experience.
6. Perform other online activities: Besides browsing websites, test other online activities on your iPad, such as watching videos, streaming music, or accessing apps that require internet connectivity. Verify that all online activities work smoothly and without any disruptions.
If you encounter any issues during the test or notice that the wired internet connection is not working as expected, proceed to the next step to troubleshoot common issues that may arise. Otherwise, congratulations! Your iPad is successfully connected to the wired internet connection.
Step 8: Troubleshooting Common Issues
While connecting your iPad to a wired Ethernet internet port is generally straightforward, you may encounter some common issues along the way. Here are a few troubleshooting steps to help you address these issues:
1. Check cable connections: Ensure that all the cable connections are secure and properly inserted. Double-check that the Ethernet cable is plugged in securely to both the USB Camera Adapter and the Ethernet internet port. A loose connection can cause intermittent or no internet access.
2. Restart your devices: Sometimes, simply restarting your iPad, modem, and router can resolve connectivity issues. Turn off your devices, wait for a few seconds, and then turn them back on. This can refresh the network settings and resolve any temporary glitches.
3. Reset network settings: If you are experiencing persistent connectivity issues, try resetting your network settings on the iPad. Go to the “Settings” app, tap on “General”, select “Reset”, and then choose “Reset Network Settings”. Keep in mind that this will reset all network configurations on your iPad, including Wi-Fi, Bluetooth, and VPN settings.
4. Update software: Ensure that your iPad is running on the latest software version. Outdated software can sometimes cause compatibility issues with the wired Ethernet connection. Go to the “Settings” app, tap on “General”, select “Software Update”, and update your iPad if a newer version is available.
5. Use a different Ethernet cable or adapter: If you suspect that the Ethernet cable or Lightning to USB Camera Adapter may be faulty, try using a different cable or adapter. Borrow from a friend or purchase a new one to see if it resolves the issue. Sometimes, a faulty cable or adapter can hinder the connection.
6. Contact technical support: If you have tried the above troubleshooting steps and are still experiencing issues, it may be necessary to reach out to technical support. Contact the manufacturer of your iPad, the Lightning to USB Camera Adapter, or your internet service provider for assistance. They can provide specific troubleshooting steps based on your setup and offer further guidance.
By following these troubleshooting steps, you can address common issues that may arise when connecting your iPad to a wired Ethernet internet port. With perseverance and the right support, you can overcome these challenges and enjoy a stable and reliable wired internet connection on your iPad.