
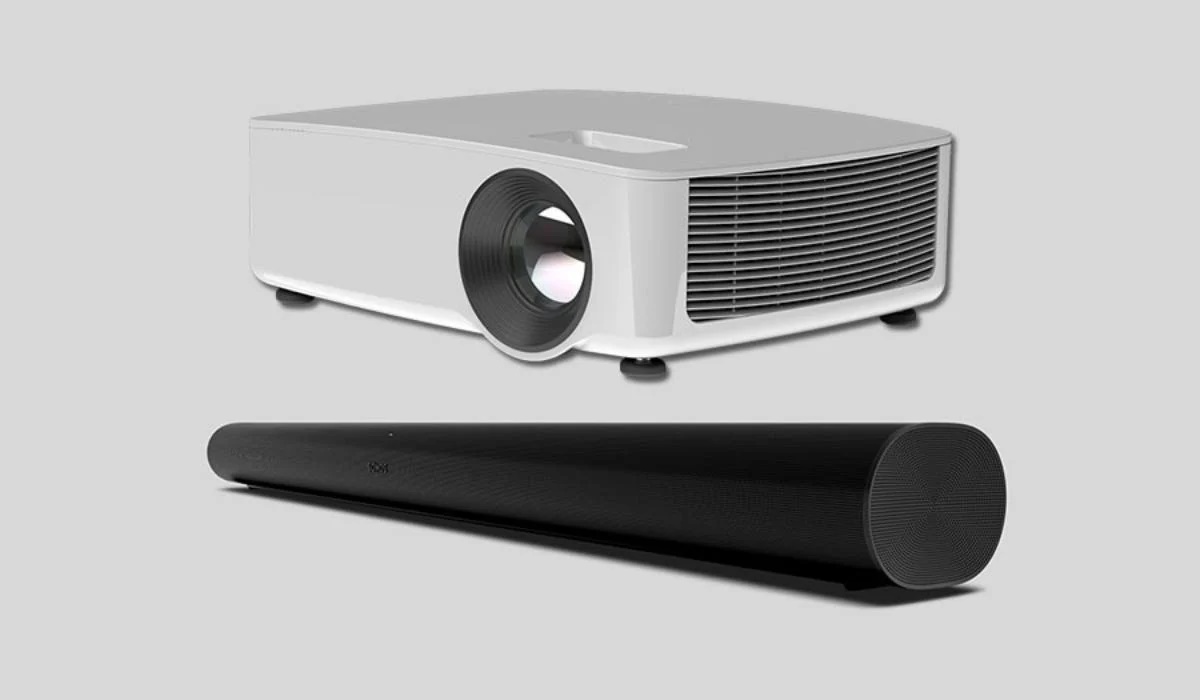
Benefits of Connecting a Soundbar to a Projector
Connecting a soundbar to a projector can greatly enhance your audiovisual experience. By adding a soundbar to your projector setup, you can elevate the sound quality, immersing yourself in a more captivating and immersive cinematic experience. Here are some key benefits of connecting a soundbar to a projector:
- Enhanced Audio Quality: Projector speakers are often built-in and may deliver subpar audio quality. With a soundbar, you can enjoy richer, more balanced sound with better clarity and depth. Whether you’re watching movies, playing video games, or hosting events, you’ll appreciate the enhanced audio experience.
- Cinematic Immersion: Soundbars are designed to produce immersive sound, making you feel like you’re in the middle of the action. By connecting a soundbar to your projector, you can recreate the cinematic experience in the comfort of your own home. The surround sound capabilities of many soundbars allow you to hear audio from all directions, pulling you further into the story.
- Improved Dialogue Clarity: Dialogue is essential in movies and shows. A soundbar can significantly enhance dialogue clarity, ensuring that every word is crisp and easy to understand. You won’t miss important conversations or struggle to catch soft-spoken lines, leading to a more enjoyable viewing experience.
- Better Bass Response: Soundbars often come with built-in subwoofers or the ability to connect external ones. This means you can enjoy deep, rumbling bass that adds impact to explosions, music, and intense action scenes. The soundbar’s dedicated bass amplification technology ensures that you feel the low-frequency sounds, contributing to a more immersive experience.
- Flexible Placement: Soundbars are generally compact and can be easily mounted on walls, placed on shelves, or positioned in front of your projector screen. This flexibility allows you to optimize the placement for the best sound distribution. You can also consider wireless soundbars that reduce clutter and provide the freedom to place them wherever you like without worrying about tangled cables.
- Simplified Setup: Connecting a soundbar to a projector is straightforward and typically requires minimal configuration. Most soundbars connect easily via HDMI, optical cable, or RCA cable, depending on the available connections on your projector. Once connected, you can control the soundbar directly or through the projector’s remote, streamlining the setup process.
Overall, connecting a soundbar to a projector offers numerous benefits, including enhanced audio quality, immersive cinematic experiences, improved dialogue clarity, powerful bass response, flexible placement options, and simplified setup. By investing in a soundbar, you can take your projector setup to the next level and elevate your entertainment experiences to new heights.
Finding the Right Soundbar
When it comes to choosing the right soundbar to connect to your projector, there are a few key factors to consider. Here are some tips to help you find the perfect soundbar for your setup:
- Audio Quality and Power: Look for a soundbar that delivers high-quality audio and has enough power to fill your viewing room. Consider the wattage and the number of channels (2.1, 5.1, etc.) to ensure a balanced and immersive sound experience. Reading customer reviews and listening to audio demos can give you a better idea of the soundbar’s performance.
- Connectivity Options: Check the available connectivity options on both the soundbar and your projector. The most common connection options include HDMI, optical cable, and RCA cable. Choose a soundbar that has the necessary input ports to directly connect to your projector. Additionally, consider whether you need Bluetooth or Wi-Fi capabilities for wireless streaming from your devices.
- Size and Design: Consider the dimensions and design of the soundbar, especially if you plan to mount it on the wall or place it in front of your projector screen. Make sure it fits well within your setup and complements the aesthetics of your viewing room. Some soundbars also come with wireless subwoofers, so consider their size and placement options as well.
- Additional Features: Evaluate the additional features that the soundbar offers. Some soundbars have built-in virtual surround sound technology, allowing them to simulate a multi-speaker setup for a more immersive experience. Others come with equalizer settings, voice enhancement, or preset audio modes for different content types, such as movies or music. Consider your specific preferences and needs when assessing these features.
- Budget and Value for Money: Set a realistic budget for your soundbar purchase. While high-end soundbars may offer exceptional audio quality and advanced features, there are also budget-friendly options that deliver impressive performance. Compare prices, read reviews, and assess the overall value for money before making a decision.
- Brand Reputation and Warranty: Research the reputation of the soundbar brands you’re considering. Look for brands known for their audio expertise and reliability. Additionally, check the warranty terms to ensure you have adequate coverage in case of any issues or defects.
Remember, finding the right soundbar is a personal choice that depends on your preferences, budget, and specific requirements. Take the time to research different models, compare their features, and read reviews from trusted sources. By finding the perfect soundbar, you can enhance your projector setup and enjoy a truly immersive audiovisual experience.
Checking Projector Audio Output
Before connecting a soundbar to your projector, it’s crucial to check the audio output capabilities of your projector. Here’s how you can do it:
- Refer to the Projector Manual: Start by consulting the user manual or specifications sheet of your projector. Look for information about the audio output options supported by your projector. It will provide details about the available audio ports and the supported audio formats.
- Inspect the Audio Ports: Examine the back or side panel of your projector for audio-related ports. The most common audio output options found on projectors include HDMI ARC (Audio Return Channel), optical audio output (TOSLINK), or RCA audio output. HDMI ARC is considered the most convenient and versatile option as it supports both audio input and output.
- Check the Audio Format: Determine the audio formats supported by your projector. Common audio formats include Dolby Digital, DTS, or PCM (Pulse-Code Modulation). Ensure that your soundbar is compatible with the audio formats supported by your projector to prevent any compatibility issues.
- Test the Audio Output: Connect speakers or headphones to the audio output port of your projector to check if there is any audio output. Alternatively, play a video or media file through your projector and listen for sound. If you can hear audio through the projector’s built-in speakers or external speakers connected to the audio output, it indicates that the audio output is functional.
If you find that your projector does not have audio output ports, or if the audio output is not satisfactory, you may need to consider alternative methods for connecting a soundbar. In such cases, you can connect the soundbar directly to the audio output of your media source, such as a set-top box or Blu-ray player, or use an HDMI audio extractor to extract the audio signal from the HDMI output of your projector.
By checking the audio output capabilities of your projector, you’ll have a clear understanding of the available options and can proceed with connecting a compatible soundbar to enhance your audio experience.
Connecting Soundbar to Projector via HDMI
Connecting a soundbar to your projector via HDMI is one of the most common and convenient methods for achieving high-quality audio. Follow these steps to establish the connection:
- Check the HDMI ARC Port: Ensure that both your soundbar and projector have HDMI ARC (Audio Return Channel) support. The HDMI ARC port on the soundbar is labeled as ARC or HDMI OUT (TV), while the HDMI ARC port on the projector may be labeled as HDMI ARC or HDMI OUT (Audio).
- Connect HDMI Cable: Use a high-speed HDMI cable to connect the HDMI ARC port on the soundbar to the HDMI ARC port on the projector. Make sure to firmly insert the connectors into the respective HDMI ports.
- Enable HDMI ARC: On your projector, access the settings menu and locate the HDMI settings. Enable HDMI ARC or HDMI-CEC (Consumer Electronics Control) if necessary. This allows the audio to be sent from the projector to the soundbar via the HDMI cable.
- Select Soundbar Input: On your soundbar, choose the HDMI ARC input or TV input using the soundbar’s remote control or buttons. This will ensure that the soundbar receives the audio signal properly.
- Test the Connection: Play a video or media file through your projector and listen for audio coming from the soundbar. Adjust the volume as needed to ensure it’s working correctly. To verify that the audio is being routed through the soundbar, mute or lower the volume of the projector’s built-in speakers.
Additionally, some projectors and soundbars may have HDMI-CEC functionality, which allows for seamless control of multiple devices through a single remote. If your devices support HDMI-CEC, you can control the soundbar’s volume or power using the projector’s remote.
Connecting your soundbar to the projector via HDMI offers several advantages. HDMI carries both audio and video signals, reducing cable clutter and providing a single connection between devices. It also supports high-quality audio formats, such as Dolby TrueHD and DTS-HD Master Audio, ensuring immersive sound for your viewing experience.
Keep in mind that the HDMI ARC method requires HDMI ARC support on both the soundbar and the projector. If your devices lack HDMI ARC capability, consider using other connection options, such as optical or RCA cables. The important thing is to choose the connection method that best suits your devices and provides the desired audio quality for your projector setup.
Connecting Soundbar to Projector via Optical Cable
If your projector doesn’t have HDMI ARC support, or you prefer an alternative audio connection, you can connect your soundbar to the projector using an optical cable. Follow these steps to establish the connection:
- Check Optical Audio Port: Ensure that both your soundbar and projector have an optical audio port. The optical audio port on the soundbar is typically labeled as “Optical,” “TOSLINK,” or “Digital Audio.” On the projector, it may be labeled as “Audio Out” or “Digital Audio Out.”
- Connect Optical Cable: Take an optical cable and firmly insert one end into the optical audio output port on the projector and the other end into the optical audio input port on the soundbar. The connectors should fit snugly into the respective ports.
- Choose Optical Input: On your soundbar, select the optical input using the soundbar’s remote control or buttons. This ensures that the soundbar receives the audio signal from the projector.
- Enable Projector Audio Output: Access the projector settings menu and navigate to the audio settings. Enable the optical audio output or set the audio output to “External” to ensure that the audio signal is sent through the optical cable.
- Test the Connection: Play a video or media file through your projector and listen for audio coming from the soundbar. Adjust the volume as needed. Mute or lower the volume of the projector’s built-in speakers to confirm that the audio is being routed through the soundbar.
Connecting a soundbar to your projector via an optical cable allows for high-quality digital audio transmission. Optical cables can carry various digital audio formats, including Dolby Digital and DTS. This ensures clear and immersive sound for your projector setup.
It’s important to note that optical connections only carry audio signals, so you may need to connect the video signal separately using an HDMI or other applicable cable. Some projectors and soundbars have additional HDMI or other input/output ports to accommodate this, allowing you to enjoy both high-quality audio and video.
If your projector and soundbar lack optical audio ports, you can explore other connection options like HDMI or RCA cables. Choose the connection method that best suits your devices and provides the desired audio quality, ensuring an enhanced audio experience for your projector setup.
Connecting Soundbar to Projector via RCA Cable
If your projector and soundbar do not have HDMI ARC or optical audio ports, another option for connecting them is using an RCA cable. Follow these steps to establish the connection:
- Check RCA Audio Ports: Ensure that both your soundbar and projector have RCA audio ports. The RCA ports on the soundbar may be labeled as “Audio In” or “Aux In,” while on the projector, they may be labeled as “Audio Out” or “Aux Out.”
- Connect RCA Cable: Take an RCA cable with red and white connectors. Insert the red connector into the right-channel RCA port on the projector, and insert the white connector into the left-channel RCA port. Then, connect the other end of the RCA cable to the corresponding audio input ports on the soundbar.
- Select the RCA Input: On your soundbar, choose the RCA input using the soundbar’s remote control or buttons. This ensures that the soundbar receives the audio signal from the projector.
- Test the Connection: Play a video or media file through your projector and listen for audio coming from the soundbar. Adjust the volume as needed. To ensure that the audio is being routed through the soundbar, mute or lower the volume of the projector’s built-in speakers.
Connecting your soundbar to the projector via RCA cable provides a basic analog audio connection. While it may not offer the same level of audio quality as HDMI or optical connections, it can still enhance the overall sound experience compared to the projector’s built-in speakers.
It’s important to note that RCA cables are unidirectional, meaning the red connector represents the right audio channel, and the white connector represents the left audio channel. Therefore, make sure you connect the cables correctly to avoid any audio imbalance or distortion.
If your projector and soundbar lack RCA audio ports, consider using alternative connection methods, such as HDMI or optical cables. Choose the connection option that best suits your devices and provides the desired audio quality for an enhanced audio experience in your projector setup.
Powering On and Testing Soundbar and Projector Connection
Once you have successfully connected your soundbar to your projector, it’s time to power on the devices and test the connection. Follow these steps to ensure everything is working correctly:
- Connect Power Cords: Ensure that both the soundbar and the projector are plugged into separate power outlets and turned on. Verify that the power indicator lights on both devices are illuminated.
- Adjust Soundbar Volume: On your soundbar, adjust the volume to a comfortable level. Start with a lower volume to avoid any sudden loud noises or distortion.
- Power On the Projector: Use the projector’s remote control or power button to turn on the projector. Allow it a few moments to warm up and display the image on the screen.
- Test Audio Output: Play a video or media file through your projector and listen for audio coming from the soundbar. If the sound is not coming from the soundbar, ensure that you have selected the correct input source on the soundbar and the audio settings on the projector are properly configured.
- Adjust Audio Settings: Depending on your projector model, you may have access to audio settings. Explore the settings menu on your projector to adjust parameters such as audio equalization, surround sound modes, or audio delay to synchronize the sound with the on-screen action.
- Test Different Content Types: Test the soundbar and projector connection with various types of content. Watch movies, listen to music, or play video games to ensure that the audio is consistently routed through the soundbar and provides an immersive experience.
If you encounter any issues with the soundbar and projector connection, double-check the cable connections, ensure that the correct input sources are selected, and verify that both devices are set to output audio through the desired output port (HDMI ARC, optical, or RCA). Also, consult the user manuals or online support resources for troubleshooting tips specific to your projector and soundbar models.
By properly powering on the soundbar and projector and testing the connection, you can ensure that the audio is routed correctly and enjoy a more immersive and enhanced audiovisual experience for your projector setup.
Adjusting Sound Settings on the Projector
When connecting a soundbar to your projector, it’s crucial to adjust the sound settings on the projector to optimize the audio output. Here are some key adjustments you can make:
- Audio Mode: Most projectors have different audio modes or presets designed for various content types, such as movies, music, or sports. Explore the projector’s audio settings menu to select the appropriate mode that best suits your viewing preferences.
- Equalizer Settings: Some projectors offer equalizer settings that allow you to fine-tune the audio frequencies. Adjusting the bass, treble, and mid-range levels can help tailor the sound to your liking and optimize the audio output to match your soundbar’s capabilities.
- Audio Delay: If you notice an audio delay or lip-sync issue, you can adjust the audio delay settings on the projector. This feature ensures that the sound is synchronized with the on-screen action, delivering a more immersive viewing experience.
- Volume Control: Use the projector’s built-in volume control settings to adjust the output level. You can increase or decrease the volume as needed to achieve the desired sound level in conjunction with the soundbar’s volume control.
- Audio Output Format: Some projectors may have audio output format settings, allowing you to choose the desired audio format, such as PCM or Bitstream. Check the projector’s audio settings menu to ensure it matches the audio format supported by your soundbar for optimal compatibility and audio quality.
- Audio Source Selection: If your projector has multiple audio input sources, such as HDMI, USB, or a built-in media player, ensure that the correct audio input source is selected. This ensures that the audio is being routed from the appropriate source to the soundbar.
Every projector model may have different sound settings and options available. Therefore, it’s essential to consult the projector’s user manual or online documentation for detailed instructions on adjusting sound settings specific to your projector model.
By fine-tuning the sound settings on your projector, you can optimize the audio output and ensure it complements the capabilities of your connected soundbar. This allows you to enjoy a synchronized, immersive, and high-quality audiovisual experience with your projector setup.
Troubleshooting Common Soundbar and Projector Connection Issues
While connecting a soundbar to a projector can greatly enhance your audio experience, there may be instances where you encounter certain connection issues. Here are some common troubleshooting steps you can take:
- Check Cable Connections: Ensure that all the cables are securely connected to their respective ports on both the soundbar and the projector. Sometimes, loose connections can result in no audio or poor audio quality.
- Verify Input Source Selection: Make sure that you have selected the correct input source on your soundbar to correspond with the connection you’ve made (HDMI ARC, optical, or RCA). Similarly, check that the projector’s audio output is set to the intended audio output port.
- Power Cycle the Devices: Turn off both the soundbar and the projector, unplug their power cords from the power outlets, wait for a few seconds, and then plug them back in. Powering on the devices again can sometimes resolve temporary connection issues.
- Update Firmware: Check if there are any available firmware updates for your soundbar or projector. Manufacturers often release firmware updates to address compatibility issues or improve overall performance. Visit the manufacturer’s website for instructions on updating the firmware.
- Try Different Cables: If possible, try using different cables to connect the soundbar and projector. Sometimes, faulty or damaged cables can cause audio issues. Switching to a new cable can help identify and resolve the problem.
- Test with Different Devices: Connect your soundbar to a different audio source, such as a TV or gaming console, to verify if the soundbar is functioning properly. If it works with other devices, the issue may be specific to the projector audio output.
- Reset Soundbar and Projector: Refer to the user manuals of both the soundbar and projector for instructions on performing a factory reset. Resetting the devices can sometimes resolve configuration or compatibility issues.
- Consult Manufacturer Support: If none of the troubleshooting steps resolve the issue, reach out to the manufacturer’s customer support for further assistance. They can provide specific troubleshooting steps or guide you through the process of resolving the connection problem.
Remember that each soundbar and projector model may have unique features and settings, so the troubleshooting options may vary. Following the manufacturer’s instructions and seeking support when needed can help you resolve any soundbar and projector connection issues efficiently.
By identifying and addressing common connection issues, you can enjoy a seamless and enhanced audio experience with your soundbar and projector setup.