
Choosing the Right Printer
When it comes to connecting a printer to your tablet, the first step is to choose the right printer that is compatible with your device. With so many printers available in the market, it can be overwhelming to make the right choice. Here are a few factors to consider when selecting a printer:
- Printer Type: Determine whether you need an inkjet or a laser printer. Inkjet printers are more affordable and suitable for everyday home use, while laser printers are faster and more efficient for high-volume printing.
- Connectivity Options: Check if the printer supports the connectivity options required for your tablet. Some printers offer Bluetooth, Wi-Fi, or USB connectivity, while others may require a specific cable connection.
- Print Quality: Consider the print quality you require. If you need professional-level prints or high-resolution images, look for a printer that offers excellent print quality.
- Size and Portability: If you frequently travel or need a printer for on-the-go use, opt for a compact and portable printer that easily fits in your bag or backpack.
- Budget: Determine your budget range for a printer. There are options available for every budget, from budget-friendly printers to high-end models with advanced features.
By carefully considering these factors, you can choose a printer that fulfills your printing needs and is compatible with your tablet. Remember to check the printer’s specifications and compatibility information provided by the manufacturer to ensure it will work seamlessly with your tablet device.
Check Printer Compatibility
Before connecting a printer to your tablet, it is crucial to ensure that the printer is compatible with your device. Here are a few steps to check printer compatibility:
- Operating System Compatibility: Verify if the printer supports the operating system of your tablet. Common operating systems include Android, iOS, Windows, and macOS. Check the printer’s specifications or contact the manufacturer to confirm compatibility with your tablet’s operating system.
- Connectivity Options: Determine the connectivity options supported by both the printer and your tablet. Most modern printers offer multiple connectivity options such as Bluetooth, Wi-Fi, and USB. Ensure that the printer’s connectivity options align with those available on your tablet.
- Software and Drivers: Check if the printer requires any specific software or drivers to connect to your tablet. Visit the manufacturer’s website and search for the printer model to download the necessary software or drivers. Alternatively, some printers may have companion apps available for download on your tablet’s app store.
- Print App Compatibility: If you plan to print directly from specific apps on your tablet, such as email clients or document editing apps, make sure that the printer is compatible with those apps. Some printer manufacturers may offer dedicated apps for printing from tablets, enhancing compatibility and user experience.
- Network Compatibility: If you intend to connect the printer via Wi-Fi, ensure that the printer supports the same network protocols used by your tablet. Check if the printer is compatible with your home or office network, be it 2.4 GHz or 5 GHz, to establish a seamless connection.
Verifying printer compatibility will help you avoid any connectivity issues or incompatibilities that might arise when connecting the printer to your tablet. It is essential to refer to the manufacturer’s documentation or support resources for accurate information on compatibility and specific requirements.
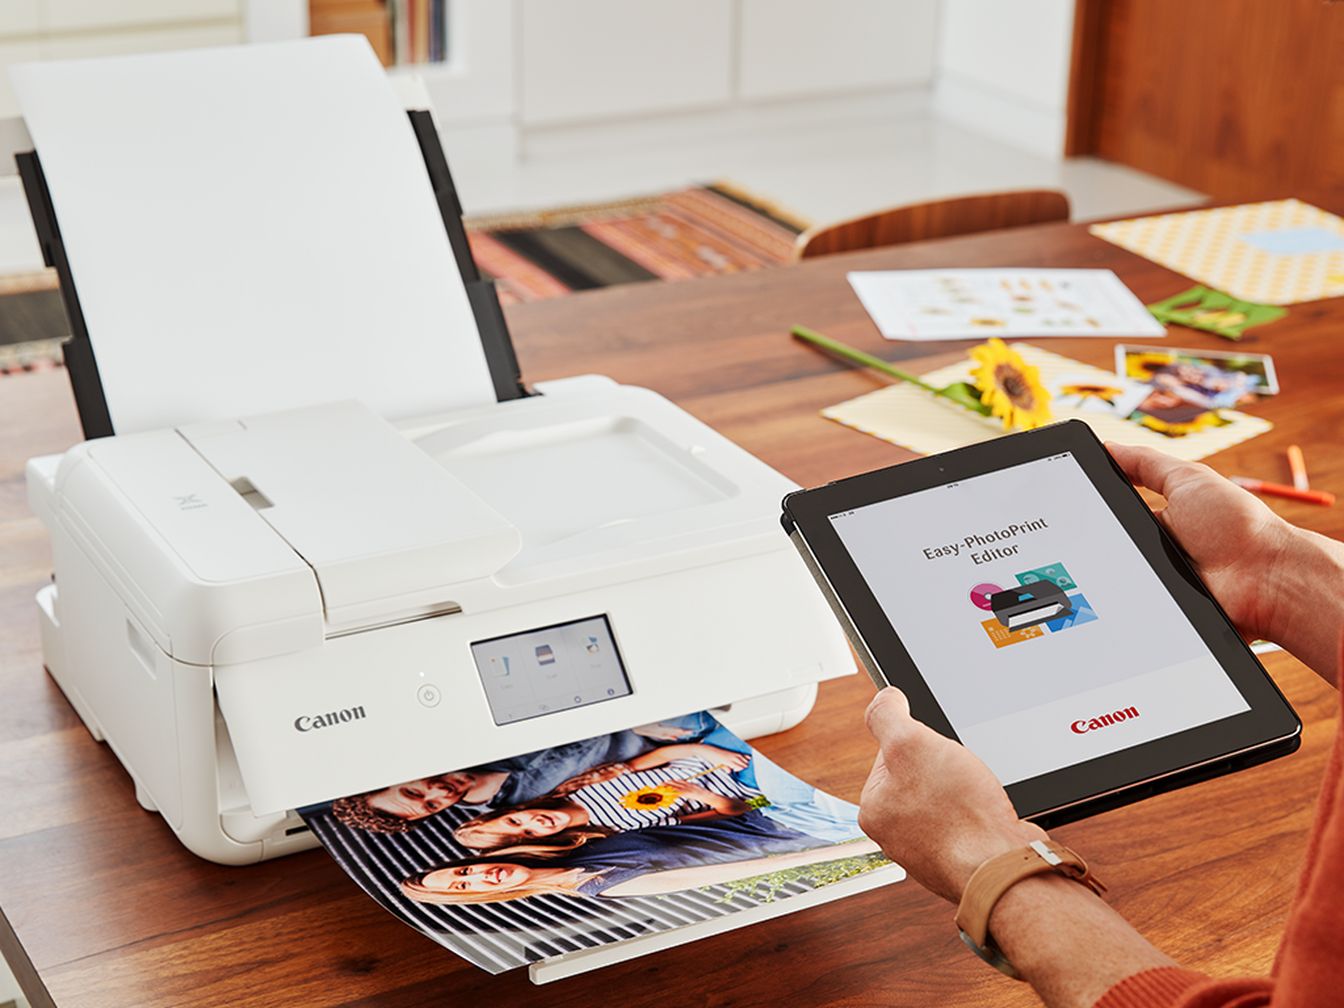
Connecting via Bluetooth
Connecting a printer to your tablet via Bluetooth offers the convenience of wireless printing without the need for additional network configurations. Here’s how you can connect your printer to your tablet using Bluetooth:
- Enable Bluetooth: Ensure that Bluetooth is enabled on both your tablet and printer. You can usually find the Bluetooth settings in the device’s settings menu.
- Put Printer in Pairing Mode: Place the printer in pairing mode. Refer to the printer’s manual for instructions on how to enable Bluetooth pairing mode. This step may involve pressing specific buttons or navigating through the printer’s menu options.
- Pair with Tablet: On your tablet, navigate to the Bluetooth settings and scan for available devices. Select the printer from the list of discovered devices. The tablet will initiate the pairing process and prompt you to enter a PIN or passcode if required. Follow the on-screen instructions to complete the pairing.
- Install Printer Driver (if necessary): Depending on your tablet’s operating system, you may need to install a printer driver for Bluetooth connectivity. If prompted, download and install the appropriate printer driver for your tablet to establish a connection with the printer.
- Print a Test Page: Once the printer is successfully paired with your tablet, test the connection by printing a test page. Open a document or image on your tablet, tap the share or print option, and select the paired printer from the available printer options. Adjust any necessary print settings, such as paper size or print quality, and confirm the print command.
Note that the steps may vary slightly depending on your tablet’s operating system and the printer model. For detailed instructions, refer to the printer’s manual or the manufacturer’s support website.
Connecting your printer to your tablet via Bluetooth provides a hassle-free wireless printing experience, allowing you to conveniently print documents and photos without the need for wired connections or network configurations.
Connecting via Wi-Fi
Connecting a printer to your tablet using Wi-Fi allows for seamless printing and the convenience of wireless connectivity. Here’s a step-by-step guide to connecting your printer to your tablet via Wi-Fi:
- Connect Printer to Wi-Fi Network: Ensure that your printer is connected to the same Wi-Fi network as your tablet. Consult the printer’s manual for instructions on how to connect to a Wi-Fi network. Some printers may have a touchscreen display that allows you to select the network and enter the Wi-Fi password.
- Enable Wi-Fi on Tablet: On your tablet, go to the settings menu and enable Wi-Fi. It will scan for available Wi-Fi networks in the vicinity. Select the same Wi-Fi network to which your printer is connected.
- Install Printer Software (if necessary): Depending on your tablet’s operating system, you may need to install the printer software to establish a connection. Follow the manufacturer’s instructions to download and install the printer software or app from the respective app store.
- Discover Printer: Once the printer is connected to the Wi-Fi network and the software/app is installed on your tablet, open the software/app and select “Discover Printer” or a similar option. It will search for available printers on the network.
- Select Printer: From the list of discovered printers, select your printer to establish the connection. Follow any additional prompts or instructions on the software/app to complete the setup process.
- Print a Test Page: To ensure the connection is successful, print a test page. Open a document or image on your tablet, tap the print option within the app or document viewer, select the printer, and adjust any necessary print settings, such as paper size or print quality. Confirm the print command and check if the test page prints correctly.
It’s important to note that the steps may vary slightly depending on your printer model and tablet’s operating system. Make sure to consult the printer’s manual or the manufacturer’s support website for specific instructions related to your devices.
Connecting your printer to your tablet via Wi-Fi provides the convenience of wireless printing, allowing you to print documents and photos from your tablet without the need for cables or physically connecting the devices.
Connecting via USB Cable
Connecting a printer to your tablet using a USB cable is a straightforward method that ensures a reliable and direct connection. Follow these steps to connect your printer to your tablet via a USB cable:
- Check USB Compatibility: Ensure that your tablet has a USB port that is compatible with the printer’s USB cable. Most tablets use USB Type-C or Micro-USB ports. If necessary, use an appropriate adapter or connector to connect the USB cable to your tablet.
- Connect the USB Cable: Plug one end of the USB cable into the USB port on your printer and the other end into the USB port on your tablet. Make sure the connection is secure on both ends.
- Configure Settings (if necessary): In some cases, your tablet may automatically detect the printer and configure the necessary settings. However, if your tablet does not recognize the printer, go to the settings menu on your tablet and select “Printers” or a similar option. From there, tap on “Add a Printer” and choose the connected printer from the list of available devices.
- Install Printer Driver (if necessary): Depending on your tablet’s operating system, you may need to install a printer driver for USB connectivity. If prompted, download and install the appropriate printer driver from the manufacturer’s website or your tablet’s app store to establish a proper connection.
- Print a Test Page: Once the printer is connected to your tablet via the USB cable and the appropriate settings and drivers are configured, print a test page to ensure the connection is successful. Open a document or image on your tablet, tap the print option, select the printer, adjust any necessary print settings, and confirm the print command.
Connecting your printer to your tablet via a USB cable provides a reliable and direct connection, making it a suitable option in environments where wireless connectivity may not be available or preferred.
Remember to consult the printer’s manual or the manufacturer’s support website for specific instructions related to your printer model and tablet’s operating system.
Installing Printer Software
Installing the necessary printer software on your tablet is crucial for establishing a successful connection and enabling seamless printing. The specific steps may vary depending on your tablet’s operating system and printer model, but the general process involves the following:
- Visit the Manufacturer’s Website: Go to the manufacturer’s website of your printer and navigate to the support or downloads section. Look for the specific printer model to find the appropriate software and driver downloads.
- Select the Operating System: Choose the operating system of your tablet from the provided options. Ensure that you select the correct version and edition of the operating system (such as Windows 10, macOS Big Sur, Android 11, etc.).
- Download the Software: Once you have selected the correct operating system, locate the software or driver download that is compatible with your printer model and tablet. Click on the download link to initiate the download process.
- Install the Software: After the download is complete, locate the downloaded file on your tablet and run the installer. Follow the on-screen instructions to install the printer software. If prompted, agree to any licensing agreements and select the desired installation settings.
- Connect the Printer: Connect your printer to your tablet using the appropriate method discussed earlier, such as Bluetooth, Wi-Fi, or USB. The printer software will detect the connected printer and complete the installation process.
- Configure Printer Settings: Once the software installation is complete, you may need to configure specific printer settings. This can include options like paper size, print quality, default printer, and other advanced settings. Access the printer settings through the printer software or the printer’s control panel.
- Test the Printer: To ensure that the printer software is installed correctly and the connection is established, print a test page. Open a document or image on your tablet, select the print option, choose the appropriate printer from the available options, and confirm the print command. Verify that the test page prints successfully.
By following these steps and installing the necessary printer software, you will ensure that your printer and tablet are in sync, allowing for seamless printing functionality. Refer to the manufacturer’s instructions or support resources for specific installation instructions related to your printer model and tablet’s operating system.
Testing the Connection
After connecting your printer to your tablet, it’s important to test the connection to ensure everything is working correctly. Testing the connection will help you verify the printer’s functionality and ensure that you can print documents and images seamlessly. Here’s how you can test the connection between your printer and tablet:
- Verify Printer Status: Ensure that the printer is turned on and ready to print. Check for any error messages or paper jams that might prevent the printer from functioning properly. Clear any issues before proceeding with the test.
- Select a Document or Image: Open a document or image on your tablet that you want to print. It can be a text document, spreadsheet, email, photo, or any other printable file format.
- Access the Print Option: Depending on the app or document viewer you are using, tap on the print icon or navigate to the print option within the menu. It is usually represented by a printer icon or the word “Print.”
- Choose Printer: From the list of available printers, select the connected printer that you want to use. Make sure it matches the printer you have connected to your tablet.
- Configure Print Settings (if desired): Adjust any necessary print settings, such as the number of copies, paper size, print quality, orientation, or color preferences. These settings may vary depending on the app or document viewer you are using.
- Initiate Printing: Once you have configured the print settings, tap on the print button to initiate the printing process. Depending on the size of the document or image, it may take a few moments for the printer to process and print the file.
- Check Printed Output: After the printer has finished printing, retrieve the printed document or image. Examine the printed output for any errors, smudges, or misalignments. Ensure that the printed file matches your expectations in terms of content and quality.
If the printed output matches your expectations and there are no apparent issues, it indicates that the connection between your printer and tablet is successfully established. However, if you encounter any problems, refer to the troubleshooting section below or consult the printer’s manual for guidance.
Regularly testing the connection will help you identify any issues early on and ensure that your printer is ready to fulfill your printing needs whenever you need it.
Troubleshooting Common Issues
While connecting a printer to your tablet can usually be a smooth process, you may encounter some common issues along the way. Here are a few troubleshooting steps you can take to resolve these issues:
- Check Connections: Ensure that all cables are properly connected between the printer and your tablet. Make sure the USB cable, power cable, or wireless connection are secure and not loose.
- Restart Devices: Sometimes, a simple restart can resolve connectivity issues. Try turning off both the printer and your tablet, wait a few seconds, and then turn them back on. This can refresh the connection and resolve any temporary glitches.
- Update Software: Check for and install any available software updates for both your tablet’s operating system and the printer firmware. Outdated software can cause compatibility issues and hinder proper connectivity.
- Reinstall Printer Software: If you’re experiencing persistent issues, try reinstalling the printer software. Uninstall any existing printer drivers and software from your tablet, download the latest version from the manufacturer’s website, and reinstall it following the instructions provided.
- Check Printer Settings: Verify that the printer settings are correctly configured. Ensure that the printer is set as the default printing device on your tablet and that the print settings, such as paper size and print quality, are adjusted correctly.
- Reset Network Settings: If you’re connecting your printer via Wi-Fi, reset your printer’s network settings and reconnect it to your Wi-Fi network. Follow the instructions provided in the printer’s manual to perform a network reset.
- Clear Print Spooler (for USB connections): If you’re using a USB connection, clear out any print jobs stuck in the print spooler. Go to the printer settings on your tablet, find the print queue, and remove any pending print jobs.
- Check for Paper Jams: If your printer is experiencing paper jams, carefully remove any jammed paper from the printer. Refer to the printer’s manual for specific instructions on how to remove paper jams.
- Contact Support: If you’ve tried all the troubleshooting steps and the issue persists, contact the manufacturer’s support for further assistance. They can provide you with specific troubleshooting advice based on your printer model and tablet’s operating system.
By following these troubleshooting steps, you can often resolve common issues encountered when connecting a printer to your tablet. Remember to refer to the printer’s manual and the manufacturer’s support resources for more detailed troubleshooting information specific to your devices.