
Setting up a Wireless Printer with your Android Tablet
Printing from an Android tablet can be a convenient and hassle-free way to bring your digital documents into the physical world. One of the easiest ways to achieve this is by setting up a wireless printer with your Android tablet. By following a few simple steps, you can have your tablet seamlessly connected to a printer and ready to print in no time.
First, make sure that your wireless printer is compatible with your Android tablet. Most modern wireless printers have built-in support for Android devices, but it’s always a good idea to check the manufacturer’s website or user manual to confirm compatibility.
Next, ensure that your printer and tablet are connected to the same Wi-Fi network. This is crucial for establishing a reliable connection between the two devices. If they are not on the same network, you may need to adjust the settings on either your printer or tablet to connect them to the appropriate network.
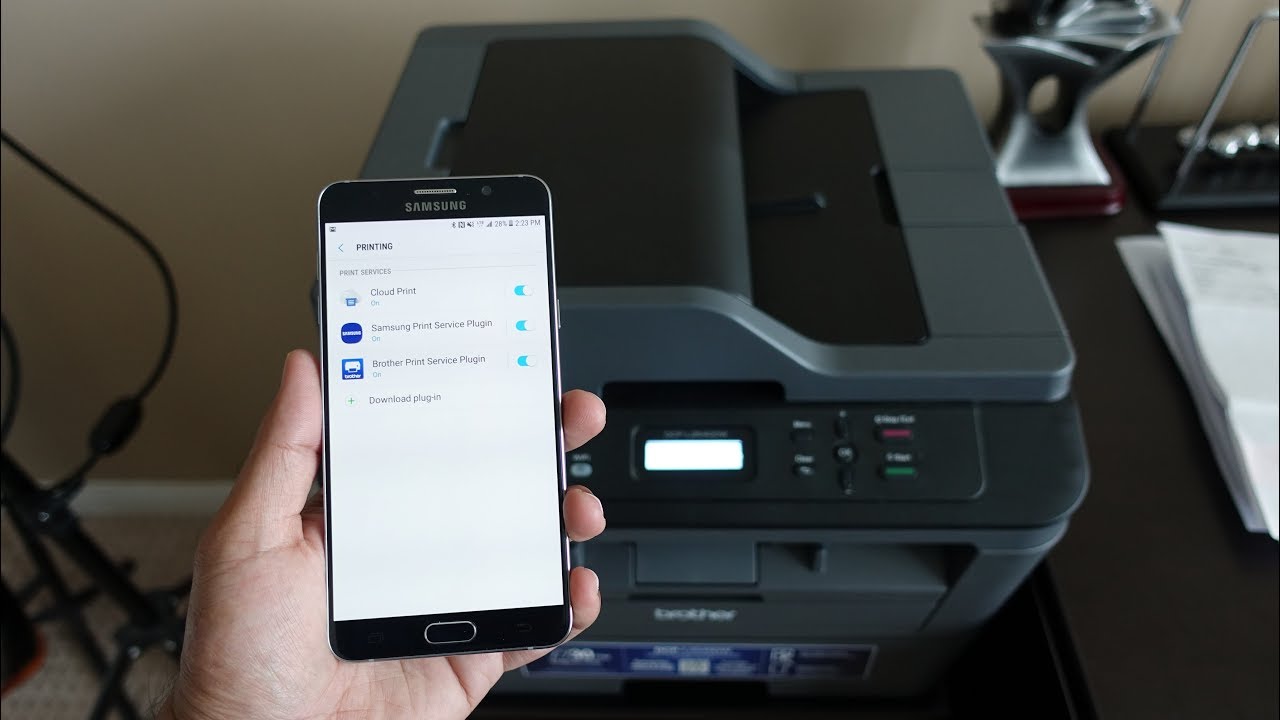
Once your tablet and printer are on the same Wi-Fi network, you’ll need to enable printing from your Android device. Open the Settings app on your tablet and navigate to the Printing section. Here, you should see a list of available printers. Tap on the name of your wireless printer to select it.
After selecting your printer, you may need to install the necessary print service plugin or app. Android devices use Google Cloud Print as the default print service, so if your printer supports this, you may be prompted to install the Google Cloud Print app. Follow the on-screen instructions to download and install the app.
Once the print service app is installed, you’re ready to start printing. Open the document or file you want to print on your tablet and look for the print option. This can usually be found in the overflow menu (three vertical dots) or in the share menu. Tap on the print option and select your wireless printer from the list of available printers.
Finally, adjust any print settings, such as the number of copies, page range, or paper size, as needed. Once you’re satisfied with the settings, tap the print button to start the printing process. Your Android tablet will communicate with the wireless printer, and your document will begin printing.
Setting up a wireless printer with your Android tablet opens up a world of convenient printing possibilities. Whether you need to print documents, photos, or web pages, having your tablet connected to a wireless printer allows you to easily and efficiently bring your digital content to life.
Printing with Google Cloud Print
Google Cloud Print is a powerful service that allows you to print wirelessly from your Android tablet to any compatible printer, regardless of its location. With Google Cloud Print, you can easily print documents, photos, emails, and web pages directly from your tablet. Here’s how to get started:
First, make sure that your printer is compatible with Google Cloud Print. Most modern printers offer built-in support for this feature, but if your printer doesn’t, you can still enable Google Cloud Print by connecting it to a computer that is already set up with Google Cloud Print.
To set up Google Cloud Print on your Android tablet, go to the Settings app and navigate to the Printing section. Tap on “Cloud Print” or “Print Services” to access the Google Cloud Print settings.
Ensure that Google Cloud Print is enabled by tapping on the toggle switch next to it. If prompted, sign in to your Google account to associate your tablet with your Google Cloud Print services.
Next, you’ll need to add your printer to Google Cloud Print. Tap on “Add Printer” and follow the on-screen instructions. Your tablet will scan for available printers on the same Wi-Fi network or connected to your Google account. Select the printer you want to add to Google Cloud Print and tap “Add Printer.”
Once your printer is added, you can start printing from your Android tablet. Open the document or file you want to print and tap on the print option. Select your printer from the list of available printers and adjust any print settings as needed.
Google Cloud Print also allows you to manage your print jobs from any device with internet access. You can track the status of your print jobs, cancel or re-print documents, and view the printing history.
Printing with Google Cloud Print offers the flexibility of printing from your Android tablet to any compatible printer, regardless of its location. Whether you’re at home, in the office, or on the go, you can easily send documents to print and have them waiting for you when you arrive at the printer.
Google Cloud Print takes the hassle out of printing and offers a seamless, wire-free printing experience. With a few simple setup steps, you can unlock the power of Google Cloud Print and enjoy the convenience of wireless printing from your Android tablet.
Printing with the Manufacturer’s Printing App
Many printer manufacturers provide their own dedicated printing apps for Android devices. These apps are specifically designed to work seamlessly with their printers, offering enhanced printing functionalities and convenient features. If you own a printer from a specific manufacturer, using their printing app can be a great way to optimize your printing experience. Here’s how you can print with the manufacturer’s printing app:
First, check if your printer manufacturer has a dedicated printing app available. You can typically find this information on their official website or by searching for the printer model in the Google Play Store.
Once you have identified the app, download and install it on your Android tablet. Make sure to grant any necessary permissions for the app to function correctly.
Open the manufacturer’s printing app on your tablet and ensure that both your tablet and printer are connected to the same Wi-Fi network.
Follow the on-screen instructions within the app to add and configure your printer. This may involve selecting your printer model, entering the Wi-Fi password, or providing additional information.
Once your printer is successfully connected to the app, you can start printing. Open the document, photo, or file you want to print on your tablet and select the print option. The manufacturer’s printing app should appear as an available printing service.
Tap on the app to select it and adjust any print settings, such as print quality, paper size, or number of copies.
Finally, tap the print button to send the print job to your printer. The manufacturer’s printing app will handle the communication with your printer and provide you with the status of the printing process.
By using the manufacturer’s printing app, you can take advantage of advanced printing features specific to your printer model, such as duplex printing, ink level monitoring, or custom print settings. These apps are often optimized for the best printing performance and can provide a seamless and reliable printing experience.
Printing with the manufacturer’s printing app not only ensures compatibility but also allows you to make the most out of your printer’s capabilities. With the dedicated app, you can effectively manage and control your printing tasks, achieving optimal print quality and efficiency.
Printing with Third-Party Printing Apps
In addition to the manufacturer’s printing apps, there is a wide range of third-party printing apps available for Android tablets. These apps offer alternative printing solutions and compatibility with various printers, giving you more flexibility and options for your printing needs. Here’s how you can print with third-party printing apps:
Start by searching for and downloading a third-party printing app from the Google Play Store. Popular options include PrintHand, PrinterShare, and Epson iPrint, among others. Make sure to choose an app that supports your printer brand and model.
Once the app is installed on your Android tablet, open it and follow the on-screen instructions to set it up. This may involve granting necessary permissions, providing Wi-Fi access, or configuring the printer connection.
After the initial setup, you will typically need to add your printer within the app. Tap on the “Add Printer” or similar option and select your printer from the list of available devices. Depending on the app, you may need to enter your printer’s IP address or connect via Wi-Fi.
Once your printer is successfully added, you can start printing through the third-party app. Open the document, photo, or file you want to print and select the print option. The third-party printing app should appear as an available printing service.
Tap on the app to select it and adjust any print settings as needed. These settings may vary depending on the app, but typically include options such as paper size, orientation, print quality, and number of copies.
Finally, tap the print button to initiate the printing process. The third-party printing app will communicate with your printer and send the print job for you. You can monitor the printing progress through the app and make any necessary adjustments or cancellations.
Printing with third-party printing apps can offer added convenience and compatibility with a wide range of printers. These apps often provide additional features such as cloud printing, direct printing from online platforms, and integration with popular services like Dropbox or Google Drive.
While using third-party printing apps can be beneficial, it’s important to ensure the security and reliability of the app. Choose reputable apps with positive reviews and be cautious when granting permissions or sharing sensitive information.
Overall, third-party printing apps can expand your printing capabilities and offer alternative ways to print from your Android tablet. Explore the options available and find an app that suits your specific needs and printer requirements.
Troubleshooting Printer Connectivity Issues
While printing wirelessly from your Android tablet can be convenient, there may be instances where you encounter connectivity issues with your printer. Luckily, there are several troubleshooting steps you can take to resolve common printer connectivity problems. Here are some tips to help you troubleshoot printer connectivity issues:
Check Wi-Fi Connection: Ensure that your Android tablet and printer are connected to the same Wi-Fi network. If not, reconnect both devices to the same network and try printing again.
Restart Devices: Sometimes, simply restarting both your tablet and printer can help resolve connectivity issues. Power off both devices, wait for a few seconds, and then power them back on.
Update Printer Firmware: Check if there are any firmware updates available for your printer. Updating the firmware can often fix compatibility issues and improve connectivity. Visit the manufacturer’s website or refer to the user manual for instructions on updating the printer firmware.
Verify Printer Status: Make sure your printer is turned on and properly connected to the power source and Wi-Fi network. Check the printer’s display panel or indicator lights for any error messages indicating issues that need to be addressed.
Clear Print Queue: If previous print jobs are stuck in the print queue, they may interfere with new print requests. Open the print queue on your Android tablet and cancel any pending print jobs. This can help resolve connectivity issues and allow new print jobs to go through.
Reinstall Printer Drivers: If your printer drivers are outdated, corrupted, or incompatible, it can lead to connectivity problems. Uninstall the printer drivers from your tablet and reinstall them from the manufacturer’s website or using the installation CD that came with the printer.
Restart Print Services: In the Settings app on your Android tablet, navigate to the Printing section and tap on “Print Services” or “Cloud Print.” Disable the print service, wait for a few seconds, and then re-enable it. This can refresh the connection between your tablet and the printer.
Test with Another App: If you are experiencing connectivity issues with a specific printing app, try using a different app to see if the problem persists. This can help determine if the issue lies with the app or with the printer connectivity.
Contact Support: If you have tried the above troubleshooting steps and are still experiencing printer connectivity issues, reach out to the printer manufacturer’s support team for further assistance. They can provide specific solutions or guide you through more advanced troubleshooting steps.
By following these troubleshooting tips, you can overcome common printer connectivity issues and ensure a seamless printing experience from your Android tablet. Remember that each printer and setup may have unique considerations, so it may be necessary to consult the printer’s user manual or contact support for specific guidance.
Tips and Tricks for Optimizing Printing Quality
When printing from your Android tablet, you want to ensure that the printed output is of the highest quality possible. To optimize the printing quality and achieve professional-looking results, consider the following tips and tricks:
Choose the Right Paper: Selecting the appropriate paper for your print job can have a significant impact on the overall quality. Use high-quality printer paper that is compatible with your printer’s specifications. Consider using photo paper for printing images and photos for sharper and more vibrant results.
Adjust Print Settings: Take the time to review and adjust the print settings according to your specific printing needs. Depending on the app or printer, you may have options for print quality, paper size, color mode, and borderless printing. Experiment with different settings to find the optimal combination for your desired output.
Monitor Ink Levels: Keep an eye on your printer’s ink levels to avoid running out of ink in the middle of a print job. Low ink levels can affect the quality and color accuracy of the prints. Some printing apps or printer software may provide alerts or notifications when ink levels are getting low.
Calibrate Color Settings: To ensure accurate color reproduction, consider calibrating the color settings on your printer. Many printers offer calibration tools or software that can help you adjust the color temperature, saturation, and hue. Consult your printer’s user manual or refer to the manufacturer’s website for instructions on calibrating color settings.
Optimize Image Resolution: When printing images or photos, ensure that the resolution is suitable for the intended print size. Low-resolution images can appear pixelated or blurry when printed. Aim for a resolution of at least 300 dots per inch (dpi) for optimal print quality.
Clean Print Heads: Over time, dust, debris, and dried ink can accumulate on the print heads, affecting print quality. Regularly clean the print heads according to the manufacturer’s instructions to maintain optimal printing performance. Some printers have an automatic cleaning function that can be accessed through the printer software or control panel.
Preview Before Printing: Before hitting the print button, take advantage of the preview feature in your printing app. This allows you to review the layout, formatting, and overall appearance of the document or image before printing. Make any necessary adjustments to ensure the desired print output.
Use Genuine Printer Cartridges: To achieve the best print quality and avoid potential compatibility issues, it is recommended to use genuine ink or toner cartridges from the printer manufacturer. Generic or third-party cartridges may not produce the same level of quality and could potentially damage your printer.
Keep Printer Firmware Updated: Regularly check for firmware updates for your printer and install them when available. Firmware updates often include performance improvements, bug fixes, and enhancements that can positively impact print quality and overall printer performance.
By implementing these tips and tricks, you can optimize the printing quality from your Android tablet and ensure that your documents, photos, and images are printed with clarity, precision, and vibrant colors. Experiment, explore, and adapt these recommendations to suit your specific printing needs and achieve the best possible results.
Understanding Paper Sizes and Print Settings
When printing from your Android tablet, it’s essential to understand the different paper sizes and print settings available to ensure that your prints are the correct size and format. Here’s a breakdown of common paper sizes and an explanation of important print settings:
Paper Sizes:
- Letter (8.5 x 11 inches): The standard paper size used for documents, letters, and most common printouts.
- Legal (8.5 x 14 inches): A slightly longer paper size often used for legal documents, contracts, and certificates.
- A4 (210 x 297 mm): The international standard paper size used in most countries outside of North America.
- 4×6 inches and 5×7 inches: Popular photo print sizes used for printing images and photographs.
Print Settings:
- Orientation: This setting determines whether pages will be printed in portrait (vertical) or landscape (horizontal) orientation. Choose the orientation that best suits the layout and content of your document.
- Page Scaling: This option allows you to adjust the size of the printed content to fit the paper. You can choose between “Fit to Page” to scale the content to the paper size or “Actual Size” to print the content at its original dimensions.
- Margins: Margins determine the spacing between the content and the edges of the paper. Adjust the margin settings to ensure that no important information gets cut off and to maintain a visually pleasing layout.
- Duplex Printing: Duplex printing, also known as double-sided printing, allows you to print on both sides of the paper. This can help save paper and is often useful for creating booklets, brochures, or multi-page documents.
- Color Settings: Depending on the printing app and printer, you may have options to select between color or black and white printing. Color settings can include options like “Grayscale” or “High-Quality Color” for more accurate color reproduction.
Understanding paper sizes and print settings ensure that your prints match your intended requirements and avoid any unexpected results. Prior to printing, verify the paper size needed for your document or image and select the appropriate options in the print settings menu of your printing app.
Additionally, it’s important to consider the capabilities and limitations of your printer when selecting paper sizes and print settings. Some printers may have specific size restrictions or limited print settings, so consult your printer’s documentation or manufacturer’s website for more information.
By familiarizing yourself with paper sizes and print settings, you can ensure that your prints are accurately sized, properly formatted, and visually appealing.
Printing Images and Photos from your Android Tablet
Your Android tablet can serve as a powerful tool for printing images and photos, allowing you to bring your digital memories into the physical world. Whether it’s a cherished family photo or a stunning landscape shot, printing images from your tablet can help preserve those special moments. Here’s how you can print images and photos from your Android tablet:
Select the Image: Start by navigating to the image you want to print on your Android tablet. This could be a photo saved in your gallery, an image downloaded from the internet, or a screenshot.
Choose the Printing App: Depending on your printer model and personal preferences, use the manufacturer’s printing app or a third-party printing app that supports image printing. Install the app on your tablet and ensure that your printer is connected and set up with the app.
Open the Printing App: Launch the printing app on your tablet and select the option to print images or photos. The location of this option may vary depending on the app, but it is usually clearly displayed on the app’s main screen or in the navigation menu.
Select the Image to Print: Within the printing app, browse through your tablet’s image gallery or choose the location where the image is stored. Tap on the image you want to print to select it for printing.
Adjust Print Settings: Most printing apps offer various print settings that allow you to customize the output. These settings can include options for print size, paper type, print quality, and color settings. Adjust the print settings according to your preferences and the desired results.
Preview and Edit: Before sending the image to print, some apps provide the option to preview and edit the image. This allows you to make any necessary adjustments, such as cropping, rotating, or enhancing the image, to ensure the best print quality.
Tap Print: Once you are satisfied with the image and print settings, tap the print button to initiate the printing process. Your tablet will communicate with the printer, and the photo or image will start printing.
Wait for the Printout: Be patient while the image is being printed. The printing time can vary depending on factors such as image size, print quality, and the speed of your printer. Once the printing process is complete, you can enjoy your printed image.
By following these steps, you can easily print images and photos from your Android tablet, preserving your precious memories or sharing them with others. Experiment with different print settings, paper types, and sizes to achieve the desired results and make your images come to life.
Printing Documents and Emails from your Android Tablet
Your Android tablet can be a valuable tool for printing important documents and emails, allowing you to have physical copies and easily share information. Whether it’s a contract, a report, or an email conversation, printing documents and emails from your tablet can help you stay organized and maintain a record of essential information. Here’s how you can print documents and emails from your Android tablet:
Choose the Printing App: Start by using the manufacturer’s printing app or a third-party printing app that supports document and email printing. Install the app on your tablet and ensure that your printer is connected and set up with the app.
Open the Document or Email: Navigate to the document or email you want to print on your Android tablet. This can be a file saved on your tablet, a document stored in a cloud storage service, or an email accessed through your email app.
Select the Print Option: Once you have the document or email open, look for the print option. This option is usually accessible through the overflow menu (three vertical dots) or the share menu within the app.
Choose the Printing App: When you tap on the print option, a list of available printers will appear. Select the printing app you installed earlier from the list. If prompted, adjust any print settings, such as paper size, print quality, or duplex printing.
Preview (Optional): Some printing apps provide a preview feature that allows you to preview the document or email before printing. This can be helpful to ensure that the content and formatting are correct and that no important information gets cut off.
Tap Print: Once you are satisfied with the print settings and preview (if available), tap the print button to start the printing process. Your tablet will communicate with the printer, and the document or email will begin printing.
Wait for the Printout: Depending on the size and complexity of the document, the printing process may take some time. Be patient and wait for the printout to complete. Once finished, you can collect your printed document or email.
By following these steps, you can easily print documents and emails from your Android tablet, making it easy to keep important information at hand or share it with others. Remember to review the print settings and preview the content to ensure a satisfactory printout that meets your specific needs.
Printing Web Pages and Online Content from your Android Tablet
Printing web pages and online content from your Android tablet can be incredibly useful for capturing articles, recipes, or other information you find online. Whether you need a physical copy for reference or want to share online content with others, printing web pages from your tablet is a convenient option. Here’s how you can print web pages and online content from your Android tablet:
Choose the Printing App: Begin by installing a printing app on your tablet that supports web page printing. Popular options include Google Cloud Print, PrintFriendly, or PrinterShare. Make sure your printer is connected and set up with the printing app.
Open the Web Page or Online Content: Use your preferred web browser to navigate to the web page or online content you want to print. Ensure that you have a stable internet connection before proceeding.
Select the Print Option: Once you have the web page or content open, tap the overflow menu (three vertical dots) at the top right corner of the browser. Look for the print option within the menu and tap on it to proceed.
Choose the Printing App: A list of available printers will appear. Select the printing app you installed earlier from the list. If prompted, adjust any print settings, such as paper size, orientation, or print quality.
Preview and Edit (Optional): Some printing apps provide a preview feature that allows you to preview the web page or online content before printing. This can be helpful for verifying the content, removing unwanted ads, or adjusting the layout. Make any necessary edits or adjustments.
Tap Print: Once you are satisfied with the print settings and preview (if available), tap the print button to initiate the printing process. Your tablet will communicate with the printer, and the web page or online content will begin printing.
Wait for the Printout: Depending on the size and complexity of the web page or content, the printing process may take some time. Be patient and allow the printer to complete the print job. Once finished, collect your printed web page or content.
By following these steps, you can easily print web pages and online content from your Android tablet, enabling you to have a physical copy of valuable information or share online content with others. Remember to review the print settings and preview the content to ensure that the final printout is as desired.