
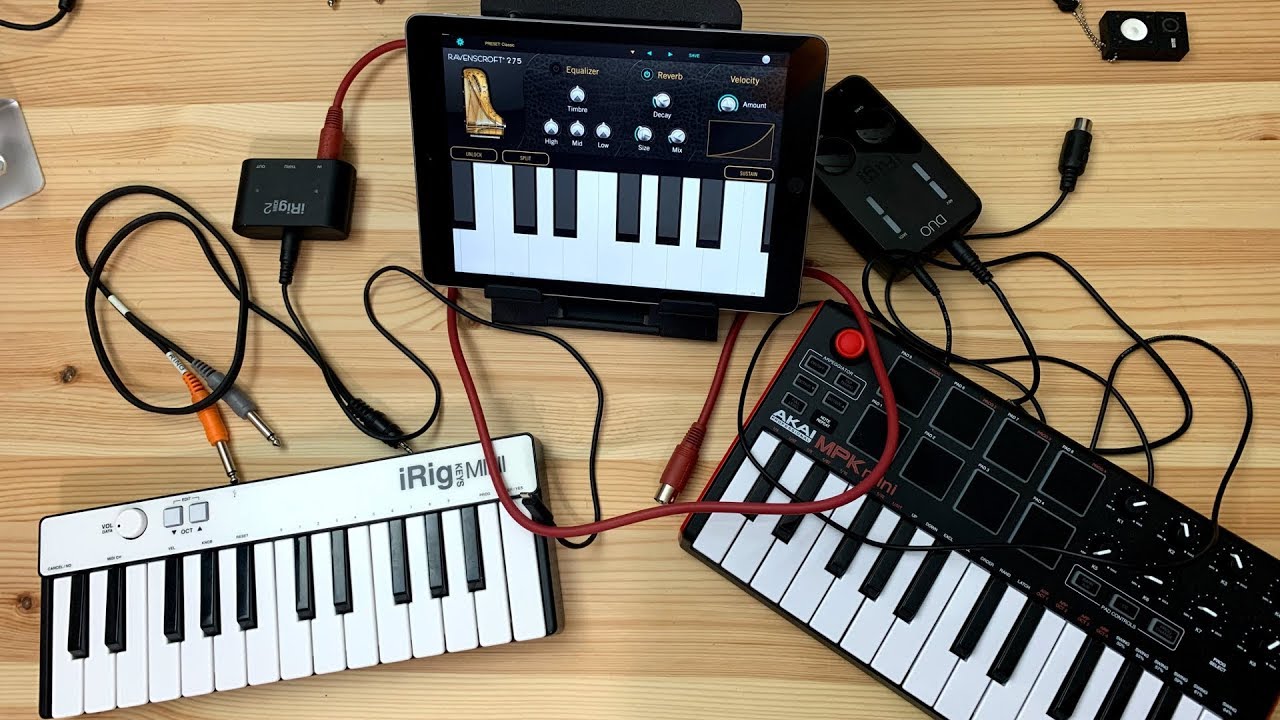
What is a MIDI Controller?
A MIDI controller is a hardware device or software application that is used to control other MIDI-enabled devices, such as synthesizers, digital audio workstations (DAWs), and virtual instruments. MIDI stands for Musical Instrument Digital Interface, and it is a protocol that allows electronic musical instruments and computers to communicate with each other.
MIDI controllers come in various forms, including keyboards, drum pads, knobs, sliders, and buttons, each designed to perform specific functions within a music production setup. They enable musicians, producers, and DJs to interact with their digital audio equipment and software in a more tactile and expressive way, reminiscent of playing traditional musical instruments.
These controllers transmit MIDI data, which includes information such as note messages, control change messages, pitch bend data, and more. When you press a key or move a control on a MIDI controller, it sends the corresponding MIDI data, which is received and interpreted by the connected MIDI-enabled devices or software.
One of the significant advantages of MIDI controllers is their versatility. They can be used in various music production scenarios, from live performances to studio recording sessions. They offer precise control over parameters, allowing musicians to manipulate sound in real-time, create dynamic performances, and experiment with different musical ideas.
Moreover, MIDI controllers are highly customizable. Many models allow users to assign specific functions to buttons, knobs, or pads, which can be tailored to individual preferences and workflows. This flexibility enables musicians and producers to adapt their MIDI controller to suit their specific needs and creative visions, making the controller an extension of their musical expression.
Overall, a MIDI controller is an essential tool for anyone involved in music production, whether you’re a professional musician, hobbyist producer, or DJ. It offers an intuitive and hands-on approach to creating music, allowing you to unleash your creativity and take your performances to the next level.
Choosing the Right MIDI Controller for Your iPad
When selecting a MIDI controller for your iPad, it’s essential to consider several factors to ensure compatibility and functionality. Here are some key points to keep in mind when choosing the right MIDI controller:
1. Intended use: Determine how you plan to use the MIDI controller with your iPad. Are you primarily a keyboard player? Do you need drum pads or knobs for controlling virtual instruments or effects? Understanding your specific requirements will help narrow down your options.
2. Connectivity: Check the available connection options on the MIDI controller and ensure it is compatible with your iPad. The most common connectivity options for iPad include USB, Bluetooth, and Lightning ports.
3. Size and portability: Consider the size and portability of the MIDI controller, especially if you plan to use it for live performances or on-the-go music production. Compact and lightweight controllers are ideal for travel, while larger ones may offer more control options.
4. Build quality: Look for a MIDI controller that is well-built and durable. Consider the materials used and pay attention to user reviews to gauge the overall quality and longevity of the device.
5. Software compatibility: Check if the MIDI controller supports popular music production apps and software on the iPad. Ensure that the controller is compatible with the specific app or DAW you plan to use.
6. Features and controls: Consider the specific features and controls that you require. This could include the number and type of keys, drum pads, encoders, faders, or transport controls.
7. Budget: Set a budget for your MIDI controller purchase and consider the options available within that range. Remember that more expensive controllers often come with advanced features and better build quality, but there are also affordable options that deliver excellent performance.
By considering these factors, you can make an informed decision when choosing a MIDI controller that best suits your needs and preferences. It’s worth researching and reading reviews before making a purchase to ensure that the controller meets your specific requirements and is compatible with your iPad and chosen music production applications.
Checking Compatibility with Your iPad
Before purchasing a MIDI controller, it’s crucial to ensure that it is compatible with your iPad. Here are some steps you can take to check compatibility:
1. Research the MIDI controller: Visit the manufacturer’s website or product documentation to find out if the MIDI controller is specifically designed to work with iPads. Look for any compatibility information provided, including supported iPad models and required software versions.
2. Check the connection options: Determine how the MIDI controller connects to your iPad. The most common options are USB, Bluetooth, or a Lightning port. Make sure that your iPad supports the chosen connection method.
3. Check the iPad’s operating system: Ensure that your iPad’s operating system is compatible with the MIDI controller. Some MIDI controllers may require specific iOS versions, so verify that your iPad meets the minimum requirements.
4. Read user reviews and forums: Look for user reviews and forums where people discuss their experiences with the MIDI controller and iPad compatibility. Often, users will share insights, tips, and any issues they encountered, which can be valuable information when making a decision.
5. Reach out to the manufacturer: If you’re still unsure about compatibility, contact the manufacturer directly for more information. They will be able to provide you with accurate details regarding compatibility and any specific settings or configurations required.
6. Check for software support: If you plan to use the MIDI controller with specific music production apps or software, ensure that those applications support the controller. Look for any compatibility information on the app’s website or contact their support team if needed.
By thoroughly researching and checking compatibility before purchasing a MIDI controller, you can avoid any compatibility issues and ensure a seamless connection with your iPad. Remember that it’s essential to have the correct connection cables or adapters to facilitate the connection between the MIDI controller and your iPad.
Using a Lightning to USB Camera Adapter
If your MIDI controller has a USB connection and your iPad has a Lightning port, you can use a Lightning to USB Camera Adapter to connect the two devices. Here’s how to use the adapter:
1. Purchase a Lightning to USB Camera Adapter: This adapter is available from Apple or authorized retailers. Ensure that you get the genuine product to guarantee compatibility.
2. Connect your MIDI controller to the adapter: Attach one end of the USB cable from your MIDI controller to the USB port on the Lightning to USB Camera Adapter.
3. Plug the adapter into your iPad: Connect the Lightning connector of the adapter to your iPad’s Lightning port. Your iPad may display a notification indicating that it has detected a connected device.
4. Power up your MIDI controller: Some MIDI controllers may require an external power source, such as batteries or an AC adapter. Make sure your MIDI controller is powered on and receiving power as needed.
5. Configure MIDI settings: Open the settings on your iPad and navigate to “Settings” > “Music” > “MIDI.” You should see your connected MIDI controller listed under “MIDI Devices.” Tap on the MIDI controller to enable it for use with supported apps.
6. Launch a compatible music app: Open a MIDI-compatible music production app on your iPad. The app should automatically recognize your MIDI controller and allow you to use it for playing instruments, controlling parameters, and recording MIDI data.
7. Test the connection: Verify that the MIDI controller is functioning correctly by pressing keys, tapping pads, or moving controls. You should hear sound or see visual feedback on the app’s interface, indicating that the MIDI data is being transmitted successfully.
Using a Lightning to USB Camera Adapter provides a reliable and straightforward way to connect your MIDI controller to your iPad. This method is widely supported by many music production apps, making it a popular choice for iPad musicians and producers.
Note that some MIDI controllers may require additional configuration or setup within specific apps to fully utilize their features. Refer to the controller’s user manual or the app’s documentation for detailed instructions on configuring and mapping your MIDI controller for optimal performance.
Using a USB Hub
If you have multiple USB devices or a MIDI controller that requires additional USB connections, using a USB hub can be a convenient solution. Here’s how you can use a USB hub to connect your MIDI controller to your iPad:
1. Choose a compatible USB hub: Look for a USB hub that is compatible with your iPad and MIDI controller. Ensure that the hub supports the required USB standard (USB 2.0, USB 3.0, etc.) and has enough available ports for your devices.
2. Connect the hub to your iPad: Plug the USB hub into your iPad using a compatible adapter or cable. Depending on your iPad’s port, you may need a Lightning to USB adapter or a USB-C to USB adapter.
3. Connect your MIDI controller to the hub: Connect your MIDI controller to one of the available USB ports on the hub. Ensure that the MIDI controller is powered on, either with batteries or an external power source if required.
4. Connect additional USB devices: If you have other USB devices, such as external storage, audio interfaces, or MIDI keyboards, connect them to the remaining available ports on the USB hub.
5. Configure MIDI settings: Open the settings on your iPad and navigate to “Settings” > “Music” > “MIDI.” You should see your connected MIDI controller listed under “MIDI Devices.” Tap on the MIDI controller to enable it for use with supported apps.
6. Launch a compatible music app: Open a MIDI-compatible music production app on your iPad. The app should recognize your MIDI controller via the USB hub and allow you to use it just like a directly connected MIDI device.
7. Test the connection: Ensure that all connected devices, including your MIDI controller, are functioning correctly. Play keys, tap pads, or move controls on your MIDI controller to generate MIDI data within the app, and check if the app responds accordingly.
Using a USB hub provides flexibility and convenience when connecting multiple USB devices, including your MIDI controller, to your iPad. It eliminates the need to constantly switch and reconnect cables, making your music production workflow more streamlined and efficient.
When selecting a USB hub, consider factors such as the number of available ports, power requirements, build quality, and compatibility with your iPad model. Additionally, ensure that the USB hub is capable of transmitting MIDI data reliably to your connected devices.
Remember that the overall performance and stability may depend on both the USB hub and the iPad’s capabilities. If you experience any issues, such as latency or dropped connections, consider using a powered USB hub or connecting only essential devices to ensure optimal performance.
Connecting via Bluetooth
If your MIDI controller supports Bluetooth connectivity, you can wirelessly connect it to your iPad. Here’s how you can connect your MIDI controller via Bluetooth:
1. Check Bluetooth compatibility: Ensure that your MIDI controller and iPad both support Bluetooth connectivity. Refer to the user manuals or specifications of your devices to confirm compatibility.
2. Enable Bluetooth on your iPad: Open the Settings app on your iPad, navigate to “Bluetooth,” and toggle it on. Make sure your iPad is discoverable to other devices by keeping the Bluetooth settings screen open.
3. Enable Bluetooth pairing mode on the MIDI controller: Consult the user manual or documentation for your MIDI controller to learn how to enable Bluetooth pairing mode. This step may involve pressing specific buttons or entering a specific sequence of commands.
4. Pair the MIDI controller with your iPad: On your iPad, under the Bluetooth settings, you should see your MIDI controller listed as a discoverable device. Tap on the device name to initiate the pairing process. Follow any on-screen prompts or enter any PIN codes required to complete the pairing.
5. Configure MIDI settings: Open the settings on your iPad and navigate to “Settings” > “Music” > “MIDI.” Your connected MIDI controller should be listed under “Bluetooth Devices.” Tap on the MIDI controller to enable it for use with supported apps.
6. Launch a compatible music app: Open a MIDI-compatible music production app on your iPad. The app should automatically recognize your MIDI controller via Bluetooth and allow you to use it for playing instruments, controlling parameters, and recording MIDI data.
7. Test the connection: Verify that the MIDI controller is functioning correctly by pressing keys, tapping pads, or moving controls. You should hear sound or see visual feedback on the app’s interface, indicating that the MIDI data is being transmitted successfully.
Bluetooth connectivity offers the advantage of wireless freedom, allowing you to move around while using your MIDI controller without the limitations of cables. However, keep in mind that Bluetooth connections may introduce some latency or occasional signal interference, which can impact real-time performance.
It’s important to note that some MIDI controllers may require additional configuration or setup within specific apps to fully utilize their features. Refer to the controller’s user manual or the app’s documentation for detailed instructions on configuring and mapping your MIDI controller for optimal performance.
By connecting your MIDI controller via Bluetooth, you can enjoy the convenience of wireless control, providing flexibility and freedom during your music production sessions on your iPad.
Configuring MIDI Settings on Your iPad
Once you have connected your MIDI controller to your iPad, it’s important to configure the MIDI settings to ensure seamless communication between your controller and music production apps. Here’s how to configure MIDI settings on your iPad:
1. Open Settings: Tap on the Settings app on your iPad’s home screen to access the settings menu.
2. Navigate to Music: Scroll down and tap on “Music.” This section includes various music-related settings, including MIDI configurations.
3. Access MIDI Settings: In the Music settings, locate and tap on “MIDI.” This opens the MIDI settings menu on your iPad.
4. View Available MIDI Devices: Under the MIDI settings, you will see a list of connected MIDI devices. This includes your MIDI controller and any other MIDI devices that are connected to your iPad.
5. Enable MIDI Devices: To enable your MIDI controller for use with supported apps, toggle on the switch next to its name in the list of available MIDI devices.
6. Arrange MIDI Devices: If you have multiple MIDI devices connected, you can arrange their order by dragging and rearranging them in the list. This allows you to prioritize or give preference to specific MIDI devices in case of conflicts or overlapping MIDI signals.
7. Test MIDI Connections: Launch a compatible music app on your iPad and verify that the MIDI controller is functioning correctly. Test the keys, pads, knobs, or other controls on your MIDI controller to ensure that they are generating MIDI data that is properly received and interpreted by the app.
8. Assign MIDI Controls: Some music production apps allow you to assign specific MIDI controls to various parameters within the app, such as virtual instrument parameters, mixer controls, or effects parameters. Refer to the app’s documentation or settings menu to learn how to assign MIDI controls according to your preferences.
9. Configure MIDI Channels: If your MIDI controller supports multiple MIDI channels, you may want to configure them to match the MIDI channel settings in your music production app. This ensures that the MIDI controller communicates with the specific tracks or instruments you intend to control.
10. Adjust Latency Settings: In some cases, you may experience slight latency (a delay between pressing a key and hearing the sound) when using your MIDI controller with iPad apps. Check the app’s settings or preferences menu for any latency or buffer size settings that can be adjusted to minimize latency.
Taking the time to configure the MIDI settings on your iPad allows for a more seamless and optimized experience when using your MIDI controller with music production apps. It ensures that the MIDI data generated by your controller is accurately transmitted and received by the apps, enabling you to fully harness the potential of your MIDI controller in your music production workflow.
Using a MIDI Controller with Music Production Apps
One of the primary purposes of a MIDI controller is to enhance your music production experience by providing hands-on control over the various functions and parameters of music production apps on your iPad. Here’s how you can use a MIDI controller with music production apps:
1. Launch a compatible music production app: Open a MIDI-compatible music production app on your iPad. This could be a virtual instrument app, a digital audio workstation (DAW), or an effects processor.
2. Connect your MIDI controller: Ensure that your MIDI controller is properly connected to your iPad using the appropriate connection method (USB, Lightning, or Bluetooth) as discussed earlier.
3. Configure MIDI settings: Open the settings menu within the music production app and locate the MIDI settings. Ensure that your MIDI controller is selected as the input device for MIDI data.
4. Assign MIDI controls: Depending on the app, you may have the option to assign specific MIDI controls to various parameters within the app. This allows you to customize the functions that different knobs, sliders, or buttons on your MIDI controller perform within the app.
5. Play virtual instruments: If you are using a virtual instrument app, such as a piano, synth, or drum machine, you can use the keys or pads on your MIDI controller to play the instrument and trigger sounds.
6. Control parameters: Many music production apps allow you to control various parameters, such as volume, pan, filter cutoff, and more. Use the knobs, sliders, or buttons on your MIDI controller to adjust and modulate these parameters in real-time.
7. Record MIDI data: If your music production app supports MIDI recording, you can use your MIDI controller to record performances or create intricate MIDI sequences. This provides a more intuitive and expressive way to create music compared to clicking or drawing MIDI notes manually.
8. Utilize transport controls: Many MIDI controllers feature transport controls, such as play, stop, record, and rewind buttons. These controls allow you to easily navigate and control playback within music production apps, enhancing your workflow and productivity.
9. Experiment and explore: The versatility of MIDI controllers allows for experimentation and exploration within music production apps. Don’t be afraid to try different combinations of controls, settings, and effects to discover unique sounds and create innovative compositions.
10. Refer to app documentation: Each music production app has its own unique features and workflows. Familiarize yourself with the app’s documentation or tutorials to learn more about how to maximize the use of your MIDI controller with that specific app.
Using a MIDI controller with music production apps opens up a world of creative possibilities. It enables a more tactile and expressive approach to music creation, allowing you to perform, manipulate, and shape your sounds with precision and finesse.
Experiment with different apps, explore various virtual instruments, and discover new ways to integrate your MIDI controller into your music production workflow. The combination of a MIDI controller and music production apps on your iPad offers a powerful platform for unleashing your creativity and producing professional-quality music.
Troubleshooting Common Issues
While using a MIDI controller with your iPad, you may encounter some common issues. Here are some troubleshooting steps to help resolve them:
1. Connection Issues: If your MIDI controller is not connecting or being recognized by your iPad, double-check the physical connection and ensure that all cables are securely connected. If using Bluetooth, make sure your MIDI controller is in pairing mode and in range of your iPad. Restarting both the MIDI controller and the iPad can also help resolve connection issues.
2. Latency: If you experience latency, a delay between pressing a key and hearing the sound, adjust the buffer size or latency settings in your music production app. Increasing the buffer size may reduce latency, but it can also increase audio processing delay.
3. Configuration: If your MIDI controller is not functioning as expected within the app, review the MIDI settings. Ensure that your MIDI controller is properly selected as the input device and that MIDI channels are correctly configured. Consult the app’s documentation or support resources for guidance.
4. Power Issues: If your MIDI controller requires external power, make sure it is adequately powered. Check the batteries or the power adapter connected to your MIDI controller. Low batteries or inadequate power can lead to performance issues or connectivity problems.
5. Firmware Updates: Occasionally, MIDI controllers may require firmware updates to improve compatibility or fix bugs. Check the manufacturer’s website or support page for any available firmware updates for your MIDI controller. Follow their instructions to update the firmware if necessary.
6. Software Updates: Keep your iPad’s operating system and music production apps updated to the latest versions. Software updates often address compatibility issues and enhance overall performance. Check the App Store for updates or enable automatic updates for your apps.
7. App-Specific Considerations: Some apps may have specific settings or requirements for MIDI controller integration. Check the app’s documentation, user forums, or contact the app’s support for assistance. They may have specific recommendations or workarounds for known issues.
8. Signal Interference: If using Bluetooth, be mindful of potential signal interference from other devices or Wi-Fi networks. Stay within close proximity of your iPad and attempt to minimize any potential sources of interference. Alternatively, consider using a wired USB connection or looking into Bluetooth dongles that provide improved stability.
9. Resetting MIDI Connections: If you encounter persistent issues, try resetting the MIDI connections on your iPad. Go to “Settings” > “Music” > “MIDI” and tap “Reset MIDI Connections.” This clears any existing MIDI configurations and reconnects your MIDI devices from scratch.
10. Seek Technical Support: If you have tried the above troubleshooting steps and are still facing issues with your MIDI controller, reach out to the manufacturer’s technical support or consult relevant online communities for assistance. They may be able to provide further guidance or help resolve the problem.
Remember to approach troubleshooting systematically, focusing on one issue at a time and testing your MIDI controller between each step. Patience and persistence will help you overcome any technical hiccups and get back to creating music with your MIDI controller and iPad.