
Checking Apple Pencil Battery
Before charging your Apple Pencil, it’s essential to check its battery level to determine whether it needs a recharge. There are a few methods you can use to check the battery status of your Apple Pencil:
- On iPad: Simply connect your Apple Pencil to your iPad and go to the home screen. Swipe down from the top-right corner to access the Control Center. Look for the battery widget, which will display the remaining battery percentage.
- In Settings: If you prefer a more detailed view of your Apple Pencil’s battery usage, you can check it in the settings. Go to “Settings” on your iPad, tap “Bluetooth,” and find your Apple Pencil in the list of connected devices. Tap the “i” icon next to the Apple Pencil, and you will see the battery percentage.
- On Apple Watch: If you have paired your Apple Pencil with an Apple Watch, you can check its battery status on the “Battery” app, which shows the battery level of all connected devices.
It’s important to note that the first-generation Apple Pencil does not have a battery indicator, so you won’t be able to check its battery level directly. However, you can keep an eye on its usage and recharge it regularly to ensure it’s ready whenever you need it.
By regularly checking your Apple Pencil’s battery level, you can avoid running out of power in the middle of an important task. Now that you’re aware of how to check the battery level, let’s move on to the different methods for charging your Apple Pencil, depending on its generation and connector type.
Charging Apple Pencil (2nd Generation)
The second-generation Apple Pencil is compatible with the iPad Pro models released in 2018 or later. Unlike its predecessor, the second-generation Apple Pencil magnetically attaches to the side of the iPad Pro and charges wirelessly. Here’s how to charge your Apple Pencil (2nd Generation):
- Ensure that your iPad Pro is unlocked and turn on the Bluetooth.
- Attach the Apple Pencil magnetically to the side of your iPad Pro. The magnetic connector will automatically align and attach to the charging port.
- Leave the Apple Pencil attached for a few moments. You will see the charging progress on the iPad Pro’s screen and in the notification center.
- If the battery is low and you need to use your Apple Pencil immediately, a quick charge of 15-20 seconds will provide up to 30 minutes of use.
The Apple Pencil (2nd Generation) charges quickly and efficiently using this magnetic connection, allowing you to spend more time creating and less time worrying about battery life. Remember to detach the Apple Pencil when you’re not using it to prevent accidental charging.
Please note that while the second-generation Apple Pencil charges wirelessly, it does not support charging via USB or lightning connectors. Make sure you own a compatible iPad Pro model to use the Apple Pencil (2nd Generation) and take advantage of its convenient charging feature.
Now that you know how to charge the Apple Pencil (2nd Generation), let’s dive into the process of charging the first-generation Apple Pencil.
Charging Apple Pencil (1st Generation)
The first-generation Apple Pencil is compatible with iPad models that have a lightning connector, such as the iPad Pro (12.9-inch, 1st and 2nd generation) and the iPad Pro (9.7-inch). Here’s how to charge your Apple Pencil (1st Generation):
- Remove the cap on the top of the Apple Pencil to reveal the lightning connector.
- Plug the lightning connector into the lightning port on your iPad.
- Leave the Apple Pencil connected for a while to allow it to charge.
- You can check the charging progress in the notification center or the battery widget on your iPad.
- When the Apple Pencil is fully charged, disconnect it from the lightning port and replace the cap.
It’s important to note that the first-generation Apple Pencil does not have a lightning adapter or any other charging option. Charging can only be done through the lightning connector, which limits its compatibility to iPads with a lightning port.
Make sure to charge your Apple Pencil (1st Generation) when the battery is low to ensure it’s ready for use whenever you need it. It’s also a good idea to keep a spare lightning cable nearby in case you need to charge your iPad while the Apple Pencil is connected.
Now that you know how to charge the first-generation Apple Pencil, let’s explore different charging methods for Apple Pencils with different connector types.
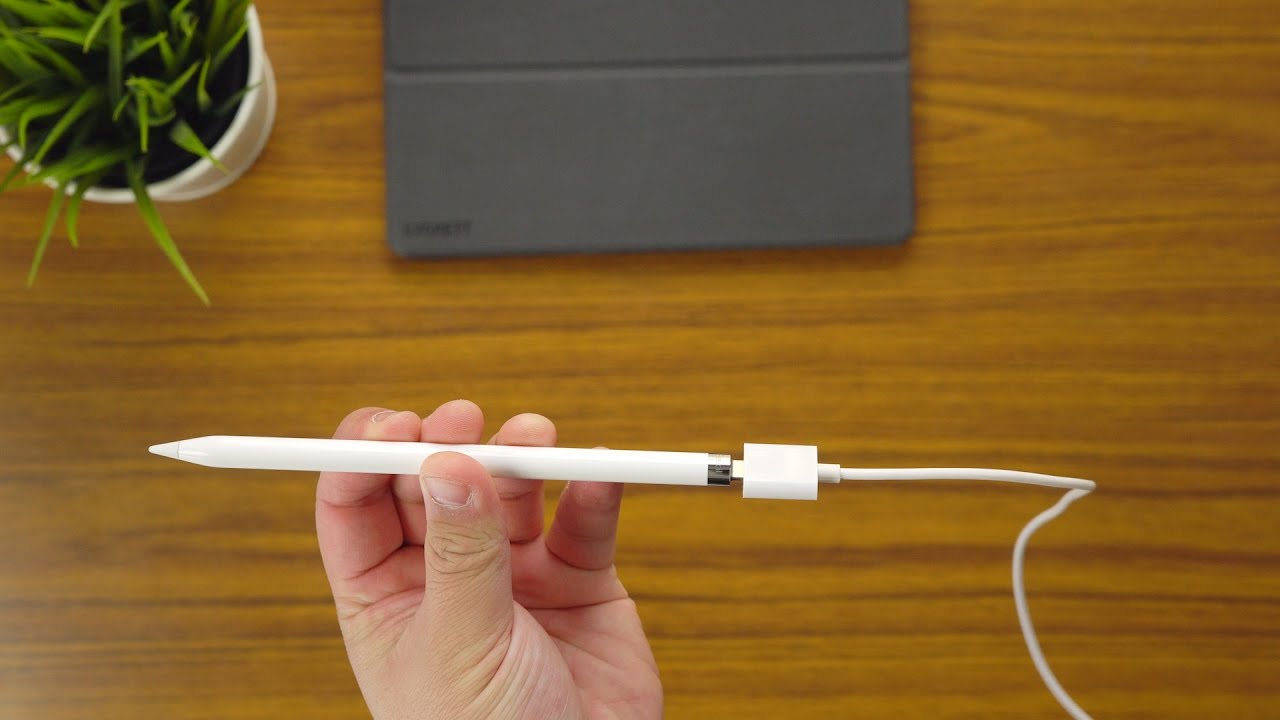
Charging Apple Pencil with Lightning Connector
If you have an Apple Pencil with a lightning connector, you can charge it using a lightning cable and a power source. Here’s how:
- Remove the cap on the top of the Apple Pencil to expose the lightning connector.
- Connect one end of the lightning cable to the lightning connector on the Apple Pencil.
- Connect the other end of the lightning cable to a power source, such as a USB port on your computer or a USB charger.
- Leave the Apple Pencil connected for a while to allow it to charge.
- You can check the charging progress on your iPad by swiping down from the top-right corner to access the Control Center and looking at the battery widget.
- Once the Apple Pencil is fully charged, disconnect it from the lightning cable and replace the cap.
Charging your Apple Pencil with a lightning connector gives you the flexibility to charge it using various power sources, such as your computer, a wall adapter, or even a portable power bank. This allows you to charge your Apple Pencil on the go or when you don’t have immediate access to your iPad.
It’s important to keep in mind that the Apple Pencil with a lightning connector is only compatible with iPads that have a lightning port. If you have an iPad with a USB-C port, you’ll need to use a different charging method, which we’ll explore next.
Now that you know how to charge the Apple Pencil with a lightning connector, let’s delve into charging the Apple Pencil with a USB-C connector.
Charging Apple Pencil with USB-C Connector
If you have the latest Apple Pencil (2nd generation) that comes with a USB-C connector, you can charge it directly from your iPad Pro with a USB-C port. Here’s how:
- Remove the cap on the top of the Apple Pencil to expose the USB-C connector.
- Connect the USB-C connector on the Apple Pencil to the USB-C port on your iPad Pro.
- Leave the Apple Pencil connected for a while to allow it to charge.
- You can check the charging progress on your iPad by swiping down from the top-right corner to access the Control Center and looking at the battery widget.
- Once the Apple Pencil is fully charged, disconnect it from the USB-C port and replace the cap.
The USB-C charging option provides a convenient and straightforward method of charging your Apple Pencil. Since it utilizes the same port as your iPad Pro, you don’t need to carry any additional cables or adapters. This makes it an ideal charging method for users who prefer a minimalistic and clutter-free setup.
However, it’s worth noting that this charging method is only applicable to the Apple Pencil (2nd generation) and iPad Pro models with USB-C ports. If you have an earlier Apple Pencil version or an iPad with a lightning connector, you’ll need to use different charging methods, such as the lightning connector or a different power source.
Now that you know how to charge the Apple Pencil with a USB-C connector, let’s explore another charging method using the magnetic connector.
Charging Apple Pencil with Magnetic Connector
If you own an iPad Pro model with a magnetic connector, you can charge your Apple Pencil by attaching it magnetically to the side of your iPad Pro. Here’s how:
- Ensure that your iPad Pro is unlocked and turn on Bluetooth.
- Take your Apple Pencil and align the flat side of the pencil with the flat side of the iPad Pro.
- Magnetically attach the Apple Pencil to the side of your iPad Pro. The magnet will automatically align and securely hold the pencil in place.
- Allow the Apple Pencil to charge for a while. You can check the battery status in the notification center or battery widget on your iPad Pro.
- Once the Apple Pencil is fully charged, you can detach it from the iPad Pro for immediate use.
The magnetic charging option provides a seamless and convenient way to charge your Apple Pencil. It eliminates the need for cables and connectors, allowing for quick and effortless charging. When the Apple Pencil is attached magnetically, it not only charges but also stays securely attached to your iPad Pro, making it easily accessible whenever inspiration strikes.
Please note that the magnetic charging feature is specific to certain iPad Pro models. If you have an older iPad model or a different Apple Pencil version, you’ll need to use a different charging method.
Now that you know how to charge the Apple Pencil with a magnetic connector, let’s discuss some common troubleshooting tips for charging issues and learn how to maximize the battery life of your Apple Pencil.
Troubleshooting Charging Issues
If you encounter any issues while charging your Apple Pencil, here are a few troubleshooting tips to resolve common charging problems:
- Check the connector: Ensure that the lightning or USB-C connector is clean and free from any debris. Use a soft, lint-free cloth to wipe the connector if necessary.
- Restart your iPad: Sometimes, a simple restart can fix charging issues. Go to the Settings app, tap on “General,” then “Shut Down,” and power your iPad back on.
- Replace the tip or accessory: If you’ve noticed any damage to the Apple Pencil tip or cap, it’s recommended to replace them with genuine Apple accessories.
- Try another charging cable or adapter: Sometimes, the cable or adapter may be faulty. Try using a different lightning or USB-C cable and adapter to see if that resolves the issue.
- Update your iPad’s software: Ensuring that your iPad has the latest software updates can help resolve any compatibility issues that might be affecting charging.
- Verify compatibility: Make sure that your Apple Pencil is compatible with your iPad model. For example, the first-generation Apple Pencil is not compatible with iPad Pro models that have a USB-C port.
If you’ve tried these troubleshooting steps and still experience charging issues, it’s recommended to contact Apple Support or visit an Apple Store for further assistance. They can provide you with personalized guidance based on your specific situation.
Now that you’re equipped with troubleshooting tips, let’s explore how you can maximize the battery life of your Apple Pencil.
Maximizing Apple Pencil Battery Life
To get the most out of your Apple Pencil and extend its battery life, here are some effective tips you can follow:
- Keep it connected when not in use: When you’re not actively using your Apple Pencil, it’s a good idea to keep it connected to your iPad or attach it magnetically to the side. This allows it to charge and ensures that it’s always ready for your next creative session.
- Avoid extreme temperatures: Extreme heat or cold can affect the performance and battery life of your Apple Pencil. Keep it stored in a moderate temperature environment to maintain optimal battery performance.
- Charge regularly: Even if the battery is not completely drained, it’s advisable to charge your Apple Pencil regularly. This helps prevent the battery from fully depleting and extends its overall lifespan.
- Adjust brightness: Lowering the screen brightness on your iPad can reduce the power consumption of your Apple Pencil. This can be particularly helpful during extended drawing or note-taking sessions.
- Use low-power mode: If you notice that your Apple Pencil’s battery draining too quickly, enabling the low-power mode on your iPad can help conserve power and extend the battery life of both devices.
- Disable Bluetooth when not in use: If you’re not planning to use your Apple Pencil for an extended period, consider disabling the Bluetooth connection on your iPad. This can help conserve battery power for both your iPad and Apple Pencil.
By following these strategies, you can optimize the battery life of your Apple Pencil, ensuring that it lasts longer between charges and performs at its best whenever you need it.
Now that you have a better understanding of how to maximize the battery life of your Apple Pencil, you can enjoy uninterrupted creative sessions and productivity with your device.