
Why it’s important to back up your iTunes library
Backing up your iTunes library is crucial to protect all your valuable music, videos, and other multimedia content. Whether you have spent years curating the perfect music collection or invested in purchasing movies and TV shows, losing it all due to a computer crash or accidental deletion can be devastating. Here are some key reasons why backing up your iTunes library is essential:
- Data Loss Prevention: Computers can crash, hard drives can fail, and accidents can happen. Without a backup, you risk losing your entire iTunes library and having to start from scratch. Backing up your iTunes library ensures that you always have a copy of your music, videos, playlists, and settings, even in the event of unforeseen circumstances.
- Easy Migration: If you ever switch to a new computer or upgrade your existing one, having a backup of your iTunes library makes the migration process a breeze. You can simply transfer your backup to the new computer or restore it from an external hard drive, saving you the time and effort of manually transferring each file.
- Protection against Accidental Deletion: We all make mistakes, and it’s easy to accidentally delete files or overwrite them with new versions. By regularly backing up your iTunes library, you can easily recover any deleted or lost content without any hassle.
- Frequent Updates and Purchases: If you frequently update your iTunes library with new music, movies, or TV shows, it’s essential to back up your content regularly. This ensures that all your recent purchases, playlists, and metadata are protected and can be easily restored if needed.
- Peace of Mind: Knowing that your iTunes library is safely backed up provides peace of mind. It removes the worry and stress associated with potential data loss, allowing you to enjoy your music and media with confidence.
Considering the importance of our iTunes libraries in our lives, taking the time to back up this valuable content is a small investment that can save us from significant heartache and frustration in the future. Thankfully, iTunes provides several methods to back up your library, ensuring that your cherished music and media are always accessible when you need them.
Choosing the right external hard drive for your iTunes library
When it comes to selecting the right external hard drive for your iTunes library, there are a few factors to consider. The goal is to find a reliable and spacious external storage solution that suits your needs. Here are some key considerations to guide you in choosing the perfect external hard drive:
- Storage Capacity: The first thing to consider is the storage capacity of the external hard drive. Take into account the size of your iTunes library, including music, videos, and other media files. If your library is already quite large or if you plan on expanding it in the future, opt for a higher capacity hard drive to accommodate your needs.
- Connectivity Options: Ensure that the external hard drive you choose has compatible connectivity options with your computer. Common connectivity options include USB, Thunderbolt, and FireWire. USB 3.0 or higher is recommended for faster data transfer speeds.
- Portability: If you frequently travel or need to access your iTunes library on multiple devices, consider the portability of the external hard drive. Look for compact and lightweight options that are easy to carry around. Solid-state drives (SSDs) are more portable, as they have no moving parts and are less prone to damage from shocks or drops.
- Reliability and Durability: It’s essential to choose an external hard drive that is reliable and built to last. Look for reputable brands known for their quality and durability. Read customer reviews to get an idea of the reliability and performance of the hard drive you are considering.
- Backup Software: Some external hard drives come with built-in backup software, making it easier to automate the backup process and ensure regular updates of your iTunes library. This can save you time and effort in managing backups manually.
- Budget: Set a budget for your external hard drive purchase and look for options within that range. Consider the value offered by different brands and models, weighing the features, storage capacity, and reliability against the price.
By considering these factors and finding the best fit for your needs, you can ensure that your iTunes library is safely stored on an external hard drive with ample storage capacity and reliable performance. Remember to regularly back up your iTunes library to the chosen external hard drive to safeguard your valuable music and media files.
Preparing your external hard drive for iTunes backup
Before you can start backing up your iTunes library to an external hard drive, you need to prepare the hard drive for this task. Here are the essential steps to ensure that your external hard drive is ready for iTunes backup:
- Format the External Hard Drive: It’s important to format the external hard drive in a compatible file system to ensure seamless integration with iTunes. For macOS users, the recommended file system is HFS+ or APFS, while Windows users should use NTFS. Formatting the hard drive will erase any existing data on it, so make sure to back up any important files before proceeding.
- Create a Dedicated Folder: Once your external hard drive is formatted, create a dedicated folder for your iTunes library. This folder will serve as the main location where all your music, videos, and other media files will be stored. Choose a clear and easily recognizable name for the folder.
- Organize your iTunes Library: Before transferring your iTunes library to the external hard drive, it’s a good idea to organize your library to ensure everything is structured and easily accessible. You can do this within the iTunes application by organizing your music into playlists, adding appropriate metadata, and renaming files if necessary. This step will make it easier to navigate and search for your content after the backup is completed.
- Allocate Sufficient Space: One crucial consideration when preparing your external hard drive is ensuring that it has enough space to accommodate your entire iTunes library. Take into account the size of your existing library and any future expansion. It’s recommended to allocate a significant amount of space to account for updates, purchases, and additional media files.
- Scan for Errors: Before initiating the backup process, run a scan on your external hard drive to detect and fix any errors. This will help ensure the integrity of your backup and minimize the risk of data loss or corruption. Most operating systems provide built-in disk utility tools for this purpose.
By following these steps to prepare your external hard drive, you can ensure that it is compatible with iTunes and ready to store your valuable music and media files. With a properly formatted and organized external hard drive, you can proceed to back up your iTunes library with confidence, knowing that your files are secure and readily accessible.
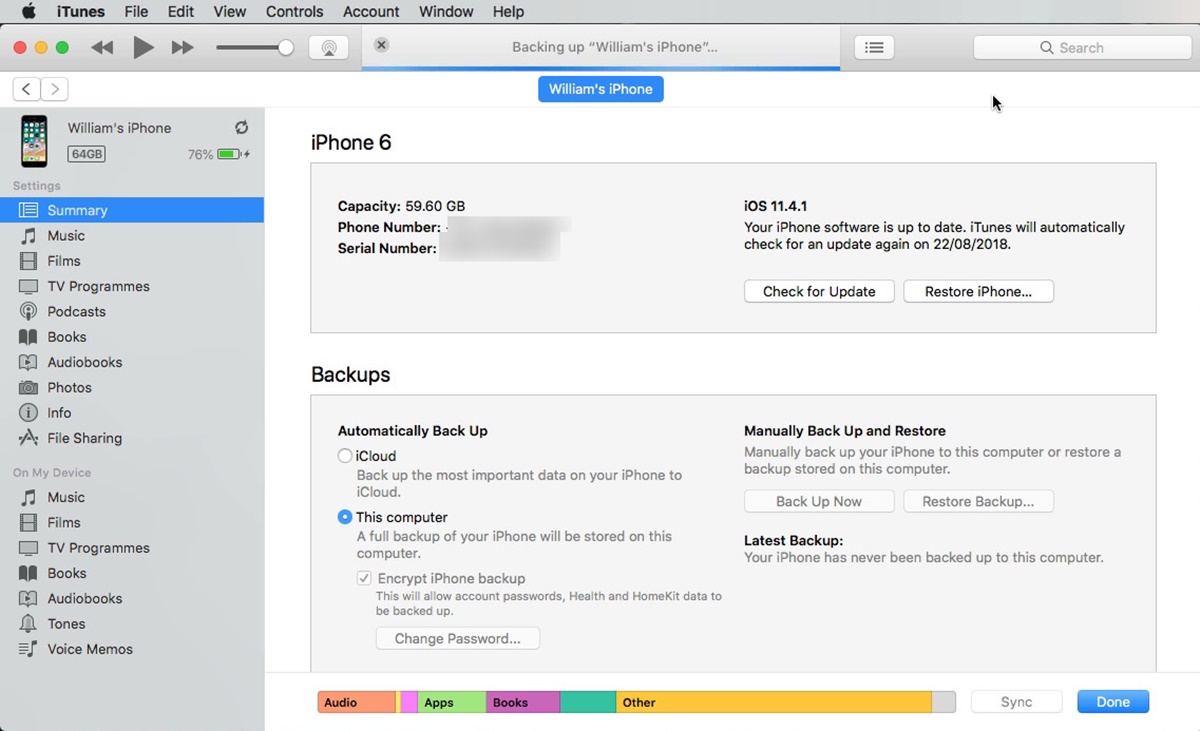
Using iTunes to back up your library to an external hard drive
iTunes provides a convenient built-in feature that allows you to easily back up your library to an external hard drive. Follow these simple steps to backup your iTunes library using iTunes:
- Connect your External Hard Drive: Plug in your external hard drive to your computer using the appropriate cable or port. Ensure that the hard drive is recognized by your computer and visible in the file explorer.
- Open iTunes Preferences: Launch the iTunes application on your computer. On macOS, click on the iTunes menu and select “Preferences”. On Windows, click on the “Edit” menu and choose “Preferences”.
- Select the External Hard Drive as the iTunes Library Location: In the Preferences window, go to the “Advanced” tab. Click on the “Change” button next to “iTunes Media Folder Location”. Browse to the dedicated folder you created on the external hard drive and select it. Click “OK” to save the changes.
- Consolidate your iTunes Library: After setting the external hard drive as the iTunes library location, go to the “File” menu and select “Library”. From the dropdown menu, choose “Organize Library”. Check the box next to “Consolidate files” and click “OK”. This will copy all your music and media files to the external hard drive.
- Wait for the Backup Process to Complete: The backup process may take some time, depending on the size of your iTunes library and the transfer speed of your computer and external hard drive. Ensure that your computer remains connected to the power source and avoid interrupting the backup process.
- Verify the Backup: Once the backup process is complete, you can double-check that your iTunes library is successfully backed up to the external hard drive. Open the external hard drive in your file explorer and navigate to the dedicated folder. Ensure that all your music, videos, and media files are present and properly organized.
With these simple steps, you can use iTunes to efficiently back up your entire library to an external hard drive. By having a backup of your iTunes library, you can enjoy your music and media files with peace of mind, knowing that your valuable content is protected and easily recoverable in case of any unforeseen events.
Manually backing up your iTunes library to an external hard drive
If you prefer more control and flexibility over the backup process, you can manually back up your iTunes library to an external hard drive. Here is a step-by-step guide to manually back up your iTunes library:
- Connect your External Hard Drive: Plug in your external hard drive to your computer using the appropriate cable or port. Ensure that the hard drive is recognized by your computer and visible in the file explorer.
- Open iTunes Preferences: Launch the iTunes application on your computer. On macOS, click on the iTunes menu and select “Preferences”. On Windows, click on the “Edit” menu and choose “Preferences”.
- Change the iTunes Media Folder Location: In the Preferences window, go to the “Advanced” tab. Click on the “Change” button next to “iTunes Media Folder Location”. Browse to the dedicated folder you created on the external hard drive and select it. Click “OK” to save the changes.
- Consolidate your iTunes Library: After setting the external hard drive as the iTunes media folder location, go to the “File” menu and select “Library”. Choose “Organize Library” from the dropdown menu. Check the box next to “Consolidate files” and click “OK”. This will copy all your music and media files to the external hard drive.
- Copy your iTunes Library: Open your file explorer and navigate to the previous default iTunes media folder location on your computer’s hard drive. Copy the entire iTunes media folder to the dedicated folder on your external hard drive. This will include all your music, videos, and other media files.
- Verify the Backup: Once the copying process is complete, you can double-check that your iTunes library is successfully backed up to the external hard drive. Open the external hard drive in your file explorer and navigate to the dedicated folder. Ensure that all your music, videos, and media files are present and properly organized.
- Update iTunes Library Location: After verifying the backup, you need to update the iTunes library location to the external hard drive. In the iTunes application, go to Preferences, then the Advanced tab. Click on the “Change” button next to “iTunes Media Folder Location” and select the dedicated folder on the external hard drive. Click “OK” to save the changes.
Manually backing up your iTunes library to an external hard drive gives you control over the backup process and ensures that all your music and media files are safely stored. Remember to repeat the manual backup process periodically or whenever you make significant changes to your iTunes library to keep your backup up to date.
Setting up automatic backups of your iTunes library
To make the backup process more convenient and hassle-free, you can set up automatic backups of your iTunes library. By automating the backup process, you ensure that your iTunes library is regularly backed up without requiring manual intervention. Here’s how you can set up automatic backups:
- Connect your External Hard Drive: Plug in your external hard drive to your computer using the appropriate cable or port. Ensure that the hard drive is recognized by your computer and visible in the file explorer.
- Open iTunes Preferences: Launch the iTunes application on your computer. On macOS, click on the iTunes menu and select “Preferences”. On Windows, click on the “Edit” menu and choose “Preferences”.
- Change the iTunes Media Folder Location: In the Preferences window, go to the “Advanced” tab. Click on the “Change” button next to “iTunes Media Folder Location”. Browse to the dedicated folder you created on the external hard drive and select it. Click “OK” to save the changes.
- Enable Automatic Backup: On the same Advanced tab in Preferences, check the box next to “Copy files to iTunes Media folder when adding to the library”. This will ensure that any new content added to your iTunes library is automatically copied to the external hard drive.
- Consolidate your iTunes Library: To ensure all your existing music and media files are backed up, go to the “File” menu and select “Library”. Choose “Organize Library” from the dropdown menu. Check the box next to “Consolidate files” and click “OK”. This will consolidate all your files in the iTunes library to the external hard drive.
- Specify Backup Frequency: Depending on your preferences, you can specify how frequently you want iTunes to backup your library. On the iTunes application, go to the “Edit” (macOS) or “File” (Windows) menu and choose “Preferences”. In the General tab, select your desired backup frequency from the “Backup” dropdown menu, such as daily, weekly, or monthly.
- Ensure iTunes is Running: To enable automatic backups, make sure that iTunes is running on your computer. You can minimize it or keep it running in the background to ensure the backups occur as scheduled.
- Regularly Monitor Backups: It’s essential to periodically check that the automatic backups are functioning correctly. Verify that the files are being copied to the external hard drive and that the backup frequency is consistent with your settings. This will help ensure the integrity of your backup and provide peace of mind.
By setting up automatic backups of your iTunes library, you can have the assurance that your music, videos, and media files are regularly and automatically backed up to an external hard drive. This reduces the risk of data loss and simplifies the backup process, allowing you to focus on enjoying your iTunes library without worrying about manual backups.
Troubleshooting common issues when backing up iTunes to an external hard drive
While backing up your iTunes library to an external hard drive is usually a smooth process, you may encounter some common issues along the way. Here are some troubleshooting tips to help you overcome these issues:
- Incompatibility: Ensure that your external hard drive is compatible with your computer’s operating system. Some hard drives may require specific drivers or software to work correctly. Check the manufacturer’s website for any necessary updates or compatibility information.
- Insufficient Storage Space: If your iTunes library is larger than the available space on your external hard drive, you will encounter problems during the backup process. Make sure you have enough free space on the external hard drive to accommodate your entire iTunes library.
- Permissions and Security Settings: Verify that you have the necessary permissions and security settings to access and modify files on the external hard drive. On macOS, you may need to manually grant permissions to iTunes. On Windows, ensure that you have the appropriate read and write permissions for the external hard drive.
- File System Format: Confirm that the file system format of the external hard drive is compatible with your computer and iTunes. macOS usually supports HFS+ or APFS, while Windows supports NTFS. Reformat the external hard drive if necessary, but remember that formatting will erase all existing data on the drive.
- Interrupted Backup: If the backup process is interrupted due to a power outage or connection issue, it may result in incomplete or corrupted backup files. Ensure a stable power source and a reliable connection between your computer and the external hard drive during the backup process.
- Issues with iTunes Library: If your iTunes library contains corrupt or damaged files, it may affect the backup process. Run a scan on your iTunes library to identify and fix any issues. You can use the iTunes Library First Aid tool or third-party software to troubleshoot and repair library problems.
- Update iTunes: Ensure that you are using the latest version of iTunes. Outdated software may have compatibility issues with external hard drives or other components of the backup process. Check for updates and install them if available.
- Seek Professional Help: If you have exhausted all troubleshooting steps and are still unable to back up your iTunes library to the external hard drive, consider seeking assistance from a technical expert or contacting Apple support for further guidance.
By following these troubleshooting tips, you can address common issues that may arise when backing up your iTunes library to an external hard drive. Remember to double-check your settings, ensure compatibility, and verify the integrity of your backup to safeguard your valuable music and media files.
Restoring your iTunes library from an external hard drive backup
If you’ve experienced a computer crash, upgraded to a new device, or accidentally lost your iTunes library, restoring it from an external hard drive backup is the key to recovering your music and media files. Follow these steps to restore your iTunes library:
- Connect the External Hard Drive: Connect the external hard drive containing your iTunes backup to your computer using the appropriate cable or port. Ensure the hard drive is recognized by your computer.
- Open iTunes: Launch the iTunes application on your computer.
- Change the iTunes Media Folder Location: In the iTunes Preferences window, go to the “Advanced” tab. Click on the “Change” button next to “iTunes Media folder location” and select the dedicated folder on the external hard drive where your backup is stored. Click “OK” to confirm the changes.
- Restore iTunes Library: Navigate to the external hard drive where the iTunes backup is located. Find the “iTunes Library.itl” file and drag it into the iTunes application. Alternatively, you can go to the “File” menu in iTunes, select “Library,” and choose “Import Playlist.” Locate and select the “iTunes Library.itl” file to import it into iTunes.
- Consolidate Files: Once the iTunes library is restored, go to the “File” menu and select “Library.” From the dropdown menu, choose “Organize Library” and check the box next to “Consolidate files.” This ensures that all your media files are properly organized and linked within the iTunes library.
- Verify the Restoration: Double-check your iTunes library to ensure that all your music, videos, playlists, and other media files are restored properly. Navigate through your library to confirm that everything is intact and accessible.
- Update Metadata and Settings: Depending on the nature of your backup, you may need to update metadata, such as song information, album artwork, and playlists. You can do this manually by editing individual items or using third-party software to automate the process.
- Authorize your Computer: If you use Apple’s Digital Rights Management (DRM) protected content, such as purchased music or movies, you may need to authorize your computer to access this content. Go to the “Account” menu in iTunes, select “Authorize This Computer,” and enter your Apple ID credentials.
By following these steps, you can successfully restore your iTunes library from an external hard drive backup. Ensure the backup is up-to-date and properly organized, and double-check that all your important music and media files are restored and accessible in iTunes.