
Why Backing Up Your iPhone X is Important
Backing up your iPhone X is crucial for ensuring the safety and security of your valuable data. Your iPhone X contains a wealth of personal information, including photos, videos, contacts, messages, and important documents. Losing this data due to accidental deletion, device damage, or theft can be devastating.
Here are a few key reasons why backing up your iPhone X is essential:
- Data Protection: Backing up your iPhone X helps protect your data from unforeseen events like hardware failure or accidental damage. By regularly creating backups, you can restore your device to its previous state and retrieve all your important files in case of any mishaps.
- Peace of Mind: Knowing that your data is safely backed up provides peace of mind. Whether you lose your device, upgrade to a new iPhone model, or experience a software issue, having a backup ensures that you won’t lose your cherished memories, important contacts, or crucial information.
- Easy Device Transfer: When upgrading to a new iPhone X or transitioning to a different iPhone model, having a backup simplifies the process. You can easily transfer all your data to the new device, ensuring a seamless transition without data loss.
- Protection Against Data Loss: Accidental deletion is a common occurrence. By backing up your iPhone X, you can restore accidentally deleted files and prevent permanent data loss. This is especially important for important documents, sentimental photos, and irreplaceable memories.
- Security: Backing up your iPhone X through reputable methods, such as iCloud or your Mac, offers an additional layer of security. Cloud-based backups encrypt your data, safeguarding it from unauthorized access. This ensures that your sensitive information remains protected.
Given the importance of your iPhone X data, it is clear that regularly backing up your device is a necessary precaution. By doing so, you can safeguard your information, protect against data loss, and enjoy peace of mind knowing that your valuable files are secure.
How to Back Up iPhone X to iCloud
Backing up your iPhone X to iCloud is a convenient and reliable way to ensure that your data is safely stored in the cloud. It allows you to easily restore your device or transfer your data to a new iPhone X. Here’s a step-by-step guide on how to back up your iPhone X to iCloud:
-
- Step 1: Connect to Wi-Fi
Make sure your iPhone X is connected to a Wi-Fi network. iCloud backups require a stable internet connection for the backup process to complete successfully.
-
- Step 2: Go to Settings and tap on your Apple ID
Launch the Settings app on your iPhone X and tap on your Apple ID at the top of the screen. This will take you to your Apple ID settings.
-
- Step 3: Tap on iCloud
In the Apple ID settings, you’ll find an option for “iCloud.” Tap on it to access the iCloud settings.
-
- Step 4: Tap on iCloud Backup
Scroll down in the iCloud settings until you find “iCloud Backup.” Tap on it to enter the backup settings.
-
- Step 5: Tap on Back Up Now
In the iCloud Backup settings, you’ll see an option to “Back Up Now.” Tap on it to initiate the backup process. Your iPhone X will start backing up your data to iCloud.
-
- Step 6: Wait for the backup to complete
Depending on the size of your data and the speed of your internet connection, the backup process may take some time. Make sure your iPhone X stays connected to Wi-Fi and keep it plugged in to ensure an uninterrupted backup.
By following these simple steps, you can easily back up your iPhone X to iCloud and have peace of mind knowing that your data is securely stored in the cloud. Remember to regularly perform backups to keep your data up to date and protected.
Step 1: Connect to Wi-Fi
Before you can start backing up your iPhone X to iCloud, it is important to ensure that your device is connected to a stable Wi-Fi network. A Wi-Fi connection is essential for a smooth and uninterrupted backup process. Here’s how you can connect your iPhone X to Wi-Fi:
-
- Open Settings
Unlock your iPhone X and navigate to the home screen. Look for the Settings app, which is represented by a gear icon. Tap on it to open the Settings menu.
-
- Select Wi-Fi
In the Settings menu, locate the Wi-Fi option. It is usually listed towards the top of the menu. Tap on Wi-Fi to access the Wi-Fi settings.
-
- Turn on Wi-Fi
Make sure the Wi-Fi toggle switch is turned on. It should appear green when enabled.
-
- Select a Wi-Fi network
Your iPhone X will display a list of available Wi-Fi networks. Choose the network you want to connect to by tapping on its name. If the network is password-protected, enter the password when prompted.
-
- Wait for connection
Once you have entered the correct password, your iPhone X will attempt to connect to the Wi-Fi network. Wait for a few moments until you see the Wi-Fi icon appear at the top left corner of the screen, indicating a successful connection.
It is important to note that during the backup process, your iPhone X needs to remain connected to Wi-Fi. Therefore, ensure that you have a stable and reliable Wi-Fi connection before proceeding with the backup. This will ensure that your data is securely transferred to iCloud without any interruptions.
By following these simple steps, you can easily connect your iPhone X to Wi-Fi and prepare it for the backup process. Once connected, you can proceed with the next steps to initiate the iCloud backup and protect your valuable data.
Step 2: Go to Settings and tap on your Apple ID
Once you have connected your iPhone X to a Wi-Fi network, the next step in backing up your device to iCloud is to access your Apple ID settings within the Settings app. Here’s how you can do it:
-
- Unlock your iPhone X
Press the power button or the home button to unlock your device. Enter your passcode or use Face ID or Touch ID if enabled.
-
- Locate the Settings app
Find the Settings app on your home screen. It is represented by a gear icon and is usually located on the first page or within a folder.
-
- Tap on your Apple ID
Scroll down the Settings menu until you see your name or Apple ID at the top of the screen. Tap on it to access your Apple ID settings.
-
- View your Apple ID settings
Once you tap on your Apple ID, you will be taken to a screen that displays various options related to your Apple ID and iCloud. This includes account information, devices, media, and payment settings. Here, you can manage your iCloud backup settings.
By accessing your Apple ID settings, you gain control over various aspects of your iCloud account, including backup and storage options. This allows you to customize your backup preferences, manage your files, and ensure that your data is securely stored in iCloud.
Remember, having an Apple ID is essential for the iCloud backup process, as it provides the necessary authentication and access to your iCloud storage. If you don’t have an Apple ID, you will need to create one before proceeding with the backup steps.
By following these steps, you can easily navigate to your Apple ID settings within the Settings app on your iPhone X. Once you have accessed your Apple ID settings, you can proceed to the next steps to manage your iCloud backup settings and initiate the backup process.
Step 3: Tap on iCloud
After accessing your Apple ID settings, the next step in backing up your iPhone X to iCloud is to navigate to the iCloud settings within the Settings app. This will allow you to manage various aspects of your iCloud account, including your iCloud backup settings. Here’s how you can do it:
-
- Open the Settings app
On your iPhone X’s home screen, locate and tap on the Settings app. The Settings app is represented by a gear icon.
-
- Scroll down and tap on iCloud
Once you’re in the Settings app, scroll down the menu until you find the “iCloud” option. It is usually located towards the middle of the menu. Tap on “iCloud” to access the iCloud settings.
-
- Enter your Apple ID password if prompted
If prompted, enter your Apple ID password to authenticate and access your iCloud settings. This step ensures the security of your iCloud account.
-
- View your iCloud settings
After entering your Apple ID password, you will be taken to the iCloud settings page. Here, you will find various options related to your iCloud account, including iCloud backups, storage, and synchronization settings.
Accessing your iCloud settings provides you with control over your iCloud backup preferences. From this page, you can manage which apps and data you want to include in your iCloud backups, view the size of your backups, and even manually initiate a backup. It gives you the flexibility to customize your backup settings based on your needs.
It’s important to note that your iPhone X needs to be connected to a Wi-Fi network to access and manage your iCloud settings. Ensure that you have a stable internet connection before proceeding with managing your iCloud backup options.
By following these steps, you can easily navigate to the iCloud settings within the Settings app on your iPhone X. Once you’re in the iCloud settings, you can proceed with adjusting your backup preferences and initiating the backup process to ensure the safety and security of your data.
Step 4: Tap on iCloud Backup
After accessing the iCloud settings on your iPhone X, the next step in backing up your device is to navigate to the iCloud Backup option. This allows you to configure and customize your backup settings before initiating the backup process. Here’s how you can do it:
-
- Open the Settings app
Unlock your iPhone X and locate the Settings app on your home screen. It is represented by a gear icon. Tap on it to open the Settings menu.
-
- Scroll down and tap on iCloud
In the Settings menu, scroll down until you find the “iCloud” option. It is usually located towards the middle of the screen. Tap on “iCloud” to access the iCloud settings.
-
- Tap on iCloud Backup
Once you’re in the iCloud settings, scroll down until you find the “iCloud Backup” option. Tap on it to enter the iCloud Backup settings.
-
- Customize your backup settings
In the iCloud Backup settings, you have the option to customize your backup preferences. You can choose whether to include certain apps in the backup, enable or disable automatic backups, and view the time and size of your last backup.
-
- Toggle on iCloud Backup
Make sure the “iCloud Backup” toggle switch is turned on. It should appear green when enabled. This ensures that your iPhone X is set to back up your data to iCloud.
Accessing the iCloud Backup settings gives you the ability to manage and configure your backup settings. You can choose which apps and data to include in your backups, enable or disable automatic backups, and view the status of your most recent backup.
It’s important to note that your iPhone X needs to be connected to a Wi-Fi network for the backup process to occur. Ensure that you have a reliable and stable internet connection before proceeding with the backup.
By following these steps, you can easily access the iCloud Backup settings on your iPhone X and customize your backup preferences. Once you have configured your settings, your iPhone X will automatically back up your data to iCloud based on your chosen preferences.
Step 5: Tap on Back Up Now
Once you have customized your iCloud Backup settings on your iPhone X, the next step is to initiate the backup process by tapping on the “Back Up Now” option. This allows you to manually trigger a backup of your data to iCloud. Here’s how you can do it:
-
- Open the Settings app
From your iPhone X’s home screen, locate and tap on the Settings app represented by a gear icon. This will open the Settings menu.
-
- Scroll down and tap on iCloud
In the Settings menu, scroll down until you find the “iCloud” option. Tap on it to access the iCloud settings.
-
- Tap on iCloud Backup
In the iCloud settings, locate and tap on the “iCloud Backup” option. This will take you to the iCloud Backup settings.
-
- Tap on Back Up Now
In the iCloud Backup settings, you’ll see an option to “Back Up Now.” Tap on it to initiate the backup process.
-
- Wait for the backup to complete
After tapping on “Back Up Now,” your iPhone X will start the backup process. The time it takes to complete the backup depends on the size of your data and the speed of your internet connection. Ensure that your iPhone X stays connected to Wi-Fi and keep it plugged in to avoid interruption during the backup.
By tapping on “Back Up Now,” you manually trigger a backup of your iPhone X’s data to iCloud. This ensures that your important files, photos, videos, contacts, messages, and other data are securely saved in the cloud.
It is essential to note that timely backups are crucial to ensure the most up-to-date data is protected. Regularly performing backups will give you peace of mind and enable you to restore your iPhone X to its previous state if necessary.
By following these steps, you can easily initiate a backup of your iPhone X to iCloud. Remember to periodically perform backups to ensure the safety and security of your valuable data.
Step 6: Wait for the Backup to Complete
After initiating a backup of your iPhone X to iCloud, the final step is to patiently wait for the backup process to complete. This step is essential to ensure that all your data is successfully transferred and securely stored in the cloud. Here’s what you need to do:
-
- Let the Backup Process Continue
Once you tap on “Back Up Now,” your iPhone X will start the backup process. The time it takes to complete the backup depends on factors such as the size of your data and the speed of your internet connection. It’s important to be patient and avoid interrupting the backup process.
-
- Keep Your iPhone X Connected to Wi-Fi
Ensure that your iPhone X stays connected to a Wi-Fi network throughout the backup process. Backup over Wi-Fi is faster and more reliable than using cellular data. Also, keep in mind that the backup process may pause if you switch to a different Wi-Fi network or if the connection is lost.
-
- Leave Your Device Plugged In
Keeping your iPhone X plugged in during the backup process is highly recommended. This will prevent any interruptions due to low battery and ensure a smooth backup operation. If your device runs out of battery midway, the backup may not complete successfully.
-
- Monitor the Backup Progress
You can check the progress of your iCloud backup by going to the iCloud Backup settings. Here, you’ll find information about the size and time of your last backup. However, it’s important to note that the progress bar might not always accurately reflect the exact time remaining for the backup.
-
- Avoid Interrupting the Backup
While the backup is taking place, avoid closing the Settings app, restarting your iPhone X, or disconnecting from the Wi-Fi network. Interrupting the backup process can lead to incomplete or failed backups.
By waiting patiently and allowing the backup process to complete, you can ensure that all your valuable data, including photos, videos, contacts, messages, and documents, is securely stored in iCloud. Performing regular backups and waiting for them to finish is crucial for the protection and accessibility of your data.
Remember, the backup process may take some time, especially if you have a large amount of data. It is worth the wait to have the peace of mind that your iPhone X is fully backed up and your information is safeguarded.
By following these guidelines and allowing the backup to complete, you can rest assured that your iPhone X’s data is securely stored and ready to be restored whenever needed.
How to Back Up iPhone X to Mac
Backing up your iPhone X to your Mac is another efficient way to ensure the safety and security of your data. By creating a backup on your Mac, you have a local copy of your important files, allowing for easy access and restoration. Here’s a step-by-step guide on how to back up your iPhone X to your Mac:
-
- Step 1: Connect your iPhone X to your Mac using a USB cable
Get a USB cable and connect one end to your iPhone X and the other end to an available USB port on your Mac. Ensure both devices are securely connected.
-
- Step 2: Open Finder on your Mac
On your Mac, locate the Finder app in the Dock or open it from the Applications folder. The Finder app allows you to manage files and transfer data between your Mac and iPhone X.
-
- Step 3: Select your iPhone X under Locations
In Finder, you will see a list of locations on the left-hand sidebar. Under the “Locations” section, locate and click on your iPhone X. This will display the contents of your iPhone X in the Finder window.
-
- Step 4: Click on Back Up Now
In the Finder window for your iPhone X, you’ll see a general overview of your device, including options for managing backups. Click on the “Back Up Now” button to start the backup process.
-
- Step 5: Wait for the backup to complete
During the backup process, your iPhone X’s data, including apps, photos, videos, and settings, will be transferred to your Mac. The duration of the backup depends on the size of your data. Ensure that your iPhone X remains connected to your Mac until the backup is complete.
Backing up your iPhone X to your Mac provides you with an alternative option to iCloud for data storage and backup. It allows for quick access to your data and offers an additional layer of security by having a local copy on your Mac.
Remember to regularly perform backups to ensure your data is up to date and protected. By following these steps, you can easily back up your iPhone X to your Mac and have peace of mind knowing that your valuable files are securely stored and readily accessible.
Step 1: Connect your iPhone X to your Mac using a USB cable
The first step in backing up your iPhone X to your Mac is to establish a physical connection between the two devices using a USB cable. This connection allows for the transfer of data between your iPhone X and your Mac. Here’s how you can do it:
-
- Get a USB cable
Obtain a USB cable that is compatible with your iPhone X and your Mac. The USB cable is usually included with your iPhone X when you purchase it. If you don’t have the original USB cable, make sure to use a certified Lightning to USB cable to ensure a reliable connection.
-
- Connect the USB cable to your iPhone X
Insert the smaller end of the USB cable, known as the Lightning connector, into the charging port of your iPhone X. The port is located at the bottom of your device.
-
- Connect the USB cable to your Mac
Take the larger end of the USB cable, which is a standard USB connector, and plug it into an available USB port on your Mac. Make sure you connect it securely to establish a stable connection.
-
- Ensure both devices are connected
Once you have connected the USB cable to both your iPhone X and your Mac, verify that the devices are properly connected. You should see your iPhone X being recognized by your Mac as a connected device.
Establishing a physical connection between your iPhone X and your Mac is the first step in initiating the backup process. The USB cable allows for the data transfer required for creating a backup of your iPhone X on your Mac.
Remember to keep your iPhone X connected to your Mac throughout the backup process to ensure a smooth and uninterrupted transfer of data. Also, make sure to use a high-quality USB cable to avoid any potential connection issues.
By following these steps, you can easily connect your iPhone X to your Mac using a USB cable and proceed with backing up your device to your Mac to ensure the security and availability of your valuable data.
Step 2: Open Finder on your Mac
After connecting your iPhone X to your Mac using a USB cable, the next step in backing up your device is to open Finder on your Mac. Finder is the file management application on macOS, and it allows you to navigate your file system, manage files, and transfer data between your devices. Here’s how you can open Finder on your Mac:
-
- Unlock your Mac
If your Mac is locked or in sleep mode, wake it up and log in using your user account credentials. Enter your password or use Touch ID if applicable.
-
- Locate the Finder icon
Look for the Finder icon in your Dock, which is usually located at the bottom of your screen. The Finder icon resembles a blue smiley face. Alternatively, you can press Command + Space to open Spotlight and search for “Finder”.
-
- Click on the Finder icon
Once you have located the Finder icon, click on it with your mouse or trackpad pointer. This action will open a new Finder window on your Mac.
Opening Finder on your Mac allows you to access various functions and settings related to file management, including managing your iPhone X backups.
It’s worth noting that Finder is an essential application on macOS, and you can use it to navigate through your Mac’s file system, access files and folders, and transfer data between your Mac and other devices.
If you encounter any difficulties or issues with opening Finder on your Mac, make sure to check that your Mac is powered on, functioning correctly, and not experiencing any software or hardware malfunctions.
By following these steps, you can easily open Finder on your Mac and continue with the backup process of your iPhone X, ensuring the safety and security of your important data.
Step 3: Select your iPhone X under Locations
After opening Finder on your Mac, the next step in backing up your iPhone X is to select your device under “Locations” in Finder. This allows you to access and manage the files and settings on your iPhone X directly from your Mac. Here’s how you can do it:
-
- Look for your iPhone X under “Locations”
In the left-hand sidebar of the Finder window, you will see a section labeled “Locations.” Under this section, you should see your iPhone X listed as a device. It may appear with the name you have given your iPhone X or as “iPhone X.”
-
- Click on your iPhone X
Once you have located your iPhone X in the “Locations” section, click on it with your mouse or trackpad pointer. This will open the contents of your iPhone X in a new Finder window.
By selecting your iPhone X under “Locations” in Finder, you establish a direct connection between your Mac and your device. This allows you to access and manage the files, settings, and other content on your iPhone X directly from your Mac.
It’s important to note that you will be able to access different sections of your iPhone X, such as Photos, Music, Videos, Apps, and more, depending on your specific settings and preferences. This provides you with the ability to manage and organize your data efficiently.
If you don’t see your iPhone X listed under “Locations” in Finder, make sure that your device is properly connected to your Mac. Check the USB cable connection and ensure that your device is unlocked and awake. If the issue persists, try using a different USB port on your Mac or a different USB cable.
By following these steps, you can easily select your iPhone X under “Locations” in Finder, allowing you to manage and access the files and settings on your device from your Mac. This step is essential in preparing for the backup process of your iPhone X to your Mac.
Step 4: Click on Back Up Now
After selecting your iPhone X under “Locations” in Finder on your Mac, the next step in backing up your device is to click on the “Back Up Now” option. This initiates the backup process, allowing your Mac to create a local copy of your iPhone X’s data. Here’s how you can do it:
-
- Look for the “Back Up Now” button
In the Finder window for your iPhone X, you will see a series of options and buttons at the top of the window. Look for the “Back Up Now” button, which is usually located near the center of the window.
-
- Click on the “Back Up Now” button
Once you have located the “Back Up Now” button, click on it using your mouse or trackpad pointer. This action will start the backup process, and your Mac will begin creating a backup of your iPhone X’s data.
-
- Wait for the backup to complete
While the backup is in progress, your Mac will transfer and save a copy of your iPhone X’s apps, settings, photos, videos, and other data. The duration of the backup process depends on the size of your data, so be patient and allow the backup to complete.
Clicking on the “Back Up Now” option is a crucial step to ensure that your valuable data is securely backed up on your Mac. This backup provides a local copy of your iPhone X’s contents, allowing you to restore your device or access your data directly from your Mac in case of any data loss or device upgrade.
While the backup is underway, it’s important to keep your iPhone X connected to your Mac via the USB cable and ensure that both devices remain powered on. Interrupting the backup process may result in an incomplete backup.
If the “Back Up Now” button is not available or grayed out, double-check the connection between your iPhone X and your Mac. Ensure that the USB cable is securely connected, and try using a different USB port if necessary. You may also need to unlock your iPhone X to allow the backup process to proceed.
By following these steps and clicking on the “Back Up Now” button, you can initiate the backup process of your iPhone X to your Mac, ensuring the safety and availability of your important data.
Step 5: Wait for the Backup to Complete
After clicking on the “Back Up Now” button, you will need to patiently wait for the backup process to complete. This step is essential to ensure that all of your iPhone X’s data is successfully transferred and backed up onto your Mac. Here’s what you need to do:
-
- Let the Backup Process Continue
Once you have initiated the backup by clicking on “Back Up Now,” your Mac will begin transferring and saving a copy of your iPhone X’s data. The time it takes to complete the backup depends on the size of your data and the speed of your Mac. It’s important to be patient and allow the backup process to continue without interruption.
-
- Keep Your iPhone X Connected to Your Mac
Ensure that your iPhone X remains connected to your Mac via the USB cable throughout the backup process. A stable connection is necessary to ensure a smooth and uninterrupted transfer of data. If the connection is disrupted, the backup may fail or become incomplete.
-
- Monitor the Backup Progress
You can monitor the progress of the backup by looking at the progress bar or the estimated time remaining displayed on your Mac’s Finder window. However, keep in mind that the estimated time remaining may not always be accurate, as the backup process can vary depending on several factors.
-
- Avoid Interrupting the Backup
While the backup is in progress, it’s essential to avoid closing the Finder window, restarting your Mac, or disconnecting your iPhone X. Interrupting the backup process can lead to an incomplete or failed backup. It’s best to let the backup run its course until it completes.
Waiting for the backup to complete ensures that all of your iPhone X’s important data, including apps, settings, contacts, photos, videos, and more, are safely stored on your Mac. Regularly performing backups is crucial in safeguarding your data and being prepared for potential data loss or device upgrades.
Remember, the time it takes for the backup process to finish can vary depending on the size of your data and the performance of your Mac. It’s important to allocate enough time for the process and not interrupt it prematurely.
By following these steps and patiently waiting for the backup to complete, you can ensure that all of your iPhone X’s data is successfully backed up on your Mac, providing you with peace of mind and the ability to restore your data if needed.
How to Ensure a Successful Backup
When backing up your iPhone X to iCloud or your Mac, there are a few important tips to keep in mind to ensure a successful backup process. By following these guidelines, you can help ensure that your valuable data is securely backed up and readily accessible when needed. Here’s how to ensure a successful backup:
-
- Tip 1: Keep your iPhone X plugged in while the backup is taking place
Connect your iPhone X to a power source or keep it plugged in via a USB cable during the backup process. This helps ensure that the backup is not interrupted due to a low battery, especially if the backup takes a significant amount of time.
-
- Tip 2: Make sure your Wi-Fi connection is stable and strong
Ensure that your iPhone X is connected to a reliable Wi-Fi network with a strong signal. A stable internet connection is crucial for a successful backup process, as interruptions or disconnections can lead to an incomplete backup. Consider connecting to a high-speed, secure Wi-Fi network to expedite the backup process.
-
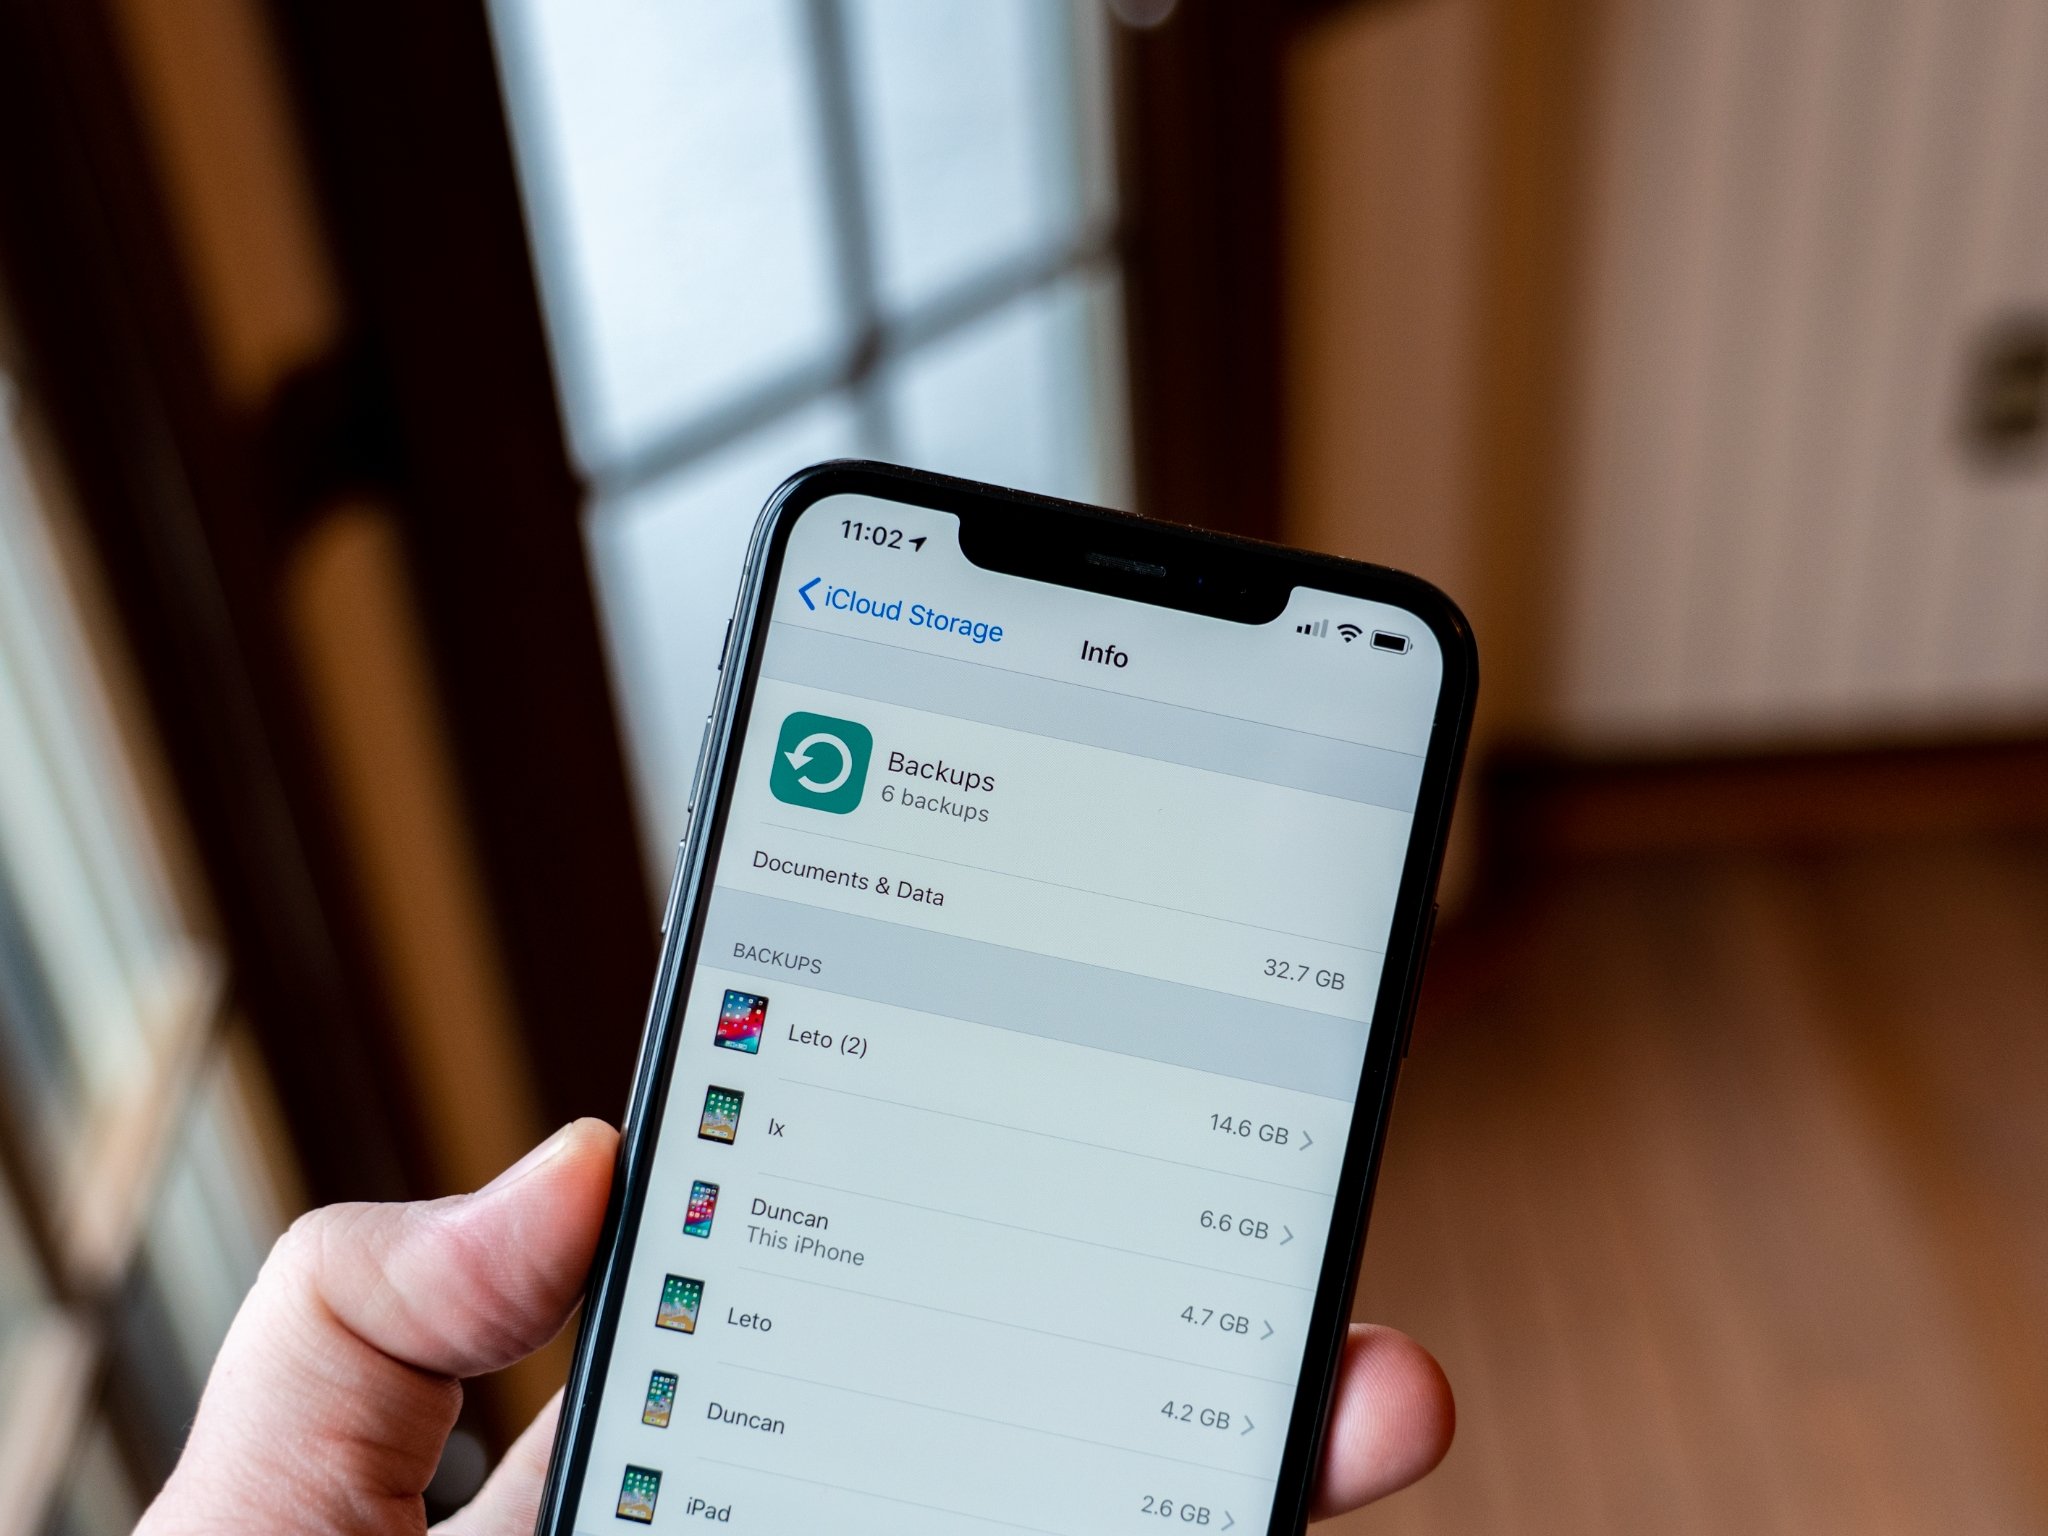
- Tip 3: Check your iCloud storage space before backing up
If you are using iCloud as your backup method, ensure that you have sufficient available storage space. Check your iCloud storage settings to see how much space is remaining and consider deleting unnecessary data or purchasing additional storage if needed. Insufficient storage space can prevent a successful backup.
Following these tips will help ensure that your backup process proceeds smoothly and that your data is safely stored. Regularly backing up your iPhone X is essential to protect your valuable files, photos, messages, and other important data in the event of device loss, damage, or software issues.
Additionally, it’s important to periodically check your backups and verify that they are up-to-date. Regularly performing backups, maintaining a secure Wi-Fi connection, and monitoring your available storage space will help ensure that your data is consistently protected.
By taking these steps, you can have the confidence of knowing that your iPhone X data is securely backed up and ready to be restored when needed.
Tip 1: Keep your iPhone X plugged in while the backup is taking place
One essential tip to ensure a successful backup of your iPhone X is to keep it plugged in while the backup process is underway. This helps to prevent any interruptions due to a low battery and ensures that the backup completes without any issues. Here’s why keeping your iPhone X plugged in is important:
1. Continuous Power Supply: The backup process can consume a significant amount of power, especially if you have a large amount of data to back up. By keeping your iPhone X plugged in, you ensure that it remains powered throughout the backup process. This prevents the backup from abruptly stopping in case the battery runs out of charge.
2. Uninterrupted Backup: Plugging in your iPhone X guarantees that the backup process isn’t disrupted. Interruptions during the backup can lead to an incomplete or corrupted backup file, potentially resulting in data loss. By keeping your device connected to a power source, you minimize the risk of any disruptions that may occur due to low battery levels.
3. Optimal Performance: Keeping your iPhone X plugged in allows it to operate at its best performance during the backup. Backing up a large amount of data requires significant resources, including processing power and network connectivity. By keeping the device plugged in, you ensure that it can utilize these resources optimally, resulting in a faster and more efficient backup process.
It is worth noting that the time required for a backup to complete can vary depending on the amount of data being backed up and the performance of your device. Additionally, some backups may take longer than others due to factors such as the number of apps, photos, and videos on your iPhone X.
By keeping your iPhone X plugged in during the backup, you can have peace of mind knowing that the backup process will be completed successfully without any interruptions. This provides you with a reliable backup of your valuable data and ensures that your information will be safe and accessible when needed.
Remember, it’s also important to make sure that the power source and USB cable you use to connect your iPhone X are reliable and in good condition to avoid any potential issues during the backup process.
By following this tip, you can ensure that your iPhone X remains powered throughout the backup process and minimize the risk of interruptions, providing you with a successful and reliable backup of your data.
Tip 2: Make sure your Wi-Fi connection is stable and strong
Another important tip to ensure a successful backup of your iPhone X is to make sure that your Wi-Fi connection is stable and strong. Having a reliable internet connection is crucial for a seamless backup process. Here’s why a stable and strong Wi-Fi connection is important:
1. Smooth Data Transfer: A stable Wi-Fi connection ensures the smooth transfer of your data during the backup process. A weak or intermittent connection can cause disruptions or incomplete transfers, resulting in an unsuccessful backup. By having a stable and strong Wi-Fi connection, you minimize the risk of data loss or corruption during the backup.
2. Efficient Backup Speed: A strong Wi-Fi connection enables faster backup speeds, especially when backing up a large amount of data. Faster upload speeds facilitate a quicker backup process, allowing you to complete the backup in a shorter amount of time. This is particularly beneficial when you have limited time or need to perform backups regularly.
3. Data Intactness: A stable Wi-Fi connection ensures the integrity of your data during the backup process. Any interruptions or fluctuations in the connection can lead to incomplete or corrupted backups, potentially rendering some of your data unusable. By maintaining a strong Wi-Fi connection, you minimize the risk of data corruption and ensure the integrity of your backup.
It’s important to note that the stability and strength of your Wi-Fi connection can be influenced by various factors. Some tips to ensure a stable and strong Wi-Fi connection include:
– Stay close to your Wi-Fi router to improve signal strength.
– Ensure that your iPhone X and the Wi-Fi router aren’t obstructions between each other.
– Keep other devices or applications that consume network bandwidth to a minimum while performing the backup.
– If necessary, consider resetting your Wi-Fi router or contacting your internet service provider if you consistently experience connection issues.
By ensuring a stable and strong Wi-Fi connection, you can ensure that your iPhone X’s data is backed up successfully and without any issues. This provides you with the confidence that your important files, photos, videos, contacts, and other data are securely stored and readily accessible.
Remember to regularly check and maintain your Wi-Fi network to optimize its speed and performance. Performing backups on a reliable Wi-Fi connection guarantees a smooth backup process and the preservation of your valuable data.
By following this tip, you can maximize the efficiency and reliability of your backup process, ensuring that all your important data is securely backed up on your chosen storage platform.
Tip 3: Check your iCloud Storage Space before Backing Up
Prior to backing up your iPhone X to iCloud, it is important to check your available iCloud storage space. Ensuring that you have sufficient storage space is essential for a successful backup without any interruptions. Here’s why checking your iCloud storage space is important:
1. Sufficient Storage Allocation: Your iCloud storage plan determines how much space is available for your backups. By checking your iCloud storage before backing up, you can ensure that there is enough available space to accommodate the backup of your iPhone X’s data. If your storage is nearly full, it may be necessary to free up space or consider upgrading your iCloud storage plan.
2. Preventing Backup Errors: Insufficient iCloud storage space can cause backup errors, leading to incomplete or failed backups. By monitoring your available storage space, you can take necessary actions to free up space or upgrade your storage plan, ensuring that your iPhone X backup can be completed successfully.
3. Emergency Data Recovery: Monitoring your iCloud storage helps you understand how much space is available for future backups. In case of any unforeseen circumstances, having adequate storage allows you to perform emergency backups and recover your data quickly without any setbacks.
To check your iCloud storage space:
- Open Settings on your iPhone X
- Tap on your Apple ID and navigate to iCloud
- Select “Manage Storage”
- Review your available iCloud storage space
If your iCloud storage space is running low, you have a few options:
– Remove unnecessary data: Delete old backups, unneeded documents, photos, or other files from your iCloud storage to free up space. Be cautious and ensure you don’t accidentally delete important data.
– Upgrade your iCloud storage plan: If you regularly require more storage, consider upgrading your iCloud storage plan to accommodate your backup needs. This allows you to back up all your important data without running out of space.
By checking your iCloud storage space and taking necessary actions, you can ensure a seamless backup process for your iPhone X. This guarantees that your data is secure and easily accessible whenever you need to restore it or set up a new device.
Regularly monitoring your iCloud storage space allows you to stay prepared and maintain adequate storage capacity for your backups, ensuring that you don’t encounter any storage-related issues during the backup process.
By following this tip, you can optimize your iCloud storage and ensure that your iPhone X backups are successful, keeping your vital data safe and easily recoverable.