
Why add links to your email signature?
When it comes to email communication, your signature is an essential element that can enhance your professional image and provide additional value to your recipients. One way to make your email signature more dynamic and informative is by adding links. Including links in your email signature allows you to direct recipients to relevant websites, social media profiles, online portfolios, or even specific articles or documents.
The benefits of adding links to your email signature are twofold. Firstly, it promotes your online presence and helps recipients easily access your digital footprint. By including links to your website, blog, or social media platforms, you provide an opportunity for others to learn more about you or your business. This can be especially valuable for professionals, freelancers, or entrepreneurs who want to showcase their work or expand their network.
Secondly, adding links in your signature can increase engagement and drive traffic to specific web pages. Whether you want to direct recipients to a new blog post, a promotional offer, relevant articles, or even your online store, including clickable links in your signature saves recipients the hassle of manually typing the URL or searching for the information. It encourages them to take immediate action and explore the content you want to share.
Moreover, the addition of links in your email signature helps to establish credibility and professionalism. It shows that you are up-to-date with digital practices and are actively managing your online presence. This can leave a lasting impression on recipients and make them more likely to trust and engage with your content. It also adds convenience for your recipients by providing direct access to information that they might be interested in.
Whether you are a business professional, a freelancer, or simply want to make your email signature more functional and personalized, adding links is a simple yet effective way to do so. By incorporating relevant links, you can enhance your professional image, increase engagement, drive traffic, and make it easier for recipients to connect with your online presence. So, let’s dive into the steps of adding links to your email signature!
Step 1: Open Mail Preferences
To begin adding links to your email signature in Mac OS X Mail or macOS Mail, you’ll first need to open the Mail Preferences window. Here’s how:
- Launch the Mail application on your Mac.
- In the menu bar at the top of the screen, click on “Mail” and then select “Preferences”. You can also use the keyboard shortcut Command + Comma (,).
- The Mail Preferences window will appear with several tabs at the top.
- Click on the “Signatures” tab to access the signature settings.
By accessing the Mail Preferences window, you gain control over your email client’s settings, including managing your email signatures. This is where you can create, edit, and apply your custom signature templates.
Note that the steps may vary slightly depending on the version of Mac OS X or macOS you are using. The instructions provided here are for the latest versions, but the general process remains the same.
Once you have successfully opened the Mail Preferences window and navigated to the “Signatures” tab, you’re ready to move on to the next step: creating a new signature.
Step 2: Create a new signature
After accessing the signature settings in Mail Preferences, the next step is to create a new signature. Follow these instructions to create your custom signature:
- In the left-hand column, you’ll see a list of email accounts that you have set up in Mail. Select the account you want to add the signature to by clicking on it.
- In the main window, you will see a list of existing signatures on the right side.
- Click on the “+” (plus) button located below the list of signatures to create a new one.
- A default name will be assigned to the new signature, such as “Untitled”. Double-click on it to rename it to something more descriptive.
At this point, you have successfully created a new signature. Now, it’s time to proceed to the next step: adding text and formatting your signature.
Note that you can create multiple signatures for each email account if desired. This allows you to customize your signatures for different purposes or accounts, such as personal and professional.
The process of creating a new signature is straightforward and can be repeated for each email account you have set up in Mail. Whether you want to have a consistent signature across all accounts or tailor them individually, the flexibility of Mail’s signature settings allows you to customize to your preferences.
Step 3: Add text and format your signature
Now that you have created a new signature, it’s time to add text and format it to your liking. Follow these steps to add content to your signature:
- In the signature editor, you will see a text box where you can enter your desired content. This is where you can add your name, contact information, and any other details you want to include in your signature.
- Start by typing your desired text directly into the editor. You can use the formatting options in the toolbar to enhance the appearance of your signature. These options allow you to change the font, size, color, alignment, and more.
- Consider using different font styles, such as bold or italic, to emphasize certain parts of your signature.
- Keep in mind that less is often more when it comes to signatures. Aim to keep your signature concise and clutter-free for a professional and streamlined look.
In addition to text, you can also consider adding a professional logo or image to your signature. This can help to visually brand your emails and make your signature more visually appealing.
Once you have added and formatted the desired text and any optional images or logos, you’re ready to move on to the next step: inserting the link into your signature.
By carefully crafting your signature with the appropriate text and formatting options, you can create a visually appealing and professional email signature that reflects your personal or business brand.
Step 4: Insert the link
After creating and formatting your signature in Mail, the next step is to insert the link you want to include. There are two ways to accomplish this:
Option 1: Manually adding a link:
- First, decide where you want to insert the link within your signature. It could be a website URL, a social media profile, or any other link you’d like to include.
- Select the text or image in your signature where you want to add the link.
- In the menu bar, click on the “Edit” tab, then select “Add Link” or use the keyboard shortcut Command + K.
- A dialog box will appear, allowing you to enter the URL of the link.
- Type or paste the URL into the dialog box, then click “OK”.
Option 2: Using a hyperlink button:
- In the signature editor, click on the “Link” button in the toolbar.
- A dialog box will appear, allowing you to enter the URL of the link.
- Type or paste the URL into the dialog box, then click “OK”.
Both options allow you to insert a link into your email signature. The first option provides more control over selecting the specific text or image you want to link, while the second option is quicker and more straightforward.
It’s important to double-check that the link you’ve inserted is valid and properly formatted. This ensures that recipients can click on the link and access the intended website or destination.
Once you have successfully inserted the link into your signature, move on to the next step: testing your link to ensure it works correctly.
Option 1: Manually adding a link
One way to insert a link into your email signature is by manually adding it using the available editing features in Mail. Follow these steps to manually add a link:
- Decide where in your signature you want to insert the link. It could be a website URL, a social media profile, or any other link you’d like to include.
- Select the text or image in your signature where you want to add the link.
- In the menu bar, click on the “Edit” tab. From the dropdown menu, select “Add Link”. Alternatively, you can use the keyboard shortcut Command + K.
- A dialog box will appear, prompting you to enter the URL of the link. Type or copy and paste the URL into the box.
- After entering the URL, click “OK” to apply the link to the selected text or image in your signature.
By manually adding a link, you have control over precisely where the link is placed in your signature. This allows you to strategically highlight specific text or images and create a more visually appealing and organized signature.
Ensure that the URL you insert is accurate and properly formatted. Double-check for any typos or missing characters, as incorrect URLs can lead to non-functional links. It’s advisable to test the link after adding it to confirm that it directs recipients to the intended destination.
Using this manual method, you can insert multiple links at different locations within your email signature. Whether you want to link to your website, social media profiles, online portfolio, or any other URL, manually adding links gives you the flexibility to customize your signature and provide valuable resources for your recipients.
Option 2: Using a hyperlink button
An alternative method for adding a link to your email signature is by using the hyperlink button available in Mail’s editing toolbar. Follow these steps to use the hyperlink button:
- In the signature editor, place your cursor where you want to insert the link.
- Look for the “Link” button in the toolbar. It typically appears as a chain link icon.
- Click on the “Link” button to open the hyperlink dialog box.
- In the dialog box, enter the URL you want to link to. You can type or paste the URL into the designated field.
- Once you’ve entered the URL, click “OK” to apply the hyperlink to the selected text.
By using the hyperlink button, you can quickly and easily insert links into your email signature without the need for manual coding or formatting. It offers a convenient and user-friendly way to add links to your signature whenever necessary.
When using this method, make sure to double-check the entered URL for accuracy. Pay attention to any extra spaces or missing characters that may cause the link to be non-functional.
Using the hyperlink button allows you to hyperlink both text and images in your email signature. Whether you want to link your company logo, a specific phrase, or any other element, this method provides a simple and efficient way to incorporate interactive links into your signature.
Remember to test the links after adding them to ensure that they work correctly and direct recipients to the desired web page or destination.
By utilizing the hyperlink button, you can effortlessly enhance your email signature with clickable links that provide valuable resources and information to your recipients.
Step 5: Test your link
After adding links to your email signature in Mac OS X Mail or macOS Mail, it’s crucial to test them to ensure their functionality. Testing your links helps confirm that they direct recipients to the intended web pages or destinations. Follow these steps to test your links:
- Save your signature by clicking the “Save” button in the signature editor.
- Compose a new email or reply to an existing one.
- Select your signature from the dropdown menu in the email composition window to apply it to the message.
- Before sending the email, take a moment to review your signature and ensure that the links appear correctly.
- Click on each link in your signature to open them in a web browser.
- Confirm that each link directs you to the correct web page and that there are no errors or broken links.
Testing your links is crucial because it ensures that your email recipients have a seamless and hassle-free experience when interacting with your email signature. It helps avoid any potential issues or disappointments if the links do not work as intended.
If you find any issues or broken links during the testing process, go back to the signature editor and edit the problematic link. Double-check that the URL is correct and properly formatted. Once you have made the necessary adjustments, save the changes, and test the link again to ensure it now functions correctly.
Performing a thorough test of your links not only confirms their functionality, but it also gives you peace of mind knowing that your email recipients can access the resources and information you have included in your signature.
Once you are satisfied that all your links are working correctly, you’re ready to move on to the next step: saving your signature for future use.
Step 6: Save your signature
After adding links and testing them in your email signature, it’s essential to save your signature to ensure that you can use it for future emails. Follow these steps to save your signature:
- In the signature editor, click the “Save” button or use the keyboard shortcut Command + S to save your changes.
- A confirmation message will appear, indicating that your signature has been saved.
- Repeat this process for any other signatures you have created or want to modify.
By saving your signature, you ensure that the changes you made, including the added links, are preserved for future use. It allows you to easily apply your customized signature to new emails without having to recreate it each time.
Furthermore, saving your signature provides consistency and professionalism across all your email communications. Your signature will remain intact and consistent, ensuring that the links and other information are consistently displayed to your recipients.
If you ever need to make changes or updates to your signature in the future, you can easily access the signature editor, make the necessary modifications, and save the changes again. This flexibility allows you to adapt your signature to reflect any updates or changes to your online presence or contact information.
Remember to regularly review and update your signature as needed to keep it relevant and up-to-date. This ensures that your recipients have access to the most accurate and current information.
Once you have saved your signature, you’re ready to proceed to the final step: applying your signature to outgoing emails.
Step 7: Apply your signature to outgoing emails
Now that you have created and saved your customized email signature with added links, the final step is to apply your signature to outgoing emails. Follow these steps to ensure your signature appears in every email you send:
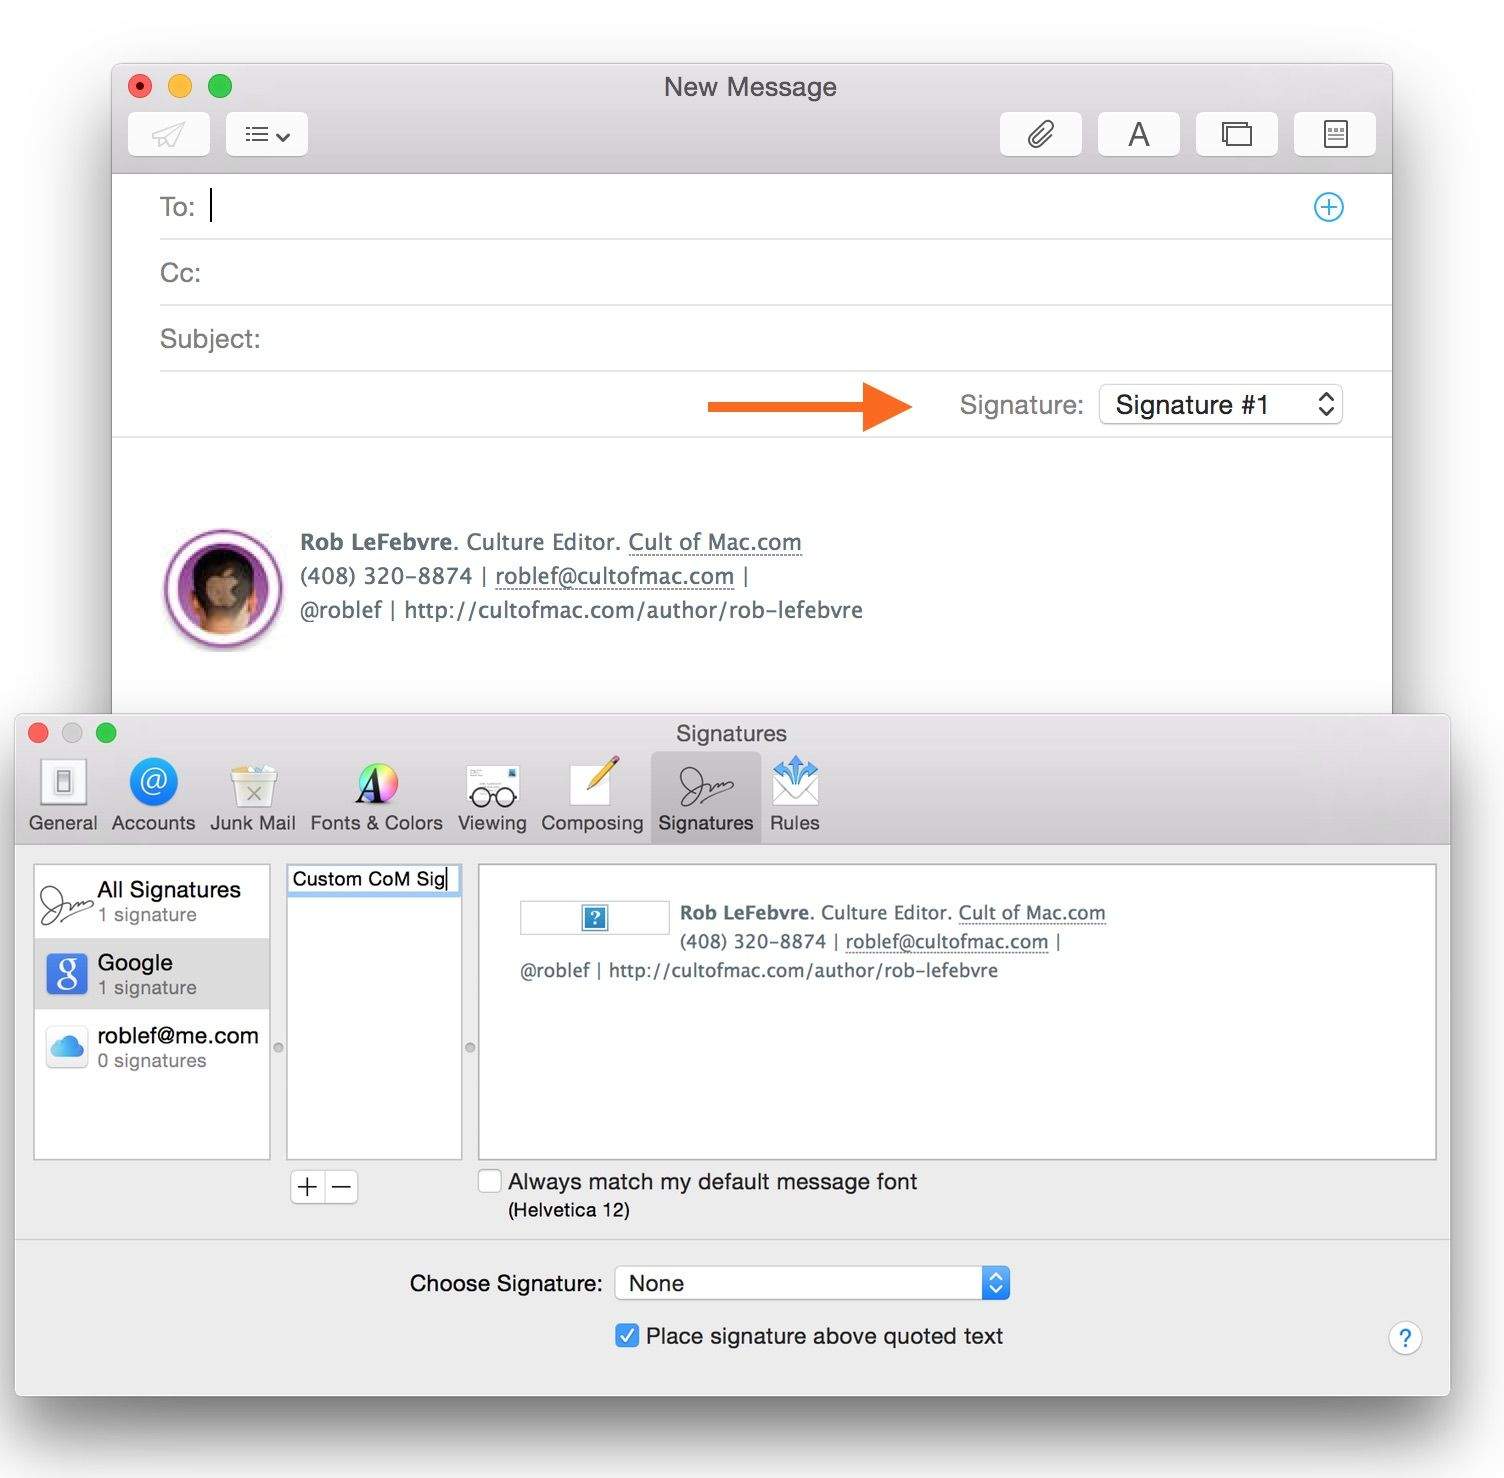
- In the Mail Preferences window, navigate to the “Signatures” tab.
- Under the email account list on the left, you will see a dropdown menu containing a list of email accounts.
- Select the email account you want to associate with your signature.
- In the middle column, you will see a list of signatures you have created.
- Choose the desired signature from the dropdown menu next to the “Choose Signature” label. This will assign the selected signature to the chosen email account.
- Repeat this process for any other email accounts you want to associate with a specific signature. You can assign the same signature to multiple accounts if desired.
By applying your signature to outgoing emails, you ensure consistent branding and professionalism across all your correspondence. Your signature, complete with the added links, will automatically appear at the bottom of every new email or reply you send using the associated email account.
It’s important to select the appropriate signature for each email account, as this allows you to tailor your signature to suit each account’s specific purpose or audience. For example, you may have a different signature for your personal email account compared to your work email account.
Remember to verify that the correct signature is selected in the dropdown menu before sending an email. This ensures that your email recipients receive the intended signature with the added links when they open your message.
By following this final step, you can confidently send emails knowing that your customized signature with added links will be automatically included, allowing recipients to access the provided resources or information directly.