
Choose an Image for Your Gmail Signature
Adding an image to your Gmail signature can give it a personalized and professional touch. When choosing an image, you want to select one that reflects your brand, personality, or the message you want to convey. Here are some tips to help you choose the perfect image for your Gmail signature:
- Consider your branding: If you are adding an image for a business email signature, it’s important to align it with your brand identity. Choose an image that incorporates your brand colors, logo, or any relevant visual elements that represent your company.
- Keep it simple: The image should be visually appealing but not too distracting. Opt for a clean, high-resolution image that enhances your email signature without overwhelming it. Avoid cluttered or complex images that may detract from the professionalism of your signature.
- Reflect your personality: If you are using Gmail for personal emails, you can add an image that showcases your personality or interests. It could be a photo of yourself, a favorite hobby, or a scenic shot that resonates with you.
- Relevance to your profession: For professionals in specific industries such as photography, design, or travel, using an image related to your field can help reinforce your expertise and create a visually engaging signature.
- Consider the image size: Remember that larger images may take longer to load and could affect the recipient’s email experience. Aim for an image size that is optimized for the web and doesn’t cause delays when opening your emails.
Take your time to select the perfect image that encapsulates your email signature’s purpose and aligns with your personal or professional brand. A well-chosen image can leave a lasting impression on the recipients and make your emails stand out from the crowd.
Resize the Image
Before adding an image to your Gmail signature, it’s essential to resize it appropriately. By resizing the image, you ensure that it fits perfectly within the signature space without distorting or affecting the layout. Here’s how you can resize the image:
- Choose the right image editing tool: There are numerous image editing tools available, both online and offline. You can use software like Adobe Photoshop, GIMP, or even web-based editors like Pixlr or Canva. Select the tool that you are most comfortable with.
- Open the image in the editing tool: Once you have the image editing software ready, open the image you want to resize. Most tools allow you to open an image directly or import it from your computer.
- Adjust the dimensions: Look for the “Image Size” or “Resize” option in the editing software. Enter the desired dimensions for your Gmail signature. Typically, keeping the width between 150-200 pixels is recommended. Ensure that the aspect ratio is maintained to avoid image distortion.
- Preview and save: After resizing, preview the image to see if it appears as you intended. Make any necessary adjustments before saving the resized image to your computer.
Resizing the image ensures that it retains its visual quality while fitting perfectly within the limited space available for your Gmail signature. Avoid using images that are too large, as they may take longer to load and potentially disrupt the formatting of your email signature.
Keep in mind that some image hosting services may automatically resize images when you upload them. If you plan to use an image hosting service, check their recommended image dimensions and resize your image accordingly before uploading it.
Upload the Image to an Image Hosting Service
In order to add an image to your Gmail signature, you will need to upload the image to an image hosting service. This ensures that the image is hosted on a reliable server and can be accessed by your email recipients. Here’s how you can upload the image to an image hosting service:
- Select a suitable image hosting service: There are several free image hosting services available, such as Imgur, Photobucket, and Google Photos. Choose one that suits your needs and offers reliable hosting and easy image management.
- Create an account (if necessary): Some image hosting services require you to create an account before you can upload images. If required, sign up for a free account by providing the necessary details.
- Upload the image: Once you have selected an image hosting service and logged in (if necessary), locate the option to upload an image. This is usually found on the homepage or within your account dashboard. Click on the “Upload” button and select the image file from your computer to begin the upload process.
- Wait for the upload to complete: The upload speed will depend on the size of the image and your internet connection. It may take a few moments for the image to finish uploading. Be patient and avoid refreshing or closing the upload page before it has completed.
- Copy the image URL: Once the image has uploaded successfully, the hosting service will provide you with a unique URL that points to your image. This URL is what you will use to insert the image into your Gmail signature. Select and copy the URL to your clipboard.
Uploading the image to an image hosting service ensures that the image is accessible and visible within your Gmail signature. It also prevents any potential issues that may arise from directly embedding an image in your email signature.
Remember to choose a reputable image hosting service with reliable uptime and no restrictions on image size or bandwidth. This will ensure that your image remains accessible and visible to your email recipients consistently.
Obtain the Image URL
Once you have uploaded your image to an image hosting service, the next step is to obtain the image URL. The image URL is a unique web address that points directly to your image. Here’s how you can obtain the image URL:
- Access the image hosting service account: Log in to your account on the image hosting service where you uploaded the image. If you created an account specifically for uploading the image, make sure to use the correct login credentials.
- Locate the image in your account: Depending on the image hosting service, you may need to navigate to your image library, gallery, or the specific album where you uploaded the image. Find the image you want to use in your Gmail signature.
- Right-click on the image: Once you’ve located the image, right-click on it to bring up a context menu of options. Select “Copy Image Address,” “Copy Image URL,” or a similar option. This will copy the image URL to your clipboard.
- Paste the image URL: Open a text editor or directly access your Gmail signature settings. In the signature editor, click on the image icon (usually represented by a mountain or sun icon). In the image URL field, right-click and select “Paste” to insert the image URL into the field.
- Verify the image URL: Double-check that the URL you pasted is correct and complete. Make sure it starts with “http://” or “https://” to ensure the image will load securely. You can also test the URL by opening it in a web browser to see if the image loads correctly.
Obtaining the image URL is a crucial step in adding the image to your Gmail signature. It allows Gmail to fetch and display the image in your signature when you send emails. Make sure to follow the steps carefully to ensure that the image URL is correctly copied and inserted into your signature settings.
Note that some image hosting services may have different steps or options for obtaining the image URL. If you encounter any difficulties, refer to the help documentation or support resources provided by the image hosting service.
Access the Gmail Settings
In order to add an image to your Gmail signature, you need to access the Gmail settings. The settings menu provides you with the options and controls to customize and configure your Gmail account. Here’s how you can access the Gmail settings:
- Open Gmail in your web browser: Launch your preferred web browser and go to the Gmail website (www.gmail.com).
- Sign in to your account: Enter your Gmail email address and password to sign in to your account. If you are already signed in, you will be taken directly to your inbox.
- Locate and click on the gear icon: In the top-right corner of the Gmail interface, you will see a gear icon. This icon represents the settings. Click on it to open the dropdown menu.
- Select “Settings” from the dropdown menu: In the dropdown menu, click on the “Settings” option. This will open the Gmail settings page in a new tab or window.
Alternatively, you can access the Gmail settings directly from your inbox by clicking on the gear icon in the top-right corner of the interface and selecting “See all settings” from the dropdown menu.
By accessing the Gmail settings, you gain control over various aspects of your Gmail account, including email organization, filters, and, most importantly, your signature settings. Once you have accessed the settings, you can proceed to create or edit your Gmail signature and add the image to it.
Remember to save any changes you make to the settings to ensure that they are applied to your Gmail account and visible in your future emails.
Create or Edit Your Gmail Signature
Once you have accessed the Gmail settings, the next step is to create or edit your Gmail signature. The signature is a block of text that is automatically added to the end of your outgoing emails. Here’s how you can create or edit your Gmail signature:
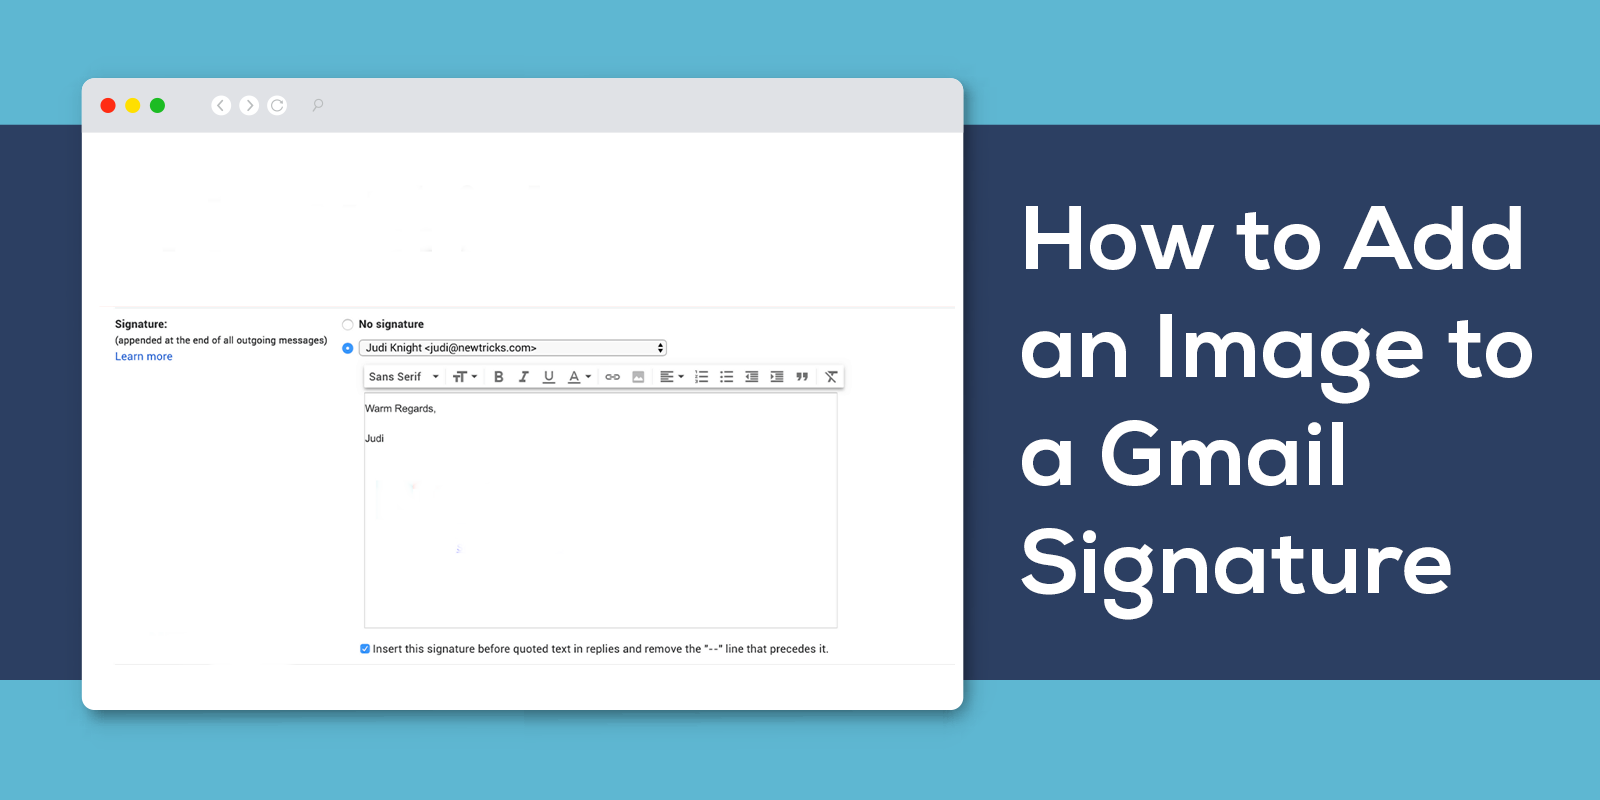
- Locate the “Signature” section: Scroll down the Gmail settings page until you find the “Signature” section. It is usually located in the “General” or “Settings” tab.
- Select the signature to edit: If you already have a signature set up, you will see it appear in the signature editor. Click on the existing signature to edit it. If you want to create a new signature, click on the drop-down menu and select “Create new”
- Enter your desired text content: In the signature editor, type in the text content you want to include in your signature. This can include your name, contact information, job title, or any other relevant details. Format the text using the available options, such as bold, italics, or underlining.
- Insert the image into the signature: To add the image to your signature, position the cursor in the signature editor where you want the image to appear. Then, click on the image icon in the editor toolbar.
- Paste the image URL: In the image URL field, paste the image URL that you obtained from the image hosting service. This will insert the image into your signature. Adjust the image size if needed.
- Customize the signature formatting: You can further customize your signature by adding additional text, changing font styles, or including hyperlinks to your website or social media profiles. Experiment with different formatting options to create a signature that suits your preferences.
Take your time to create or edit your Gmail signature, ensuring that it accurately represents your personal or professional brand. Once you are satisfied with the changes, remember to save the signature settings to apply it to your outgoing emails.
Keep in mind that the signature will only appear in emails composed using the Gmail web interface and not in emails sent from mobile devices or third-party email clients.
Click on the Image Icon in the Signature Editor
After creating or editing your Gmail signature, the next step is to insert the image into the signature. To do this, you need to click on the image icon in the signature editor. Here’s how you can add your desired image to the Gmail signature:
- Access the Gmail signature editor: Open your Gmail account and navigate to the settings page. Locate the “Signature” section within the settings.
- Edit the desired signature: If you have multiple signatures set up, choose the signature you want to add the image to. Click on it to edit or select “Create new” to create a new signature.
- Position the cursor where the image should appear: Within the signature editor, position the cursor at the exact spot where you want the image to be placed. This ensures the image is inserted at the desired location.
- Click on the image icon: Look for the image icon in the signature editor’s toolbar. The icon is usually represented by a mountain or a sun symbol. Clicking on this icon will open a window or prompt to add the image URL.
- Add the image URL: In the image URL field, paste the image URL that you obtained from the image hosting service. This URL serves as the direct link to the image.
By clicking on the image icon in the signature editor, you enable Gmail to associate the image URL with your signature effectively. This ensures that the image will be displayed whenever you send an email using that specific signature.
Remember to double-check the image URL to ensure it is correct and valid. Any errors or typos in the URL may result in the image not displaying correctly in your signature. If necessary, you can adjust the image size within the signature editor to achieve the desired appearance.
Once you have added the image to your Gmail signature, you can further customize the signature text, formatting, or any additional details you want to include. Take the time to review and finalize your signature before saving the changes.
Paste the Image URL in the Image URL Field
When adding an image to your Gmail signature, it is important to paste the image URL into the designated image URL field. This allows Gmail to fetch and display the image correctly in your signature. Here are the steps to paste the image URL in the image URL field:
- Access the Gmail signature editor: Open your Gmail account and navigate to the settings page. Locate the “Signature” section within the settings.
- Edit the desired signature: Choose the signature you want to add the image to. Click on it to edit or select “Create new” to create a new signature.
- Position the cursor where the image should appear: Within the signature editor, position the cursor at the exact spot where you want the image to be placed. This ensures the image is inserted at the desired location.
- Click on the image icon: Look for the image icon in the signature editor’s toolbar. It is usually represented by a mountain or sun symbol. Clicking on this icon will prompt a window for adding the image URL.
- Paste the image URL: In the image URL field provided, right-click and select “Paste” to insert the image URL that you obtained from an image hosting service. Alternatively, you can use the keyboard shortcut “Ctrl+V” (Windows) or “Command+V” (Mac) to paste the URL.
By pasting the image URL in the designated field, Gmail knows where to retrieve the image from and display it in your signature. Make sure the image URL is correct, complete, and starts with “http://” or “https://”, ensuring the image will load securely.
After pasting the image URL, you can preview the image within the signature editor to ensure that it appears as expected. If needed, you can adjust the image size or reposition it within the signature editor.
Remember to save the changes to your signature settings to apply the image in your Gmail signature. Always double-check the signature in a test email to see how it appears to recipients before sending important emails.
Adjust the Image Size (if necessary)
After pasting the image URL into the image URL field in the Gmail signature editor, you may need to adjust the size of the image to ensure it fits appropriately within your signature. Here’s how you can adjust the image size:
- Select the image in the signature editor: Click on the inserted image within the signature editor to select it. A bounding box or handles will appear around the image, indicating that it is selected.
- Resize the image: Depending on the signature editor’s capabilities, you can typically resize the image by clicking and dragging one of the handles on the corners or sides of the bounding box. By doing so, you can increase or decrease the image’s dimensions proportionally.
- Preserve the aspect ratio: To maintain the image’s aspect ratio (the proportional relationship between its width and height), hold the “Shift” key on your keyboard while resizing the image. This prevents the image from becoming stretched or distorted.
- Preview the resized image: After adjusting the image size, preview it within the signature editor to ensure it appears as desired. Take note of its proportions and overall visual harmony within the signature. Make further adjustments if necessary.
It’s important to strike a balance when resizing the image. Ensure that the image is not too small to be clearly visible, but also avoid making it excessively large, which may overshadow other elements of your signature. The recommended width for an image in a signature is generally between 150-200 pixels, depending on your preferences and the available space.
Remember to consider the overall layout and design of your signature when adjusting the image size. Maintain visual balance and harmony by aligning the image with other text or contact details within the signature.
Once you are satisfied with the resized image in your Gmail signature, save your changes to preserve the new dimensions. Preview the signature in a test email to ensure the image is displaying correctly before using it in your regular email communication.
Add Alt Text to the Image (optional)
While not mandatory, adding alt text to the image in your Gmail signature is a best practice that provides a text alternative for visually impaired individuals or when the image cannot be displayed. Alt text, short for alternative text, describes the image to provide context and enable accessibility. Here’s how you can add alt text to the image:
- Select the image in the signature editor: Click on the image in the signature editor to select it. This allows you to access the image properties and make changes.
- Access the image properties: Right-click on the selected image and choose “Image properties” or a similar option from the context menu. Alternatively, look for an option in the signature editor’s toolbar to access the image properties.
- Find the alt text field: In the image properties, there should be a field designated for alt text. It may be labeled as “Alternative text,” “Alt text,” or something similar.
- Add a concise and descriptive alt text: Enter a brief and descriptive summary of the image content in the alt text field. Be concise yet informative, conveying the image’s purpose or message. Avoid using lengthy sentences or unnecessary details.
- Save your changes: After adding the alt text, click on the “OK” or “Save” button to save your changes and close the image properties dialog.
By adding alt text to your image, you enhance the accessibility of your email signature. People who use assistive technologies like screen readers will be able to understand and interpret the image based on the alt text provided. Additionally, if the image fails to load for any reason, the alt text will be displayed as a fallback, providing context and information.
Remember that alt text should be concise and descriptive, capturing the essence of the image’s content. It’s important to strike a balance between providing enough information and keeping the alt text concise and easy to comprehend.
Adding alt text to your signature images demonstrates inclusivity and consideration for all recipients of your emails, ensuring they can engage with the content regardless of any visual limitations.
Save Your Signature
After creating or making changes to your Gmail signature, it’s important to save your signature settings to ensure that it is applied to your outgoing emails. Here’s how you can save your signature:
- Review your signature: Take a moment to review your signature and make sure all the desired information is included and formatted correctly. Check that your image, text, and any additional details are aligned and visually appealing.
- Scroll to the bottom of the settings page: If you’re not already at the bottom of the settings page, scroll down to locate the “Save Changes” or similar button.
- Click “Save Changes”: When you find the “Save Changes” button, click on it to save your signature settings. This will apply the changes you made to your signature.
- Compose a test email: To ensure your signature appears as intended, compose a test email to yourself or to a colleague. Check that the signature displays correctly, including the image, text, and any additional formatting.
- Verify the signature in test emails: Open the test email(s) and confirm that the signature is visible and formatted correctly. Double-check that any links or contact information within the signature are working as expected. Make further adjustments if necessary.
Saving your signature is vital to ensure that it is consistently applied to all outgoing emails from your Gmail account. Whenever you compose a new email or reply to a message, your signature will be automatically appended at the end of the email.
Keep in mind that signatures created in the web version of Gmail may not appear if you compose emails using mobile devices or third-party email clients. In such cases, you may need to set up your signature separately on those platforms.
By saving your signature and verifying its appearance in test emails, you can feel confident that your Gmail signature looks professional, reflects your personal or professional brand, and provides the necessary contact information to your recipients.