
Reasons to Change Your Gmail Signature
Changing your Gmail signature can have numerous benefits, both professionally and personally. Here are a few compelling reasons why you should consider updating your Gmail signature:
- Brand Consistency: Your Gmail signature represents your personal or professional brand. By keeping it up to date and consistent across all your communication platforms, you create a cohesive and professional image.
- Improved Professionalism: A well-crafted Gmail signature adds a touch of professionalism to your emails. It shows that you pay attention to detail and take pride in your online presence.
- Contact Information: Your signature serves as a convenient way for recipients to find and contact you. By including essential details like your name, job title, phone number, and website, you make it effortless for others to get in touch with you.
- Marketing Opportunities: Your Gmail signature can be an effective marketing tool. By including links to your social media profiles or promoting your latest blog post, you can drive traffic and engagement to your online presence.
- Personal Expression: Your Gmail signature is a chance to inject some personal flair into your emails. You can customize it with a quote, a witty phrase, or even a link to your favorite podcast or video.
- Professional in Multiple Roles: If you wear several professional hats or work in multiple roles, your Gmail signature can help indicate which position you’re representing in any given conversation.
- Informative and Up-to-date: A well-designed signature showcases your most relevant and current information. It ensures that recipients have easy access to your latest contact details, which is particularly important if you’ve changed jobs or updated your website.
- Stand Out from the Crowd: An eye-catching Gmail signature can make you memorable in a sea of emails. By incorporating a visually appealing design or using a unique font, you can leave a lasting impression on recipients.
By considering these reasons, you can see the value in changing your Gmail signature regularly. It’s a simple yet effective way to enhance your online presence, promote your brand, and make a positive impact on your email communications.
Steps to Change Your Gmail Signature
Changing your Gmail signature is a quick and straightforward process. Whether you’re using Gmail on your desktop or mobile device, follow these steps to update your signature:
- Option 1: Changing Your Gmail Signature on Desktop
- Open your Gmail account and click on the gear icon located in the upper right corner to access the settings menu.
- Select “See all settings” from the dropdown menu.
- Navigate to the “General” tab and scroll down to the “Signature” section.
- Click on the signature box to edit or create your new signature. You can customize it with text, images, links, and formatting options using the available toolbar.
- Once you’re satisfied with your new signature, scroll down and click “Save Changes” at the bottom of the page.
- Compose a new email or reply to an existing one to see your updated signature in action.
- Option 2: Changing Your Gmail Signature on Mobile
- Open the Gmail app on your mobile device.
- Tap on the three horizontal lines in the upper left corner to open the menu.
- Scroll down and select “Settings”.
- Choose the email account for which you want to change the signature.
- Tap on “Signature settings”, then toggle on the “Mobile signature” option.
- Edit or create your new signature in the provided text box.
- Tap “Save” to apply your changes.
- Compose a new email or reply to an existing one to see your updated signature.
By following these steps, you can easily modify your Gmail signature to reflect your desired changes. Whether you’re on a desktop or mobile device, you’ll have a personalized signature that represents you professionally and impresses your email recipients.
Option 1: Changing Your Gmail Signature on Desktop
If you primarily use Gmail on your desktop, here is a step-by-step guide on how to change your Gmail signature:
- Open your preferred web browser and log in to your Gmail account.
- Once you’re in your inbox, locate the gear icon in the upper right corner of the screen and click on it. This will open a dropdown menu.
- From the dropdown menu, select “See all settings” to access the Gmail settings page.
- On the settings page, navigate to the “General” tab.
- Scroll down until you find the “Signature” section.
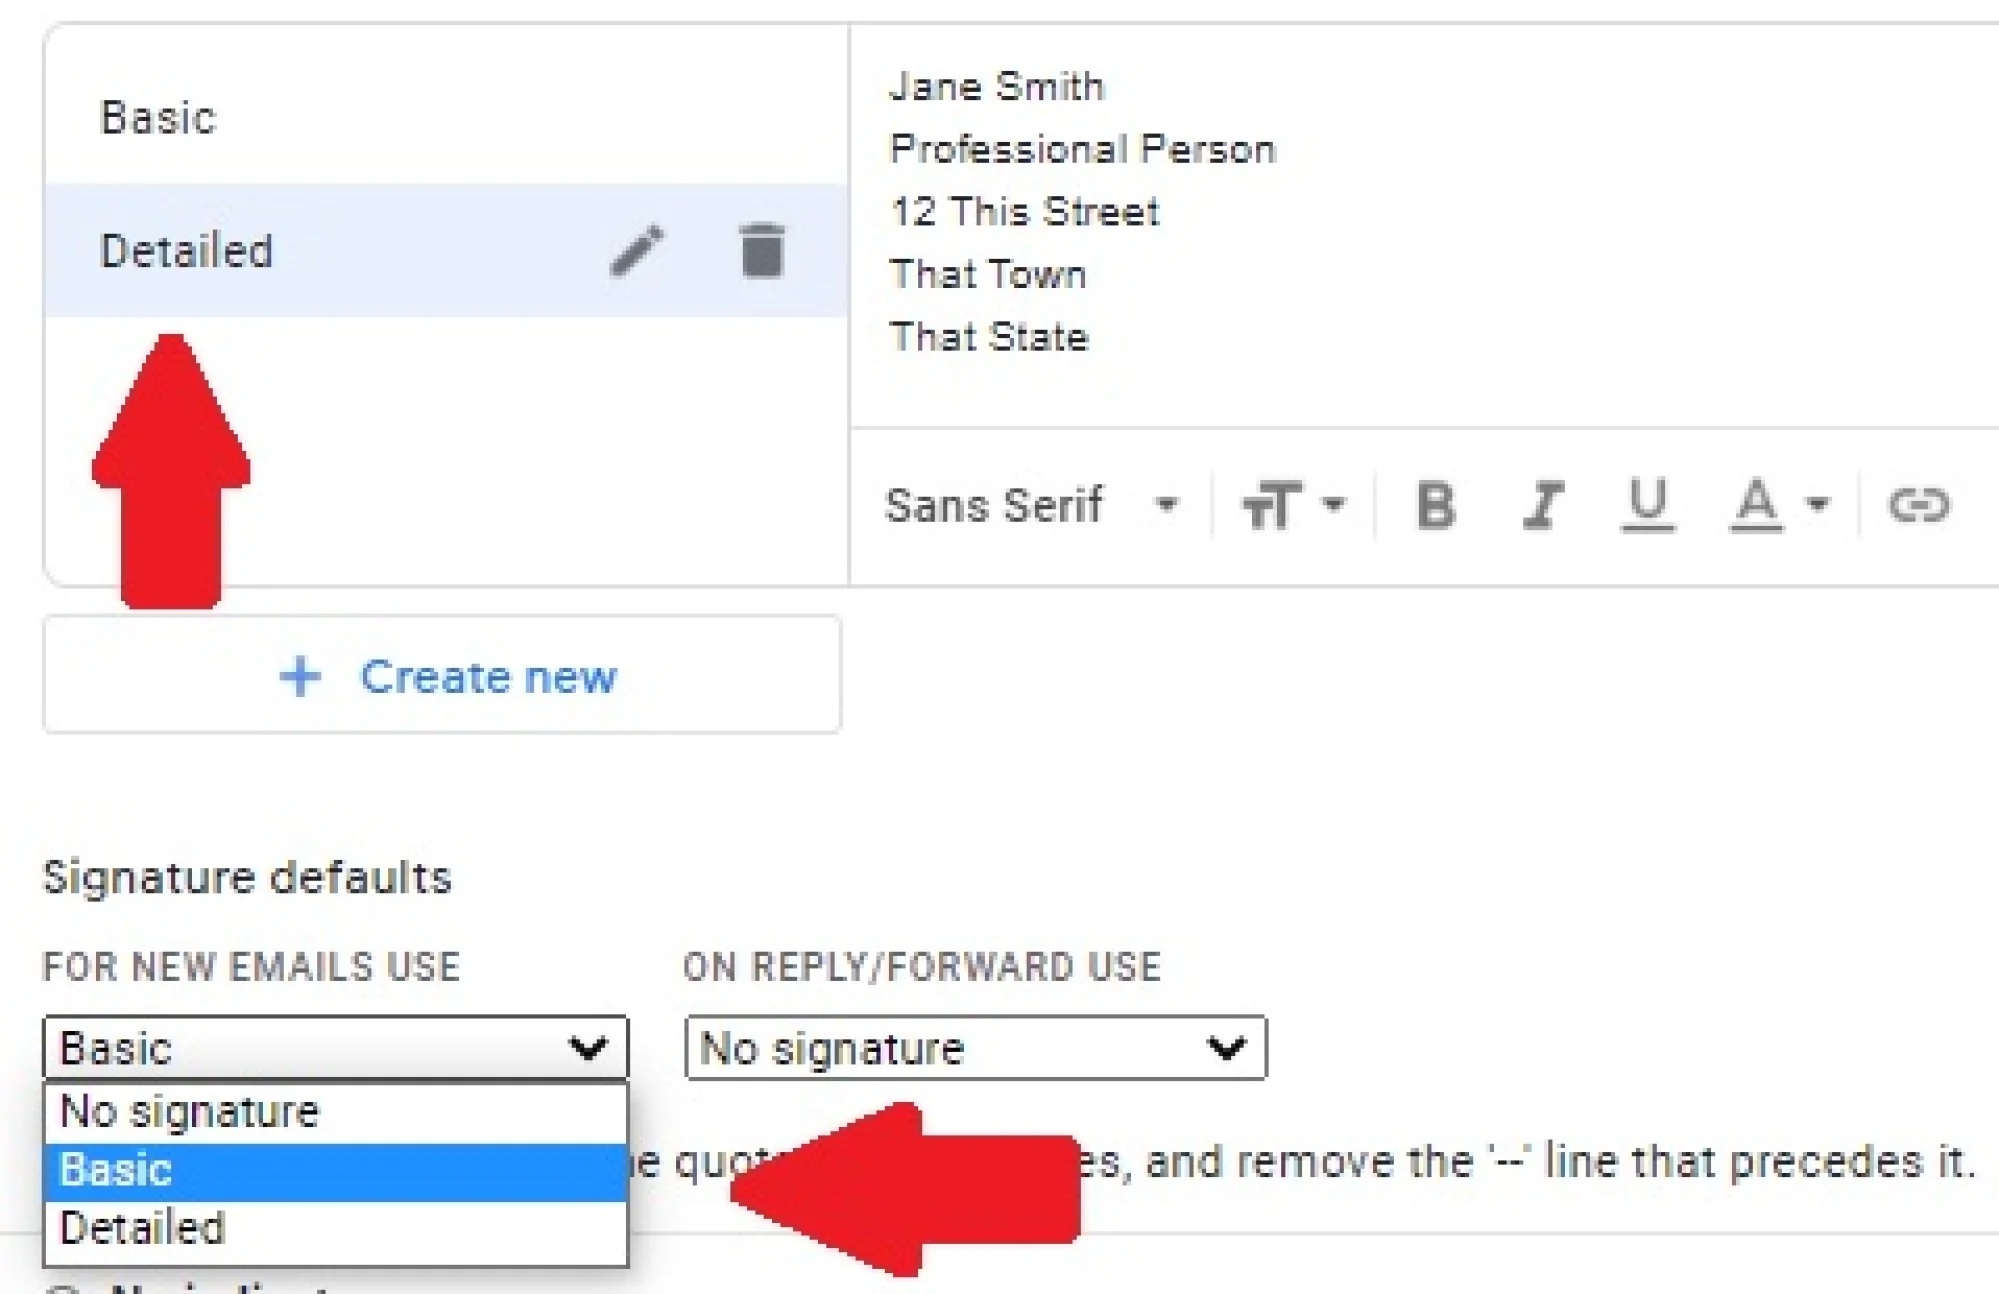
- In the signature box, you’ll see your current signature if you have one set up. You can edit this or create a new signature from scratch.
- Use the available formatting options to customize your signature. You can add text, images, links, and apply formatting such as bold or italic.
- Preview your signature in the box provided to see how it will appear in your emails.
- Once you’re satisfied with your new signature, scroll down to the bottom of the page and click “Save Changes”.
- To confirm that your new signature is working correctly, compose a new email or reply to an existing one. Your updated signature should now be visible at the bottom of your email.
By following these steps, you can easily change your Gmail signature on the desktop version of Gmail. It’s a simple process that allows you to create a professional and personalized signature that reflects your individual style and branding.
Option 2: Changing Your Gmail Signature on Mobile
If you primarily use Gmail on your mobile device, you can still easily change your Gmail signature. Here’s how:
- Open the Gmail app on your mobile device.
- In the top-left corner of the screen, tap on the three horizontal lines to open the menu.
- Scroll down the menu and find the “Settings” option. Tap on it.
- In the Settings menu, choose the email account for which you want to change the signature. If you have multiple accounts linked to your Gmail app, select the one you want to update.
- Within the account settings, you’ll find an option called “Signature settings”. Tap on it.
- Toggle on the “Mobile signature” option if it’s not already enabled.
- In the text box provided, you can now edit or create your new signature. Feel free to include your name, job title, contact information, or any other details you want to include.
- Once you’ve finished updating your signature, tap “Save” to apply the changes.
- You can now create a new email or respond to an existing one to see your updated signature in action.
With these simple steps, you can easily change your Gmail signature using the mobile app. This allows you to have a consistent and professional email signature, even when you’re on the go.
How to Remove or Delete Your Gmail Signature
If you no longer want to use a signature in your Gmail emails, or if you want to remove your current signature and start fresh, follow these steps:
- Open your Gmail account on your preferred web browser or mobile device.
- Access the settings menu by clicking on the gear icon in the upper right corner of the screen on the desktop version, or tapping on the three horizontal lines and selecting “Settings” on the mobile app.
- In the settings menu, navigate to the “General” or “Settings” tab, depending on the version you’re using.
- Scroll down until you find the “Signature” section.
- In the signature box, either delete the existing signature or remove all the text and formatting to create a blank signature.
- Make sure there is no text or content in the signature box and that it’s completely empty.
- Scroll down to the bottom of the settings page and click or tap “Save Changes” to update your settings.
Once you’ve followed these steps and saved your changes, your Gmail emails will no longer include a signature. You can always return to the settings later if you decide to create a new signature or make further changes.
Remember that having a signature is optional, and you can remove or delete it at any time based on your personal preference or the specific requirements of each email you send.
Tips for Creating an Effective Gmail Signature
Your Gmail signature is an important component of your email communication. It represents your professional identity and can leave a lasting impression on recipients. To ensure that your signature is both effective and impactful, consider following these tips:
- Keep it concise: A signature should be succinct and to the point. Include only essential information such as your name, job title, and contact details. Avoid overcrowding the signature with too much text or excessive links.
- Make it visually appealing: Use a clean and professional design that matches your personal or company brand. Incorporate appropriate colors, fonts, and formatting to make your signature visually appealing and easy to read.
- Include contact information: Ensure that your signature includes relevant contact details such as your phone number, email address, and website. This makes it convenient for recipients to reach out to you.
- Add relevant links: Consider including links to your professional social media profiles, blog, or portfolio website. This gives recipients the opportunity to explore more about you and your work.
- Use a call-to-action: Include a call-to-action in your signature to encourage recipients to take a specific action. For example, you can invite them to visit your website, subscribe to your newsletter, or schedule a meeting.
- Maintain consistency: Ensure that your Gmail signature is consistent with your branding across different platforms. Use the same colors, fonts, and style to create a unified and professional look for your online presence.
- Optimize for mobile: With a growing number of emails being read on mobile devices, it’s crucial to ensure that your signature is mobile-friendly. Make sure it looks good and functions properly on smaller screens.
- Update it regularly: Review and update your signature periodically to keep it current and relevant. Update information such as job titles, contact details, or promotional links to reflect changes in your professional life.
- Test it: Send test emails to yourself or colleagues to ensure that your signature appears correctly across different email clients and devices. This will help you identify any formatting issues that need to be fixed.
- Avoid excessive promotional content: While it’s acceptable to include promotional links, refrain from overwhelming your signature with too many advertisements or marketing messages. Maintain a balance to keep it professional and focused.
By following these tips, you can create an effective Gmail signature that conveys professionalism, provides essential information, and engages your recipients. A well-designed signature can leave a positive and memorable impression, helping you build your brand and strengthen your online presence.
Best Practices for Gmail Signatures
When creating a Gmail signature, it’s important to follow best practices to ensure that it is professional, effective, and leaves a positive impression on recipients. Here are some best practices to keep in mind:
- Keep it simple: A cluttered signature can be overwhelming and difficult to read. Ensure that your signature is clean, organized, and not overly busy.
- Use a readable font: Choose a font that is legible and easy to read across different devices and email clients. Avoid using overly fancy or decorative fonts that may compromise readability.
- Adhere to brand guidelines: If you are creating a signature for a company or organization, make sure it aligns with the brand’s visual identity and style guidelines.
- Include a high-quality headshot: Adding a professional headshot to your signature can help recipients put a face to the name. Make sure the image is clear and of high resolution.
- Follow legal requirements: If your signature includes legal disclaimers or compliance statements, ensure that they are accurate and up to date.
- Pay attention to formatting: Use appropriate formatting, such as bold or italic, to emphasize important information. However, avoid excessive use of formatting that can make your signature appear cluttered.
- Test across multiple devices: Make sure your signature displays correctly on different devices and screen sizes. Test it on desktops, laptops, smartphones, and tablets to ensure consistency.
- Consider mobile responsiveness: With the increasing number of emails being opened on mobile devices, make sure your signature is mobile-friendly. It should be easily readable and properly formatted on smaller screens.
- Include relevant social media icons: If you have professional social media profiles, consider adding icons or links to them in your signature. However, only include the platforms that are relevant to your industry or personal brand.
- Update your signature regularly: Keep your signature current by updating it as needed. Update contact information, job titles, or promotional links to ensure that your signature is always accurate and reflects your latest information.
By adhering to these best practices, you can create a professional and effective Gmail signature that enhances your online presence, builds brand consistency, and leaves a lasting impression on your email recipients.
Final Thoughts
Your Gmail signature is an essential component of your email communication and can significantly impact how you are perceived by recipients. By following the steps to change your Gmail signature and implementing the tips and best practices mentioned above, you can create a signature that represents your professional identity, enhances your brand, and leaves a positive impression on those who receive your emails.
Remember that your Gmail signature should be concise, visually appealing, and provide relevant contact information. It’s important to maintain consistency in your branding across different platforms and devices, ensuring that your signature is mobile-friendly and displays correctly on various screen sizes.
Regularly review and update your signature to keep it current and relevant. Whether you’re changing job roles, updating contact information, or adding new promotional links, having an up-to-date signature will ensure that recipients have accurate and useful information at their fingertips.
Finally, don’t forget to test your signature on different email clients and devices to ensure its compatibility and proper rendering. By testing and optimizing your signature, you can ensure that your emails look professional and polished across various platforms, leaving a strong and consistent impression on recipients.
With these guidelines in mind, you can create a compelling Gmail signature that reflects your professionalism, strengthens your brand, and enhances your overall email communication.