
Creating a Gmail Account
Having a Gmail account is the first step to accessing Gmail with Outlook. If you already have a Gmail account, you can skip this section and proceed to the next one.
If you don’t have a Gmail account yet, follow these steps to create one:
- Open your web browser and go to the Gmail website.
- Click on the “Create account” option, usually located at the top right corner of the page.
- Fill out the required information in the registration form, including your first and last name, desired email address, password, and phone number.
- Agree to the terms and conditions, then click “Next” to proceed.
- Verify your phone number by entering the verification code sent to your mobile device.
- Complete the setup process by adding a profile picture (optional) and setting up account recovery options.
- Once you have completed the registration, you will have successfully created a Gmail account.
It’s important to choose a strong and unique password to ensure the security of your Gmail account. Additionally, consider enabling two-factor authentication for an extra layer of security.
Now that you have a Gmail account, you are ready to proceed to the next section and enable IMAP in Gmail.
Enabling IMAP in Gmail
In order to access your Gmail account with Outlook, you need to enable IMAP (Internet Message Access Protocol) in your Gmail settings. IMAP allows you to sync your emails across multiple devices and clients.
Follow these steps to enable IMAP in Gmail:
- Sign in to your Gmail account using your email address and password.
- Click on the gear icon located in the top right corner of the Gmail interface, then select “Settings” from the dropdown menu.
- In the settings menu, navigate to the “Forwarding and POP/IMAP” tab.
- Under the “IMAP Access” section, select the option “Enable IMAP”.
- Scroll down to the bottom of the page and click “Save Changes” to apply the settings.
Once you have enabled IMAP, you are now ready to add your Gmail account to Outlook.
Enabling IMAP in Gmail ensures that your emails are accessible through both the web interface and third-party email clients like Outlook. It allows for seamless synchronization of your emails, making it easier to manage your Gmail account across all your devices.
Now that you have enabled IMAP in Gmail, proceed to the next section to learn how to add your Gmail account to Outlook.
Adding Gmail Account to Outlook
Now that you have a Gmail account and IMAP is enabled, you can add your Gmail account to Outlook to access your emails, contacts, and calendar from one place. Follow these steps to add your Gmail account to Outlook:
- Open Outlook on your computer and click on the “File” tab in the top left corner.
- In the sidebar that opens, click on “Add Account” under the “Info” category.
- In the “Add Account” window, enter your Gmail email address and click “Connect”.
- On the Gmail sign-in page, enter your password and click “Next”.
- Outlook will then attempt to set up your Gmail account automatically. If successful, you will see a “Success” message. Click “Done” to finish the setup process.
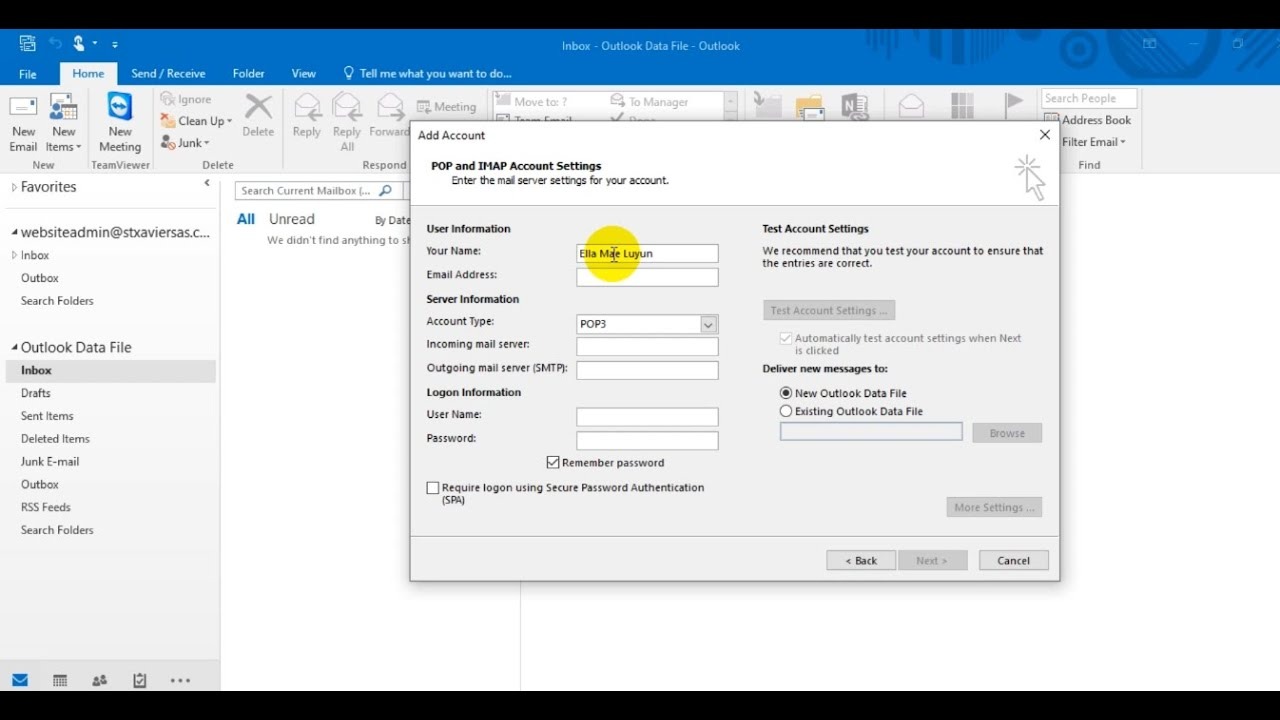
- If the automatic setup fails, you may need to enter your account details manually. Select the option “Advanced options” in the “Add Account” window and click “Let me set up my account manually”.
- Choose the account type as “IMAP” and enter the following details:
- Incoming mail server: imap.gmail.com
- Outgoing mail server: smtp.gmail.com
- Username: your Gmail email address
- Password: your Gmail account password
- Click “Connect” to proceed.
- Outlook will now attempt to connect to your Gmail account. If successful, you will see a “Success” message. Click “Done” to finish the setup process.
Once you have added your Gmail account to Outlook, you can start accessing your emails, contacts, and calendar directly within the Outlook interface. This allows for a more streamlined and efficient experience, as you can manage all your accounts and information in one place.
In the next section, we will discuss how to configure Gmail account settings in Outlook to ensure proper synchronization and customization.
Configuring Gmail Account Settings in Outlook
After adding your Gmail account to Outlook, it’s important to configure the account settings to optimize your experience and ensure smooth synchronization between the two platforms. Here are the steps to configure Gmail account settings in Outlook:
- Open Outlook on your computer and click on the “File” tab in the top left corner.
- Click on “Account Settings” and then select “Account Settings” again from the dropdown menu.
- In the Account Settings window, select your Gmail account from the list and click on “Change”.
- In the Change Account window, you can modify various settings, including:
- Server settings: Here, you can adjust the incoming and outgoing mail server settings if needed. By default, Outlook should have configured these settings correctly based on the information provided during the setup process.
- Sync settings: You can choose how often Outlook syncs with the Gmail server and the amount of email to sync. Adjust these settings according to your preferences and needs.
- Folder options: This allows you to choose which Gmail folders to sync with Outlook. By default, your Inbox, Sent Items, and Drafts folders are synced. You can also choose to sync other folders such as Archive or specific labels you have created in Gmail.
- Other advanced settings: You can explore other advanced settings such as setting up automatic replies, data file locations, and caching options.
- Once you have made the necessary changes, click “Next” and then “Finish” to save the settings.
Configuring the Gmail account settings in Outlook allows you to customize the synchronization, email retrieval, and folder settings according to your preferences. This ensures that your Gmail emails are seamlessly integrated and organized within the Outlook interface.
In the next section, we will discuss how to sync emails, contacts, and calendar events from your Gmail account to Outlook.
Syncing Emails from Gmail to Outlook
Once you have added your Gmail account to Outlook and configured the necessary settings, you can start syncing your emails from Gmail to Outlook. This allows you to access and manage all your Gmail messages directly from the Outlook interface. Here’s how to sync emails from Gmail to Outlook:
- Open Outlook on your computer.
- In the Outlook interface, click on the “Send/Receive” tab in the top menu.
- Click on the “Send/Receive All Folders” button to initiate the synchronization process. Outlook will start syncing your Gmail emails to your Outlook inbox.
- Depending on the size of your mailbox and the number of emails to sync, it may take some time to complete the syncing process. You can monitor the progress in the bottom right corner of the Outlook window.
- Once the syncing is complete, your Gmail emails will be available in the corresponding folders within Outlook, such as the Inbox, Sent Items, and other synced folders.
- You can now access, read, and manage your Gmail emails directly within Outlook. Any changes made in Outlook will be reflected in your Gmail account, ensuring synchronization between the two platforms.
By syncing your Gmail emails to Outlook, you can enjoy a unified and streamlined experience, accessing all your emails from different accounts in one place. This simplifies email management and allows you to leverage the features and functionalities of Outlook to organize, filter, and categorize your emails effectively.
In the next sections, we will discuss how to sync contacts and calendar events from your Gmail account to Outlook, as well as how to send and receive emails using Outlook with your Gmail account.
Syncing Contacts from Gmail to Outlook
In addition to syncing emails, you can also sync your contacts from your Gmail account to Outlook. Syncing contacts allows you to have all your important contacts readily available within the Outlook interface. Here’s how to sync contacts from Gmail to Outlook:
- Open Outlook on your computer.
- In the Outlook interface, click on the “File” tab in the top left corner.
- Click on “Account Settings” and then select “Account Settings” again from the dropdown menu.
- In the Account Settings window, select your Gmail account from the list and click on “Change”.
- In the Change Account window, click on the “Address Books” tab.
- Click on the “New” button and select “Google” as the type of address book.
- Enter your Gmail email address and password when prompted.
- Click “OK” to save the changes.
- Outlook will then sync your Gmail contacts and display them in the Outlook interface.
Once the contacts are synced, you can access, view, and manage them in the Contacts section of Outlook. Any changes made to the contacts in Outlook will be synced back to your Gmail account, ensuring that both platforms are up to date with the latest contact information.
Syncing contacts from Gmail to Outlook provides a seamless integration of your contact list, allowing you to have all your important contacts easily accessible when composing emails or scheduling meetings.
In the next section, we will discuss how to sync calendar events from your Gmail account to Outlook.
Syncing Calendar from Gmail to Outlook
Syncing your calendar from Gmail to Outlook allows you to have all your important events and appointments in one place for easy access and management. Here’s how to sync your calendar from Gmail to Outlook:
- Open Outlook on your computer.
- In the Outlook interface, click on the “File” tab in the top left corner.
- Click on “Account Settings” and then select “Account Settings” again from the dropdown menu.
- In the Account Settings window, select your Gmail account from the list and click on “Change”.
- In the Change Account window, click on the “Internet Calendars” tab.
- Click on the “New” button and enter your Gmail calendar URL.
- Click “Add” to add the calendar to Outlook.
- Outlook will then sync your Gmail calendar and display it in the Calendar section of the Outlook interface.
Once the calendar is synced, you can view and manage your Gmail events, create new appointments, and set reminders within Outlook. Any changes made to the calendar events in Outlook will be reflected in your Gmail account, ensuring synchronization between the two platforms.
By syncing your calendar from Gmail to Outlook, you can easily stay organized and manage your schedule more efficiently. You can view and edit your events on any device with Outlook installed, ensuring that you never miss an important appointment.
In the next section, we will discuss how to send and receive emails in Outlook using your Gmail account.
Sending and Receiving Emails in Outlook with Gmail Account
Now that your Gmail account is set up in Outlook, you can start sending and receiving emails through Outlook using your Gmail account. Here’s how to send and receive emails in Outlook with your Gmail account:
Sending Emails:
- Open Outlook on your computer.
- Click on the “New Email” button to start composing a new email.
- In the “From” field, select your Gmail account from the dropdown list to indicate that you want to send the email from your Gmail address.
- Enter the recipient’s email address in the “To” field, add a subject, and write your email message.
- Click on the “Send” button to send the email. Outlook will use your Gmail account to send the email.
Receiving Emails:
When new emails arrive in your Gmail account, they will automatically be synced and displayed in your Outlook inbox. You can read and manage these emails within the Outlook interface.
To check for new emails manually, you can click on the “Send/Receive” tab in the top menu and then click on the “Send/Receive All Folders” button. Outlook will sync with your Gmail account and download any new emails to your Outlook inbox.
By using Outlook as your email client for your Gmail account, you can take advantage of Outlook’s advanced features and organization tools. You can easily categorize and filter your emails, set up rules and folders, and manage your Gmail account alongside other email accounts you may have.
In the next section, we will discuss how to organize emails in Outlook with your Gmail account by creating folders.
Organizing Emails in Outlook with Gmail Account
Organizing your emails is essential for maintaining a clutter-free inbox and staying on top of your messages. In Outlook, you can easily organize your Gmail account by creating folders and applying rules. Here’s how to organize your emails in Outlook with your Gmail account:
Creating Folders:
- Open Outlook on your computer.
- In the navigation pane, select your Gmail account to view its folders.
- Right-click on your Gmail account name and choose “New Folder” from the context menu.
- Enter a name for the folder and press Enter to create it.
- You can create multiple folders to categorize your emails, such as “Work”, “Personal”, “Financial”, or any other relevant categories.
Once you have created folders in Outlook, you can drag and drop emails into these folders to organize them accordingly.
Applying Rules:
In addition to creating folders, you can also apply rules to automate the organization of your Gmail emails in Outlook. Rules allow you to define specific conditions and actions for incoming emails. Here’s how to create rules:
- In Outlook, click on the “File” tab and select “Manage Rules & Alerts” from the dropdown menu.
- In the Rules and Alerts window, click on the “New Rule” button to create a new rule.
- Follow the wizard to define the conditions and actions for the rule. You can choose criteria such as sender, subject, keywords, and more.
- Specify the action that should be taken when the conditions are met, such as moving the email to a specific folder.
- Click “Finish” to save the rule.
By creating folders and applying rules, you can keep your Gmail emails organized and streamline your email management process. Outlook provides powerful tools to help you stay organized and efficiently navigate through your Gmail account.
In the next section, we will discuss how to add additional Gmail accounts to Outlook, allowing you to manage multiple Gmail accounts within the same interface.
Creating Folders in Outlook for Gmail Account
Creating folders in Outlook for your Gmail account is a great way to organize and manage your emails effectively. By categorizing your emails into specific folders, you can easily locate and access them whenever needed. Here’s how to create folders in Outlook for your Gmail account:
- Open Outlook on your computer.
- In the navigation pane, locate your Gmail account under “Accounts” or “Mail Folders”.
- Right-click on your Gmail account and select “New Folder” from the context menu.
- In the “Create New Folder” dialog box, enter a name for the folder.
- Choose the location where you want to create the folder. You can select your Gmail account or any existing folder within it.
- Click “OK” to create the folder.
Once the folder is created, you can start organizing your emails by dragging and dropping them into the appropriate folders. This allows you to keep your inbox clean and easily find specific emails based on their category or topic.
You can create multiple folders within your Gmail account in Outlook, such as “Work”, “Personal”, “Travel”, or any other relevant categories based on your requirements.
Additionally, Outlook provides the option to create subfolders within existing folders. This can help further organize your emails hierarchically. To create a subfolder, simply right-click on an existing folder and follow the same steps as mentioned above.
By utilizing folders in Outlook for your Gmail account, you can streamline your email management process and ensure that important emails are stored in a systematic manner. This makes it easier to stay organized and quickly find specific emails when needed.
In the next section, we will discuss how to add additional Gmail accounts to Outlook, enabling you to manage multiple Gmail accounts within the same Outlook interface.
Adding Additional Gmail Accounts to Outlook
If you have multiple Gmail accounts, you can easily add and manage them within the Outlook interface. Adding additional Gmail accounts allows you to keep all your emails, contacts, and calendars organized in one place. Here’s how to add additional Gmail accounts to Outlook:
- Open Outlook on your computer.
- Click on the “File” tab in the top left corner.
- In the sidebar that opens, click on “Add Account” under the “Info” category.
- In the “Add Account” window, enter the email address of the additional Gmail account you want to add and click “Connect”.
- Enter the password for the Gmail account and click “Next”.
- Outlook will attempt to set up the account automatically. If successful, you will see a “Success” message. Click “Done” to finish the setup process.
- If the automatic setup fails, select the option “Advanced options” and click “Let me set up my account manually”.
- Choose the account type as “IMAP” and enter the necessary details, such as the incoming and outgoing mail server settings for the Gmail account. You can find this information on the Gmail website or contact your email provider for assistance.
- Click “Connect” to proceed with the manual setup.
- Once the account is set up, Outlook will sync the additional Gmail account, and you’ll be able to access its emails, contacts, and calendars within the Outlook interface.
By adding multiple Gmail accounts to Outlook, you can manage all your email accounts seamlessly without the need to switch between different platforms. This helps you stay organized and allows for efficient email management across all your Gmail accounts.
In the next section, we will discuss some common issues that you may encounter when integrating Gmail and Outlook, and how to troubleshoot them.
Troubleshooting Common Issues with Gmail and Outlook Integration
Integrating Gmail with Outlook can sometimes encounter issues that may disrupt the smooth synchronization between the two platforms. However, most of these issues can be resolved with some troubleshooting steps. Here are common issues you may encounter and how to troubleshoot them:
Email Sync Issues:
If you’re experiencing problems with email sync between Gmail and Outlook, try the following steps:
- Check your internet connection to ensure it’s stable and working properly.
- Verify that IMAP is enabled in your Gmail account settings.
- Restart Outlook and try syncing your emails again.
- If the issue persists, remove your Gmail account from Outlook and add it again following the setup process mentioned earlier in this article.
- Ensure that your Outlook and Gmail applications are updated to the latest versions.
Authentication Issues:
If you’re encountering authentication issues when adding your Gmail account to Outlook, follow these steps:
- Double-check that you have entered the correct Gmail email address and password.
- Enable two-factor authentication in your Gmail account for an extra layer of security.
- Provide the correct server settings (IMAP and SMTP) for your Gmail account during the manual setup process in Outlook.
- Consider generating an app password in your Gmail account settings specifically for Outlook if normal sign-in fails.
Folder Sync Issues:
If you’re experiencing problems syncing folders between Gmail and Outlook, try these troubleshooting steps:
- Ensure that you have selected the appropriate folders to sync with Outlook during the account setup or in the account settings.
- Refresh the folder list in Outlook by right-clicking on your Gmail account and selecting “Update Folder List”.
- If certain folders are not syncing, try removing and re-adding the account in Outlook.
- Check for any specific folder synchronization settings within your Gmail account settings.
If the above troubleshooting steps do not resolve your issues, it may be helpful to consult the official support documentation or contact the respective support teams of Gmail or Outlook for further assistance.
By troubleshooting and resolving these common integration issues, you can ensure a smooth and hassle-free experience when accessing Gmail through Outlook.