
Why would you want to change the time on your Kindle?
As a knowledgeable Kindle user, you may be wondering why one would need to change the time on their Kindle device. While the default time setting is usually accurate, there are a few scenarios where adjusting the time becomes necessary. Let’s explore some of the reasons why you might find yourself needing to change the time on your Kindle:
- Traveling: If you are traveling to a different time zone, it’s essential to update your Kindle’s time to ensure that your device accurately reflects the local time. This will not only help you stay on schedule but also assist with syncing your reading progress and accessing time-sensitive content, such as newspapers or magazines.
- Daylight Saving Time: Many regions or countries observe daylight saving time, where clocks are adjusted forward or backward by an hour. During these time transitions, the time on your Kindle may not automatically update, so you will need to manually adjust it to match the new time.
- Personal Preference: Some users prefer to have their Kindle display a different time than their local time for various reasons. This could be to keep track of the time in a different location, such as their hometown or a favorite travel destination. Changing the time on your Kindle allows you to customize your device according to your personal preferences.
- Sync Issues: If you are experiencing sync issues with your Kindle, such as books not updating or progress not being saved, changing the time could help resolve the problem. By ensuring that the time on your Kindle is accurate, it can facilitate proper syncing with your Amazon account and solve any synchronization-related issues.
Now that you understand some of the reasons why you might want to change the time on your Kindle, let’s dive into the steps to successfully adjust the time settings on your device.
Step 1: Go to the settings menu
Changing the time on your Kindle is a straightforward process. The first step is to access the settings menu, where you can find all the necessary options to customize your device. Follow the steps below to navigate to the settings menu:
- Start by unlocking your Kindle device and ensuring that you are on the home screen.
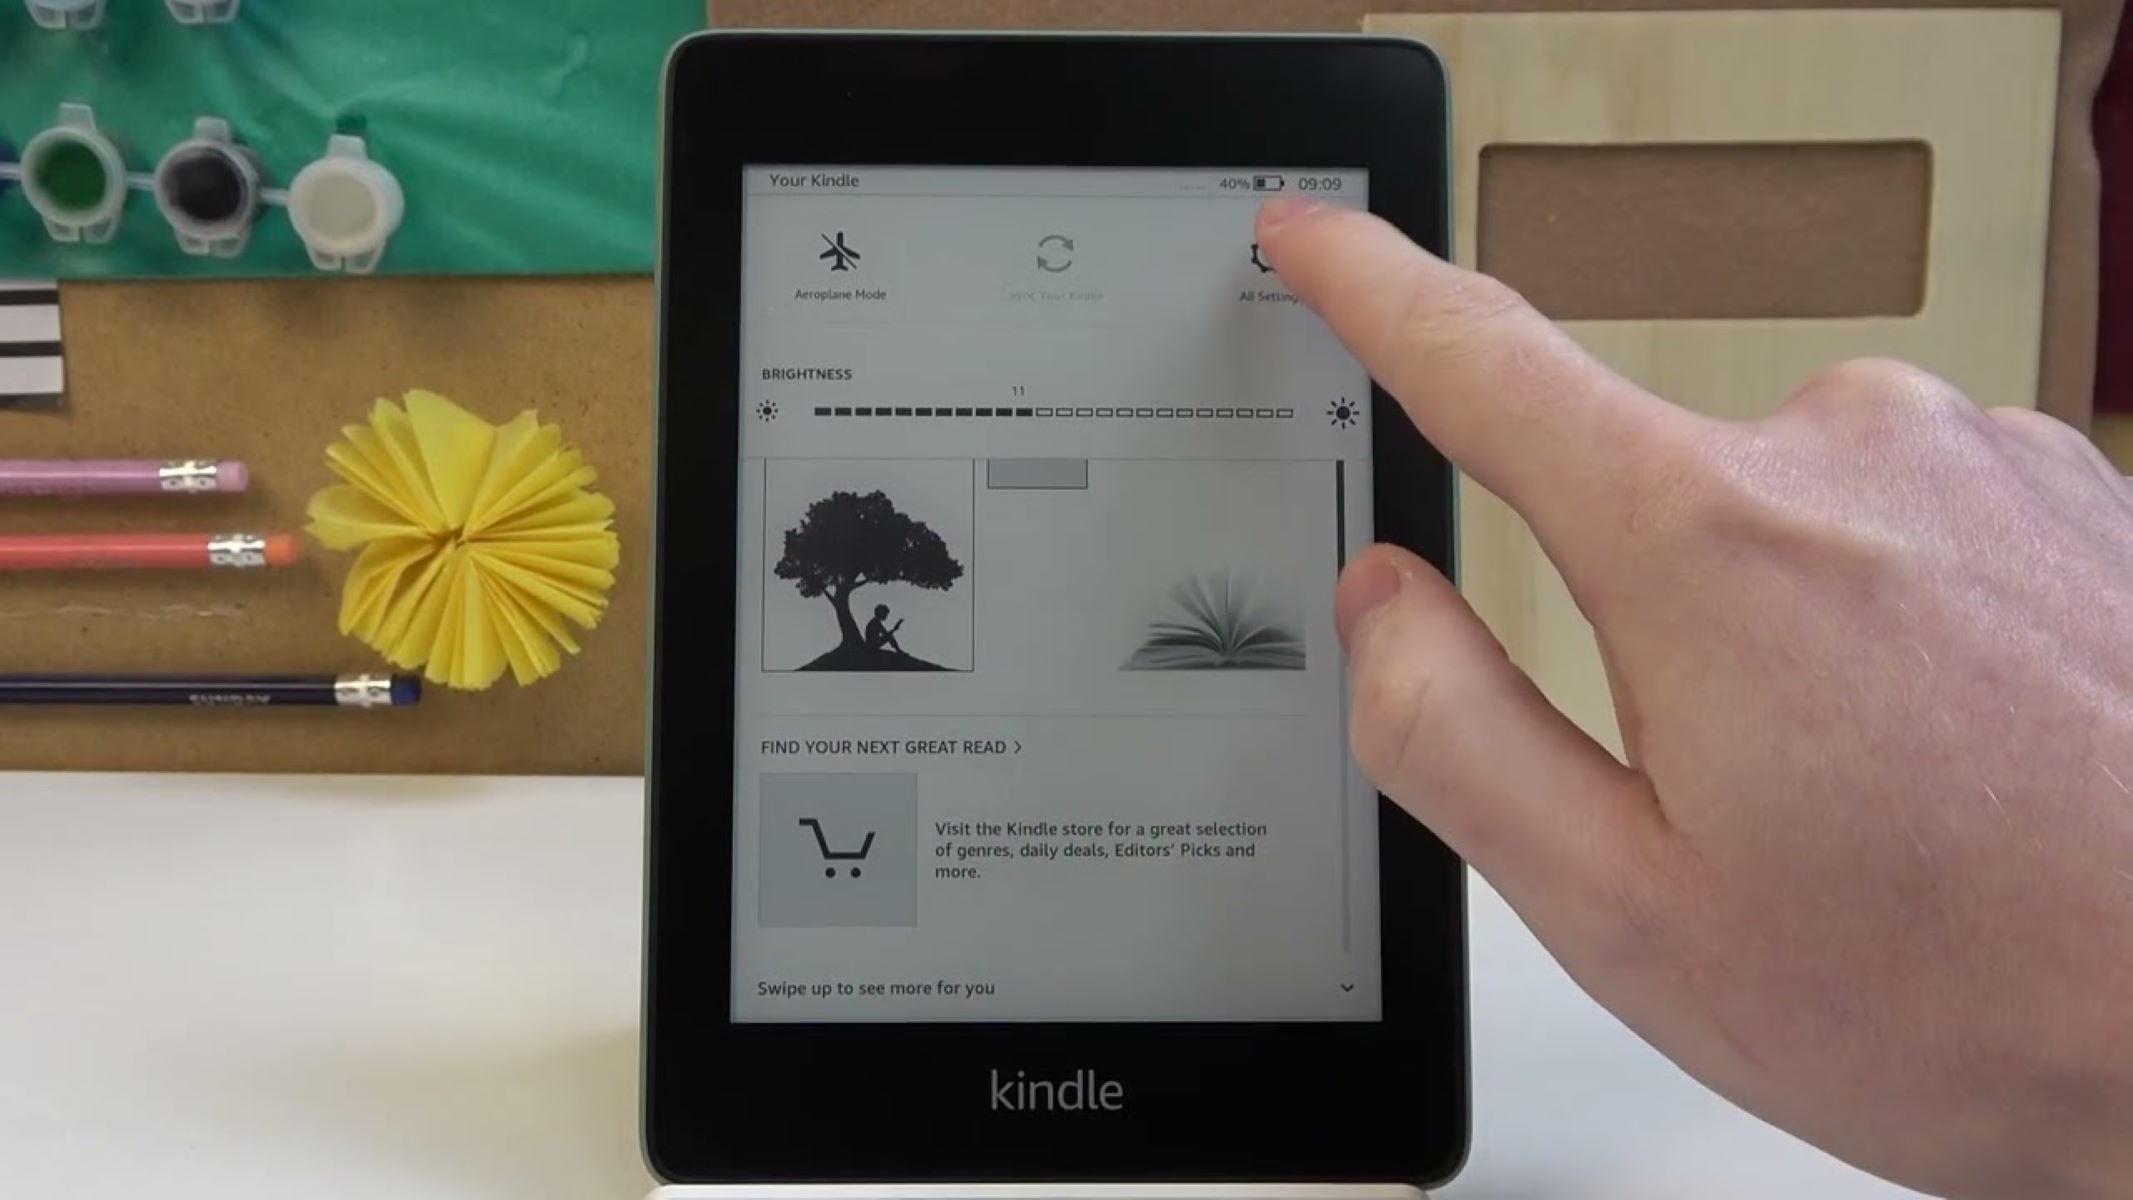
- On most Kindle models, you will find a toolbar or navigation menu at the top of the screen. Look for the “Settings” option, usually depicted as a gear or three vertical dots.
- Tap on the “Settings” option, and a drop-down menu will appear, displaying various options and configurations for your Kindle.
- From the settings menu, you can customize various aspects of your device, including display settings, wireless connections, device options, and more.
Now that you have accessed the settings menu on your Kindle, you are ready to proceed to the next step and locate the time settings to make the necessary adjustments.
Step 2: Tap on “Device Options”
Once you are in the settings menu of your Kindle, the next step is to locate the “Device Options” section. This is where you will find the time settings to make the necessary adjustments. Follow the steps below to access the “Device Options”:
- From the settings menu, scroll down until you find the category labeled “Device Options”. The position of this category may vary depending on your Kindle model and software version.
- Tap on “Device Options” to access a list of additional settings related to your Kindle’s hardware and functionality.
- Within the “Device Options” section, you may find various settings such as display, audio, parental controls, and more. These options allow you to further personalize your Kindle experience.
- Scan through the options until you find the one labeled “Date & Time”. This is the specific setting you need in order to change the time on your Kindle.
- Tap on “Date & Time”, and you will be directed to a new screen where you can adjust the time settings according to your preferences.
Now that you have successfully accessed the “Device Options” section and located the “Date & Time” setting, you are ready to move on to the next step and make the necessary time adjustments on your Kindle.
Step 3: Select “Date & Time”
Once you have tapped on the “Device Options” section on your Kindle, the next step is to select the “Date & Time” option. This is where you can access the specific settings related to the time on your device. Follow the steps below to navigate to the “Date & Time” settings:
- After tapping on the “Device Options” section, you will be presented with a list of additional settings related to your Kindle’s hardware and functionality.
- Scroll through these options until you find “Date & Time”. It is usually located near the top of the list.
- Once you have located “Date & Time”, tap on it to access the specific time settings.
- In the “Date & Time” settings section, you will find various options to manage the time on your Kindle device. These options include manual time adjustment, automatic time update, time zone selection, and more.
By selecting “Date & Time”, you have reached the section where you can make the necessary adjustments to the time settings of your Kindle. In the following steps, we will guide you through the process of adjusting the time manually or enabling automatic time update, depending on your preference.
Step 4: Adjust the time manually
Now that you have accessed the “Date & Time” settings on your Kindle, you can proceed to adjust the time manually. This allows you to set the time on your device according to your desired preference. Follow the steps below to adjust the time manually:
- Within the “Date & Time” settings section, you will see an option to manually adjust the time on your Kindle. Look for the “Set Time” or “Time” option.
- Tap on the “Set Time” or “Time” option, and a numeric keypad or scrollable time selector will appear on the screen, depending on your Kindle model.
- Use the keypad or scrollable selector to enter or select the desired time. Ensure that you set the accurate hour, minute, and, if applicable, AM/PM.
- Once you have entered or selected the correct time, double-check to ensure its accuracy.
- After confirming that the entered time is correct, tap on the “Save” or “Set” button to save the changes and apply the new time setting on your Kindle device.
By following these steps, you can manually adjust the time on your Kindle to your desired preference. Ensure that you set the time accurately, taking into account any daylight saving time changes or time zone differences if necessary. Once you have successfully adjusted the time, your Kindle will display the updated time accordingly.
Step 5: Enable automatic time update
Enabling automatic time update on your Kindle ensures that the time on your device remains accurate without requiring manual adjustments. This feature is particularly useful when traveling across different time zones or during daylight saving time transitions. Follow the steps below to enable automatic time update on your Kindle:
- Within the “Date & Time” settings section, you will find an option titled “Automatic Time Update” or “Set Automatically”.
- Tap on the “Automatic Time Update” or “Set Automatically” option to access the corresponding settings.
- In this section, you will find a toggle or checkbox to enable automatic time update. Ensure that it is switched to the “On” or “Enabled” position.
- Once you have enabled automatic time update, your Kindle will connect to the internet and sync with the official time servers to automatically update its time.
- It is important to note that for automatic time update to work, your Kindle needs to be connected to a Wi-Fi signal or have an active cellular data connection.
By enabling automatic time update, you can ensure that the time on your Kindle remains accurate without the need for manual adjustments. This feature saves you the hassle of constantly changing the time when traveling or during daylight saving time transitions. However, remember to keep your Kindle connected to a network to ensure that it can sync and update the time accordingly.
Step 6: Switch time zones
If you are traveling to a different time zone or simply want to change the time zone on your Kindle, you can easily switch to the desired time zone. This is particularly useful to ensure that your Kindle displays the correct local time when you are in a different part of the world. Follow the steps below to switch time zones on your Kindle:
- Within the “Date & Time” settings section of your Kindle, look for the option labeled “Time Zone” or “Set Time Zone”.
- Tap on the “Time Zone” or “Set Time Zone” option to access the available time zones.
- You will be presented with a list of time zones. Scroll through the list to locate and select the desired time zone based on your current location or preference.
- Once you have selected the desired time zone, the time on your Kindle will automatically update to reflect the local time of the selected time zone.
- It is essential to ensure that you have selected the correct time zone, especially when traveling, to avoid any confusion regarding the displayed time on your Kindle.
- If you travel frequently or often switch between time zones, you can easily update the time zone setting on your Kindle to match your current location.
By following these steps, you can switch time zones on your Kindle to ensure that the displayed time accurately corresponds to your current location. Whether you are traveling for business or pleasure, adjusting the time zone setting on your Kindle ensures that you stay on schedule and effectively manage your reading progress and access to time-dependent content.
Step 7: Troubleshooting common issues
While changing the time on your Kindle is typically a straightforward process, you may encounter some common issues along the way. Here are a few troubleshooting tips to help you overcome these issues:
- Time not updating: If you have enabled automatic time update but notice that the time on your Kindle is not updating, check your Wi-Fi or cellular connection. Ensure that your device is connected to a reliable network to allow for time synchronization.
- Incorrect time: If the time on your Kindle is displaying incorrectly even after adjusting it manually or enabling automatic time update, check that you have selected the correct time zone. Double-check the time zone setting to ensure it corresponds to your current location.
- Sync issues: If you experience issues with book syncing or progress not being saved, verify that the time on your Kindle is accurate. Inaccurate time settings can interfere with synchronization. Adjust the time manually or enable automatic time update to resolve syncing issues.
- Device freezing or lagging: If your Kindle is freezing or lagging after changing the time settings, try restarting your device. Press and hold the power button, then select the “Restart” option from the menu. This can help resolve any temporary issues caused by the time adjustment.
- Software updates: Ensure that your Kindle’s software is up to date. Periodically check for any available updates by going to the settings menu and selecting “Device Options” > “System Updates”. Keeping your Kindle software updated can address any potential time-related bugs or glitches.
By troubleshooting these common issues, you can overcome any obstacles that may arise when changing the time on your Kindle. If you continue to encounter difficulties, you may want to consider reaching out to Amazon support for further assistance.