
What is a Distribution List in Outlook?
A distribution list, also known as a contact group, is a feature in Microsoft Outlook that allows you to create a list of email addresses to easily send messages to multiple recipients. Instead of manually typing each individual email address every time you want to send an email to a group of people, you can simply use the distribution list to streamline the process.
A distribution list functions as a single recipient in your Outlook contacts. This means that when you send an email to the distribution list, it will be automatically distributed to all the members included in the list. It serves as a convenient way to send emails to specific groups, such as your team at work, a project group, or a group of clients.
One of the greatest advantages of using a distribution list is that it saves time and eliminates the need for repetitive typing. With just a few clicks, you can reach multiple contacts simultaneously, enhancing your productivity and efficiency. Additionally, using a distribution list helps ensure that all relevant recipients receive the email, reducing the risk of accidentally omitting someone from important communications.
Furthermore, the distribution list feature in Outlook allows you to manage the contacts within the list effortlessly. You can add or remove contacts as needed, ensuring that your list stays up-to-date and reflects the current members of the group. This simplifies the process of maintaining accurate and organized contact groups.
Whether you need to send announcements, updates, invitations, or any other type of email to a specific group of recipients, using a distribution list in Outlook provides a convenient and efficient solution. It allows you to streamline your email communications and ensures that your messages reach the intended audience with ease.
How to Create a Distribution List in Outlook
Creating a distribution list in Outlook is a straightforward process. Follow these simple steps to create your own distribution list:
- Launch Microsoft Outlook and navigate to the “People” or “Contacts” tab.
- Click on the “New Contact Group” or “New Contact List” button, depending on your version of Outlook.
- Enter a name for your distribution list in the “Name” field. Choose a descriptive name that clearly identifies the purpose or membership of the group.
- Click on the “Add Members” button and select the desired contacts from your Outlook contacts or address book. You can search for contacts by their names or email addresses.
- After selecting the contacts, click “OK” to add them to the distribution list.
- If you need to add contacts who are not in your address book, click on the “New E-mail Contact” button and enter their details manually.
- Once all the contacts have been added, click “Save & Close” to save your distribution list.
It’s important to note that the contacts you add to your distribution list are not modified or removed from your individual contacts; they are simply linked to the distribution list. This means that any changes you make to the contacts within the distribution list will not affect their original contact entries.
By following these steps, you can create a distribution list in Outlook and have it readily available for sending emails to multiple recipients with ease. This feature is particularly useful for individuals who frequently communicate with the same groups of people, as it eliminates the need to manually enter each recipient’s email address every time you send a message.
Adding Members to a Distribution List in Outlook
Expanding your distribution list by adding new members is a simple process in Microsoft Outlook. Follow these steps to add members to your distribution list:
- Open Microsoft Outlook and navigate to the “Contacts” or “People” tab.
- Click on the distribution list you want to add members to, or create a new distribution list if necessary.
- Click on the “Modify” or “Edit” button to open the distribution list for editing.
- In the dialog box that appears, click on the “Add Members” button.
- Select the desired contacts from your Outlook contacts or address book. You can search for contacts by their names or email addresses.
- If you need to add contacts who are not in your address book, click on the “New E-mail Contact” button and enter their details manually.
- Click “OK” to add the selected contacts to the distribution list.
- Once you have added all the members you want, click “Save & Close” to save the changes to the distribution list.
Adding new members to a distribution list expands its recipient base, allowing you to easily send emails to a larger group without the need to type individual email addresses each time. This is especially beneficial when communicating with teams, departments, or project groups, as it ensures that everyone receives the relevant information efficiently.
Remember, when you add members to a distribution list, their original contact entries in your Outlook contacts or address book remain unaffected. This means that any changes made to the distribution list will not impact the individual contact details of the members within it.
By following these simple steps, you can effortlessly add members to your distribution list and ensure that your email communications reach the intended recipients effectively and efficiently.
Removing Members from a Distribution List in Outlook
Managing the members of your distribution list in Microsoft Outlook is essential to keep the list up-to-date and ensure that messages are sent to the correct recipients. If you need to remove members from a distribution list, follow these simple steps:
- Open Microsoft Outlook and go to the “Contacts” or “People” tab.
- Select the distribution list that contains the members you want to remove.
- Click on the “Modify” or “Edit” button to open the distribution list for editing.
- In the dialog box that appears, you will see a list of all the members included in the distribution list.
- Select the members you intend to remove by clicking on their names.
- Click on the “Remove” or “Delete” button to remove the selected members from the distribution list.
- Once you have finished removing the desired members, click “Save & Close” to save the changes to the distribution list.
Removing members from a distribution list is important to maintain the accuracy and relevance of the list. By regularly reviewing and updating the list, you can ensure that you are sending messages to the appropriate recipients and avoiding any potential confusion or miscommunication.
When you remove a member from a distribution list, it only removes them from the particular list, while their original contact information in your Outlook contacts or address book remains intact. This allows you to modify the distribution list without affecting the individual contact details.
Following these steps will enable you to easily remove members from your Outlook distribution list, keeping it updated and ensuring that your email communications reach the intended recipients efficiently.
Sending an Email to a Distribution List in Outlook
Once you have created a distribution list in Microsoft Outlook, sending an email to the entire group is a straightforward process. Follow these steps to send an email to a distribution list:
- Launch Microsoft Outlook and open a new email message.
- In the “To” field, start typing the name or the email address of the distribution list you want to send the email to.
- Outlook will automatically suggest the distribution list based on your input. Select it from the suggested options.
- The distribution list will now appear in the “To” field of your email, representing all the members of the group.
- Compose your email as usual, including a subject line, the body of the email, and any attachments you want to include.
- Once you are ready to send the email, click the “Send” button.
When sending an email to a distribution list, Outlook treats the distribution list as a single recipient. This means that the email you send will be automatically distributed to all the members of the group. Each recipient will receive the email as if it was individually sent to them.
Sending emails to a distribution list is a convenient and time-saving feature, especially when you need to communicate with a group of people on a regular basis. It eliminates the need to manually enter each recipient’s email address and ensures that everyone on the list receives the same message simultaneously.
It’s important to remember that when sending emails to a distribution list, recipients will be able to see the other members of the group, unless you choose to use the “Bcc” (blind carbon copy) field to protect their email addresses.
By following these simple steps, you can quickly and efficiently send emails to a distribution list, keeping your communications organized and reaching the intended recipients with ease.
Updating a Distribution List in Outlook
Keeping your distribution list up-to-date is crucial to ensure that your email communications reach the correct recipients in Microsoft Outlook. If you need to make changes or update a distribution list, follow these steps:
- Launch Microsoft Outlook and go to the “Contacts” or “People” tab.
- Select the distribution list you want to update or modify.
- Click on the “Modify” or “Edit” button to open the distribution list for editing.
- In the dialog box that appears, you will see a list of all the members currently included in the distribution list.
- To add new members, click on the “Add Members” button and select contacts from your Outlook contacts or address book. You can also manually add new email addresses using the “New E-mail Contact” option.
- To remove existing members, select the members’ names and click on the “Remove” or “Delete” button.
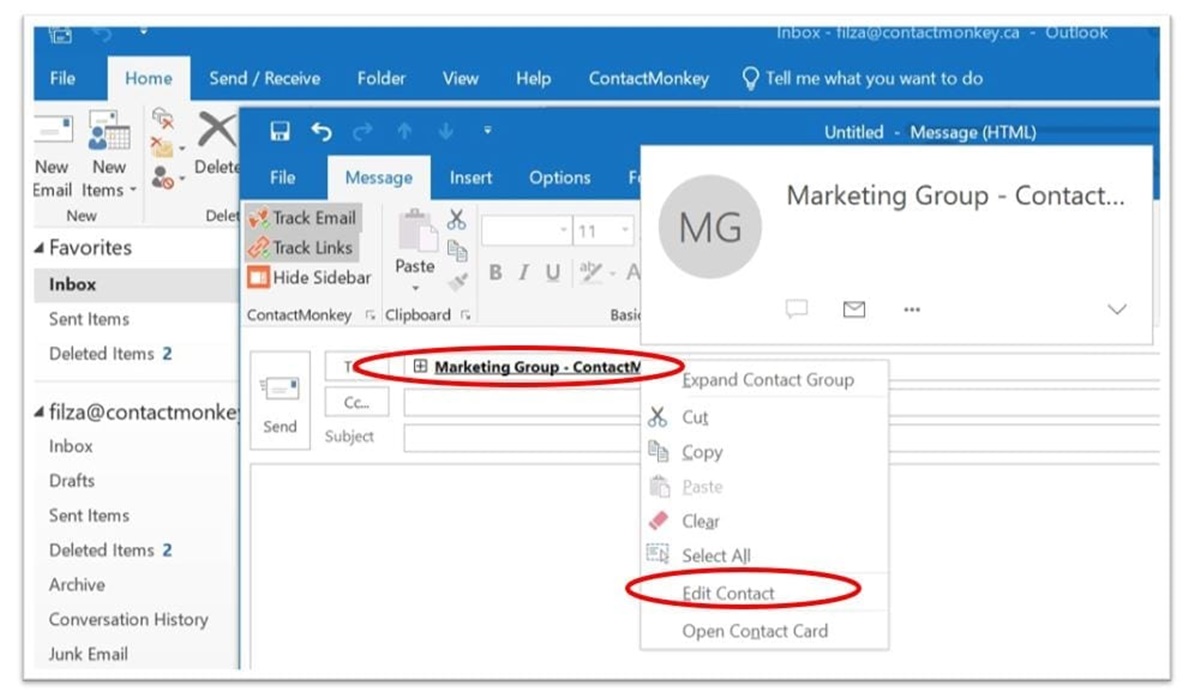
- If you need to edit the details of a specific member, select their name from the list and click on the “Edit” button.
- Once you have finished making the necessary updates, click “Save & Close” to save the changes to the distribution list.
It is important to regularly update your distribution list to reflect any changes in group membership, contact information, or any other relevant updates. This ensures that your email communications reach all the intended recipients promptly.
By following these steps, you can easily update the members of your Outlook distribution list, keeping it current and accurate. This will help streamline your communication process and ensure that your messages are received by the proper recipients.
Managing Bounced Emails from a Distribution List in Outlook
When sending emails to a distribution list in Microsoft Outlook, it’s important to be aware that some emails may bounce back. This happens when an email is undeliverable, usually due to reasons such as an invalid email address, a full mailbox, or a blocked email. Managing bounced emails from a distribution list is essential to maintain the accuracy of your recipient list and ensure efficient communication. Follow these steps to manage bounced emails:
- Monitor your inbox for any bounced emails from the distribution list. These emails are often marked as “undeliverable” or “bounce” notifications.
- Open the bounced email to verify the reason for the bounce. This information is usually provided in the email header or body.
- Check if the bounced email is due to an invalid or misspelled email address. If so, remove the email address from the distribution list to prevent future bounces.
- If the bounce was temporary, such as a full mailbox or a temporary server issue, you can keep the email address in the distribution list and try sending the email again at a later time.
- Consider reaching out to the recipient through an alternative communication method, such as a phone call, to verify the email address or address any delivery issues.
- If you receive repeated bounces from the same email address, consider removing it permanently from the distribution list.
- Regularly review and update your distribution list to ensure it remains accurate and free from bounced emails.
Effectively managing bounced emails is crucial to preserving the integrity and efficiency of your communication process. By promptly removing invalid email addresses and resolving delivery issues, you can maintain an active and up-to-date distribution list. This helps ensure that your messages reach the intended recipients and avoid unnecessary email bounces.
Remember, it is normal to encounter occasional bounced emails when using a distribution list. However, by proactively managing and addressing these bounces, you can maintain a more reliable and effective communication system in Outlook.
Best Practices for Emailing to a Distribution List in Outlook
When using a distribution list in Microsoft Outlook to send emails to a group of recipients, it’s essential to follow best practices to ensure effective communication and maximize the value of your messages. Here are some best practices to consider when emailing to a distribution list:
- Use a clear and descriptive subject line: A concise and informative subject line helps recipients understand the purpose of the email and increases the likelihood of it being opened.
- Personalize your message when appropriate: While sending emails to a group, make an effort to personalize your message by addressing recipients by name or using relevant contextual information.
- Avoid excessive use of email attachments: Instead of attaching large files to your email, consider hosting them on a cloud storage platform and including a link in your message. This helps prevent overwhelming recipients’ inboxes and reduces the risk of bouncebacks due to file size limits.
- Avoid using a distribution list for sensitive information: If you need to share sensitive or confidential information, it’s best to use individual email addresses instead of a distribution list to maintain privacy and ensure the message reaches the intended recipients only.
- Respect email preferences: Be mindful of recipients’ preferences by adhering to any opt-out requests or subscription preferences specified by individual contacts. This helps maintain a positive relationship and avoids potential issues with spam or unwanted emails.
- Regularly update your distribution list: Keep your distribution list accurate by promptly adding new members, removing outdated or invalid email addresses, and updating contact information. This helps ensure that your messages reach the correct recipients.
- Avoid unnecessary replies to all: When replying to an email sent to a distribution list, carefully consider if your response requires the entire group’s attention. In most cases, it is more appropriate to reply only to the sender or relevant individuals rather than “Reply All.”
- Proofread your emails: Before sending, carefully proofread your email for any errors, spelling mistakes, or grammatical errors. A well-crafted and error-free message enhances your professionalism and improves the credibility of your communication.
- Use the Bcc (blind carbon copy) field when necessary: When sending emails to a large distribution list, consider using the Bcc field to protect recipients’ email addresses and maintain privacy. This ensures that recipients cannot see the email addresses of other recipients.
By following these best practices, you can enhance your email communication when using a distribution list in Outlook. These practices help improve the effectiveness of your messages, maintain a positive relationship with recipients, and ensure that your emails are received and read by the intended audience.
Troubleshooting Common Issues with Emailing to a Distribution List in Outlook
While using a distribution list in Microsoft Outlook can greatly simplify your email communication process, it is not uncommon to encounter some challenges along the way. Here are some common issues that you may encounter when emailing to a distribution list in Outlook and how to troubleshoot them:
- Bounced emails: If you receive bounce notifications or undeliverable messages after sending an email to a distribution list, review the email addresses of the bounced emails. Check for misspelled or invalid addresses and remove them from the distribution list to prevent future bounces.
- Incomplete or missing email: Sometimes, not all recipients receive your email. Double-check your distribution list to ensure that all intended recipients are included and that there are no missing or incorrect email addresses. Additionally, verify that your email was sent successfully and not stuck in your outbox.
- Blocked emails: It’s possible that some recipients have blocked your email address or marked your messages as spam. In such cases, reaching out to the affected recipients through an alternative communication method can help address any issues and ensure your emails are received in the future.
- Outdated or incorrect distribution list: Ensure that your distribution list is up-to-date and accurately reflects the members you intend to reach. Regularly review and update the list, adding new members and removing outdated or invalid email addresses, to prevent any delivery issues.
- Privacy concerns: Be mindful of recipients’ privacy and take appropriate measures to protect their email addresses. Consider using the Bcc (blind carbon copy) field when sending emails to a large distribution list to ensure that recipients cannot see each other’s email addresses.
- Overwhelming recipients: If you frequently send emails to a large distribution list, ensure that your email content is concise, relevant, and not overly frequent. Consider using other communication channels for non-essential information to avoid overwhelming recipients’ inboxes.
- Importance and urgency: Clearly indicate the importance and urgency of your message in the subject line or the body of the email. This helps recipients prioritize and respond to your message accordingly.
- Testing and validation: Before sending important emails to a distribution list, consider sending a test email to a small group or yourself to ensure that the formatting, links, and attachments work as expected. This can help identify any issues or errors before reaching the entire distribution list.
By troubleshooting these common issues and implementing the necessary solutions, you can ensure that your email communication with a distribution list in Outlook is efficient, reliable, and delivers your messages to the intended recipients with ease.