
Overview of Text Case in PowerPoint Presentations
In PowerPoint presentations, the way text appears can greatly impact the overall visual appeal and clarity of your slides. One important aspect of text formatting is controlling the case of the text, which refers to how letters are capitalized or styled. By changing the text case, you can emphasize key points, create a consistent look and feel, and ensure proper grammatical conventions. PowerPoint provides several options for changing text case, giving you the flexibility to tailor your content to suit your needs.
The Change Case command in PowerPoint allows you to quickly modify the case of selected text. This feature is especially useful when you want to convert a large amount of text or headings to a different case style without manually retyping. PowerPoint offers various options for changing text case, including uppercase, lowercase, sentence case, title case, and even toggle case. Each option has its own advantages and can be applied to specific sections or the entire presentation.
When you change the text to uppercase, all letters in the selected text are transformed into capital letters. This can be useful for headings or titles that require a bold and attention-grabbing appearance. On the other hand, when you convert text to lowercase, all letters are changed to their lowercase form. This can be beneficial when you want to create a more informal and relaxed tone or when dealing with lengthy paragraphs.
Sentence case is another option provided by PowerPoint, in which only the first letter of the first word in each sentence is capitalized, while the rest remain lowercase. This is commonly used for body text, as it follows proper grammatical rules and enhances readability. Title case, on the other hand, capitalizes the first letter of each word in the selected text. This is ideal for headings, subheadings, or titles that require a polished and professional appearance.
Toggle case is a unique option that allows you to change the case of each character individually. For example, if you have a phrase in uppercase, it will be converted to lowercase, and vice versa. This can be useful for creative and stylistic purposes, especially when you want to draw attention to specific letters or parts of the text.
To change the text case in PowerPoint, you can use the Change Case command from the Ribbon menu, or you can utilize shortcut keys for quicker access. Additionally, you have the option to apply text case changes to specific portions of text or to the entire presentation, depending on your requirements.
With these options and techniques available in PowerPoint, you can easily modify the text case in your presentations to achieve consistency, readability, and visual impact. Whether you want to emphasize key points, create a professional look, or add a touch of creativity, changing the text case can play a vital role in enhancing the overall quality of your PowerPoint slides.
Using the Change Case Command in PowerPoint
PowerPoint offers a convenient feature called the Change Case command, which allows you to quickly and easily modify the case of selected text in your presentations. This command provides several options for changing the case, allowing you to customize the appearance of your text to fit your needs.
To access the Change Case command, start by selecting the text that you want to modify. You can select a single word, a phrase, a whole sentence, or even multiple paragraphs. Once your desired text is selected, navigate to the “Home” tab in the PowerPoint ribbon. In the “Font” group, you will find the “Change Case” button represented by an uppercase ‘A’ followed by a lowercase ‘a’.
Clicking on the “Change Case” button will open a dropdown menu with several options to choose from. Let’s explore each of these options and their applications in more detail.
Uppercase: This option transforms all the selected text into uppercase letters. It’s particularly useful when you want to make headings or titles more prominent and eye-catching. By converting text to uppercase, you can create a bold and commanding visual impact.
Lowercase: This option changes all the selected text to lowercase letters. It’s beneficial when you want to adopt a more informal and relaxed tone or if you’re dealing with a lengthy paragraph that requires improved readability.
Sentence case: Selecting this option capitalizes only the first letter of the first word in each sentence, while leaving the rest of the text in lowercase. Sentence case adheres to proper grammatical rules and is commonly used for body text. It enhances readability and maintains a professional appearance.
Title case: When you choose this option, the first letter of each word in the selected text is capitalized. Title case is ideal for headings, subheadings, or titles that require a polished and professional look. It helps to distinguish important elements and makes your text visually appealing.
Toggle case: This unique option allows you to change the case of each character individually. For example, if you have a phrase in uppercase, it will be converted to lowercase, and vice versa. Toggle case is a creative and stylistic option that can be used to draw attention to specific letters or parts of the text.
By utilizing the Change Case command in PowerPoint, you can easily modify the case of selected text to achieve consistency, readability, and visual impact in your presentations. Whether you want to make headings more prominent, create a professional look, or add a touch of creativity, the Change Case command provides the tools necessary to customize your text according to your specific needs.
Changing Text to Uppercase in PowerPoint
Changing text to uppercase in PowerPoint can be a powerful way to make your headings, titles, and important text stand out. By converting text to uppercase, you create a bold and attention-grabbing visual impact on your slides. PowerPoint offers a simple and efficient way to change text to uppercase, allowing you to enhance the readability and emphasis of your content.
To change text to uppercase in PowerPoint, start by selecting the text that you want to modify. You can select a single word, a phrase, a sentence, or even multiple paragraphs. Once the text is selected, navigate to the “Home” tab in the PowerPoint ribbon. In the “Font” group, you will find various text formatting options, including the “Change Case” button represented by an uppercase ‘A’ followed by a lowercase ‘a’.
Click on the “Change Case” button, and a dropdown menu will appear with different options. From the menu, select the “Uppercase” option. Instantly, the selected text will be changed to all capital letters. This change applies to both uppercase and lowercase letters, leaving any special characters or symbols unaffected.
Changing text to uppercase can be particularly useful for headings or titles, as it helps to create a visually commanding presence. Uppercase text stands out on the slide and draws the viewer’s attention to the important message you want to convey. It can also be useful when you want to emphasize certain keywords or phrases within your content.
It’s important to use uppercase text strategically and sparingly, as excessive use can make your slides appear cluttered or overwhelming. Reserve uppercase for headings or elements that require immediate attention and impact. For the body text or longer passages, using uppercase sparingly for specific words or phrases can be an effective way to highlight key points.
Changing text to uppercase in PowerPoint is a simple yet powerful formatting technique that adds visual weight and emphasis to your content. By utilizing this feature, you create a clear and impactful hierarchy on your slides, making it easier for your audience to grasp the main ideas and information. Remember to use uppercase strategically to maintain readability and keep your slides visually balanced and professional.
Changing Text to Lowercase in PowerPoint
Changing text to lowercase in PowerPoint can help create a more relaxed and informal tone in your presentations. It is especially useful when you want to improve the readability of lengthy paragraphs or when you want to create a more casual atmosphere. PowerPoint provides a simple and effective way to change text to lowercase, allowing you to customize the appearance of your text to suit your needs.
To change text to lowercase in PowerPoint, begin by selecting the text that you wish to modify. You can select a single word, a phrase, a sentence, or even multiple paragraphs. Once the text is selected, navigate to the “Home” tab in the PowerPoint ribbon. In the “Font” group, you will find various text formatting options, including the “Change Case” button represented by an uppercase ‘A’ followed by a lowercase ‘a’.
Click on the “Change Case” button, and a dropdown menu will appear with different options. From the menu, select the “Lowercase” option. Instantly, the selected text will be transformed into all lowercase letters. This change applies to both lowercase and uppercase letters, leaving any special characters or symbols unaffected.
Changing text to lowercase can be particularly useful when you want to create a more casual and approachable tone in your presentation. It is ideal for informal communication or when you want to create a sense of familiarity with your audience. Lowercase text can also enhance the readability of lengthy paragraphs by removing the visual weight of uppercase letters.
However, it is essential to use lowercase text judiciously and ensure it does not compromise the professionalism of your presentation. While lowercase text can create a more relaxed atmosphere, overusing it can make your slides appear unprofessional or less authoritative. Reserve lowercase text mainly for body text or longer passages where readability and a conversational tone are desired.
When using lowercase text, it is crucial to consider the overall balance and visual hierarchy of your slides. Ensure that lowercase text does not blend into the background or become difficult to read. Adjusting font size, spacing, and contrast can help maintain readability and visual clarity.
By changing text to lowercase in PowerPoint, you have the flexibility to create a more relaxed and readable presentation. Whether you are delivering a more informal talk or conveying a sense of approachability, lowercase text can help you achieve those objectives successfully. Use lowercase strategically and sparingly to maintain a professional look while still engaging your audience in a more relaxed manner.
Changing Text to Sentence Case in PowerPoint
Changing text to sentence case in PowerPoint allows you to follow proper grammatical conventions and enhance the readability of your content. By capitalizing only the first letter of the first word in each sentence while keeping the rest of the text in lowercase, you can create a professional and polished appearance for your body text. PowerPoint provides a straightforward way to change text to sentence case, giving you the ability to easily format your content.
To change text to sentence case in PowerPoint, start by selecting the text you want to modify. This can include a single sentence, multiple sentences, or even whole paragraphs. Once the text is selected, navigate to the “Home” tab on the PowerPoint ribbon. In the “Font” group, you will find various text formatting options, including the “Change Case” button represented by an uppercase ‘A’ followed by a lowercase ‘a’.
Click on the “Change Case” button, and a dropdown menu will appear with different options. From the menu, select the “Sentence case” option. Immediately, the selected text will be transformed to sentence case where only the first letter of the first word in each sentence is capitalized, while the rest of the text remains in lowercase.
Changing text to sentence case is particularly useful when you want to format your body text according to proper grammar rules. It creates a professional and polished appearance, making your content easier to read and understand. Sentence case is commonly used for paragraphs, bulleted lists, and any other sections that require a consistent and clear format.
It’s important to note that changing text to sentence case does not affect proper nouns, acronyms, or words that are typically capitalized, such as the first letter of each bullet point in a list. PowerPoint recognizes these exceptions and retains their original capitalization while converting the rest of the text to sentence case.
Using sentence case can also help to maintain a consistent style throughout your presentation. By ensuring that all sentences follow the same capitalization rules, you create a cohesive and professional look that enhances the overall visual appeal of your slides.
When working with sentence case in PowerPoint, it’s worth paying attention to any specific style guides or branding guidelines that your organization may have. These guidelines may recommend using sentence case or an alternative approach, so be sure to follow them to ensure consistency and cohesiveness in your presentation.
Changing text to sentence case in PowerPoint offers a straightforward and efficient way to enhance the readability and professionalism of your body text. By following proper grammar conventions, you create a polished and cohesive appearance that elevates the overall quality of your presentation.
Changing Text to Title Case in PowerPoint
Changing text to title case in PowerPoint allows you to capitalize the first letter of each word in the selected text. This formatting option is particularly useful for headings, subheadings, or titles that require a polished and professional appearance. By converting text to title case, you can create a visually appealing and organized layout for your PowerPoint slides. PowerPoint provides a simple way to change text to title case, giving you the flexibility to customize your content.
To change text to title case in PowerPoint, start by selecting the text you want to modify. This can be a single word, a phrase, a sentence, or even multiple paragraphs. Once the text is selected, navigate to the “Home” tab on the PowerPoint ribbon. In the “Font” group, you will find various text formatting options, including the “Change Case” button represented by an uppercase ‘A’ followed by a lowercase ‘a’.
Click on the “Change Case” button, and a dropdown menu will appear with different options. From the menu, select the “Title case” option. Instantly, the selected text will be transformed into title case, where the first letter of each word is capitalized while the rest of the text remains in lowercase.
Changing text to title case can greatly enhance the visual impact of your headings and titles. It creates a clear distinction between words and helps to highlight important information. Additionally, using title case provides a standardized and organized appearance to your slides, making them visually appealing and professional.
When working with text converted to title case, PowerPoint recognizes common style rules and retains the capitalization of certain words like proper nouns, acronyms, or words that are typically capitalized (such as “The”, “Of”, “A”, etc.). This ensures that the overall formatting preserves the correct capitalization while still maintaining a consistent title case format.
It’s worth mentioning that when you change text to title case, PowerPoint treats certain lowercase words, such as articles, conjunctions, and prepositions, as lowercase, unless they appear at the beginning or end of the title. This is in line with standard title case conventions and helps to maintain readability and clarity in your headings and titles.
Changing text to title case in PowerPoint is a quick and effective way to create visually appealing headings, subheadings, or titles in your presentation. By capitalizing the first letter of each word, you can achieve a professional and polished look that enhances the overall quality of your slides. Use title case strategically to maintain consistency and visual hierarchy throughout your presentation.
Changing Text to Toggle Case in PowerPoint
Changing text to toggle case in PowerPoint allows you to transform the case of each character individually, creating a unique and attention-grabbing effect. This formatting option is particularly useful when you want to add a creative and stylistic touch to your text or emphasize specific letters or parts of the content. PowerPoint provides an easy way to change text to toggle case, giving you the flexibility to customize your presentation.
To change text to toggle case in PowerPoint, start by selecting the text you want to modify. This can be a single word, a phrase, a sentence, or even multiple paragraphs. Once the text is selected, navigate to the “Home” tab on the PowerPoint ribbon. In the “Font” group, you will find various text formatting options, including the “Change Case” button represented by an uppercase ‘A’ followed by a lowercase ‘a’.
Click on the “Change Case” button, and a dropdown menu will appear with different options. From the menu, select the “Toggle case” option. Immediately, the selected text will be transformed into toggle case, where the case of each character is changed individually. For example, if you have a phrase in uppercase, it will be converted to lowercase, and vice versa.
Changing text to toggle case can add a creative and eye-catching element to your slides. It can be particularly useful when you want to draw attention to specific letters or words, or when you aim to create a unique visual effect. Toggle case allows you to play with the case of each character, adding a touch of style and creativity to your text.
Using toggle case can also be a useful technique when you want to make a statement or add emphasis to specific parts of your content. By altering the case of certain letters or words, you can create a visual contrast and draw attention to those elements, making them stand out to your audience.
When working with toggle case in PowerPoint, it’s important to use it judiciously and avoid overuse, as excessive toggle case can make your slides appear cluttered or difficult to read. Reserve toggle case for specific phrases, titles, or words where you want to add a creative twist or emphasize certain letters.
Additionally, keep in mind that toggle case does not affect any special characters or symbols in your text. Only the case of alphabetical characters is changed while any non-alphabetical characters remain untouched.
Changing text to toggle case in PowerPoint offers a versatile and visually captivating way to customize your content. By altering the case of each character, you can add stylistic elements and draw attention to specific parts of your text. Use toggle case strategically to create unique effects and enhance the overall visual impact of your presentation.
Using Shortcut Keys to Change Text Case in PowerPoint
To streamline the process of changing text case in PowerPoint, you can utilize handy shortcut keys that provide quick access to the different formatting options. Using these keyboard shortcuts saves time and allows for efficient editing. Whether you want to convert text to uppercase, lowercase, sentence case, title case, or toggle case, PowerPoint provides convenient shortcuts to accomplish these tasks.
Here are the shortcut keys to change text case in PowerPoint:
- Uppercase: To convert selected text to uppercase, press “Ctrl” + “Shift” + “A”. This shortcut instantly changes the selected text to all capital letters.
- Lowercase: To transform selected text to lowercase, press “Ctrl” + “Shift” + “K”. This key combination switches the selected text to all lowercase letters.
- Sentence case: To change selected text to sentence case, press “Ctrl” + “Shift” + “S”. This shortcut capitalizes the first letter of the first word in each sentence while leaving the rest of the text in lowercase.
- Title case: To convert selected text to title case, press “Ctrl” + “Shift” + “T”. This keyboard combination capitalizes the first letter of each word in the selected text.
- Toggle case: To apply toggle case to selected text, press “Ctrl” + “Shift” + “O”. This shortcut changes the case of each character individually, alternating between uppercase and lowercase.
To use these shortcuts, simply select the text you want to modify and press the corresponding key combination. PowerPoint will instantly apply the desired text case formatting to the selected text. These shortcuts provide a quick and efficient way to format your text on the go, eliminating the need to navigate through menus and drop-down options.
Using shortcut keys to change text case in PowerPoint can significantly enhance your workflow, especially when you’re working with large amounts of text or frequently editing your presentation. These shortcuts allow you to make quick adjustments without interrupting your creative momentum or productivity.
In addition to the keyboard shortcuts mentioned above, PowerPoint also provides a useful shortcut for the “Change Case” command. To access this command without using the mouse, press “Shift” + “F3” on your keyboard. This will open the “Change Case” menu, where you can select the desired text case option using the arrow keys and then press “Enter” to apply the formatting.
By utilizing these shortcut keys, you can efficiently change text case in PowerPoint, saving time and effort. Whether you’re creating a new presentation or editing an existing one, these shortcuts provide a convenient way to format your text and enhance the visual appeal of your slides.
Applying Text Case to Selected Text in PowerPoint
In PowerPoint, you have the flexibility to apply text case formatting to specific sections of your presentation. This means that you can selectively change the case of individual words, phrases, sentences, or paragraphs based on your content requirements. By applying text case to selected text, you can highlight key points, create visual contrast, and ensure consistency throughout your slides.
To apply text case to selected text in PowerPoint, start by selecting the portion of text you want to modify. You can select a single word, a phrase, a sentence, or even multiple paragraphs. Once the text is selected, navigate to the “Home” tab on the PowerPoint ribbon and locate the “Font” group. Within this group, you will find the “Change Case” button represented by an uppercase ‘A’ followed by a lowercase ‘a’.
Click on the “Change Case” button, and a dropdown menu will appear with options such as uppercase, lowercase, sentence case, title case, and toggle case. From the menu, select the desired text case option. The selected text will now reflect the chosen formatting, while the rest of the text on the slide remains unchanged.
Applying text case to selected text allows you to emphasize certain words or sections, making them visually distinct from the rest of the content. This can be particularly useful when you want to highlight headings, key phrases, or important information within your presentation.
Furthermore, applying text case to selected text helps create consistency and coherence throughout your slides. By using the same text case formatting for similar elements, such as subheadings or bullet points, you establish a visual hierarchy and make it easier for your audience to follow the structure of your presentation.
It’s important to note that when you apply text case to selected text, PowerPoint retains any special characters, symbols, or formatting that were present in the original text. This ensures that the applied formatting does not interfere with the clarity or functionality of your content.
By selectively applying text case to selected text in PowerPoint, you have the ability to highlight important information, create visual contrast, and maintain consistency in your presentation. It’s a powerful way to enhance the readability, organization, and overall impact of your slides. Utilize this feature to optimize the visual representation of your content and engage your audience effectively.
Applying Text Case to the Whole Presentation
In PowerPoint, you have the convenience of applying text case formatting to the entire presentation, allowing for consistent and uniform styling across all slides. This feature enables you to quickly and efficiently modify the case of all text elements in your presentation, ensuring a cohesive and professional look. By applying text case to the whole presentation, you can maintain visual consistency, enhance readability, and establish a polished appearance throughout your slides.
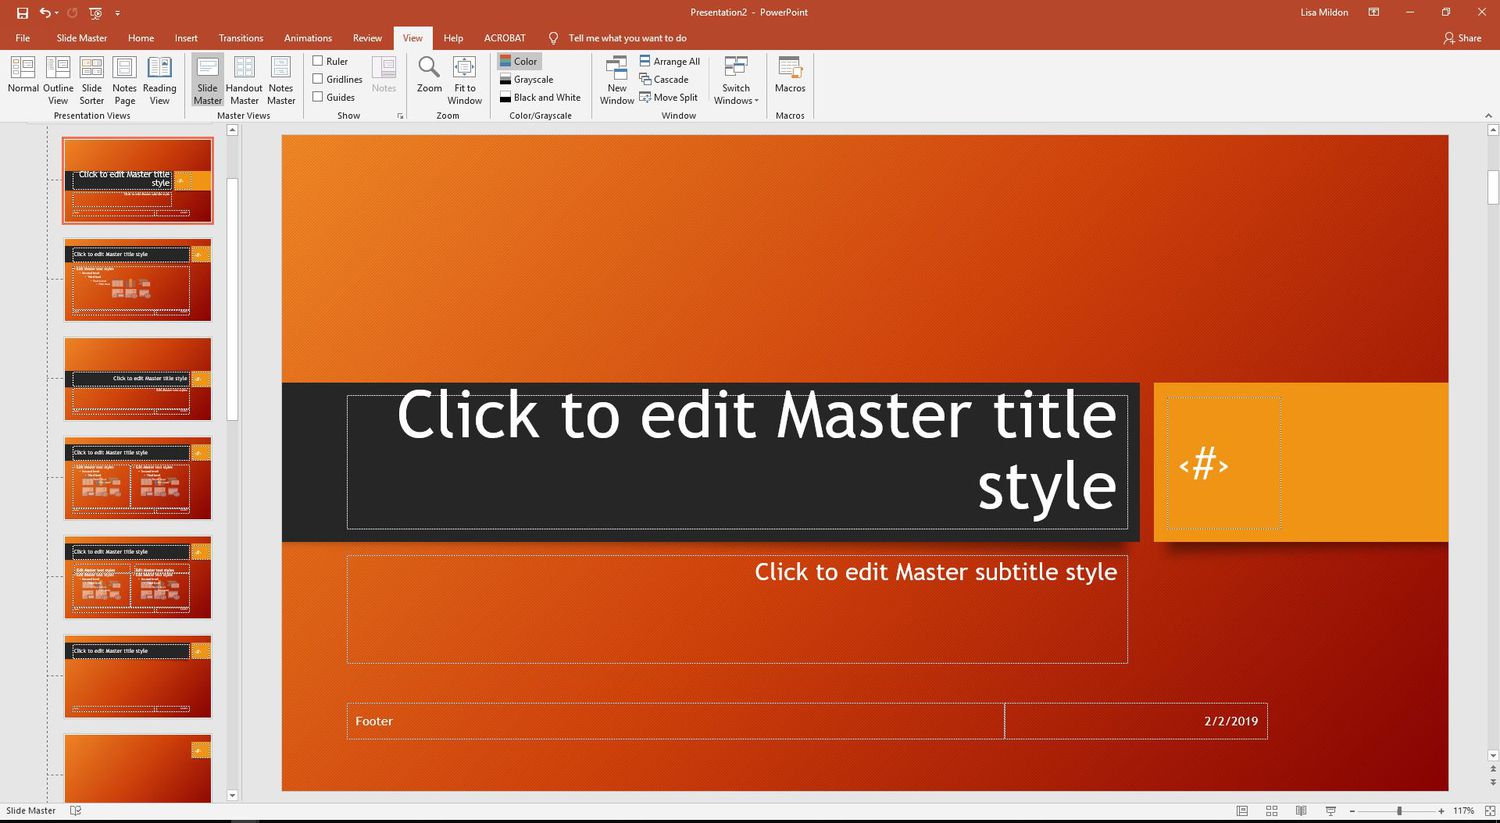
To apply text case to the whole presentation in PowerPoint, start by selecting the “View” tab on the PowerPoint ribbon. Within the “Presentation Views” group, click on the “Slide Master” option. This view allows you to make changes to the overall layout and formatting of your slides.
Once in Slide Master view, you will see the main slide master at the top, which is applied to all slides in your presentation. Click on the main slide master to activate it. Next, navigate to the “Home” tab on the PowerPoint ribbon and locate the “Font” group. Within this group, you will find the “Change Case” button represented by an uppercase ‘A’ followed by a lowercase ‘a’.
Click on the “Change Case” button, and a dropdown menu will appear with options such as uppercase, lowercase, sentence case, title case, and toggle case. From the menu, select the desired text case option. The text case formatting will now be applied to the entire presentation, including all slide titles, headings, body text, and any other text elements contained within.
Applying text case to the whole presentation enables you to establish a consistent and professional appearance throughout your slides. It ensures that all text elements follow the same formatting rules, making it easier for your audience to understand and navigate your content smoothly.
Moreover, applying text case to the whole presentation helps enhance readability and create visual clarity. Consistent text case formatting eliminates any distractions or inconsistencies that may arise from using different case styles in various sections of your presentation. This uniformity ensures that your content is visually cohesive and easy to follow.
While applying text case to the whole presentation can be beneficial, it’s essential to consider the context and purpose of your slides. Depending on the content and design requirements, you may choose to apply different text case formatting to specific elements or slides that require individual attention or emphasis.
By applying text case to the whole presentation in PowerPoint, you can effortlessly maintain consistency, readability, and a professional visual style. Utilize this feature to streamline your formatting process and ensure that every aspect of your presentation reflects a cohesive and polished appearance.
Tips and Tricks for Changing Text Case in PowerPoint
Changing text case in PowerPoint is a powerful tool that allows you to customize the appearance of your content and enhance visual impact. To make the most of this feature, here are some tips and tricks to consider when changing text case in PowerPoint:
1. Use text case sparingly: While changing text case can be beneficial for emphasis and readability, it’s important to use it strategically and sparingly. Overusing uppercase, lowercase, or other text case styles can overwhelm your audience and diminish the effectiveness of your message. Reserve text case changes for headings, titles, or key points that require visual prominence.
2. Consider readability: When changing text case, consider how it will affect the readability of your content. Uppercase letters can be more challenging to read than lowercase or title case. Ensure that your text remains clear and legible by using appropriate font sizes, good color contrast, and suitable font styles.
3. Follow grammatical rules: When applying sentence case or title case to your text, be mindful of grammatical conventions. For sentence case, remember to capitalize the first letter of the first word in each sentence, while leaving the rest of the text in lowercase. In title case, capitalize the first letter of each word in the selected text.
4. Use shortcut keys: Take advantage of the shortcut keys available in PowerPoint to speed up your workflow. Memorize the keyboard shortcuts for changing text case so that you can make quick adjustments without the need to navigate through menus. This can save you time and make the formatting process more efficient.
5. Preview changes: Before finalizing the text case formatting, it’s always a good idea to preview the changes on your slides. This allows you to see how the modified text appears in the context of your presentation. By reviewing the changes, you can ensure that the text case formatting aligns with your overall design and conveys the desired message effectively.
6. Consider branding guidelines: If you are creating a presentation for an organization or brand, consult any specific branding guidelines or style guides you may have. These guidelines may include recommendations on text case usage or prescribed styles that align with the brand’s identity. Adhering to the established design guidelines ensures consistency and professionalism in your presentation.
7. Edit text before changing case: Before applying text case changes, make sure to proofread and edit your text for spelling, grammar, and coherence. Applying text case to unedited or poorly written text can draw attention to any errors or inconsistencies. Take the time to review and refine your content, ensuring its quality before applying any formatting changes.
By implementing these tips and tricks when changing text case in PowerPoint, you can enhance the visual appeal, readability, and professionalism of your presentation. Use the text case options thoughtfully and strategically to ensure that your content effectively conveys your intended message and engages your audience effectively.