
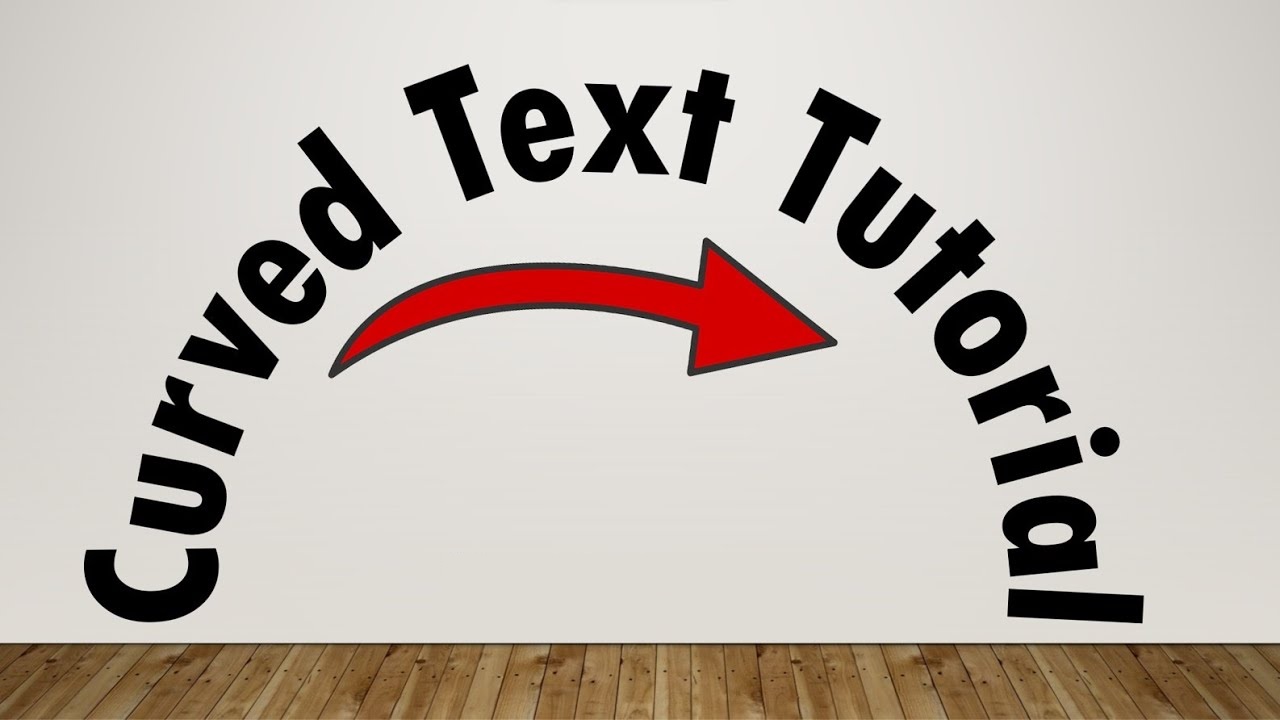
Why Use Curved Text in PowerPoint
When creating presentations in PowerPoint, it’s important to make them visually appealing and captivating. One way to achieve this is by using curved text. Curved text can add a touch of creativity and uniqueness to your slides, making them stand out from the crowd and leaving a lasting impression on your audience. So why should you consider using curved text in PowerPoint? Let’s explore some of the benefits it offers:
- Enhanced Visual Impact: Curved text can instantly grab the attention of your audience. It breaks away from the traditional linear format of text and adds a visually dynamic element to your slides. By curving the text, you can create interesting shapes and flow that draw the eye and make information more memorable.
- Aesthetic Appeal: Curved text can transform an ordinary presentation into an extraordinary one. It allows you to experiment with various shapes, arcs, and curves, giving your slides a unique and visually appealing look. It adds a sense of style and sophistication to your content, making it more engaging and captivating.
- Emphasize Key Points: Curved text can be used strategically to highlight and emphasize important information or key points in your presentation. By curving specific words or phrases, you can draw attention to them and make them more noticeable. This helps to guide your audience’s focus and reinforces the main message of your slide.
- Improved Readability: While it may seem counterintuitive, curving text can actually enhance readability in certain cases. When properly executed, curved text can follow the natural eye flow, making it easier for the audience to read and comprehend. It can also help to break up long paragraphs of text and present information in a visually appealing way.
- Creative Expression: Curved text offers a creative outlet to showcase your design skills and add a personal touch to your presentations. You can experiment with different font styles, sizes, colors, and alignments to create visually stunning effects that align with your branding or theme. With curved text, you have the freedom to express your creativity and make your slides truly unique.
In summary, using curved text in PowerPoint presentations can greatly enhance the visual impact, aesthetics, and emphasis of your slides. It can improve readability, add a creative touch, and help your content stand out. So, the next time you are preparing a presentation in PowerPoint, consider incorporating curved text to elevate your design and engage your audience.
How to Add Curved Text
Adding curved text to your PowerPoint slides is a simple and straightforward process. Follow these steps to add curved text and unleash your creativity:
- Open PowerPoint: Launch PowerPoint and open the presentation slide where you want to add curved text.
- Select the Shape: Choose the shape on which you want to add the curved text. This can be a circle, a rectangle, or any other shape that suits your design.
- Insert the Shape: Insert the chosen shape onto your slide by going to the “Insert” tab and selecting “Shapes.” Choose the desired shape from the dropdown menu and draw it onto your slide using the mouse.
- Add Text: Double-click on the shape to activate the text box. Type in the desired text that you wish to curve.
- Access the Format Shape Options: With the shape selected, navigate to the “Format” tab, which appears when you click on the shape. Look for the “Shape Format” tab on the ribbon and click on it.
- Curving the Text: In the “Shape Format” tab, locate the “Text Effects” button and click on it. From the dropdown menu, select “Transform.” A submenu will appear with various text transformation options.
- Choose the Curved Text Style: Browse through the available options in the “Transform” submenu and select the curved text style that you prefer. PowerPoint offers several choices, such as “Arch Up,” “Arch Down,” “Circle,” and more.
- Adjust the Curvature: After selecting a curved text style, you can further customize the curvature by clicking on the “Text Effects” button again and choosing “Text Options.” This will open a separate format window where you can fine-tune the curvature, angle, and other text settings.
- Customize the Text Appearance: To customize the appearance of the curved text, use the various formatting options available in PowerPoint. You can change the font, size, color, alignment, and other attributes to match your overall design.
- Preview and Finalize: As you make adjustments to the curved text, you can preview the changes in real-time. Once you are satisfied with the result, click outside the shape to finalize and lock the curved text in place.
By following these steps, you can easily add curved text to your PowerPoint slides. Experiment with different shapes and styles to create visually appealing and engaging presentations that captivate your audience.
Adjusting the Curvature of the Text
After adding curved text to your PowerPoint slides, you may want to adjust the curvature to achieve the desired effect. Luckily, PowerPoint offers various options to fine-tune the curvature of the text. Follow these steps to adjust the curvature of your curved text:
- Select the Curved Text: Click on the shape that contains the curved text to activate it. You will notice that the shape is selected, and small handles or dots appear around it.
- Access the Text Options: With the shape selected, go to the “Format” tab, which appears when you click on the shape. Look for the “Text Effects” button and click on it. From the dropdown menu, select “Text Options.”
- Modify the Curvature: In the “Text Options” window, you will see options to adjust the curvature, angle, and other text settings. Locate the “Text Effects” section, which offers sliders or numerical input fields to fine-tune the curvature of the text.
- Move the Curvature Slider: One way to adjust the curvature is to move the “Curvature” slider. Slide it to the left or right to increase or decrease the curvature respectively. Observe the changes in real-time to find the ideal curvature for your curved text.
- Input Custom Values: If you prefer more precise control over the curvature, you can manually input values in the “Curvature” field. Enter a positive value to increase the curvature or a negative value to decrease it. Experiment with different values until you achieve the desired effect.
- Other Adjustments: Apart from the curvature, you can also make additional adjustments in the “Text Options” window. For instance, you can modify the angle of the text, its vertical alignment, spacing, depth, and other text effects.
- Preview and Finalize: As you make adjustments to the curvature and other settings, you can preview the changes in real-time. This allows you to fine-tune the curved text until it meets your requirements. Once you are satisfied with the result, click outside the shape to finalize the adjustments and lock the curved text in place.
By following these steps, you can easily adjust the curvature of your curved text in PowerPoint. Take the time to experiment and find the perfect balance that enhances the visual impact and readability of your presentations. Adjusting the curvature allows you to create unique and captivating curved text effects that leave a lasting impression on your audience.
Customizing the Appearance of the Curved Text
Adding curved text to your PowerPoint slides is not only about the shape and curvature, but also about customizing its appearance. PowerPoint provides a range of tools and options to help you customize the appearance of your curved text. Here’s how you can do it:
- Select the Curved Text: Click on the shape containing the curved text to activate it. The shape will be selected, and you will see small handles or dots surrounding it.
- Access the Format Shape Options: With the shape selected, go to the “Format” tab, which appears when you click on the shape. Look for the “Shape Format” tab on the ribbon and click on it.
- Modify Font Styles and Attributes: In the “Shape Format” tab, you can modify the font styles and attributes of the curved text. Click on the “Font” options to access a variety of customization options, including font family, size, color, and style (bold, italic, underline, etc.). Select the desired options to customize the appearance of the text.
- Align the Curved Text: Use the alignment options available in the “Shape Format” tab to align the curved text within the shape. You can choose to align the text to the left, right, center, or justify it. Experiment with different alignments to find the one that best complements your design.
- Adjust Letter Spacing and Line Spacing: PowerPoint allows you to adjust the spacing between letters and lines in the curved text. This can help improve readability and make the text more visually appealing. Use the “Character Spacing” and “Line Spacing” options in the “Font” section to customize the spacing according to your preferences.
- Apply Text Effects: If you want to add visual effects to your curved text, you can explore the “Text Effects” options in the “Shape Format” tab. This includes options such as shadow, reflection, glow, bevel, and more. Apply the desired effects sparingly to enhance the overall look and feel of your curved text.
- Experiment with Fill and Outline: In addition to the text itself, you can also customize the fill and outline of the shape containing the curved text. Use the “Shape Fill” and “Shape Outline” options in the “Shape Format” tab to change the color, transparency, and line style of the shape. This allows you to create a cohesive and visually striking design that complements the curved text.
- Preview and Finalize: As you customize the appearance of the curved text, you can preview the changes in real-time. This allows you to make adjustments and fine-tune the design until it meets your requirements. Once you are satisfied with the appearance of the curved text, click outside the shape to finalize the customization and lock it in place.
With these customization options, you can truly personalize the appearance of your curved text in PowerPoint. Use a combination of font styles, alignments, spacing adjustments, and effects to create visually stunning and engaging curved text that enhances your presentation.
Using Curved Text on Different Shapes
Curved text in PowerPoint is not limited to a specific shape or design. You can apply curved text to various shapes, allowing for even more creative possibilities and unique effects. Here are some examples of using curved text on different shapes:
- Circular Text: One of the most common uses of curved text is on circular shapes. Circular text creates a visually pleasing effect that can resemble labels, badges, or logos. Simply choose a circular shape, such as a circle or an oval, and add curved text around its perimeter. This technique is ideal for displaying slogans, taglines, or any content that benefits from a circular arrangement.
- Arch Text: Arch text is another popular use of curved text. It involves adding text that follows the contour of an arch-shaped shape. This technique works well for creating headings or subheadings that are visually interesting and eye-catching. Arch text can be applied to shapes like curves, arches, or even irregular shapes that emulate an arching effect.
- Serpentine Text: Serpentine text refers to text that follows a zigzag or wavy path. This technique is effective for adding a dynamic and playful touch to your slides. Serpentine text can be applied to shapes such as squiggly lines, S-shaped curves, or irregular shapes that allow for a flowing and winding text arrangement.
- Path Text: Path text involves adding text that follows a custom path or shape that you create manually. PowerPoint provides the option to draw custom shapes using the “Curve” or “Freeform” tools. Once you’ve created your desired shape, you can add the curved text along that path. This technique allows for endless possibilities in terms of shape and text arrangement, giving you complete creative control.
- Using Custom Shapes: In addition to the predefined shapes offered by PowerPoint, you can also use custom shapes to apply curved text. Custom shapes can be created using vector graphics software or downloaded from online sources. By importing custom shapes into PowerPoint, you can apply curved text to these unique shapes, adding a personalized touch to your presentations.
These are just a few examples of how you can use curved text on different shapes in PowerPoint. The key is to experiment and think creatively to find new and unique ways to apply curved text to complement your content and design. Whether it’s circular text, arch text, serpentine text, or path text, utilizing curved text on different shapes adds an element of creativity and visual interest to your PowerPoint presentations.
Creating Circular Text in PowerPoint
Circular text can add a visually appealing and unique element to your PowerPoint presentations. Whether you want to create labels, logos, or decorative text, applying curved text in a circular shape is an effective technique. Here’s how you can create circular text in PowerPoint:
- Select the Circle: Start by selecting the circle shape on which you want to add the circular text. Go to the “Insert” tab and choose “Shapes” from the dropdown menu. Pick the desired circle shape and draw it onto your slide.
- Add Text: Double-click on the circle shape to activate the text box. Type in the text that you want to display in a circular arrangement. You can use a single word, a short phrase, or even a combination of letters.
- Format the Text: With the text selected, go to the “Home” tab and use the formatting options to customize the appearance of the text. You can change the font, size, color, alignment, and style. Choose options that align with your overall design or branding.
- Apply Text Path Effect: In order to make the text follow the circular shape, you need to apply the text path effect. With the text still selected, go to the “Format” tab. Look for the “WordArt Styles” group and click on the “Text Effects” button. From the dropdown menu, choose “Transform” and then select the desired circular text effect, such as “Circle” or “Curved Up”.
- Adjust Position and Size: Once the circular text effect is applied, you may need to adjust the position and size of the text within the circle. Click and drag the text to your preferred position. To resize the text, use the corner handles of the text box while holding the Shift key to maintain proportions.
- Customize the Circle: To further customize the appearance of the circular text, you can modify the circle shape itself. Click on the circle shape to select it, and then use the “Shape Format” tab to change its fill color, outline color, or add additional effects if desired.
- Preview and Fine-tune: As you make adjustments to the circular text and the circle shape, you can preview the changes in real-time. This allows you to fine-tune the design until it meets your requirements. Take your time to experiment and create the perfect circular text effect for your PowerPoint presentation.
By following these steps, you can easily create circular text in PowerPoint. Whether you’re using it for labels, logos, or decorative elements, circular text adds a visually dynamic and appealing element to your slides. So, unleash your creativity and experiment with different styles, fonts, and arrangements to make your circular text standout in your presentations.
Creating Arch Text in PowerPoint
Arch text, also known as curved text in an arch shape, offers a visually pleasing and eye-catching way to present headings or subheadings in your PowerPoint presentations. Here’s a step-by-step guide on how to create arch text in PowerPoint:
- Select the Arch Shape: Start by selecting the arch shape on which you want to add the arch text. Go to the “Insert” tab, choose “Shapes” from the dropdown menu, and select the desired arch shape. Alternatively, you can draw a custom curved line or shape using the “Curve” or “Freeform” tools.
- Insert Text: Double-click on the arch shape to activate the text box. Type in the text that you want to display in an arch arrangement. This could be a heading, subheading, or any text that you want to present in an arched form.
- Format the Text: With the text selected, go to the “Home” tab and use the formatting options to customize the appearance of the text. Adjust the font, size, color, alignment, and other attributes to match your design or theme.
- Apply Text Path Effect: To make the text follow the arch shape, apply the text path effect. With the text still selected, go to the “Format” tab, click on the “Text Effects” button in the “WordArt Styles” group, and choose “Transform” from the dropdown menu. Select the desired arch text effect, such as “Arch Up” or “Arch Down”.
- Adjust Position and Size: Depending on the size and shape of your arch, you may need to adjust the position and size of the text within the arch shape. Click and drag the text to your desired position, ensuring it fits well within the arch. To resize the text, use the corner handles of the text box while holding the Shift key to maintain proportions.
- Customize the Arch Shape: To further enhance the appearance of the arch text, you can customize the arch shape itself. Click on the shape to select it, and then use the “Shape Format” tab to change its fill color, outline color, or add effects such as shadows or gradients if desired.
- Preview and Fine-tune: As you make adjustments to the arch text and the arch shape, preview the changes in real-time to ensure it aligns with your vision. Take the time to fine-tune the design until you’re satisfied with the aesthetical appeal of the arch text.
With these simple steps, you can create arch text in PowerPoint to make your headings or subheadings stand out. Whether it’s for titles in a slideshow, section headers, or any other use, arch text adds a visually appealing and professional touch to your PowerPoint presentations.
Tips for Using Curved Text Effectively
Using curved text in PowerPoint can enhance the visual appeal and engagement of your presentations. To ensure you make the most of this effect, consider the following tips when using curved text in your slides:
- Keep it Simple: While curved text adds a unique element to your slides, it’s important to avoid overusing it. Reserve the curved text effect for headings, subheadings, or key points that you want to emphasize. Too much curved text can become distracting and diminish its impact.
- Ensure Readability: While curved text can be visually appealing, it should not compromise readability. Choose a font style and size that is clear and easy to read, even when curved. Avoid excessively decorative fonts or small sizes that may strain the eyes of your audience.
- Consider Hierarchy and Alignment: Pay attention to the hierarchy and alignment of your curved text. Use different font sizes or styles to denote importance and create a visual hierarchy. Ensure the alignment of the curved text is consistent and aligned with other elements on the slide for a polished and professional look.
- Balance Curved and Straight Text: To maintain a cohesive and balanced design, consider using a combination of curved and straight text in your presentation. Utilize curved text for headings or decorative elements, while using straight text for body content or additional details. This helps create variation and keeps the presentation visually interesting.
- Experiment with Colors and Effects: Don’t be afraid to get creative with colors and effects when using curved text. Experiment with different color combinations, gradients, shadows, or other text effects to make the curved text pop and align with your overall design scheme. However, ensure that the colors and effects used are consistent and complement your presentation’s visual style.
- Consider Branding and Design Theme: When incorporating curved text, consider your branding and design theme. Choose fonts, colors, and styles that align with your brand guidelines and overall design aesthetics. Consistency in visual elements helps create a cohesive and professional presentation.
- Avoid Distorting the Text: When curving the text, be mindful not to distort it excessively. Curved text that is stretched or squeezed may become difficult to read and appear unprofessional. Maintain the natural proportions of the characters and ensure that the text flows smoothly along the curve.
- Test and Preview: Before finalizing your slides, thoroughly test and preview the curved text on different devices and screen sizes. Ensure that the text is readable and visually appealing in various viewing scenarios. Make any necessary adjustments to ensure optimal readability and visual impact.
By following these tips, you can effectively use curved text to enhance the visual appeal and engagement of your PowerPoint presentations. Keep in mind that simplicity, readability, and consistency are key factors to consider when implementing this effect. With careful planning and execution, curved text can elevate your slides and captivate your audience.
Examples of Using Curved Text in PowerPoint Presentations
Curved text is a versatile and visually appealing element that can be creatively used in PowerPoint presentations. Here are some examples of how you can leverage curved text to enhance the design and impact of your slides:
- Title Slide: Apply curved text to your title slide to make a bold and captivating first impression. Curving the main title or adding a curved subheading can create an eye-catching focal point that draws attention and sets the tone for your presentation.
- Section Headers: Use curved text for section headers or dividers to clearly distinguish different parts of your presentation. Curving the headers adds a visual break and enhances the hierarchical structure of your content, making it easier for the audience to follow along.
- Quotes and Pull Quotes: Curved text is an effective way to highlight and emphasize quotes or pull quotes within your presentation. Curving the text around a shape, such as a speech bubble or quotation mark, not only makes the quote visually appealing but also helps it stand out from the rest of the content.
- Data Visualization: Add curved text to graphs or charts to label specific data points, categories, or axes. This not only enhances the visual appeal of your data visualization but also makes it easier for the audience to understand and interpret the information presented.
- Product Features or Benefits: Curved text can be used to showcase the features or benefits of a product or service in a visually engaging way. By curving the text around the outline of the product image or using shapes related to the benefits, you can create an aesthetically pleasing representation that captures the attention of your audience.
- Inspiring Statements: Curving inspirational or motivational statements can add a touch of creativity and impact to your slides. Whether it’s affirmations, key messages, or guiding principles, curving the text can create a visually powerful effect that resonates with your audience and leaves a lasting impression.
- Timeline or Process Flow: Utilize curved text to label milestones or steps in a timeline or process flow diagram. Curving the text along the path of the timeline or flow creates a visually appealing representation that guides the audience through the progression of events or steps.
- Call-to-Action: Make your call-to-action stand out by curving the text within a shape, such as a button or arrow. Curving the text adds emphasis and draws attention to the action you want your audience to take, increasing the effectiveness of your call-to-action.
These examples illustrate the versatility and impact of curved text in PowerPoint presentations. Remember to think creatively and strategically when incorporating curved text, ensuring that it aligns with your content, enhances the visual appeal, and effectively communicates your message to the audience.