
Safety Precautions Before Removing the Battery
Before embarking on the task of removing the battery from your Moto G Power, it is crucial to prioritize safety. The lithium-ion battery in your device is a powerful component that requires careful handling to prevent accidents and damage. Here are some essential safety precautions to consider before proceeding with the battery removal process:
-
Power Off the Device: Ensure that your Moto G Power is powered off before attempting to remove the battery. This simple yet critical step minimizes the risk of electrical shock and other potential hazards during the procedure.
-
Work in a Well-Lit Area: Adequate lighting is essential for performing delicate tasks such as battery removal. Choose a well-lit and spacious area to work in, as this will help you see the components clearly and reduce the chances of making errors.
-
Use ESD-Safe Tools: Electrostatic discharge (ESD) can cause damage to sensitive electronic components. To prevent ESD-related issues, it is advisable to use ESD-safe tools and equipment when handling the battery and other internal parts of your Moto G Power.
-
Avoid Excessive Force: When removing the battery, exercise caution and avoid applying excessive force. The components inside the device are delicate, and using too much force can lead to damage or breakage, complicating the battery removal process.
-
Keep Small Components Secure: As you work on removing the battery, be mindful of small screws, clips, and other components that may come loose. Keep track of these items and store them in a secure container to prevent loss or misplacement.
-
Mindful of Battery Condition: If the battery appears to be swollen, damaged, or leaking, it is crucial to handle it with extreme care. Swollen or damaged batteries can pose safety risks, and it is advisable to seek professional assistance in such cases.
By adhering to these safety precautions, you can approach the process of removing the battery from your Moto G Power with confidence and minimize the likelihood of accidents or damage to the device. Prioritizing safety not only protects you and your device but also ensures a smooth and successful battery removal experience.
Tools Required for Removing the Battery
When it comes to removing the battery from your Moto G Power, having the right tools at your disposal is essential for a smooth and efficient process. Here are the tools you will need to successfully remove the battery from your device:
-
ESD-Safe Tweezers: ESD-safe tweezers are indispensable for handling small components and delicate connectors within your device. These tweezers are designed to prevent electrostatic discharge, offering a safe and precise way to manipulate tiny parts during the battery removal process.
-
Plastic Opening Tools: Plastic opening tools, often made of durable and non-conductive materials, are ideal for prying open the back cover of your Moto G Power without causing damage. These tools help create separation between the device's components, allowing for safe and controlled access to the internal hardware.
-
Precision Screwdriver Set: A precision screwdriver set with various interchangeable bits is essential for removing screws and fasteners securing the back cover and internal components of your device. These screwdrivers enable you to work with different types and sizes of screws, ensuring that you can disassemble the device with precision and ease.
-
Spudger or Nylon Pry Tool: A spudger or nylon pry tool is useful for gently disconnecting cables and connectors without causing damage. These non-metallic tools are designed to prevent accidental short circuits and scratches while navigating the internal components of your Moto G Power.
-
Anti-Static Mat: Working on an anti-static mat provides an additional layer of protection against electrostatic discharge. This specialized mat helps dissipate static electricity, reducing the risk of ESD-related damage to sensitive electronic components during the battery removal process.
-
Anti-Static Wrist Strap: An anti-static wrist strap, when worn correctly, helps to ground your body and prevent the buildup of static charge. This precaution is particularly important when handling the battery and other internal components, as it minimizes the risk of ESD-related damage and ensures a safe working environment.
By ensuring that you have these essential tools on hand, you can approach the task of removing the battery from your Moto G Power with confidence and precision. These tools not only facilitate the safe disassembly of the device but also contribute to a successful battery removal process, allowing you to address battery-related issues or perform maintenance with ease.
Removing the Back Cover of Moto G Power
Removing the back cover of your Moto G Power is a crucial initial step in gaining access to the internal components, including the battery. This process requires precision and care to avoid damaging the device's exterior or the components housed beneath the cover. Here's a detailed guide on how to safely remove the back cover of your Moto G Power:
-
Power Off the Device: Before proceeding, ensure that your Moto G Power is powered off to prevent any potential electrical hazards during the disassembly process.
-
Identify the Notch: Examine the edges of the device to locate the small notch or groove designed for prying open the back cover. This notch is typically situated along the seam where the back cover meets the main body of the device.
-
Use a Plastic Opening Tool: Gently insert a plastic opening tool, such as a spudger or a specialized non-conductive pry tool, into the identified notch. Carefully apply gentle pressure to create separation between the back cover and the main body of the device.
-
Work Around the Edges: Once the initial separation is achieved, continue to work the plastic opening tool around the edges of the device, gradually releasing the clips securing the back cover in place. Exercise patience and caution to avoid applying excessive force, as this could lead to damage.
-
Lift Off the Back Cover: As the clips are released, carefully lift the back cover away from the device. Take note of any resistance and ensure that no cables or connectors are still attached before fully removing the cover.
-
Set Aside the Back Cover: Once the back cover is successfully removed, place it in a safe and clean location to prevent scratches or damage. This step ensures that the cover remains in optimal condition for reassembly after the battery-related tasks are completed.
By following these steps, you can safely and effectively remove the back cover of your Moto G Power, gaining access to the internal components, including the battery. This process sets the stage for further actions, such as disconnecting the battery connector and ultimately removing the battery from the device. Prioritizing precision and care during the back cover removal process is essential for maintaining the integrity of your Moto G Power while addressing battery-related concerns or performing maintenance tasks.
Disconnecting the Battery Connector
Disconnecting the battery connector is a critical step in the process of removing the battery from your Moto G Power. This procedure requires careful attention to detail and precision to ensure the safe disconnection of the battery from the device's internal circuitry. Here's a detailed guide on how to effectively disconnect the battery connector:
-
Prepare the Workspace: Before proceeding with the disconnection, ensure that you are working in a well-lit and spacious area. It is essential to have a clean and organized workspace to prevent misplacement of small components and to facilitate unhindered access to the battery connector.
-
Identify the Battery Connector: Locate the battery connector within the device. In most cases, the battery connector is a small, rectangular component with a thin cable attached to it. It is typically situated near the battery and is secured to the device's logic board.
-
Use ESD-Safe Tweezers: To disconnect the battery connector, carefully use ESD-safe tweezers to grip the connector's tab or pull gently on the attached cable. It is crucial to exercise caution and avoid applying excessive force to prevent damage to the connector or the surrounding components.
-
Apply Even Pressure: When using the tweezers to disconnect the battery connector, apply even pressure on both sides of the connector to release it from its socket. Avoid twisting or bending the connector, as this could lead to misalignment or damage, complicating the reassembly process.
-
Verify Disconnection: Once the connector is released, gently pull the cable away from the socket. Ensure that the connector is fully disconnected and that there is no residual tension on the cable, as this could indicate incomplete disconnection.
-
Secure the Cable: After disconnecting the battery connector, carefully secure the cable in a position where it will not impede further disassembly or maintenance tasks. This precaution prevents accidental reconnection and ensures a clear path for accessing the battery.
-
Exercise Patience: Throughout the disconnection process, exercise patience and attentiveness to detail. Rushing or applying unnecessary force can lead to damage to the connector or the device's internal components, potentially complicating the battery removal process.
By following these steps, you can effectively disconnect the battery connector from your Moto G Power, paving the way for the safe and successful removal of the battery. Prioritizing precision and care during this crucial step is essential for maintaining the integrity of the device and ensuring a smooth battery removal process.
Removing the Battery from Moto G Power
Removing the battery from your Moto G Power is a delicate yet essential process that requires precision and attention to detail. By following the steps outlined below, you can safely and effectively remove the battery from your device, whether for replacement, maintenance, or troubleshooting purposes.
-
Prepare the Workspace: Before proceeding with the battery removal, ensure that you are working in a well-lit and organized environment. Having a clean workspace minimizes the risk of misplacing small components and provides ample room to maneuver during the battery removal process.
-
Review Safety Precautions: Revisit the safety precautions outlined earlier to reinforce the importance of prioritizing safety throughout the battery removal process. This includes ensuring that the device is powered off, using ESD-safe tools, and handling the battery with care, especially if it shows signs of damage or swelling.
-
Position the Device: Place your Moto G Power on a stable surface with the screen facing down. This positioning provides easy access to the back cover and internal components, facilitating a smooth battery removal process.
-
Refer to the User Manual: If available, consult the user manual or official guidelines for your Moto G Power model. The user manual may contain specific instructions or diagrams related to battery removal, providing valuable insights into the device's internal layout and the battery's placement.
-
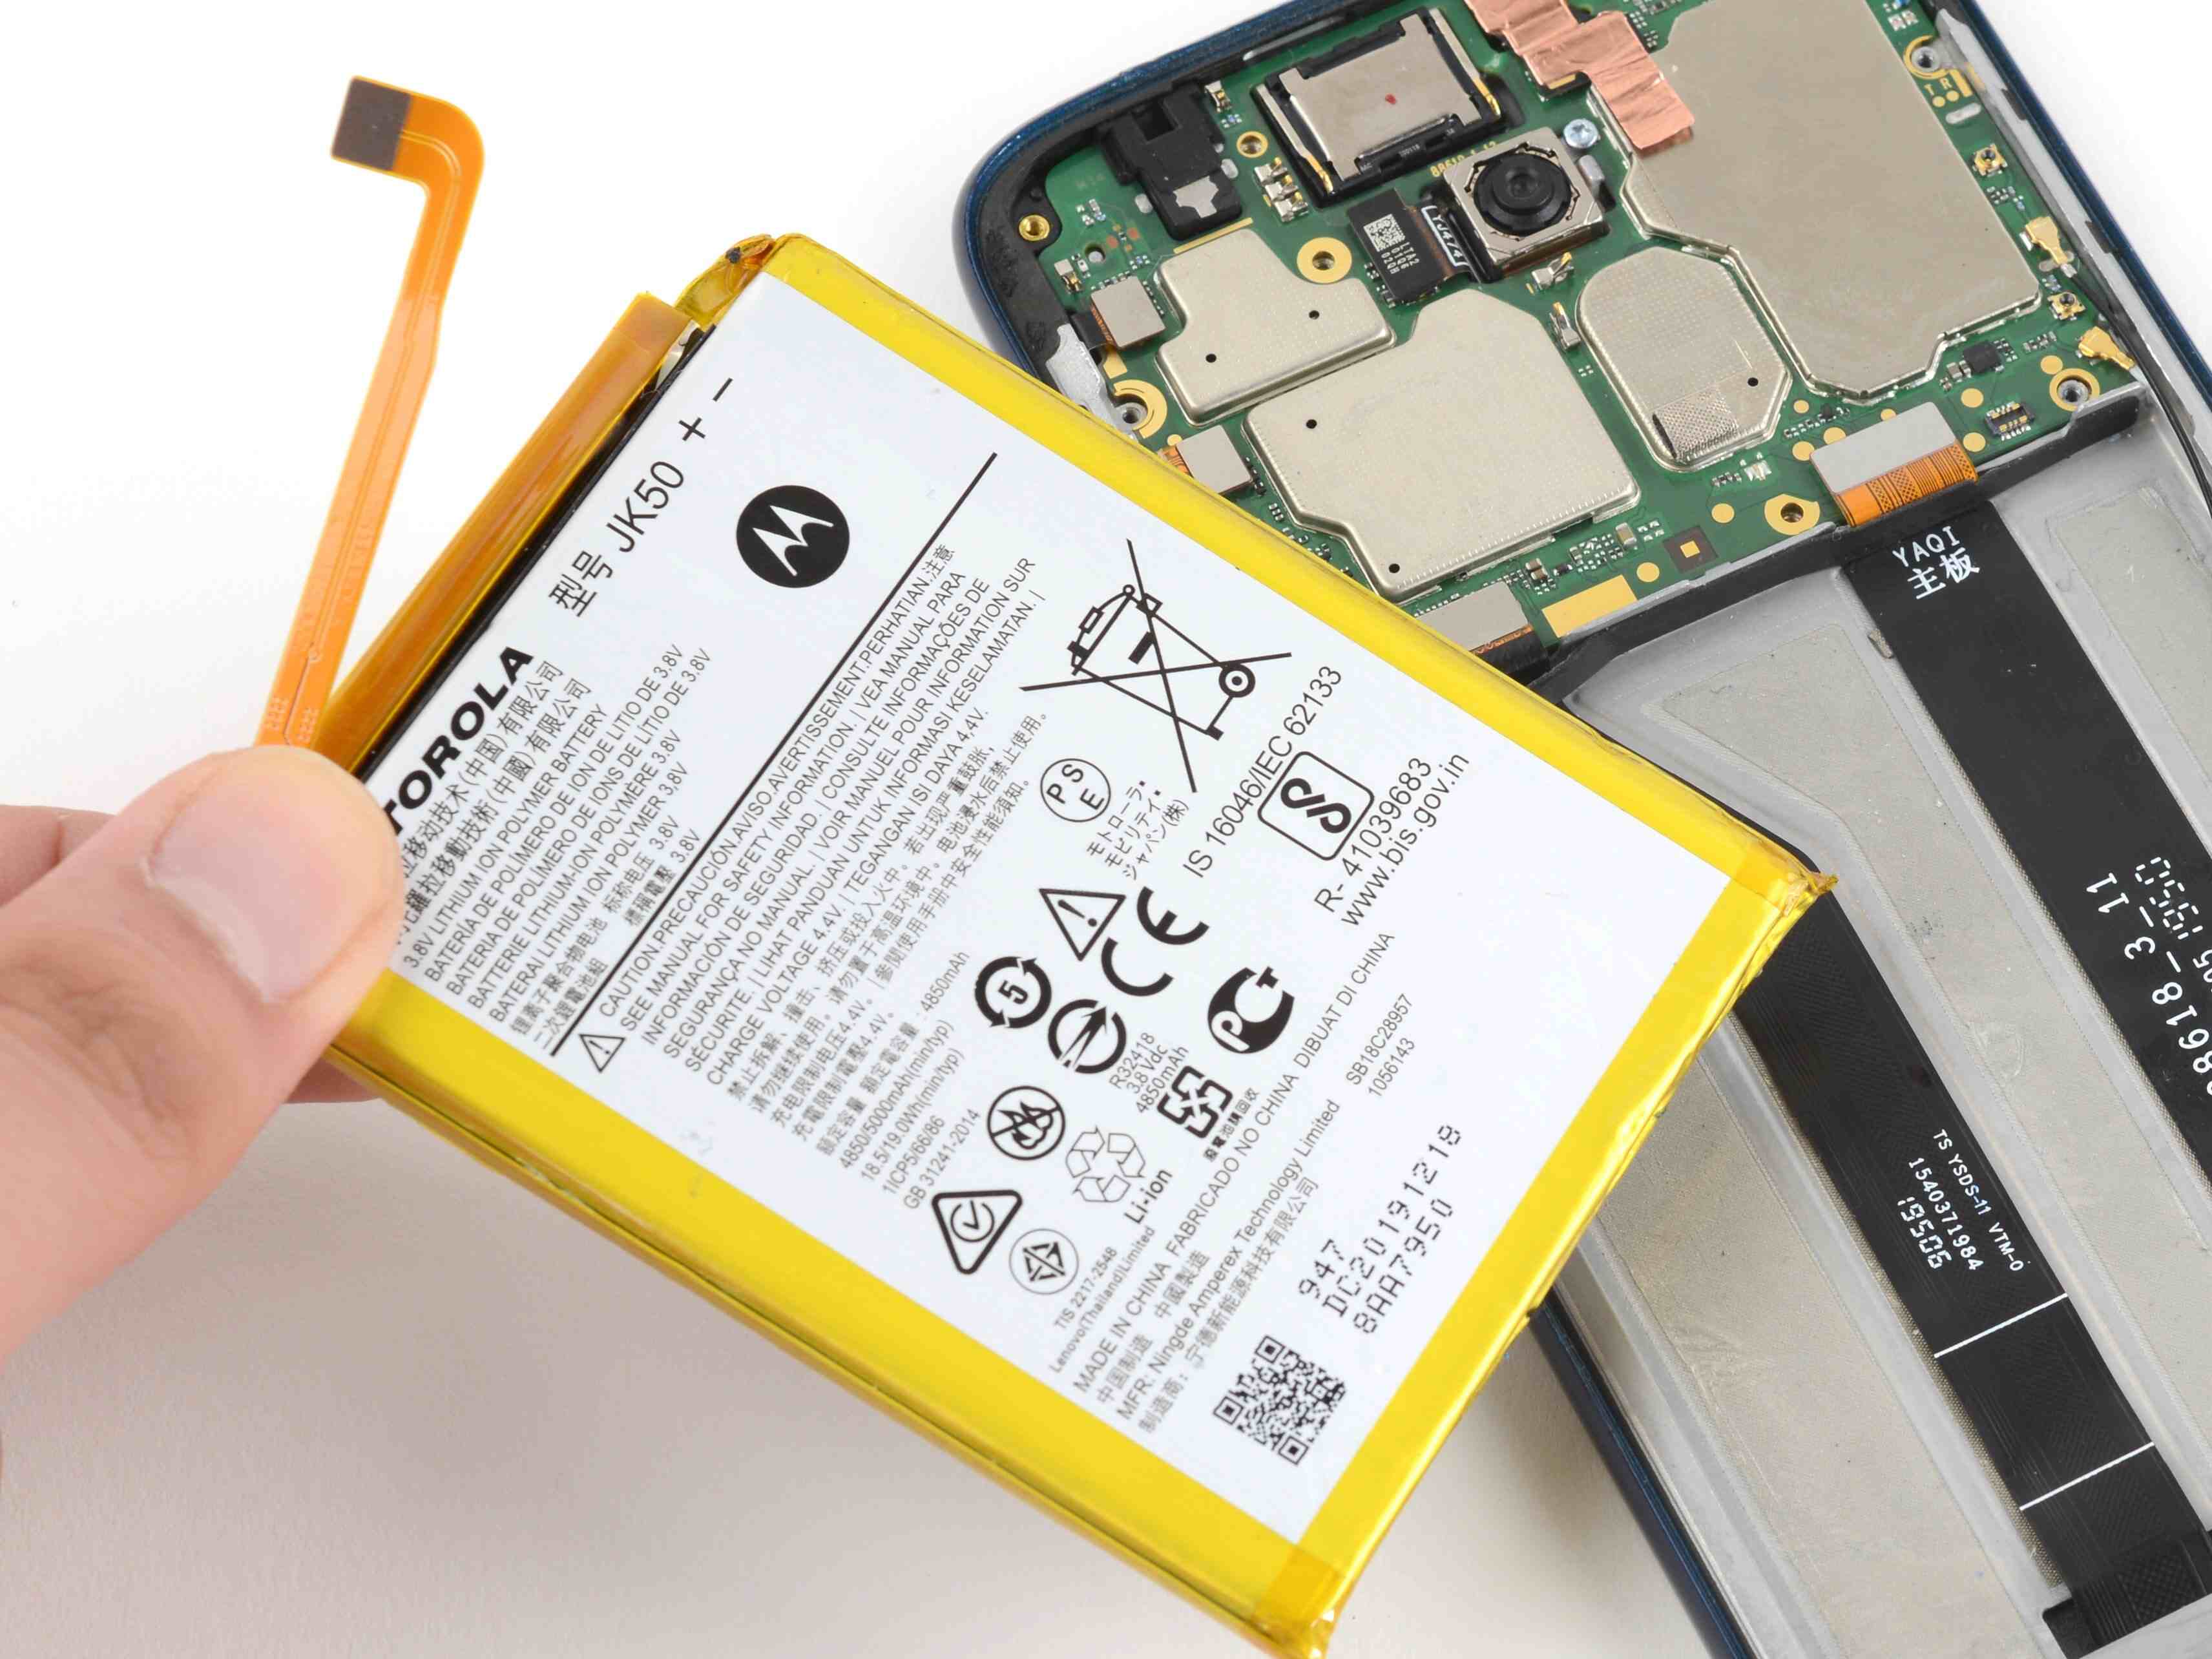
Identify the Battery: Locate the battery within the device. In most cases, the battery is a rectangular or square-shaped component situated near the center or bottom of the device's interior. Take note of any adhesive or securing mechanisms holding the battery in place.
-
Use Plastic Opening Tools: Gently insert a plastic opening tool, such as a spudger or non-conductive pry tool, underneath the edge of the battery. Carefully create separation between the battery and the device's housing, ensuring that you do not apply excessive force to avoid damaging the battery or surrounding components.
-
Lift and Remove the Battery: Once the battery is loosened from its position, carefully lift it away from the device, taking note of any attached cables or connectors. Exercise caution to prevent damage to the battery or the device's internal circuitry during this step.
-
Inspect the Battery Compartment: After removing the battery, take a moment to inspect the battery compartment and surrounding areas for any debris, dust, or signs of damage. Cleaning the compartment may be necessary before installing a new battery or performing maintenance.
By following these steps, you can successfully remove the battery from your Moto G Power, allowing you to address battery-related issues or perform necessary maintenance with confidence and precision. Prioritizing careful handling and attention to detail throughout the battery removal process is essential for maintaining the integrity of your device and ensuring a seamless transition to subsequent tasks.