
Checking Fingerprint Sensor Compatibility
Before diving into the process of activating the fingerprint sensor on your iPhone 13, it's crucial to ensure that your device is equipped with this feature. The iPhone 13 series boasts advanced biometric capabilities, including a built-in fingerprint sensor for seamless and secure authentication. To determine whether your iPhone 13 supports this functionality, follow these steps:
-
Model Verification: Firstly, identify the specific model of your iPhone 13. The fingerprint sensor is integrated into the power button on certain models, such as the iPhone 13, iPhone 13 mini, iPhone 13 Pro, and iPhone 13 Pro Max. If you own any of these models, you're in luck, as they are equipped with the Touch ID fingerprint sensor.
-
Software Update: Ensure that your iPhone 13 is running the latest version of iOS. Apple frequently releases software updates to introduce new features and enhance device functionality. Navigate to Settings > General > Software Update to check for and install any available updates. This step is essential to guarantee that your device is equipped with the necessary software support for the fingerprint sensor.
-
Physical Inspection: Examine the power button of your iPhone 13. If it features a small, circular sensor integrated into the button itself, then your device is indeed equipped with a fingerprint sensor.
By following these steps, you can confidently verify the presence of a fingerprint sensor on your iPhone 13. Once you've confirmed its compatibility, you can proceed with the subsequent steps to set up and activate this convenient and secure biometric feature.
Remember, the fingerprint sensor offers a convenient and secure method of unlocking your device and authenticating various actions, making it a valuable addition to your iPhone 13's array of features.
Setting Up a Passcode
Setting up a passcode on your iPhone 13 is a fundamental step in ensuring the security of your device and its data. While the fingerprint sensor provides a convenient and efficient method of unlocking your phone and authenticating various actions, a passcode serves as an essential backup security measure. In the event that the fingerprint sensor is unavailable or fails to recognize your fingerprint, the passcode acts as a reliable alternative for accessing your device.
To set up a passcode on your iPhone 13, follow these straightforward steps:
-
Accessing Settings: Begin by navigating to the "Settings" app on your iPhone 13. The Settings app serves as the central hub for customizing and managing various aspects of your device, including security and privacy settings.
-
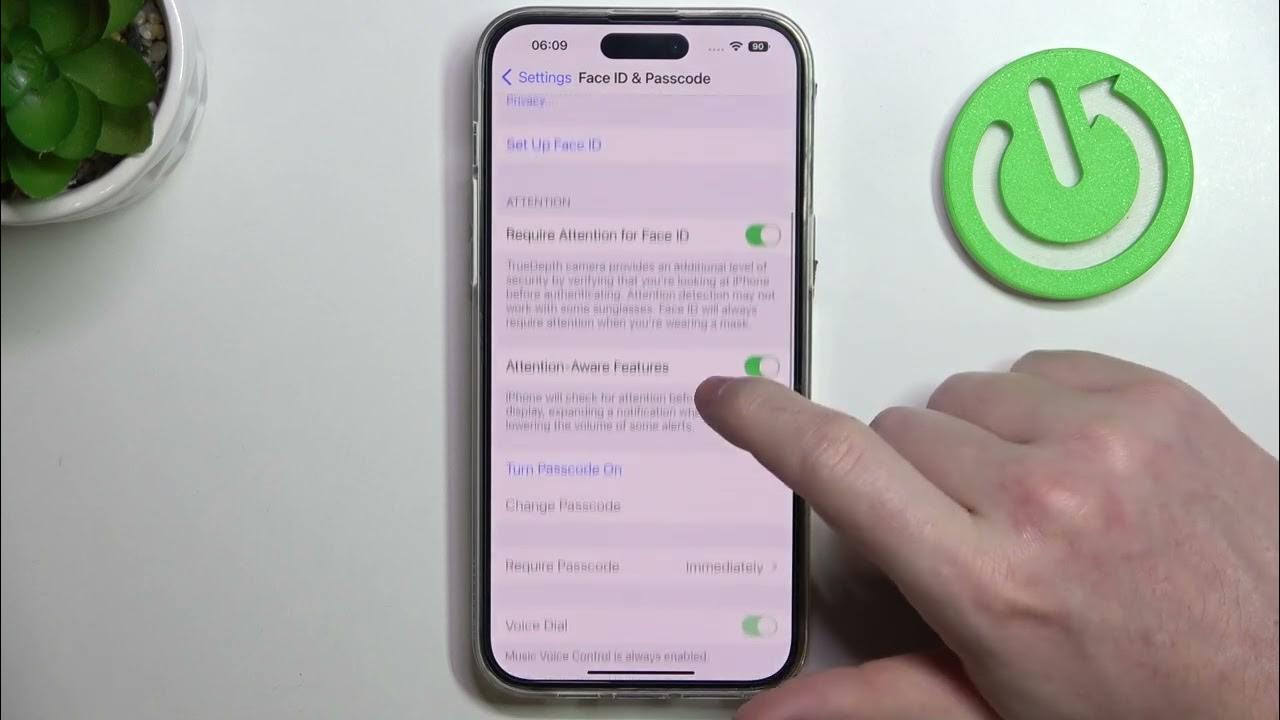
Selecting "Face ID & Passcode" or "Touch ID & Passcode": Depending on the specific model of your iPhone 13, you will encounter either "Face ID & Passcode" or "Touch ID & Passcode" within the Settings menu. Tap on this option to proceed to the passcode setup.
-
Entering Current Passcode (if applicable): If you have previously set up a passcode on your device, you will be prompted to enter it before proceeding further. This step ensures that only authorized individuals can modify the passcode settings.
-
Choosing "Turn Passcode On": Upon accessing the passcode settings, select the "Turn Passcode On" option. This action initiates the process of creating a new passcode for your iPhone 13.
-
Creating a New Passcode: You will be prompted to enter a new passcode of your choice. It's important to select a passcode that is memorable for you but difficult for others to guess. Apple recommends using a six-digit passcode for optimal security, but you also have the option to create a custom alphanumeric code for enhanced protection.
-
Confirming Passcode: After entering your chosen passcode, you will be required to confirm it by entering the same code once again. This step ensures accuracy and prevents inadvertent errors during the passcode creation process.
-
Completing the Setup: Once the new passcode is confirmed, the setup process is complete. Your iPhone 13 is now secured with a passcode, providing an additional layer of protection alongside the fingerprint sensor.
By following these steps, you can effectively set up a passcode on your iPhone 13, bolstering the security of your device and safeguarding your personal information. With both the fingerprint sensor and passcode in place, you can enjoy peace of mind knowing that your iPhone 13 is well-protected against unauthorized access.
Remember, maintaining the confidentiality of your passcode is crucial, as it serves as a key to unlocking your device and accessing sensitive data. Additionally, periodic updates to your passcode can further enhance the security of your iPhone 13, ensuring that it remains resilient against potential threats.
Enrolling Fingerprint
Enrolling your fingerprint on the iPhone 13 is a straightforward process that empowers you to leverage the device's advanced biometric capabilities for seamless authentication and enhanced security. By enrolling your fingerprint, you can conveniently unlock your device, authorize app installations, and authenticate various actions with a simple touch. The following steps guide you through the process of enrolling your fingerprint on the iPhone 13:
-
Accessing Touch ID & Passcode: Begin by accessing the "Settings" app on your iPhone 13 and navigating to the "Touch ID & Passcode" section. If prompted, enter your passcode to proceed to the fingerprint enrollment settings.
-
Selecting "Add a Fingerprint": Within the "Touch ID & Passcode" settings, select the option labeled "Add a Fingerprint." This action initiates the fingerprint enrollment process, allowing you to register your fingerprint with the device.
-
Positioning Your Finger: Upon selecting "Add a Fingerprint," the iPhone 13 prompts you to place your finger on the Touch ID sensor located within the power button. Ensure that your finger covers the sensor completely and adjust its position as guided by the on-screen instructions.
-
Lifting and Resting Your Finger: As you place your finger on the Touch ID sensor, the device captures various aspects of your fingerprint to create a comprehensive biometric profile. Follow the on-screen prompts to lift and rest your finger repeatedly, allowing the iPhone 13 to capture different angles and details of your fingerprint.
-
Adjusting Finger Positions: Throughout the enrollment process, the iPhone 13 provides guidance on adjusting the position of your finger to ensure that the entire fingerprint is accurately captured. This meticulous approach enhances the accuracy and reliability of the enrolled fingerprint for seamless authentication.
-
Completing the Enrollment: Once the iPhone 13 has successfully captured and processed your fingerprint, the enrollment process is complete. You have the option to label the enrolled fingerprint for easy identification, especially if you plan to register multiple fingerprints on the device.
By enrolling your fingerprint on the iPhone 13, you establish a personalized biometric profile that enables swift and secure access to your device. The enrolled fingerprint serves as a unique identifier, allowing you to leverage the convenience of biometric authentication while reinforcing the security of your iPhone 13. With your fingerprint enrolled, you are well-equipped to harness the full potential of the device's advanced Touch ID technology, streamlining your daily interactions with enhanced efficiency and peace of mind.
Activating Fingerprint Sensor
Activating the fingerprint sensor on your iPhone 13 is a pivotal step that unlocks the full potential of this advanced biometric feature. Once the fingerprint sensor is activated, you can seamlessly harness the convenience and security it offers, enabling swift device unlocking and effortless authentication for various actions. The following steps guide you through the process of activating the fingerprint sensor on your iPhone 13:
-
Accessing Touch ID & Passcode: Begin by accessing the "Settings" app on your iPhone 13 and navigating to the "Touch ID & Passcode" section. If prompted, enter your passcode to proceed to the fingerprint sensor activation settings.
-
Enabling Fingerprint Sensor: Within the "Touch ID & Passcode" settings, locate the option to enable the fingerprint sensor. This setting may be labeled as "Enable Touch ID" or "Turn on Fingerprint Sensor." Toggle the switch to activate the fingerprint sensor on your iPhone 13.
-
Verifying Fingerprint Enrollment: Upon activating the fingerprint sensor, the device prompts you to verify the enrolled fingerprint(s) that will be used for authentication. This step ensures that only authorized fingerprints are granted access to the device, enhancing security and preventing unauthorized usage.
-
Testing Fingerprint Sensor: After activating the fingerprint sensor and verifying the enrolled fingerprint(s), it's advisable to test the functionality of the sensor. Simply place the enrolled finger on the Touch ID sensor located within the power button to ensure that the device accurately recognizes and authenticates the fingerprint.
-
Fine-Tuning Sensor Settings: Within the "Touch ID & Passcode" settings, you have the option to fine-tune additional sensor settings to suit your preferences. This includes adjusting the sensitivity of the fingerprint sensor and customizing its behavior for various interactions, such as unlocking the device and authorizing app purchases.
By following these steps, you can effectively activate the fingerprint sensor on your iPhone 13, unlocking a seamless and secure biometric authentication experience. Once activated, the fingerprint sensor becomes a cornerstone of your device's security infrastructure, offering a convenient and reliable method of unlocking your iPhone 13 and authorizing various actions with a simple touch. With the fingerprint sensor activated, you are poised to embrace a new level of efficiency and peace of mind, knowing that your device is fortified with advanced biometric security.
Remember, the fingerprint sensor is designed to streamline your interactions with the iPhone 13, offering a seamless and intuitive approach to device authentication. By activating this feature, you are harnessing the power of cutting-edge biometric technology, elevating the overall user experience while reinforcing the security of your device.
Using Fingerprint Sensor for Authentication
Harnessing the fingerprint sensor for authentication on your iPhone 13 introduces a seamless and secure approach to accessing your device and authorizing various actions. With your fingerprint enrolled and the sensor activated, you can leverage this advanced biometric feature to streamline your interactions with the device, enhancing both convenience and security.
Effortless Device Unlocking
Upon activating the fingerprint sensor, unlocking your iPhone 13 becomes a swift and intuitive process. With a simple touch of your enrolled finger on the Touch ID sensor integrated into the power button, the device swiftly recognizes and authenticates your fingerprint, granting immediate access to the home screen. This frictionless unlocking mechanism eliminates the need for manually entering passcodes or navigating complex authentication procedures, significantly expediting your access to the device.
Secure App Authentication
In addition to unlocking the device, the fingerprint sensor empowers you to securely authenticate various actions within apps and services. Whether it's authorizing app installations, confirming in-app purchases, or accessing sensitive information within supported applications, the fingerprint sensor serves as a reliable and secure method of verification. By simply placing your enrolled finger on the sensor, you can swiftly authorize these actions with confidence, knowing that your unique biometric profile ensures the integrity of the authentication process.
Enhanced Privacy and Security
The utilization of the fingerprint sensor for authentication enhances the privacy and security of your interactions with the iPhone 13. Unlike traditional authentication methods that may be susceptible to unauthorized access or inadvertent disclosure, the fingerprint sensor offers a highly personalized and secure approach to device interaction. Your unique fingerprint serves as a robust identifier, bolstering the confidentiality of your data and mitigating the risk of unauthorized usage, thereby fostering a heightened sense of privacy and security in your daily interactions with the device.
Streamlined User Experience
By integrating the fingerprint sensor into the authentication process, Apple has elevated the overall user experience on the iPhone 13. The seamless and intuitive nature of biometric authentication simplifies device interactions, allowing you to navigate through tasks and activities with enhanced efficiency and ease. Whether it's swiftly unlocking the device, authorizing app actions, or securing sensitive information, the fingerprint sensor contributes to a cohesive and user-centric experience, aligning with Apple's commitment to delivering intuitive and secure technology solutions.
In essence, leveraging the fingerprint sensor for authentication on your iPhone 13 represents a significant advancement in device security and user experience. By embracing this biometric feature, you are poised to enjoy a seamless and secure interaction with your device, underpinned by the convenience and reliability of advanced Touch ID technology.