
Choosing the Right Blending Brush
When it comes to achieving a flawless eye makeup look, one of the most crucial tools in your arsenal is a blending brush. This versatile brush allows you to seamlessly blend different eyeshadow shades together, creating a soft and well-blended finish. However, with so many options available, it can be overwhelming to choose the right blending brush for your needs. Here are some tips to help you make the right choice.
Consider the Shape: Blending brushes come in various shapes, each serving a different purpose. The most common shapes include dome-shaped, tapered, and fluffy brushes. Dome-shaped brushes are perfect for blending color into the crease and creating dimension. Tapered brushes are great for precise blending and applying color to the outer corner of the eye. Fluffy brushes are ideal for blending out harsh lines and diffusing color.
Examine the Bristles: The type of bristles used in a blending brush can greatly impact its performance. Opt for brushes with natural hair bristles as they tend to be softer and blend shadows seamlessly. Synthetic bristles, on the other hand, are more suitable for applying cream eyeshadows or when working with wet products.
Consider the Size: The size of the blending brush is also important. Smaller brushes are perfect for intricate blending and creating precise looks, while larger brushes are great for quickly blending larger areas or creating a soft wash of color. Consider the size of your eyelids and the effect you want to achieve when selecting a blending brush.
Test for Sensitivity: If possible, try testing the brush on your skin to see if you have any sensitivity or allergic reactions to the bristles. This is especially important if you have sensitive skin or if you are prone to allergies. Opt for brushes made with hypoallergenic materials if you have known sensitivities.
By considering the shape, bristles, size, and sensitivity of a blending brush, you can find the perfect tool to help you achieve flawless eyeshadow application. Remember, everyone’s preferences may differ, so it may take some trial and error to find the right blending brush that works best for you. Happy blending!
Prepping the Eyelids
Before diving into your eyeshadow application, it’s essential to properly prep your eyelids. Prepping the eyelids not only helps the eyeshadow adhere better but also ensures a smoother and more long-lasting finish. Here’s a step-by-step guide on how to prep your eyelids for flawless eyeshadow application.
Cleanse and Moisturize: Start by cleansing your eyelids with a gentle cleanser or makeup remover to remove any oils, dirt, or previous makeup. Follow this up with a lightweight eye cream or moisturizer to hydrate the delicate skin on your eyelids. Allow the moisturizer to absorb fully before moving on to the next step.
Apply an Eyeshadow Primer: The next crucial step in prepping the eyelids is to apply an eyeshadow primer. This helps to create a smooth base for the eyeshadow, prevents creasing, and enhances the color payoff. Use a small amount of primer and gently blend it across the entire eyelid, from lash line to brow bone.
Set with Translucent Powder: To further enhance the longevity of your eyeshadow, lightly dust your eyelids with a translucent or skin-toned powder. This helps to absorb any excess oil on the eyelids and creates a matte surface for better eyeshadow adherence.
Choose the Right Base Shade: Before you start applying your desired eyeshadow colors, it’s recommended to apply a neutral base shade close to your skin tone. This helps to even out any discoloration on the eyelids and provides a seamless canvas for the rest of the eyeshadow colors.
Blend and Set the Base Shade: Use a fluffy blending brush to gently blend the base shade across the entire eyelid, starting from the lash line and blending upwards towards the crease. This ensures a smooth transition and a well-blended base for the rest of the eyeshadow colors. Set the base shade with a light dusting of translucent powder.
By following these steps to properly prep your eyelids, you’ll create the perfect canvas for your eyeshadow application. Not only will your eyeshadow adhere better and last longer, but you’ll also achieve a more seamless and professional-looking finish.
Applying Transition Shade
When it comes to achieving a seamless and well-blended eyeshadow look, the transition shade plays a crucial role. This shade helps to create a smooth transition between different eyeshadow colors and adds depth to the crease. Here’s a step-by-step guide on how to apply the transition shade for a flawless eye makeup look.
Select the Right Transition Shade: Start by choosing a transition shade that is one to two shades darker than your skin tone. Opt for a matte finish to create a natural-looking transition. Colors such as soft browns, taupes, or warm neutrals work well as transition shades for most eye looks.
Load Your Brush: Dip a fluffy blending brush into the transition shade, tapping off any excess. This helps to prevent any fallout and allows for better control while applying the eyeshadow.
Focus on the Crease: Begin by applying the transition shade to the crease of your eyelid. The crease is the area between your eyelid and brow bone. Use windshield wiper motions or back-and-forth motions to deposit the color evenly into the crease. Start with a light hand and build up the intensity gradually.
Blend, Blend, Blend: Use circular motions or a back-and-forth motion to blend the transition shade seamlessly into the crease. This ensures a soft and diffused transition between the transition shade and the base shade. Remember to blend the color well, ensuring there are no harsh lines or uneven patches.
Extend to the Outer V: To add dimension and depth to your eye look, extend the transition shade slightly beyond the crease and into the outer V area. This creates a subtle contour effect and helps to create a more balanced and well-defined eye look.
Adjust and Build Up: Step back and assess the intensity of the transition shade. If you want more depth, you can build up the color by adding more product and blending it into the crease. Take your time to adjust and build up the shade to achieve your desired look.
By following these steps, you’ll be able to apply the transition shade seamlessly and create a smooth transition between different eyeshadow colors. This essential step sets the foundation for the rest of your eyeshadow application and helps to achieve a well-blended and professional-looking result.
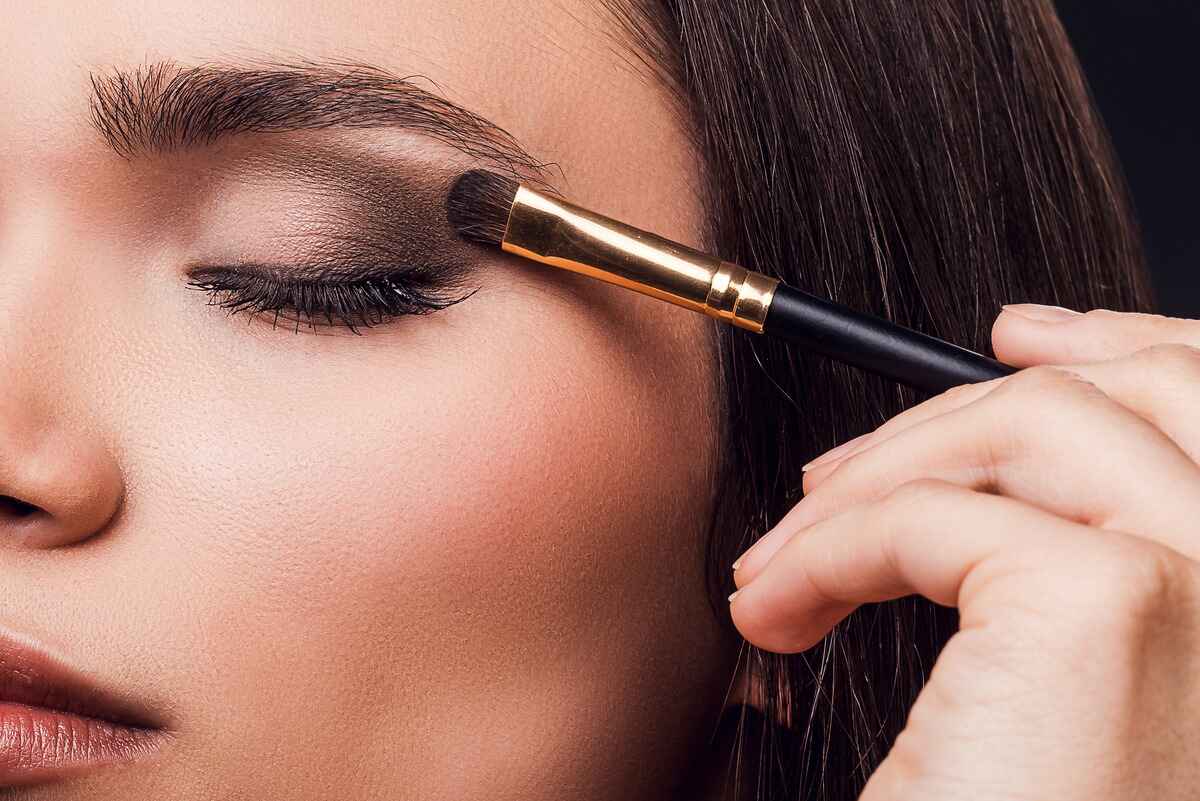
Blending the Crease Color
Once you’ve applied the transition shade to create a seamless transition between colors, it’s time to focus on blending the crease color. Blending the crease color is crucial for achieving dimension, depth, and a cohesive eyeshadow look. Here’s a step-by-step guide on how to seamlessly blend the crease color.
Choose the Crease Color: Select a color that complements or contrasts with the transition shade to add depth and dimension to your eye look. The crease color is typically a shade darker than the transition shade and is often used to define the crease and outer V area.
Load Your Brush: Load a small, precise blending brush or a pencil brush with the crease color. Make sure to tap off any excess product to avoid applying too much color at once.
Define the Crease: Start by applying the crease color directly into the crease area, which is the natural indentation on your eyelid when your eyes are open. Using gentle back-and-forth or windshield wiper motions, apply the color in a thin line from the inner corner to the outer corner of the crease. Focus on gradually building up the intensity and blending as you go.
Blend with Transition Shade: To achieve a seamless blend, go back to your clean transition shade brush (or a clean blending brush) and lightly blend the crease color with the transition shade. This helps soften any harsh lines and creates a smooth transition between the two shades.
Blend Horizontally: To ensure a well-blended crease color, use horizontal blending motions along the crease. This helps to evenly distribute the color and prevent any patchiness or harsh lines. Take your time and blend until the edges are soft and diffused.
Adjust and Build Up: Step back and assess the intensity of the crease color. If you desire more depth, add additional layers of the color and continue blending until you achieve your desired look. Remember to blend with the transition shade whenever necessary to maintain a seamless blend.
By following these steps, you’ll be able to blend the crease color seamlessly, creating depth and dimension to your eye look. A well-blended crease color adds complexity and polish to your eyeshadow application, resulting in a professional and beautifully blended finish.
Softening Harsh Lines
Creating a seamless and well-blended eyeshadow look is essential for achieving a professional and polished finish. One common challenge that many makeup enthusiasts face is dealing with harsh lines between eyeshadow colors. Fortunately, there are several techniques you can employ to soften these lines and achieve a more seamless blend. Here’s a step-by-step guide on how to soften harsh lines in your eyeshadow application.
Blend, Blend, Blend: The key to softening harsh lines is to blend, and then blend some more. Use a clean blending brush or a clean makeup brush to gently blend the areas where the colors meet. Use soft and circular motions to seamlessly blend the colors together, ensuring there are no visible lines or demarcations.
Utilize a Transition Shade: If you notice harsh lines between your eyeshadow colors, bringing in a transition shade can be incredibly helpful. Apply a matte shade that is between your lighter base color and the darker color along the crease. Use a fluffy blending brush to blend the transition shade over the area where the harsh lines are visible. The transition shade will help to create a more gradual color transition, softening any harsh lines.
Use a Clean Brush: When blending to soften harsh lines, it’s crucial to use a clean brush. Residual eyeshadow on your brush can transfer and intensify the color in certain areas, resulting in even more visible lines. Keep a clean blending brush on hand to blend without adding any additional product.
Apply a Neutral Eyeshadow: To further soften harsh lines, you can apply a neutral eyeshadow color to the problematic areas. Choose a shade that matches your skin tone or is slightly lighter. Use a clean brush to gently sweep and blend the neutral eyeshadow over the areas with harsh lines. This will help to diffuse the colors and create a smoother transition.
Layer and Build Up: If the harsh lines are still visible after blending and softening, you can layer and build up the eyeshadow colors gradually. Apply a small amount of the respective colors to the areas with harsh lines, and blend gently using a clean brush. Repeat this process until the lines are softened and the blend appears seamless.
By following these techniques, you’ll be able to soften harsh lines between eyeshadow colors and achieve a seamlessly blended eye makeup look. Remember, practice makes perfect, so don’t be discouraged if it takes some time to master these techniques. With patience and persistence, you’ll soon be creating flawlessly blended eyeshadow looks.
Adding Depth to the Outer Corner
Adding depth to the outer corner of your eyes can create a dramatic and well-defined eyeshadow look. This technique helps to create dimension and enhances the overall shape of your eyes. Here’s a step-by-step guide on how to add depth to the outer corner of your eye makeup look.
Select the Right Eyeshadow Color: Choose an eyeshadow color that is darker than the transition shade and crease color you have already applied. Opt for shades such as deep browns, dark purples, or smoky grays. Matte or shimmer finishes can both work, depending on the desired look.
Load Your Brush: Using a small, precise eyeshadow brush, lightly load it with the chosen darker eyeshadow color. Be sure to tap off any excess product to avoid applying too much color at once.
Map Out the Outer Corner: Imagine a line extending from the outer corner of your eye towards the tail end of your eyebrows. This is the area where you’ll be concentrating the darker eyeshadow color. Lightly deposit the color onto the outer corner, focusing on the area just above the crease and extending towards the outer edge of your eye.
Blend and Diffuse: Use a clean blending brush or a fluffy brush to blend and diffuse the darker eyeshadow color. Use circular motions or windshield wiper motions to soften any harsh lines and ensure a seamless transition between the darker shade and the rest of your eyeshadow look.
Build Up the Intensity: If you desire a more intense or dramatic look, you can build up the intensity by adding more layers of the darker eyeshadow color. Apply a little at a time and blend it out each time to maintain a smooth transition and avoid any harsh lines.
Connect with the Crease: To create a cohesive look, take a clean blending brush and lightly blend the crease color and the outer corner color together. This helps to create a seamless transition and ensures that the outer corner shade appears well-integrated with the rest of your eye makeup.
By following these steps, you’ll be able to add depth to the outer corner of your eye makeup look for a more defined and dramatic effect. Remember to blend and build up the color gradually to achieve your desired intensity, and have fun experimenting with different eyeshadow colors to create various eye-catching looks.
Blending Colors on the Lower Lash Line
Blending eyeshadow colors on the lower lash line can add depth, drama, and balance to your overall eye makeup look. This technique helps to create a harmonious transition between the upper and lower portions of your eyes and ties the entire look together. Here’s a step-by-step guide on how to blend colors on the lower lash line.
Choose the Right Eyeshadow Colors: Select an eyeshadow shade or combination of shades that complement the colors you have used on your upper eyelid. Consider using a slightly darker shade than the transition color for added definition, or experiment with complementary or contrasting colors to create a unique look.
Load Your Brush: Use a small, precise eyeshadow brush or a smudge brush to pick up a small amount of the chosen eyeshadow color. It’s important to start with a light application and build up the intensity gradually.
Start at the Outer Edge: Begin by applying the eyeshadow color to the outer edge of the lower lash line. This helps to create depth and elongate the eyes. Use gentle, short strokes or a soft patting motion to deposit the color onto the lash line, moving towards the inner corner.
Blend for a Soft Transition: Use a clean brush or a smudge brush to blend the eyeshadow color along the lower lash line. Use small, circular motions or back-and-forth motions to soften any harsh lines and create a seamless transition between the colors. Be sure to blend well to achieve a natural and well-blended look.
Connect with the Upper Eyeshadow: To create a cohesive look, gently blend the lower lash line color with the eyeshadow on your upper eyelid. This helps to blend the two areas together and creates a harmonious transition between the upper and lower portions of your eye makeup. Use a clean blending brush to achieve a seamless blend.
Highlight the Inner Corner: For an extra touch of brightness and to open up the eyes, apply a shimmery or highlight shade to the inner corner of the lower lash line. This creates a subtle and gorgeous highlight that draws attention to the eyes.
By following these steps, you’ll be able to blend eyeshadow colors seamlessly on the lower lash line, enhancing the depth and overall impact of your eye makeup look. Remember to start with a light application and gradually build up the intensity, and don’t forget to blend well for a flawless and cohesive result.
Creating a Smoky Eye Look
A smoky eye look is a classic and timeless makeup technique that adds a touch of sultriness and allure to your eyes. It’s a versatile style that can be adapted to various occasions, from a glamorous night out to a sophisticated daytime look. Here’s a step-by-step guide on how to create a stunning smoky eye look.
Prep and Prime: Start by prepping your eyelids with an eyeshadow primer or a concealer to ensure that your eyeshadow lasts longer and appears more vibrant. This step creates a smooth canvas for your smoky eye look.
Apply Base Eyeshadow: Begin by applying a neutral or a light eyeshadow shade all over your eyelids. This will act as a base color to even out your skin tone and help the other eyeshadows blend seamlessly.
Define the Crease: Use a medium-toned eyeshadow shade and apply it to the crease area. This will create depth and dimension. Blend the color well using circular motions or windshield wiper motions.
Build Up the Smoke: Take a darker eyeshadow shade, such as a deep brown, charcoal, or black, and apply it to the outer corner of your eyelid. Start with a small amount, as it’s easier to add more product than to remove excess. Use a pencil brush or a small blending brush to apply and blend, focusing on creating a gradient effect with a softer blend towards the center of the eyelid.
Blend, Blend, Blend: The key to achieving a smoky eye is thorough blending. Use a clean blending brush to blend the different eyeshadow shades together, ensuring a seamless transition with no harsh lines. Circular motions and windshield wiper motions can be used to soften and merge the colors together.
Smoke Out the Lower Lash Line: Apply the same darker eyeshadow shade to the lower lash line. Use a pencil brush or a smudge brush for precision. Start from the outer corner and gradually blend inward, keeping the intensity darkest at the outer corner and fading it out as you move towards the inner corner.
Highlight the Inner Corner: Use a shimmery or a light-colored eyeshadow to highlight the inner corner of your eyes. This will brighten and open up the eyes, adding an extra touch of sparkle to your smoky eye look.
Finish with Eyeliner and Mascara: Complete your smoky eye look with a black or dark brown eyeliner along the upper lash line and tightline. Finish with several coats of mascara to enhance the definition and volume of your lashes.
By following these steps, you’ll be able to create a stunning smoky eye look that accentuates your eyes and adds a touch of mystery to your overall makeup. Don’t be afraid to experiment with different colors and intensities to customize your smoky eye look to suit your personal style and the occasion.
Using Circular Motions for a Seamless Blend
When it comes to blending eyeshadow, using the right technique is crucial for achieving a seamless and well-blended look. One effective technique is to use circular motions during the blending process. This method helps to soften harsh lines, create a seamless transition between colors, and achieve a beautifully blended eye makeup look. Here’s a step-by-step guide on how to use circular motions for a seamless blend.
Apply Base Eyeshadow: Start by applying a base eyeshadow shade all over your eyelids. This shade should be close to your natural skin tone or a few shades lighter. It creates a smooth canvas and helps the other eyeshadow colors blend seamlessly.
Deposit the Colors: Apply your desired eyeshadow colors onto your eyelids using a small, precise brush. Start by depositing the lighter shades onto the areas where you want them to show the most, such as the inner corner or the center of the lid. Then, apply the darker shades to the outer corner or the crease, gradually building up the intensity.
Create Circular Motions: Take a clean blending brush and, using light pressure, start blending the colors with circular motions. The circular motions help to blend the colors together in a natural and diffused manner. Start from the areas where the colors meet and slowly work your way outwards, blending the edges and creating a seamless transition.
Blend with Gentle Pressure: While using circular motions, be sure to apply gentle pressure to avoid removing too much product or creating harsh lines. The goal is to blend the colors together smoothly and softly. Don’t be afraid to go back and forth between circular motions and back-and-forth motions to achieve the desired blend.
Blend the Crease and Outer Corner: Pay special attention to blending the crease and the outer corner, as these areas tend to have more concentrated color. Use circular motions to softly blend the edges and create a gradient effect. Be patient and take your time during this step to ensure a seamless and well-blended final result.
Assess and Adjust: Step back and assess your work to determine if any further blending is needed. If you notice any harsh lines or uneven patches, go back in with the blending brush, using circular motions to further soften and blend the colors together. Repeat this step as necessary until you achieve the desired level of seamless blending.
By using circular motions during the blending process, you can achieve a seamless and well-blended eye makeup look. Remember to use gentle pressure, take your time, and blend the colors together gradually for the most natural and harmonious result. Practice this technique to master the art of seamless blending and elevate your eye makeup game.
Cleaning and Maintaining Your Blending Brushes
Keeping your blending brushes clean and well-maintained is essential for achieving flawless and hygienic makeup application. Clean brushes not only ensure that your eyeshadow colors remain true but also help prevent bacteria buildup, prolong the lifespan of your brushes, and prevent any potential skin irritations. Here are some tips on how to clean and maintain your blending brushes effectively.
Regular Brush Cleaning: It’s important to clean your blending brushes regularly to remove any buildup of product, oils, and bacteria. Depending on how often you use your brushes, aim for cleaning them at least once every 1-2 weeks. Use a gentle brush cleanser or a mild soap, gently swirl the brushes in warm water, rinse thoroughly, and reshape the bristles. Allow them to air dry completely before using them again.
Spot Cleaning: If you’re using a brush for different eyeshadow colors within the same makeup application, spot cleaning can be helpful. Use a brush cleaner or a spray specifically designed for spot cleaning, apply it onto a clean tissue or cloth, and gently swirl the brush over the spot cleaner. This quick method helps remove excess color from the brush without having to fully deep clean it.
Proper Brush Drying: After cleaning your blending brushes, it’s crucial to let them dry properly to maintain their shape and prevent any water damage. Lay them flat or hang them upside down to ensure that the water drains away from the ferrule (the metal part that holds the bristles). Avoid placing wet brushes upright as the water could seep into the handle and loosen the glue, leading to bristle shedding.
Reshape the Brushes: To maintain the shape and structure of your blending brushes, reshape them while they are still damp. Gently reshape the bristles to their original shape and allow them to dry in that position. This step helps to ensure that your brushes maintain their effectiveness and performance.
Store Brushes Properly: Consider storing your blending brushes in an upright position or in a brush holder to protect the bristles and prevent them from getting damaged. Make sure the bristles are not pressed against each other too tightly, as this can cause them to deform over time. Additionally, store your brushes in a clean and dry area to maintain their cleanliness and prevent exposure to dust or dirt.
Replace When Necessary: Keep an eye on the condition of your blending brushes. If you notice any signs of shedding, splaying bristles, or a decrease in performance, it may be time to replace the brush. Investing in high-quality brushes and regularly maintaining them will extend their lifespan, but eventually, all brushes will wear out and need to be replaced.
By incorporating regular cleaning and proper maintenance into your routine, you can ensure that your blending brushes are always in excellent condition, prolong their lifespan, and optimize their performance. With clean and well-maintained brushes, you’ll be able to achieve flawless and professional-looking eye makeup application every time.