
Choosing the Right Candle Jar
When it comes to emptying a candle jar, choosing the right jar is essential. Not all candle jars are suitable for this process, so it’s important to consider a few factors before you start. Here are some tips to help you choose the perfect candle jar for emptying:
- Material: Opt for a candle jar made of glass or ceramic. These materials are heat-resistant and can withstand the melting process without getting damaged. Avoid candle jars made of plastic or other flammable materials, as they can pose a safety risk.
- Size: Consider the size of the candle jar based on the amount of wax you want to empty. If you have a large amount of wax, choose a bigger jar. For smaller amounts, a smaller jar will suffice. Keep in mind that larger jars may require more time and effort to empty.
- Shape: The shape of the jar is also important. Opt for a jar with a wide opening to make it easier to remove the wax and clean the jar afterwards. Jars with narrow openings can be more difficult to work with.
- Style: Consider the style of the jar based on your preferences. Whether you like a sleek and modern design or a vintage-inspired look, choose a jar that matches your aesthetic taste.
Remember that the candle jar you choose should be one that you are willing to part with or repurpose. Emptying a candle jar may alter its appearance, so it’s best to use one that you don’t mind changing in the process.
Preparing the Candle Jar for Emptying
Before you can start emptying a candle jar, you need to prepare it properly. This involves removing any remaining wax, cleaning the jar, and ensuring it’s ready for the emptying process. Follow these steps to prepare the candle jar:
- Burn the remaining wax: If there is any wax left in the jar, light the candle and let it burn until the wax liquefies completely. This will make it easier to remove the wax later on.
- Allow the jar to cool: Once the flame is extinguished, allow the jar to cool down completely. This will prevent any accidents or injuries during the emptying process.
- Freeze the jar: To make the wax removal easier, place the cooled jar in the freezer for a few hours. The freezing temperature will cause the wax to shrink and separate from the sides of the jar.
- Remove the wax: After the jar has been in the freezer, take it out and use a butter knife or a spoon to gently pry the frozen wax off the sides. Be careful not to scrape or damage the jar while doing this.
- Clean the jar: Once the wax is removed, wash the candle jar with warm soapy water to remove any residue or remaining scent. Use a sponge or a soft cloth to scrub the inside and outside of the jar carefully.
- Dry the jar: After cleaning, ensure that the jar is completely dry before moving on to the next step. You can air-dry it or use a clean cloth to remove any remaining moisture.
By following these preparation steps, you’ll ensure that the candle jar is ready for the emptying process. This will make it easier to work with and allow you to enjoy a clean and fresh start for your next candle creation or repurpose the jar for other uses.
Removing the Wax
Once you have prepared the candle jar, it’s time to remove the wax. There are a few methods you can choose from, depending on your preference and the amount of wax remaining in the jar. Here are some common techniques for removing the wax:
- Hot water method: Fill a sink or a bowl with hot water, making sure it’s not boiling as extremes in temperature can crack the jar. Place the candle jar in the water, ensuring the water level is below the jar’s rim. Let it sit for a few minutes, allowing the heat to soften the wax. Use a butter knife or a spoon to gently loosen and lift the softened wax from the jar’s sides. Dispose of the collected wax appropriately.
- Freezing method: If there is a small amount of wax left in the jar, you can use the freezing method. Place the jar in the freezer for a few hours until the remaining wax becomes brittle. Once frozen, use a butter knife or a spoon to chip away the wax from the jar’s interior. Be careful not to apply too much force to avoid damaging the jar.
- Heat gun or hairdryer method: This method works well for stubborn wax residue on the jar’s sides. Using a heat gun or a hairdryer on a low setting, direct the warm air towards the wax, melting it from the inside. Once the wax becomes liquid, pour it out into a heat-resistant container. Wipe the inside of the jar with a paper towel or a cloth to remove any remaining residue.
Regardless of the method you choose, remember to handle hot objects with caution and protect your hands from burns. Use oven mitts or heat-resistant gloves if necessary. It’s also important to dispose of the removed wax properly, either by recycling or discarding it according to local regulations.
By using these techniques, you can effectively remove the wax from the candle jar, leaving it ready for the next step: melting the wax for repurposing or disposal.
Melting the Wax
After successfully removing the wax from the candle jar, the next step is to melt the wax for repurposing or proper disposal. It’s important to choose a safe and suitable method for melting the wax. Here are a few ways to melt the wax:
- Double boiler method: Fill a large saucepan with water and place it on the stove over medium heat. Take a heat-resistant container or another smaller saucepan and place it inside the larger one, creating a makeshift double boiler. Cut or break the wax into smaller pieces and place them in the smaller container. Stir the wax occasionally as it melts until it reaches a liquid state. Make sure to monitor the process closely to avoid overheating or burning the wax.
- Microwave method: If you’re working with a smaller amount of wax, you can use the microwave to melt it. Place the wax in a microwave-safe container and heat it in short bursts of 1 minute or less, stirring in between. Be cautious as the wax can heat unevenly and may become too hot. Stir and check the wax after each burst to ensure it’s melted completely and smooth.
- Candle wax melting pot or warmer: If you frequently repurpose candle wax, investing in a candle wax melting pot or warmer can be a convenient option. These devices are specifically designed for melting wax safely and efficiently. Follow the manufacturer’s instructions for usage and melting times.
When melting the wax, it’s crucial to prioritize safety. Always work in a well-ventilated area away from flammable materials, and never leave the melting wax unattended. Use heat-resistant gloves or oven mitts when handling hot containers, and be cautious of steam or hot wax splattering.
Once the wax has completely melted, you can proceed to the next step of pouring it into a new container or mold, or disposing of it properly according to local regulations. Remember to clean and dry the original candle jar before using it for any new project or purpose.
Pouring the Wax
After melting the wax, the next step in emptying a candle jar is pouring the wax into a new container or mold. The pouring process requires care and precision to ensure a clean and successful transfer. Follow these steps for pouring the wax:
- Prepare the new container: Choose a new container or mold that suits your intended use for the wax. Ensure that it’s clean, dry, and heat-resistant to withstand the hot wax.
- Position the candle jar: Place the empty candle jar on a heat-resistant surface or a towel to prevent any spills or mess. It should be stable and secure to hold while pouring the wax.
- Slowly pour the wax: With a steady hand, slowly pour the melted wax into the new container or mold. Start from the center and work your way towards the edges to ensure even distribution of the wax.
- Leave space and level the surface: Leave a small gap at the top of the new container to allow for the wax to expand and contract. Use a spoon or a spatula to level the surface of the poured wax, if desired.
- Allow the wax to cool and set: Let the newly poured wax cool and solidify completely. The cooling time will vary depending on the amount of wax and the surrounding temperature. Avoid moving or disturbing the container during this process.
During the pouring process, it’s important to exercise caution to avoid any burns or spills. Handle the hot wax with heat-resistant gloves or oven mitts and be mindful of the temperature of the container.
If you are repurposing the candle jar and want to use it for a new candle, you can pour the melted wax directly back into the cleaned and dry jar. Allow the wax to fully set before trimming and lighting the wick.
Remember that certain types of wax may shrink or have different melting points, so always refer to the manufacturer’s instructions for specific guidance.
By following these steps, you can successfully pour the melted wax into a new container or mold, allowing you to repurpose the wax or create new candles with ease.
Cleaning the Candle Jar
Once you have emptied the candle jar and completed the pouring process, it’s time to clean the jar to remove any residual wax, aromas, or soot. Cleaning the candle jar properly will ensure that it’s ready to be used for repurposing or for storing other items. Follow these steps to clean the candle jar:
- Scrape out the remaining wax: Use a butter knife or a spoon to scrape off any remaining wax stuck to the sides or bottom of the jar. Be gentle to avoid scratching or damaging the jar.
- Remove the wick: If there is a metal or plastic wick tab at the bottom of the jar, gently pull it out using pliers or tweezers. Dispose of the wick appropriately.
- Wash the jar: Fill the sink or a basin with warm soapy water. Submerge the jar and use a sponge or cloth to scrub the inside and outside of the jar, removing any leftover residue or soot. You can also use a mixture of vinegar and water for added cleaning power.
- Rinse thoroughly: Rinse the jar with clean water to remove any soap or cleaning solution. Ensure that all traces of soap are removed to prevent any interference with future use.
- Dry the jar: Once the jar is clean and free of soap, use a clean cloth or towel to dry it thoroughly. Pay close attention to any remaining moisture as it can affect the quality of the repurposed item or cause mold growth.
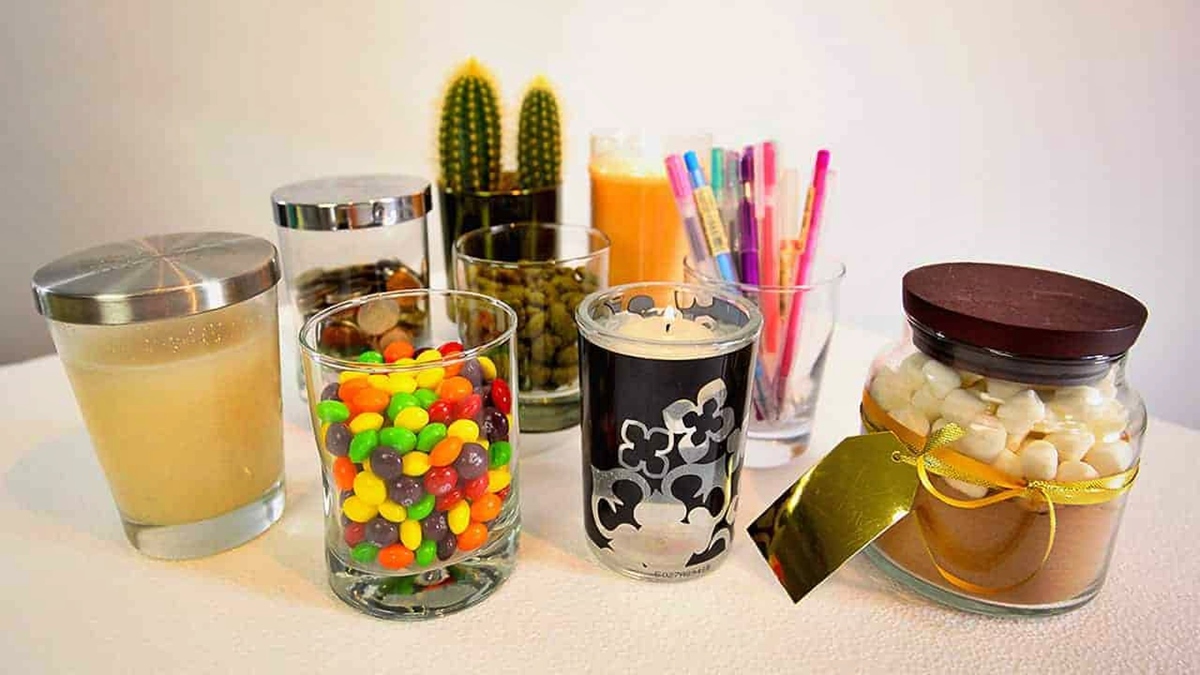
Once the jar is clean and dry, you can use it for various purposes. It can be repurposed as a decorative container, a storage jar, a flower vase, or filled with another candle of your choice.
Remember that cleaning the candle jar regularly after use will help maintain its appearance and extend its lifespan. Regular cleaning can also prevent any unwanted odor or residue from lingering in the jar.
By following these steps and giving your candle jar a thorough cleaning, you can enjoy a fresh and ready-to-use container for your next project or storage needs.