
Choosing the Right Location for Your Wall Shelf
When it comes to installing a wall shelf, choosing the right location is crucial. The placement can greatly affect both the functionality and aesthetic appeal of your shelf. Here are some key factors to consider when selecting the perfect spot:
- Identify the purpose: Before choosing a location, determine the purpose of your wall shelf. Is it intended for storage, display, or a combination of both? Knowing the purpose will help you decide the ideal placement.
- Consider the room layout: Evaluate the layout of the room and find a spot that complements the overall design. Look for empty walls or areas that need a functional or decorative element.
- Mind the height: Take into account the height at which you want your wall shelf to be installed. Consider the items that will be placed on the shelf and ensure they are easily accessible and visible.
- Wall conditions: Assess the condition of the wall where you plan to mount your shelf. Make sure it is sturdy enough to hold the weight of the shelf and its contents. Additionally, consider factors such as wall texture and any existing wall decorations.
- Avoid overcrowding: Be mindful of the surrounding furniture and décor. Avoid placing your wall shelf in a crowded area to maintain a balanced and visually appealing space.
Remember, the chosen location should not only serve the practical purpose of your wall shelf but also contribute to the overall aesthetic of the room. Take your time to carefully evaluate the available options and select a spot that enhances the functionality and beauty of your space.
Measuring and Planning for Your Wall Shelf
Before you start building your wall shelf, it is essential to take accurate measurements and plan out the design. Here are some steps to help you in this process:
- Measure the wall: Begin by measuring the width and height of the wall where you intend to install the shelf. Use a tape measure to get precise measurements.
- Determine the shelf size: Based on the available wall space and your personal preference, decide on the width, depth, and height of your shelf. Consider the items you plan to place on the shelf and ensure they will fit comfortably.
- Create a detailed plan: Use graph paper or a design software to sketch out the dimensions and layout of your wall shelf. This will help you visualize the final product and ensure accuracy during the construction process.
- Consider the location of wall studs: Take note of the location of wall studs or other support structures in the wall. If possible, plan to attach your shelf brackets to these studs for added stability.
- Account for clearance: Leave enough space between the shelf and any nearby furniture or fixtures. This will prevent overcrowding and ensure easy access to the items on the shelf.
By meticulously measuring and planning for your wall shelf, you can ensure a precise fit and a well-balanced design. This preparation phase is crucial for a successful installation and will save you time and effort in the long run.
Gathering the Materials and Tools Needed
Before you can start building your wall shelf, it is essential to gather all the necessary materials and tools. Here is a list of items you will need:
- Wooden boards: Choose high-quality boards that are suitable for your desired shelf size and design. Consider factors such as durability and aesthetic appeal.
- Shelf brackets: Select sturdy brackets that can support the weight of the shelf and its contents. Choose a style that complements your overall design and provides the desired level of stability.
- Screws and nails: Depending on the type of shelf brackets you have chosen, you will need the appropriate screws or nails to attach them securely to the wall and the shelf boards.
- Measuring tools: Invest in a good tape measure, level, and square to ensure accuracy during the construction and installation process.
- Saw: Depending on the complexity of your design, you may need a handsaw, circular saw, or miter saw to cut the wooden boards to the desired dimensions.
- Sandpaper or sanding block: Smooth any rough edges or surfaces on the wooden boards using sandpaper or a sanding block. This will create a clean and polished appearance for your shelf.
- Power drill or screwdriver: Use a power drill or screwdriver to attach the brackets to the wall and to secure the shelf boards in place.
- Pencil and ruler: These simple tools will come in handy for marking measurements and making precise cuts on the wooden boards.
By gathering all the necessary materials and tools before you begin the construction process, you can work efficiently and ensure a smooth and successful assembly of your wall shelf.
Preparing and Sanding the Wood for Your Shelf
Before you start assembling your wall shelf, it is crucial to properly prepare and sand the wood to achieve a smooth and polished finish. Here are the steps to follow:
- Inspect the wood: Check the wooden boards for any imperfections such as knots, cracks, or uneven surfaces. If necessary, make a note of these areas to address during the sanding process.
- Cut the wood to size: If you haven’t already done so, use a saw to cut the wooden boards to the desired dimensions for your shelf. Ensure that the cuts are clean and accurate.
- Sand rough edges and surfaces: Use sandpaper or a sanding block to gently sand the edges and surfaces of the wooden boards. Start with a coarse-grit sandpaper to remove any roughness or imperfections, then switch to a finer grit paper to achieve a smooth finish.
- Promote evenness: Pay special attention to any uneven areas or prominent knots on the wood. Sand them down until they are level with the rest of the surface to ensure a uniform appearance.
- Remove dust: After sanding, thoroughly clean the wooden boards to remove any sawdust or debris. This will prevent the dust from interfering with the finish or sticking to the paint or stain.
- Optional staining or painting: If desired, apply a wood stain or paint to the sanded boards. Follow the manufacturer’s instructions for proper application and allow sufficient drying time before proceeding to the assembly.
Properly preparing and sanding the wood for your wall shelf will not only enhance its appearance but also ensure longevity and durability. Take the time to complete this step carefully, and you will be rewarded with a beautifully finished shelf.
Cutting the Wood to Size for Your Shelf
Once you have measured and planned for your wall shelf, the next step is to cut the wooden boards to the appropriate size. Follow these guidelines to ensure accurate cuts:
- Gather your materials: Prepare the wooden boards that you have chosen for your shelf as well as the necessary cutting tools such as a handsaw, circular saw, or miter saw.
- Measure twice, cut once: Use a measuring tape or ruler to mark the exact dimensions on the wood according to your plan. Double-check your measurements to avoid any mistakes before making the cuts.
- Secure the wood: Use clamps or a workbench to firmly hold the plank in place while cutting. This will help prevent any slipping or movement that may affect the accuracy of your cuts.
- Use the appropriate cutting method: Depending on the tools you have and the complexity of your design, carefully cut the wood following your marked measurements. Take your time and make slow, steady cuts to ensure precision.
- Smooth the edges: After cutting, check for any rough or jagged edges. Use sandpaper or a sanding block to smooth out these edges, creating a clean and professional-looking finish.
- Double-check the fit: Assemble the cut pieces together to ensure they fit snugly. Make any necessary adjustments or additional cuts if needed to achieve the desired fit.
Remember, accuracy is key when cutting the wood for your shelf. Taking your time and carefully measuring and cutting will result in well-fitting pieces that will contribute to the overall stability and aesthetic appeal of your wall shelf.
Assembling the Shelf Brackets and Supports
Once you have prepared the wooden boards for your wall shelf, it’s time to assemble the shelf brackets and supports. Proper installation of these components is crucial for the stability and functionality of your shelf. Here is a step-by-step guide to help you:
- Identify the bracket placement: Based on your design and measurements, mark the desired location of the shelf brackets on the wall. Ensure they are level and evenly spaced.
- Attach the brackets to the wall: Using a power drill or screwdriver, secure the brackets to the wall, ensuring they are securely fastened. If possible, mount the brackets into wall studs for added support.
- Pre-drill the shelf boards: Before attaching the shelf boards to the brackets, pre-drill pilot holes on the underside of the boards. This will prevent the wood from splitting when inserting the screws.
- Align and attach the shelf boards: Carefully align the pre-drilled holes on the shelf boards with the brackets. Insert screws through the holes and tighten them to secure the boards to the brackets. Ensure the boards are level and properly supported.
- Check for stability: Once the shelf boards are attached, gently test the stability of the shelf by applying slight pressure. Ensure that it is secure and can safely hold the intended weight.
- Make necessary adjustments: If any adjustments are needed, such as leveling the shelf or tightening the screws, do so to ensure a sturdy and functional final product.
Proper assembly of the shelf brackets and supports is essential to create a strong and reliable wall shelf. Take your time during this step and double-check the alignment and stability to ensure a successful installation that will withstand the test of time.
Attaching the Shelf to the Wall
After assembling the shelf brackets and supports for your wall shelf, it’s time to attach the shelf to the wall. Proper installation ensures stability and safety, allowing you to confidently display your items. Here’s a step-by-step guide to help you:
- Identify the desired height: Determine the height at which you want your shelf to be installed. Use a measuring tape or level to mark this position on the wall.
- Mark the bracket positions: Position the shelf brackets against the wall, aligning them with the marked height. Use a pencil to trace the screw holes or mark the spots where the brackets will be attached.
- Pre-drill the holes: Use a power drill and an appropriately sized drill bit to pre-drill holes in the marked spots on the wall. Make sure the holes are deep enough to accommodate the screws.
- Attach the brackets to the wall: Use a screwdriver or power drill to secure the brackets to the wall, using the pre-drilled holes as a guide. Ensure that the brackets are tightly and securely fastened.
- Place the shelf on the brackets: Carefully position the shelf on top of the installed brackets, ensuring it sits securely and evenly. Depending on the type of bracket and shelf design, you may need to insert screws through the bottom of the shelf to secure it to the brackets.
- Check for stability: Apply gentle pressure to the shelf to ensure it is stable and properly supported. Make any necessary adjustments to ensure the shelf is level and securely attached to the wall.
- Double-check the alignment: Step back and visually inspect the shelf to ensure it is level and aligned with neighboring surfaces. Make any minor adjustments as needed.
Properly attaching the shelf to the wall is crucial for a secure and functional installation. Take your time during this step to ensure the shelf is properly aligned, stable, and safely attached to the wall.
Adding Finishing Touches to Your Wall Shelf
Now that you have successfully assembled and installed your wall shelf, it’s time to add some finishing touches to enhance its appearance and functionality. Consider the following steps to give your shelf that final polished look:
- Sanding and smoothing: If there are any rough edges or imperfections on the wooden boards, use sandpaper or a sanding block to smooth them out. This will create a clean and professional finish.
- Stain or paint: Depending on your personal preference, you can choose to stain or paint the wood to match your room’s décor or add a creative touch. Apply the chosen finish according to the manufacturer’s instructions and allow proper drying time.
- Protective coating: Apply a protective coating, such as clear varnish or polyurethane, to safeguard the shelf from scratches, stains, and moisture. This will prolong the life of the shelf and maintain its appearance over time.
- Accessorize: Consider adding decorative elements to your wall shelf to personalize it and make it visually appealing. This can include placing small potted plants, framed photos, or decorative items that reflect your style and enhance the overall aesthetic.
- Organize and style: Arrange your items on the shelf in an organized and visually pleasing manner. Group similar items together and play with different heights and textures to create an eye-catching display.
- Lighting: If desired, you can install LED strip lights or small LED spotlights underneath the shelf to highlight specific items or create ambiance. Ensure the lighting is discreet and complements the overall design.
By adding these finishing touches, your wall shelf will not only be functional but also a stylish addition to your space. Take the time to bring out the full potential of your shelf and enjoy the completed look that reflects your personal style and taste.
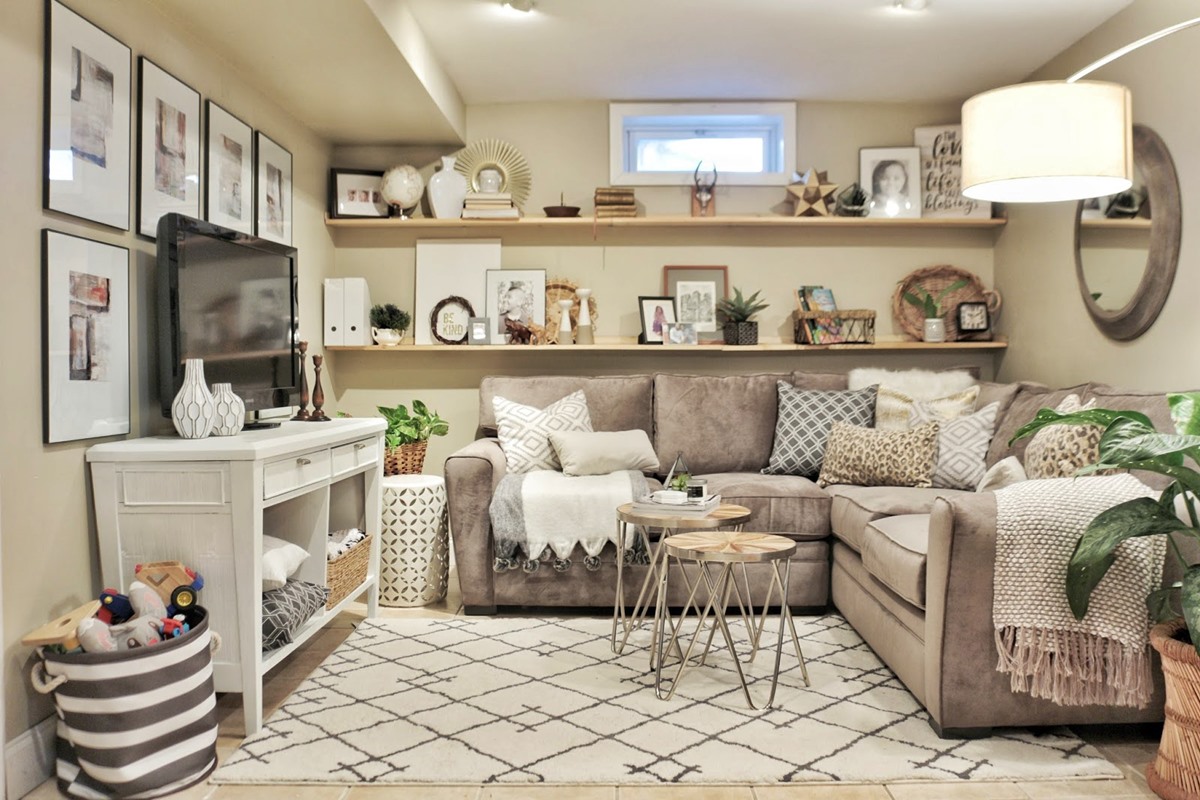
Decorating and Styling Your Wall Shelf
Now that your wall shelf is assembled and adorned with finishing touches, it’s time to unleash your creativity and bring it to life through decoration and styling. Here are some ideas to help you make your shelf a focal point in your space:
- Curate a theme: Choose a theme or color scheme that aligns with the room’s overall decor. This will create a harmonious and cohesive look. For example, if your room has a coastal theme, incorporate seashells, driftwood, and nautical accents.
- Display meaningful items: Showcase items that hold sentimental value or reflect your hobbies and interests. This could include family photos, travel souvenirs, or collectibles. Arranging them tastefully will add a personal touch to your shelf.
- Balance and symmetry: Achieve visual balance by placing items of varying heights and sizes on your shelf. Experiment with symmetrical arrangements, where items on one side mirror those on the other, for a polished and organized look.
- Mix textures: Introduce different textures to add depth and visual interest to your display. Combine smooth ceramics, plush textiles, and natural elements like plants or woven baskets. The interplay of textures will make your shelf visually engaging.
- Use decorative storage solutions: Incorporate stylish baskets, boxes, or bins to neatly store small items or keep things out of sight. Not only will they declutter your shelf, but they will also add a touch of sophistication to your overall design.
- Integrate greenery: Add a touch of nature by including live plants or realistic faux plants on your shelf. Greenery adds freshness and liveliness to your space, while also purifying the air and creating a calming atmosphere.
- Play with lighting: Consider using ambient or accent lighting to illuminate your shelf. Showcase individual items with small spotlights or add string lights for a cozy and magical vibe. Lighting can create drama and highlight key features of your display.
- Rotate and refresh: Keep your shelf visually appealing by changing the arrangement and swapping out items periodically. This allows you to showcase different pieces and keep your space dynamic and evolving.
Remember, decorating and styling your wall shelf is a creative expression of your personal taste and style. Have fun experimenting with different ideas and arrangements to create a truly unique and visually captivating display.