
Tools and Materials Needed
Before you begin building your mantel shelf, it’s important to gather all the necessary tools and materials. Here’s a list to get you started:
Tools:
- Measuring Tape
- Pencil
- Circular Saw or Miter Saw
- Sandpaper or Power Sander
- Drill
- Screwdriver
- Level
- Stud Finder
- Paintbrush or Roller
Materials:
- Wooden Plank for the Shelf
- Wooden Board for the Brace
- Metal Wall Mounting Bracket
- Screws
- Wood Putty
- Sanding Sealer
- Primer
- Paint or Wood Stain
- Decorative Items
Having the right tools and materials on hand will make the mantel shelf building process much smoother. Make sure to double-check your measurements and ensure that the wood you choose is sturdy and suitable for holding decorative items. Additionally, consider the style and design of your home when selecting the paint or wood stain for the mantel shelf. This will help create a cohesive look that complements your existing decor.
Now that you have gathered all the necessary tools and materials, you are ready to move on to the next step: measuring and planning the mantel shelf.
Step 1: Measure and Plan
The first step in building a mantel shelf is to accurately measure the dimensions of the area where the shelf will be installed. Use a measuring tape to determine the length, height, and depth of the space above the fireplace. Take into consideration any obstructions such as switches or outlets that may affect the placement of the shelf.
Once you have the measurements, it’s time to plan the design and style of your mantel shelf. Consider the overall aesthetic of your home and choose a design that complements it. Decide if you want a simple, minimalist shelf or one with more intricate details. Sketch out your design on paper, noting the dimensions and any decorative elements you plan to add.
During the planning phase, it’s essential to take into account the weight capacity of the shelf. If you plan on displaying heavy items, such as large vases or sculptures, you may need to reinforce the shelf with additional brackets or supports. Consult weight capacity guidelines and consider seeking professional advice if you are unsure.
Remember to check the local building codes and regulations regarding the installation of fireplace mantels. Some areas may have specific requirements that you need to adhere to for safety reasons.
Once you have finalized your measurements and design, you are ready to move on to the next step: gathering the necessary materials for building your mantel shelf.
Step 2: Gather Materials
With your measurements and design plan in hand, it’s time to gather all the materials needed to build your mantel shelf. Here’s a list of the essential materials you’ll need:
- Wooden Plank for the Shelf: Choose a sturdy and visually appealing wood that complements your home’s decor. Measure and cut it to match the desired length and depth of your mantel shelf.
- Wooden Board for the Brace: This will provide additional support for your mantel shelf. Measure and cut it to match the width and depth of your shelf.
- Metal Wall Mounting Bracket: Select a bracket that is strong enough to support the weight of your mantel shelf. It should be long enough to span at least two wall studs for secure installation.
- Screws: Choose long enough screws to securely attach the wall mounting bracket to the wall studs.
- Wood Putty: Use wood putty to fill any gaps or holes in the wood before sanding and finishing.
- Sanding Sealer: Apply sanding sealer to the wood to ensure a smooth and even finish.
- Primer: If you plan to paint your mantel shelf, primer will help the paint adhere better to the wood.
- Paint or Wood Stain: Select a paint color or wood stain that matches your desired style and complements your home’s decor.
- Decorative Items: Consider any decorative items you wish to display on your mantel shelf, such as framed photos, candles, or vases.
Take your time to choose high-quality materials that meet your aesthetic preferences and fit within your budget. This will ensure that your mantel shelf is not only visually pleasing but also durable and long-lasting. Once you have gathered all the necessary materials, it’s time to move on to the next step: cutting the shelf and brace.
Step 3: Cut the Shelf and Brace
Now that you have all the necessary materials, it’s time to start building your mantel shelf. The first task at hand is cutting the shelf and brace to the appropriate size. Follow these steps to ensure accurate and precise cuts:
- Measure and mark the desired length and depth of the shelf on the wooden plank. Use a measuring tape and pencil to make clear and precise markings.
- Using a circular saw or miter saw, carefully cut along the marked lines to create the shelf. Take your time and use safety precautions, such as wearing goggles and keeping your hands away from the blade.
- Repeat the process to cut the wooden board for the brace. Measure and mark the desired width and depth, then use the saw to make the cuts.
Once you have cut the shelf and brace, ensure that they fit properly in the designated space above the fireplace. Make any necessary adjustments to the size or shape to achieve the desired fit.
It’s important to note that if you are not comfortable or experienced with using power tools, it is advisable to seek assistance from a professional carpenter or handyman.
After cutting the shelf and brace to size, smooth any rough edges or surfaces using sandpaper or a power sander. This will ensure a clean and finished look for your mantel shelf. Proceed to the next step: sanding and finishing the wood.
Step 4: Sand and Finish the Wood
To give your mantel shelf a polished and professional appearance, it is essential to sand and finish the wood properly. Follow these steps to achieve a smooth and refined surface:
- Start by using coarse-grit sandpaper to remove any rough spots, imperfections, or splinters from the wood. Sand along the grain of the wood for best results. Pay extra attention to the edges and corners of the shelf and brace.
- After removing the initial roughness, switch to a finer grit sandpaper to further smoothen the surface. This will help remove any remaining roughness and produce a more refined finish.
- Use a sanding block or power sander to ensure an even and consistent sanding across the entire surface of the wood. Be careful not to apply too much pressure, as it may damage the wood.
- Once the wood is smooth to the touch, wipe away any dust or debris using a clean cloth or tack cloth.
- Apply a sanding sealer to the wood to enhance its durability and provide a smooth base for the final finish. Follow the manufacturer’s instructions for application and drying time.
- If you plan to paint the mantel shelf, apply a primer to the wood after the sanding sealer has dried. This will help the paint adhere better and prevent any discoloration.
- If you prefer the natural look of the wood, you can choose to apply a wood stain instead. Select a stain that matches your desired color and follow the instructions for application and drying time.
- Allow the sealer, primer, or stain to dry completely according to the manufacturer’s instructions. This may take a few hours or overnight, depending on the product.
Remember to work in a well-ventilated area and wear protective gear, such as gloves and a mask, when sanding and applying sealers, primers, or stains.
Now that the wood has been sanded and finished, it’s time to move on to the next step: installing the wall mounting bracket.
Step 5: Install the Wall Mounting Bracket
With your mantel shelf sanded and finished, it’s time to install the wall mounting bracket. This bracket will provide the necessary support for your shelf and ensure it is securely attached to the wall. Follow these steps for proper installation:
- Using a stud finder, locate the wall studs behind the area where the mantel shelf will be installed. Mark the positions of the studs using a pencil.
- Hold the wall mounting bracket against the wall, aligning it with the marked stud positions. Ensure that the bracket is level using a spirit level.
- Using a drill, create pilot holes through the bracket holes and into the wall studs. Make sure the drill bit is slightly smaller in diameter than the screws you will be using.
- Insert screws into the pilot holes and tighten them securely using a screwdriver or drill. Ensure that the bracket is firmly attached to the wall and does not wobble.
- Double-check the levelness of the bracket and make any necessary adjustments. A properly installed and level bracket is essential for a stable mantel shelf.
It is crucial to secure the bracket to the wall studs for maximum stability and weight-bearing capacity. If the location of the stud does not align with your desired bracket position, consider using wall anchors for added support.
Take your time during this step to ensure the bracket is securely attached and level. A sturdy wall mounting bracket will provide a solid foundation for your mantel shelf.
Now that the wall mounting bracket is installed, you are ready to move on to the next step: attaching the shelf and brace.
Step 6: Attach the Shelf and Brace
With the wall mounting bracket securely installed, it’s time to attach the shelf and brace to complete the construction of your mantel shelf. Follow these steps for proper attachment:
- Place the wooden brace against the wall and align it with the wall mounting bracket. Ensure that the brace is level and centered.
- Using a drill, create pilot holes through the brace and into the wall mounting bracket. Make sure the drill bit is smaller in diameter than the screws you will be using.
- Insert screws into the pilot holes and tighten them securely using a screwdriver or drill. Ensure that the brace is firmly attached to the bracket and the wall.
- Position the wooden shelf on top of the brace, aligning it with the desired placement. Ensure that the shelf is centered and level.
- From underneath the shelf, drill pilot holes through the bottom of the shelf and into the wooden brace.
- Insert screws into the pilot holes and tighten them securely, attaching the shelf to the brace.
- Ensure that the shelf is level and properly aligned with the brace. Make any necessary adjustments before tightening the screws completely.
Take your time during this step to ensure that the shelf and brace are securely attached. A properly installed mantel shelf will provide a stable and safe surface for your decorative items.
It’s important to use the appropriate length screws to secure the shelf and brace together. Be mindful not to overtighten the screws, as it may cause the wood to split or crack.
Now that the shelf and brace are attached, you’re almost done building your mantel shelf. The next step is crucial for ensuring its stability: securing the mantel shelf to the wall.
Step 7: Secure the Mantel Shelf
To ensure the stability and safety of your mantel shelf, it’s important to secure it to the wall. Follow these steps to properly secure your mantel shelf:
- Use a level to ensure that the mantel shelf is positioned straight and level on the wall.
- From underneath the shelf, mark the location where it meets the wall.
- Remove the shelf and apply a generous amount of construction adhesive or strong wood glue to the backside of the shelf, focusing on the area that will contact the wall.
- Position the shelf back onto the wall, aligning it with the marked location.
- Press the shelf firmly against the wall to ensure a strong bond with the adhesive.
- Allow the adhesive to dry and cure according to the manufacturer’s instructions. This may take several hours or overnight.
- For added security, you can also use L-brackets or angle brackets to further secure the mantel shelf to the wall. Install these brackets underneath the shelf and attach them to the wall using screws.
Securing the mantel shelf to the wall is important to prevent any accidental tipping or movement. The adhesive, along with the optional brackets, will provide extra reinforcement and stability.
It’s essential to follow the manufacturer’s instructions for the adhesive and allow it sufficient time to dry and cure. This will ensure a strong and durable bond between the shelf and the wall.
Now that your mantel shelf is securely attached to the wall, it’s time for the final step: decorating and styling your mantel shelf to complement your home’s decor.
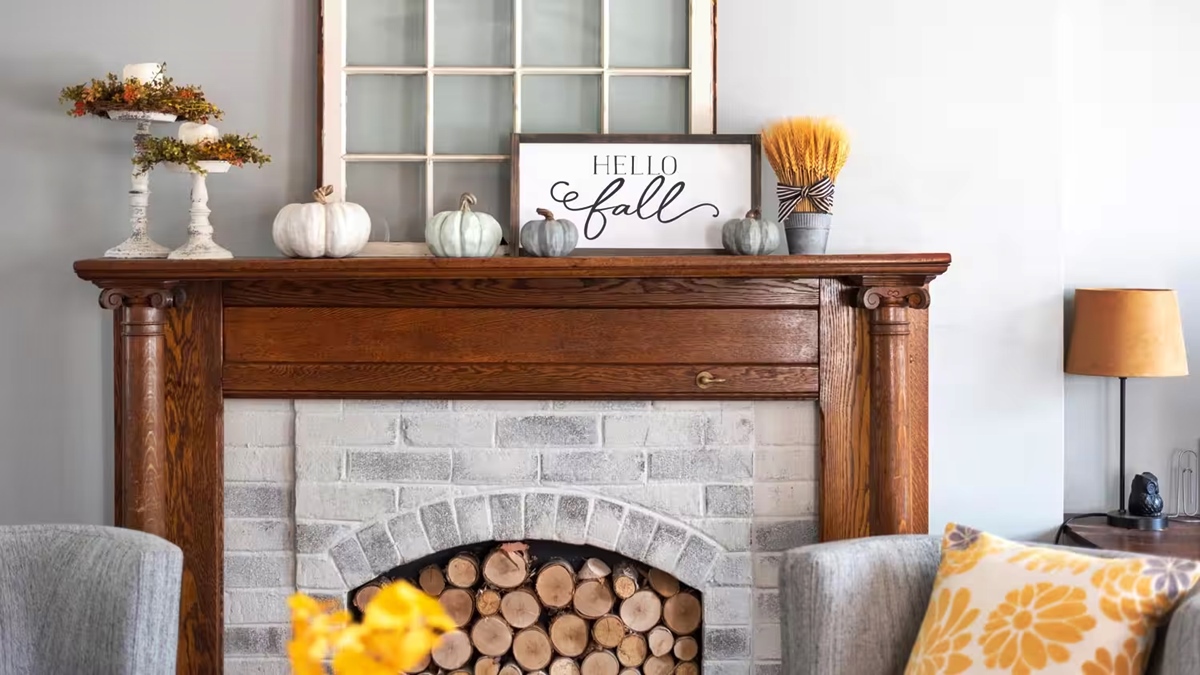
Step 8: Decorate and Style the Mantel Shelf
Now that your mantel shelf is fully constructed and securely installed, it’s time to add the finishing touches by decorating and styling it. Follow these steps to bring your mantel shelf to life:
- Clean the surface of the mantel shelf and remove any dust or debris.
- Consider the overall aesthetic of your space and select decorative items that complement your home’s decor. This could include framed photos, artwork, candles, vases, or sculptures.
- Arrange the decorative items on the mantel shelf, ensuring a balanced and visually pleasing display. Experiment with different heights, textures, and colors to create an engaging arrangement.
- Take into account the size of the mantel shelf and the scale of the items you are displaying. Avoid overcrowding the space and leave room for breathing space between items.
- Consider incorporating elements that reflect your personal style and interests. This could be incorporating plants, books, or unique collectibles that tell a story.
- Experiment with different layouts and arrangements until you find the one that suits your taste and enhances the overall ambiance of the room.
- Add final touches such as accent lighting or small accessories to further elevate the visual impact of your mantel shelf.
Remember, the style and arrangement of your mantel shelf can evolve over time. Don’t be afraid to switch out or rearrange decorative items to keep the display fresh and inspiring.
Take a step back and assess your newly styled mantel shelf from different angles to ensure it looks visually appealing from all viewpoints. Adjust any items or elements as necessary.
With the final step complete, you’ve successfully built and styled your mantel shelf. Sit back, relax, and enjoy the warmth and beauty it brings to your living space.