
Materials and Tools Needed
Before you begin building a wood shelf, it’s essential to ensure you have all the necessary materials and tools at hand. Here is a list of items you will need:
- Wooden boards (Choose a type of wood that suits your preference and the overall aesthetic of the room)
- Saw (Circular saw or miter saw)
- Sandpaper (Different grits to achieve a smooth finish)
- Measuring tape
- Pencil or marker
- Drill
- Screws
- Screwdriver (or a screwdriver bit for your drill)
- Level (to ensure your shelf is straight when mounted)
- Wall anchors (if your shelf requires additional support)
- Paint or stain (optional, for finishing the wood)
- Paintbrush or foam roller (if you choose to paint or stain the wood)
Having these materials and tools ready before you start will ensure a smoother and more efficient building process. Additionally, it’s helpful to have a clean and spacious work area, protective gear such as safety goggles and gloves, and a workbench or sawhorse to secure the wood while cutting.
Remember to double-check your measurements, gather all the necessary supplies, and have a clear vision of how you want your wood shelf to look. Proper preparation will contribute to a successful and satisfying DIY project.
Step 1: Measuring and Planning
The first step in building a wood shelf is to measure your space and plan accordingly. Whether you’re creating a small floating shelf or a larger wall-mounted unit, accurate measurements are crucial for a perfect fit. Follow these steps to ensure proper measuring and planning:
- Measure the space: Use a measuring tape to determine the height, width, and depth of the area where you intend to install your wood shelf. Take precise measurements and write them down for reference.
- Consider weight-bearing capacity: Depending on your intended use, you may need to take into account the weight the shelf will be supporting. If you plan on displaying heavy items, such as books or collectibles, it’s essential to ensure that the wood and support brackets can handle the load.
- Create a design: Sketch or visualize the design and structure of your wood shelf. Decide on the style, number of shelves, and any additional features you want to incorporate. This step will help you determine the amount of wood and other materials needed.
- Make a materials list: Based on your design and measurements, create a list of the materials required for your wood shelf project. This includes the type and quantity of wood, screws, brackets, and any other necessary hardware.
- Plan for mounting: If you’re planning to mount the shelf on a wall, locate the wall studs or use wall anchors for added stability. Take note of any electrical outlets or obstructions that may affect the placement of your shelf.
By taking the time to measure accurately and plan your wood shelf project beforehand, you’ll minimize the chances of errors and ensure a smooth building process. Planning also allows you to anticipate any challenges or modifications needed along the way. Once you have completed this step, you’ll be ready to move on to cutting the wood and bringing your shelf to life.
Step 2: Cutting the Wood
Once you have your measurements and design finalized, it’s time to move on to cutting the wood for your shelf. Follow these steps to ensure accurate and precise cuts:
- Prepare your workspace: Clear a flat surface and set up your saw securely. Ensure there is enough space to maneuver the wood and follow all safety precautions.
- Measure and mark the wood: Refer to your measurements and use a pencil or marker to mark the length and width of each piece of wood. Double-check your measurements for accuracy.
- Set up your saw: If you have a circular saw or miter saw, adjust the blade to the appropriate angle and depth based on your design. Follow the manufacturer’s instructions for proper setup.
- Cut the wood: Place the marked piece of wood flat on the surface and align it with the blade. Hold the wood securely and make a steady, smooth cut along the marked line. Take caution to keep your fingers away from the blade at all times.
- Repeat for all pieces: Repeat the cutting process for each piece of wood according to your design and measurements. Take your time and maintain precision with each cut.
It’s important to practice caution and use appropriate safety measures when cutting wood. Always wear protective eyewear and gloves to prevent any potential injuries. If you’re not confident in your cutting skills, seek the help of a professional or someone experienced in woodworking.
Remember, the accurate and precise cutting of the wood will determine the quality and fit of your wood shelf. Double-check your cuts and ensure they align correctly before moving on to the next step of sanding the wood.
Step 3: Sanding the Wood
After cutting the wood for your shelf, the next step is to sand the surfaces to achieve a smooth and polished finish. Sanding not only improves the appearance of the wood but also prepares it for painting or staining. Here’s how to properly sand the wood:
- Select the right sandpaper: Choose sandpaper with a grit suitable for your project. For initial sanding, start with a coarse grit (around 80 or 100) to remove any rough edges or imperfections. Then, move to a finer grit (around 180 or 220) for a smoother finish.
- Sand in the direction of the grain: Always sand in the direction of the wood grain to avoid leaving visible scratches. Apply light pressure and use long, even strokes for consistent results.
- Smooth the edges: Pay extra attention to the edges of the wood, as they may be rough due to cutting. Use a sanding block or folded sandpaper to smooth out any sharp corners or splinters.
- Remove dust: Regularly wipe away the dust with a clean cloth or vacuum as you sand. This will help you see any remaining imperfections and prevent them from becoming trapped under a new layer of finish.
- Check the smoothness: After sanding with the coarse grit, switch to the finer grit sandpaper and repeat the process. Check the wood’s smoothness by running your hand over it. If it feels smooth to the touch, you can move on to the next step.
Sanding the wood provides a clean and even surface for painting, staining, or varnishing. It also ensures a professional-looking end result. Take your time and be thorough in your sanding process, paying attention to every surface and edge of the wood. Once you’re satisfied with the smoothness of the wood, you’re ready to proceed with assembling the shelf.
Step 4: Assembling the Shelf
With the wood cut and sanded, it’s time to assemble your wood shelf. Follow these steps to properly put all the pieces together:
- Organize the components: Lay out all the wood pieces and hardware, such as screws and brackets, in an organized manner. This will make it easier to identify and access the necessary parts.
- Begin with the base: If your shelf has multiple tiers or shelves, start by attaching the base piece to the vertical supports. Use a drill and screws to securely fasten the pieces together.
- Attach the shelves: Place each shelf onto the support brackets or the previously assembled structure. Ensure they are level and evenly spaced before screwing them in place.
- Reinforce the connections: Use additional screws or brackets to reinforce the connections between the shelves and support pieces. This will provide extra stability and prevent the shelves from sagging over time.
- Double-check the alignment: Use a level to ensure your shelves are straight and aligned. Make any necessary adjustments before tightening all the screws.
- Secure any additional features: If your design includes hooks, cubbies, or other accessories, securely attach them at this stage. Take your time to ensure they are level and aligned with the shelves.
During the assembly process, it’s important to follow the manufacturer’s instructions and guidelines specific to the hardware you’re using. Pay attention to details and ensure each piece fits snugly together for a sturdy and durable wood shelf.
Once your wood shelf is fully assembled, take a moment to inspect the connections and ensure everything is secure. This will guarantee a long-lasting shelf that can withstand the weight of the items you plan to place on it. Now that your wood shelf is assembled, it’s time to reinforce it for maximum durability.
Step 5: Reinforcing the Shelf
To ensure the longevity and stability of your wood shelf, it’s important to reinforce it properly. Reinforcing the shelf will provide added strength and support, especially if you plan on placing heavy items on it. Follow these steps to reinforce your wood shelf:
- Add corner braces: Install corner braces at the joints of your wood shelf to reinforce the connections. Use a drill and screws to securely attach the braces to both the shelf and the support pieces.
- Apply wood glue: Apply a thin layer of wood glue at the joints before inserting screws or brackets. This will add an extra layer of stability to the shelf.
- Install a back panel: Adding a back panel to your wood shelf can provide increased rigidity and prevent items from falling behind the shelf. Attach the back panel securely with screws.
- Use L-brackets: Install L-brackets underneath each shelf for added support. Position the L-brackets in a way that they are not visible when the shelf is mounted.
- Check for wobbling: After reinforcing the shelf, check for any wobbling or instability. Make adjustments as needed, tightening screws or adding additional reinforcement.
- Consider wall anchors: If your wood shelf is heavy or will be holding significant weight, you might want to consider installing wall anchors. These anchors provide extra stability by securing the shelf to the wall.
Proper reinforcement is crucial for a sturdy and reliable wood shelf. Take your time to ensure that all connections are secure and that the shelf is level and stable. This step will guarantee a functional and durable shelf that can withstand regular use.
Once you have reinforced your wood shelf, it’s time to move on to mounting it on the wall. Follow the next step to ensure a secure and proper installation.
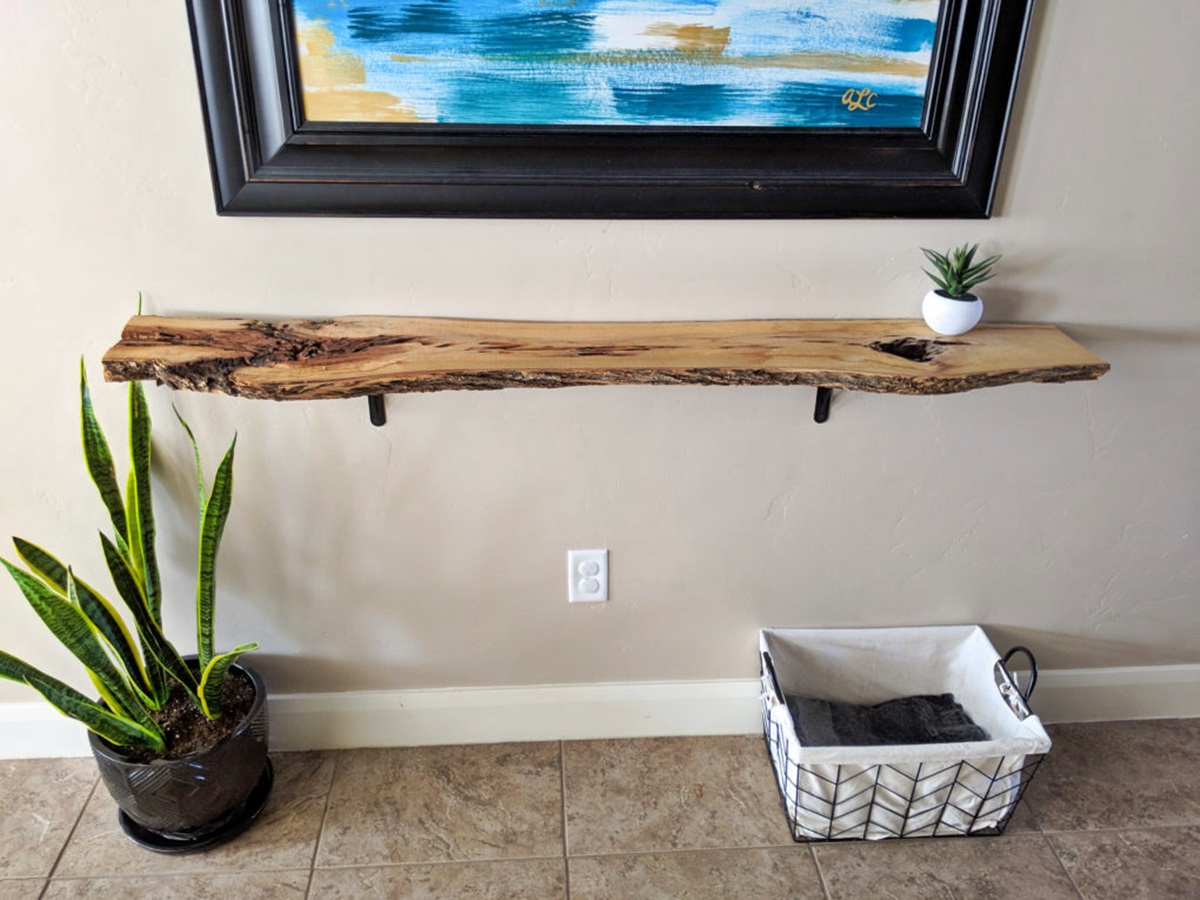
Step 6: Mounting the Shelf on the Wall
Mounting your wood shelf on the wall is the next step in completing your project. Follow these steps to ensure a secure and proper installation:
- Locate the wall studs: Use a stud finder to locate the wall studs where you will be mounting the shelf. This will provide the most secure support.
- Mark the mounting points: Using a pencil, mark the spots on the wall where the screws or brackets will go. Ensure the markings are level and in line with the desired placement of the shelf.
- Pre-drill pilot holes: To prevent splitting, pre-drill pilot holes for the screws or anchors using a drill bit that is slightly smaller than the diameter of the screws or anchors you are using.
- Install brackets or fasteners: Install the brackets or fasteners onto the wall using the pre-drilled holes as guides. Use a screwdriver or drill to secure them firmly into place.
- Place the wood shelf on the brackets: Carefully lift the wood shelf and position it onto the installed brackets or fasteners. Ensure the shelf is level on the wall and that it fits securely onto the supports.
- Secure the shelf to the brackets: Use screws or other fasteners provided with the brackets to secure the wood shelf to the brackets. Ensure that each support point is securely fastened.
- Double-check for stability: Give the wood shelf a gentle shake to make sure it is properly secured to the wall. If there is any wobbling or instability, recheck the installation and tighten any loose screws.
Mounting the wood shelf on the wall is a critical step in completing your project. Take your time and ensure that the shelf is level and securely attached to the wall. This will provide a safe and functional space to display your items or store your belongings.
With the shelf successfully mounted, you’re nearly finished! The final step is to add any finishing touches to enhance the appearance of your wood shelf.
Step 7: Final Touches
Completing your wood shelf project involves adding the final touches to enhance its overall appearance and functionality. Here are a few optional steps you can take to give your shelf that finishing touch:
- Paint or stain: Consider applying a coat of paint or stain to the wood shelf to match your desired aesthetic. This can help protect the wood and give it a polished look. Use a paintbrush or foam roller to apply an even layer and follow the manufacturer’s instructions for drying and curing times.
- Seal the wood: If you prefer a natural finish, you can apply a wood sealer or varnish to protect the wood and enhance its natural beauty. Follow the instructions on the product for best results.
- Add decorative elements: Personalize your wood shelf by adding decorative elements such as trim, molding, or decorative brackets. This can elevate the overall appearance and make the shelf uniquely yours.
- Organize and style: Once your wood shelf is installed and finished, arrange your items or decor pieces on the shelf in an organized and visually pleasing manner. Consider using storage baskets or decorative containers to keep items neat and tidy.
- Regular maintenance: To keep your wood shelf looking its best, regularly dust and clean it with a soft cloth or microfiber duster. Avoid using abrasive cleaners or harsh chemicals that can damage the wood finish.
Adding these final touches can transform a simple wood shelf into a beautiful and functional piece of furniture. These steps allow you to customize the shelf to match your style and ensure its longevity.
Take pride in your completed wood shelf project and enjoy the functional storage or display space it provides. Whether it’s showcasing your favorite books or displaying cherished decor, your wood shelf is now ready to enhance the aesthetics and organization of your living space.