
The Purpose of UV Lamps in Nail Care
UV lamps play a crucial role in nail care, especially in the realm of gel polish, builder gel, and acrylic nails. These lamps emit ultraviolet (UV) light which acts as a catalyst to cure or harden the nail products, creating long-lasting and durable results.
Gel polish, which is known for its shiny and chip-free finish, requires UV light to cure. The UV lamp activates photoinitiators present in the gel polish, causing a chemical reaction that transforms the liquid gel into a solid. This process ensures that the polish adheres securely to the nails and provides a glossy and resilient coating.
Similarly, builder gel, a versatile nail enhancement product used to create extensions or add strength to natural nails, relies on UV light for proper curing. The UV lamp aids in cross-linking the molecules in the builder gel, transforming it from a thick gel-like consistency to a solid, hardened state. This ensures the durability and longevity of the nails.
Acrylic nails, another popular choice for nail enhancements, also benefit from the use of UV lamps. While the curing of acrylic nails does not solely depend on UV light, it aids in the drying process. The UV light helps to speed up the polymerization of the acrylic monomer, allowing the nail to harden and solidify more quickly.
In addition to their role in curing nail products, UV lamps also serve as a practical time-saving tool. The use of UV lamps drastically reduces the drying time of gel polish, builder gel, and acrylic nails compared to air-drying methods. This efficiency makes UV lamps an essential component in professional nail salons, enabling nail technicians to serve more clients effectively.
It is worth noting that UV lamps come in various types, including traditional UV lamps and LED lamps. While both produce UV light, LED lamps typically have a faster curing time and are considered more energy-efficient. However, it is important to ensure that the specific nail products you are using are compatible with the UV lamp you have.
In summary, UV lamps fulfill a vital role in nail care by providing the necessary light energy to cure and harden gel polish, builder gel, and acrylic nails. With their ability to speed up the drying process, UV lamps have revolutionized the nail industry and allowed for longer-lasting, salon-quality results.
Understanding Different Types of UV Lamps
When it comes to UV lamps used in nail care, there are two primary types: traditional UV lamps and LED lamps. While both serve the same purpose of curing nail products, there are notable differences between the two.
Traditional UV lamps have been widely used in the nail industry for many years. These lamps emit a broad spectrum of UV light, typically in the range of 320-400 nanometers. The curing process with traditional UV lamps often takes longer, usually around 2-3 minutes per coat of product. They are also known to generate heat during use, which can sometimes cause discomfort for clients with sensitive skin.
On the other hand, LED lamps have gained popularity in recent years due to their faster curing times and energy efficiency. LED lamps emit a narrow spectrum of UV light, primarily in the range of 365-405 nanometers. This focused light source allows for quicker and more efficient curing, with curing times typically ranging from 30-60 seconds per coat. LED lamps also generate less heat, minimizing the risk of discomfort during the nail curing process.
While LED lamps offer faster curing times, it’s important to note that not all nail products are compatible with LED technology. Some gel polishes, builder gels, and acrylic nail systems may require traditional UV lamps for proper curing. Therefore, it’s essential to refer to the manufacturer’s instructions for specific product recommendations regarding UV lamps.
Additionally, LED lamps are generally more expensive compared to traditional UV lamps. However, the energy efficiency and longer lifespan of LED bulbs often make them a cost-effective choice in the long run.
When selecting a UV lamp for your nail salon or personal use, it’s crucial to consider the size and capacity of the lamp. Ensure that the lamp is large enough to accommodate a full hand or foot comfortably. Some UV lamps come with removable bases or trays, allowing for convenient pedicures as well.
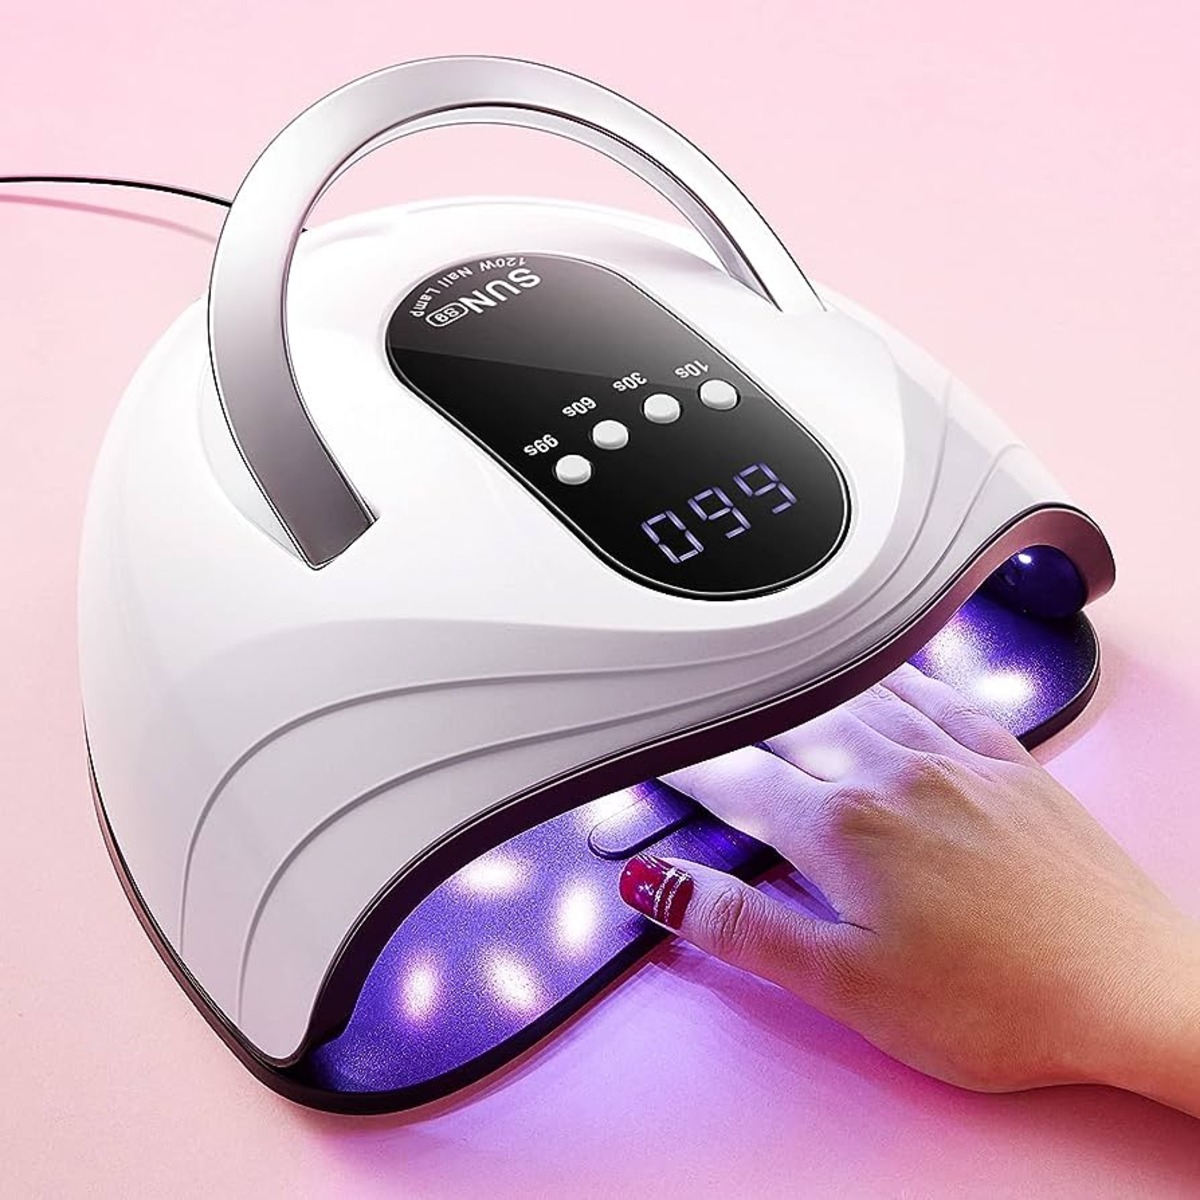
Moreover, look for UV lamps that offer multiple timer settings. Different nail products may require varying curing times, and having control over the curing duration can ensure optimal results. Most UV lamps come with preset timer options, typically ranging from 30 seconds to 3 minutes.
In summary, understanding the differences between traditional UV lamps and LED lamps is essential when it comes to nail care. Consider factors such as curing time, compatibility with nail products, heat generation, and cost before making a decision. Selecting the right UV lamp for your needs will allow you to achieve professional-quality nails with efficiency and ease.
Factors Influencing the Nail Curing Time
The curing time of nail products under UV lamps can vary based on several factors. Understanding these factors is crucial for achieving optimal results and ensuring that your nails are properly cured.
1. Type and Brand of Nail Product: Different gel polishes, builder gels, and acrylic nail systems have specific curing requirements. Some products may require longer curing times, while others may cure more quickly. Always refer to the manufacturer’s instructions for the recommended curing time for the specific product you are using.
2. Thickness of the Nail Product: The thickness of the applied nail product plays a significant role in the curing time. Thicker layers of gel polish, builder gel, or acrylic may require longer curing times to ensure complete drying and hardening.
3. UV Lamp Power and Wavelength: The power output and wavelength of the UV lamp can influence the curing time. Higher-powered UV lamps may offer faster curing compared to lower-powered lamps. Additionally, the wavelength of the UV light emitted by the lamp can affect the curing efficiency for different nail products. LED lamps, for example, emit a narrower range of UV light and may have different curing times compared to traditional UV lamps.
4. Distance Between the UV Lamp and Nails: The distance between the UV lamp and your nails can impact the curing time. It is important to place your hands or feet in the correct position within the lamp to ensure proper exposure to UV light. Be mindful of any obstructions that may block the UV light from reaching your nails, as this can lead to incomplete curing.
5. Ambient Temperature: The surrounding temperature can influence the curing process. Warmer temperatures generally accelerate the curing time, while cooler temperatures may slow it down. Ensure that the room temperature is within the optimal range recommended by the nail product manufacturer for efficient and consistent curing.
6. Nail Technician Experience: The experience and technique of the nail technician can also affect the curing time. A skilled technician will have a better understanding of the nail product and UV lamp combination, allowing them to optimize the curing process for the best outcome.
It is crucial to note that while shorter curing times may seem desirable for saving time, it is essential to follow the recommended curing time for your specific nail product. Insufficient curing can lead to tacky or weak nails that may not last as long as intended.
By considering these factors and following the manufacturer’s instructions, you can ensure that your nail products are properly cured, resulting in beautiful and long-lasting manicures or enhancements.
How to Determine the Perfect Curing Time for Your Nails
Finding the perfect curing time for your nails can be a trial-and-error process. However, with some tips and experimentation, you can determine the ideal curing time that ensures your nail products are fully cured and long-lasting. Here are some steps to help you:
1. Refer to the Manufacturer’s Instructions: Always start by checking the recommended curing time provided by the manufacturer of the specific nail product you are using. This serves as a baseline for understanding the general curing requirements.
2. Conduct Patch Tests: If you are using a new nail product or trying out a different brand, conduct patch tests to determine the appropriate curing time. Apply a small amount of the product to a single nail and cure it under the UV lamp for the recommended time. Assess the results to determine if the nail product is fully cured and if the curing time needs adjustment.
3. Observe the Consistency of the Nail Product: Pay attention to the texture and consistency of the nail product during the curing process. Ideally, the product should go from a liquid or gel-like state to a solid and hardened state. If the product remains tacky or not fully cured, increase the curing time in small increments until the desired result is achieved.
4. Consider the Thickness of the Layers: Thicker layers of gel polish, builder gel, or acrylic will require longer curing times. If you are applying multiple layers of the nail product, adjust the curing time accordingly, ensuring that each layer is properly cured before adding the next.
5. Monitor the Nail’s Finish: After the recommended curing time, inspect the nails for any signs of uncured or sticky residue. If the nail surface feels tacky or there are any blemishes, continue to cure the nails under the UV lamp for additional time until the desired finish is achieved.
6. Take Note of the Curing Time: Keep a record of the curing time that works best for each specific nail product and nail thickness. This will serve as a reference for future applications, saving time and ensuring consistent results.
Remember that different UV lamps may have varying curing times, even for the same nail product. If you change your UV lamp, it’s necessary to test the curing time again to find the most effective duration.
By following these steps and considering the thickness of the layers, nail product consistency, and observing the results, you can determine the perfect curing time for your nails. This will help you achieve beautifully polished and long-lasting manicures or enhancements.
Ideal Curing Times for Gel Polish
Gel polish has gained popularity for its long-lasting and chip-free finish. To achieve the best results with gel polish, it is essential to understand and follow the ideal curing times. The curing time for gel polish can vary depending on the brand, thickness of the layers, and the type of UV lamp used. Here are some general guidelines to help you determine the ideal curing time for gel polish:
1. Follow the Manufacturer’s Instructions: Always refer to the manufacturer’s instructions provided with the gel polish. Each brand may have specific recommendations for the curing time. These guidelines are based on the formulation of the gel polish and can help ensure optimal results.
2. Consider the Gel Polish Formula: Gel polishes come in different formulations, such as traditional UV-cured and LED-cured. The curing time may vary depending on the formula. Traditional UV-cured gel polishes typically require curing times of 2-3 minutes per coat, while LED-cured gel polishes may have shorter curing times ranging from 30-60 seconds per coat.
3. Adjust for Thickness: The thickness of the gel polish layer will affect the curing time. Thin layers of gel polish will cure more quickly than thick layers. If applying multiple coats, ensure that each layer is adequately cured before applying the next. Increase the curing time if necessary, to ensure that each layer is fully dry and hardened.
4. LED Lamp vs. UV Lamp: LED lamps generally have faster curing times compared to traditional UV lamps. If you are using an LED lamp, follow the recommended curing time provided by the manufacturer of the gel polish. For UV lamps, increase the curing time accordingly.
5. Test and Observe: Conduct a patch test or trial application to determine the ideal curing time for a specific gel polish brand or color. Apply a small amount of gel polish to a single nail and cure it under the UV lamp for the recommended time. Observe the results and adjust the curing time as needed to achieve the desired finish.
It is important to note that over-curing gel polish can lead to unnecessary drying and potential damage to the nails. Under-curing can result in a soft or tacky finish that may not last as long.
Finding the ideal curing time for gel polish may require some experimentation and adjustment. By considering the gel polish formula, thickness, and type of UV lamp, you can determine the ideal curing time that results in durable, glossy, and chip-resistant manicures.
Recommended Curing Times for Builder Gel
Builder gel is a versatile nail enhancement product used to add strength, structure, and length to natural nails. To ensure proper curing and achieve strong and durable results with builder gel, it is important to follow the recommended curing times. The curing time for builder gel can vary depending on factors such as the brand, type of UV lamp, and thickness of the layers. Here are some general guidelines to help you determine the recommended curing time for builder gel:
1. Follow the Manufacturer’s Instructions: Start by referring to the manufacturer’s instructions provided with the specific builder gel product. Each brand may have different formulations and curing requirements. Follow the recommended curing time suggested by the manufacturer for the best results.
2. Consider the Builder Gel Type: Builder gels come in different viscosities, from thick to self-leveling. The curing time can vary based on the type of gel you are using. Thicker builder gels generally require longer curing times, as they need more UV light exposure to cure and harden.
3. Adjust for Thickness: The thickness of the builder gel layer will affect the curing time. If applying multiple layers of builder gel or creating extensions, ensure that each layer is properly cured before adding the next. Increase the curing time if necessary to ensure thorough drying and hardening of each layer.
4. UV Lamp vs. LED Lamp: Different UV lamps and LED lamps may have varying curing times for builder gel. Follow the recommended curing time provided by the manufacturer for your specific UV lamp or LED lamp. LED lamps tend to have faster curing times compared to traditional UV lamps, but it is important to ensure compatibility with the builder gel brand you are using.
5. Test and Observe: Conduct a patch test or trial application to determine the ideal curing time for a specific builder gel product. Apply a small amount of builder gel to a single nail and cure it under the UV lamp for the recommended time. Assess the results and adjust the curing time as needed to achieve the desired hardness and strength.
It is crucial to ensure thorough curing of builder gel to prevent lifting or peeling of the enhancement. Under-curing can lead to weak and brittle nails, while over-curing can cause unnecessary drying and potential damage.
Finding the recommended curing time for builder gel may require some experimentation and adjustment based on the gel type, lamp used, and layer thickness. By following the manufacturer’s instructions and considering these factors, you can achieve beautiful and long-lasting enhancements with builder gel.
Curing Time Guidelines for Acrylic Nails
Acrylic nails are a popular choice for nail enhancements due to their durability and versatility. The proper curing of acrylic nails is crucial to ensure a strong and long-lasting result. The curing time for acrylic nails can vary based on factors such as the brand of acrylic system, the type of UV lamp used, and the thickness of the layers. Here are some general guidelines to help you determine the recommended curing time for acrylic nails:
1. Follow the Manufacturer’s Instructions: Start by referring to the manufacturer’s instructions provided with the specific acrylic system you are using. Each brand may have different formulations and curing requirements. Follow the recommended curing time suggested by the manufacturer for the best results.
2. Consider the Acrylic System: Acrylic systems come in different formulations, including traditional monomer and polymer systems, as well as newer odorless acrylic systems. The curing time can vary depending on the type of acrylic system you are using. Traditional monomer and polymer systems generally require longer curing times compared to odorless systems.
3. Adjust for Layer Thickness: The thickness of each layer of acrylic will affect the curing time. Ensure that each layer of acrylic is properly cured before applying the next. Thicker layers may require longer curing times to ensure complete drying and hardening.
4. UV Lamp vs. Air Exposure: Unlike gel polish and builder gel, acrylic nails do not solely rely on UV light for curing. UV lamps are often used to help speed up the drying process, but air exposure is also necessary. Follow the recommended curing time for the specific acrylic system you are using and allow sufficient air-drying time between each layer.
5. Test and Observe: Conduct a patch test or trial application to determine the ideal curing time for a specific acrylic system. Apply a small amount of acrylic to a single nail and allow it to cure using the recommended method (UV lamp or air drying). Assess the results and adjust the curing time as needed to ensure complete drying and hardness.
Proper curing of acrylic nails is essential to avoid premature lifting or cracking. Under-curing may result in weak and brittle nails, while over-curing can cause unnecessary drying and potential damage to the acrylic.
Keep in mind that the curing time for acrylic nails may also depend on the room temperature and humidity. Cooler temperatures and higher humidity levels may require longer curing times, while warmer temperatures and lower humidity may speed up the curing process.
By following the manufacturer’s instructions, considering the acrylic system used, adjusting for layer thickness, and conducting test applications, you can determine the optimal curing time for acrylic nails. This will help you achieve strong, beautiful, and long-lasting acrylic enhancements.
Tips to Enhance Nail Curing Under UV Lamps
Proper nail curing is essential to achieve long-lasting and durable results. Here are some tips to enhance the nail curing process when using UV lamps:
1. Prepare Your Nails Properly: Before applying any nail products, ensure that your nails are clean, dry, and free from any oils or residue. Use a gentle nail cleanser or rubbing alcohol to cleanse the nail surface and remove any excess oils that can hinder proper curing.
2. Apply Thin and Even Layers: When applying gel polish, builder gel, or acrylic, it’s important to apply thin and even layers. Thick layers may take longer to cure properly and can lead to uneven drying or incomplete hardening. Aim for thin, even coats to ensure even exposure to the UV light.
3. Avoid Overlapping of Layers: When applying multiple layers of nail products, avoid overlapping the layers excessively. Overlapping can create areas that are thicker and harder to cure thoroughly. It’s best to apply each layer precisely and cleanly, allowing for proper drying and hardening.
4. Follow Recommended Curing Times: Always refer to the manufacturer’s instructions for the recommended curing times for the specific nail products you are using. Over- or under-curing can affect the longevity and quality of the nail enhancements. Set a timer or use a UV lamp with built-in timers to ensure consistent and accurate curing times.
5. Position Your Nails Properly: Place your hands or feet in the correct position within the UV lamp for optimal exposure to UV light. Ensure that all nails are evenly exposed to the UV light source. Avoid any obstructions that may block the light from reaching your nails, such as overlapping fingers or toes.
6. Consider Using Nail Gel Base and Top Coat: Applying a nail gel base coat and top coat can enhance the curing process and ensure better adhesion and durability. These products are specifically formulated to promote proper curing and provide a protective layer for your nail enhancements.
7. Invest in a Quality UV Lamp: Using a good-quality UV lamp is essential for efficient and effective nail curing. Ensure that your UV lamp is properly maintained, with functional bulbs that emit the correct UV light wavelength. Replace the bulbs as recommended by the manufacturer to ensure consistent curing results.
8. Follow Room Temperature Recommendations: Room temperature can affect the curing process. Follow the recommended temperature range provided by the nail product manufacturer. Avoid exposing the UV lamp to extreme heat or cold, as this can affect its performance and the curing process.
By following these tips, you can enhance the nail curing process when using UV lamps, ensuring that your nail enhancements are properly cured and long-lasting. Take the time to prepare your nails, apply thin and even layers, and follow the manufacturer’s instructions for optimal results.
The Risks of Overexposure to UV Light
While UV lamps are essential tools for nail curing, it is essential to be aware of the risks associated with overexposure to UV light. Prolonged and excessive exposure to UV light can have negative effects on both your skin and overall health. Here are some potential risks to consider:
1. Skin Damage: UV light can damage the skin, leading to the premature aging of the skin, such as wrinkles, fine lines, and age spots. It can also increase the risk of skin cancer, including both melanoma and non-melanoma skin cancers.
2. Eye Damage: Extended exposure to UV light without proper eye protection can lead to eye damage. UV rays can cause cataracts, which can result in blurred vision and even blindness over time. Protect your eyes by wearing UV-blocking goggles or closing your eyes during the nail curing process.
3. Sensitivity and Irritation: UV light can cause skin sensitivity and irritation, especially for individuals with sensitive skin. It may lead to redness, rash, itching, dryness, and discomfort. If you notice any signs of skin irritation, discontinue UV exposure and consult a dermatologist if necessary.
4. Allergic Reactions: Some individuals may experience allergic reactions to UV light, resulting in a condition known as photosensitivity. This can lead to symptoms such as rashes, hives, and extreme sensitivity to sunlight or other light sources.
5. Nail Damage: Overexposure to UV light can potentially weaken and damage the natural nails. Prolonged exposure to UV light can cause dryness, brittleness, and thinning of the nails, making them more prone to breakage and damage.
To minimize the risks of overexposure to UV light, it is important to take necessary precautions:
– Limit your exposure to UV light by following the recommended curing times for nail products.
– Consider using broad-spectrum UV-blocking sunscreen on your hands and fingers before placing them under the UV lamp.
– Consider using UV-protective gloves or fingerless gloves that keep your nails exposed while protecting the surrounding skin.
– Wear UV-blocking goggles or keep your eyes closed during the nail curing process to protect your eyes from UV light.
Furthermore, it’s important to strike a balance between having well-maintained nails and protecting your skin and health. If you have any concerns about UV light exposure, consult with a dermatologist or healthcare professional.
By being aware of the risks and taking the necessary precautions, you can enjoy the benefits of UV lamps while minimizing the potential harm to your skin, eyes, and overall well-being.
FAQ: Common Questions About Nail Curing Times Answered
1. How long should I cure my gel polish?
The recommended curing time for gel polish can vary depending on the brand and type of UV lamp used. Generally, it ranges from 30-60 seconds per coat for LED-cured gel polishes and 2-3 minutes per coat for traditional UV-cured gel polishes. Always refer to the manufacturer’s instructions for the specific gel polish you are using.
2. How long does builder gel take to cure?
The curing time for builder gel can range from 2-4 minutes per coat, depending on the brand and type of UV lamp used. Thicker layers of builder gel may require longer curing times to ensure complete drying and hardening.
3. What is the curing time for acrylic nails?
Unlike gel polish and builder gel, acrylic nails do not solely rely on UV light for curing. UV lamps are often used to help speed up the drying process, but air exposure is also necessary. Allow sufficient air-drying time between each layer of acrylic, following the manufacturer’s instructions for the specific acrylic system. Each layer may take around 2-5 minutes to dry depending on the thickness and formulation.
4. Can I cure my nails for a longer time to ensure better results?
While it may be tempting to cure your nails for longer to ensure better results, it’s important to follow the recommended curing times provided by the manufacturer. Over-curing can lead to unnecessary drying and potential damage to the nails, while under-curing may result in a soft or tacky finish. Stick to the recommended curing times for optimal and long-lasting manicures or enhancements.
5. Can I use any UV lamp for curing my nails?
It’s important to ensure that the UV lamp you are using is compatible with the specific nail products you are using. Different UV lamps emit different wavelengths of UV light, which can affect the curing process. LED lamps generally have faster curing times compared to traditional UV lamps, but not all nail products are compatible with LED technology. Always refer to the manufacturer’s instructions for the UV lamp compatibility with the nail products.
Remember, these are general guidelines, and it’s important to refer to the specific instructions provided by the manufacturer of the nail products you are using. If you have any further questions or concerns about nail curing times, consult with a professional nail technician or reach out to the manufacturer for clarification.