
Choosing the Right UV Nail Lamp
When it comes to achieving salon-quality gel nails at home, a reliable UV nail lamp is an essential tool in your arsenal. However, with so many options available on the market, choosing the right UV nail lamp can be a daunting task. To help you make an informed decision, we’ve compiled a list of factors to consider when selecting a UV nail lamp.
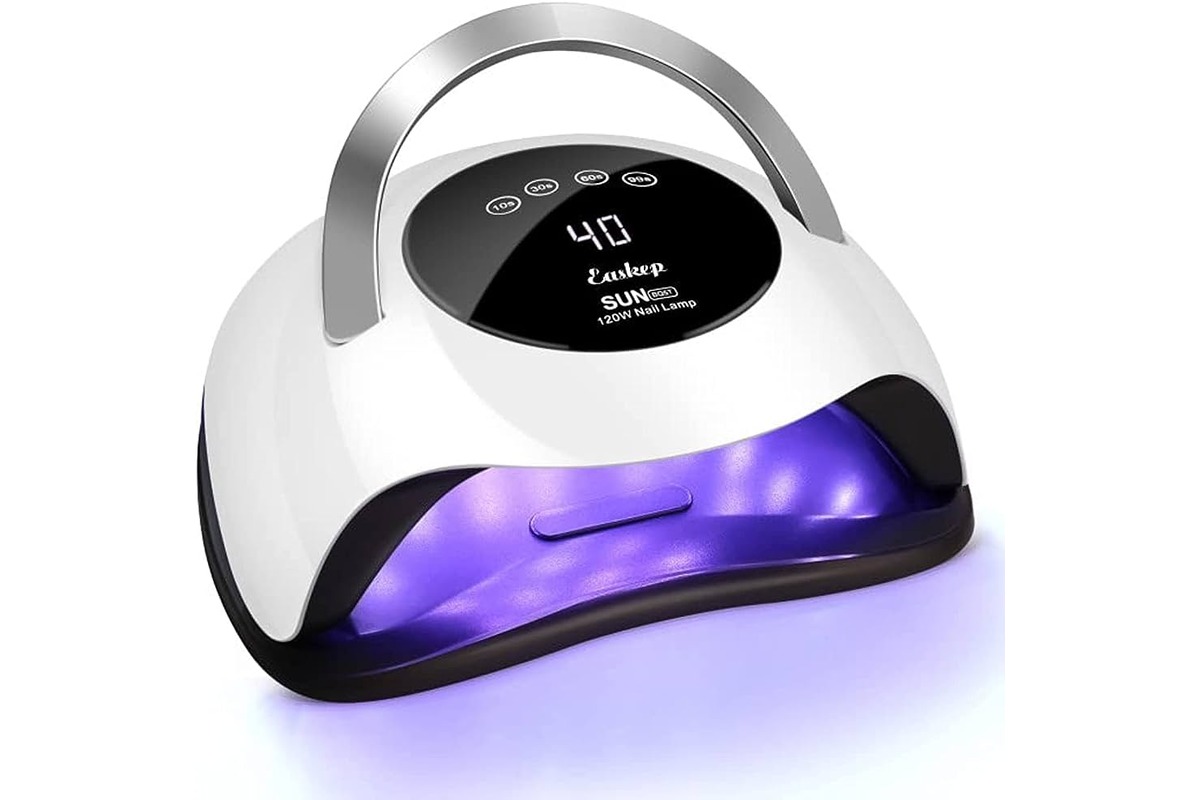
First and foremost, consider the wattage of the UV lamp. Higher wattage lamps tend to cure gel polish more efficiently, resulting in a quicker and more thorough curing process. Look for lamps with wattage ranging from 36 to 54 watts, as these are ideal for professional and salon-quality results.
Next, take a close look at the size and design of the lamp. Opt for a lamp that can easily accommodate the size of your hands comfortably. It should have enough space for you to place all of your fingers inside without feeling cramped. Additionally, check if the lamp has a removable bottom tray or if it can be turned to accommodate pedicures as well.
Another critical factor to consider is the lamp’s timer options. Look for a UV nail lamp that offers multiple timer settings, typically ranging from 30 seconds to 120 seconds. This variety allows you to customize the curing time according to the type of gel polish you are using and the desired level of curing.
Additionally, consider the type and arrangement of the UV bulbs in the lamp. Opt for UV nail lamps that use high-quality UV bulbs to ensure even and reliable curing. It’s also worth looking for lamps that have bulbs strategically arranged to avoid any shadowing or uneven curing.
Don’t forget to check if the UV nail lamp comes with any additional features that enhance user experience and convenience. Some lamps offer built-in motion sensors that automatically turn on when you insert your hand and turn off when you remove it. Others have LCD displays that show the remaining curing time, making it easier to keep track of the process.
Last but not least, read customer reviews and ratings to get insights into the performance, durability, and overall user satisfaction of the UV nail lamp you’re considering. This information can help you make an informed decision and ensure you invest in a lamp that will last and provide stellar results.
By considering these factors and doing your research, you can confidently choose the right UV nail lamp that suits your needs and helps you achieve flawless gel nails from the comfort of your own home.
Preparing Your Nails
Before you begin applying gel polish and using the UV nail lamp, it’s crucial to prepare your nails properly. Proper nail preparation ensures that the gel polish adheres well and results in a long-lasting and flawless manicure. Here are the steps to follow for nail preparation:
1. Start by removing any existing nail polish or residue from your nails using a gentle nail polish remover. Make sure to thoroughly clean all nails, including the edges and cuticles, to create a clean canvas for the gel polish.
2. Next, use a cuticle pusher or an orangewood stick to gently push back the cuticles. This step helps to create a smooth and clean nail bed for the gel polish application. Be careful not to cut or damage the cuticles, as they serve as a protective barrier for your nails.
3. Once the cuticles are pushed back, lightly buff the surface of your nails using a nail buffer or a gentle nail file. This step helps to remove any shine or residue on the nail surface, allowing the gel polish to adhere better. Avoid excessive buffing, as it can weaken the nails.
4. After buffing, thoroughly wash your hands with mild soap and warm water to remove any residual dust or debris from the nail surface. This ensures that the gel polish adheres properly and minimizes the risk of lifting or peeling.
5. To ensure maximum adhesion, apply a thin layer of nail dehydrator or primer to the nail surface. This product helps to remove any remaining oils or moisture on the nails, creating a dry and clean surface for the gel polish to adhere to.
6. Finally, apply a thin base coat to your nails and allow it to dry completely before proceeding with the gel polish application. The base coat not only provides a smooth surface for the gel polish but also helps to protect your natural nails from staining.
By following these steps, you’ll ensure that your nails are properly prepped and ready for the gel polish application. This will result in a longer-lasting and salon-quality manicure when paired with the use of a UV nail lamp.
Applying Gel Polish
Now that you’ve prepped your nails, it’s time to apply the gel polish. Follow these steps to achieve a professional-looking manicure:
1. Start by applying a thin layer of gel polish to the center of your nail, starting from the cuticle and working your way towards the nail tip. Use gentle and even strokes to ensure a smooth and even application. Avoid getting any gel polish on the skin or cuticles.
2. Once you’ve applied the first coat, place your hand under the UV nail lamp for the recommended curing time. The curing time will depend on the specific gel polish brand and the wattage of your UV lamp, so refer to the instructions provided with your gel polish for guidance.
3. After the first coat has cured, apply a second thin layer of gel polish using the same technique. This second coat helps to build up the color intensity and coverage. Again, be careful to avoid the skin and cuticles and cure the second coat under the UV lamp.
4. If desired, you can apply additional coats of gel polish for more depth and opacity. Just remember to cure each layer under the UV lamp before applying the next one. Keep in mind that thicker application may require longer curing times.
5. Once you’re satisfied with the color and coverage, apply a final top coat to seal and protect the gel polish. The top coat adds shine and prolongs the wear of your manicure. Cure the top coat under the UV lamp according to the recommended curing time.
6. After curing the top coat, use a lint-free nail wipe soaked in rubbing alcohol or gel cleanser to gently remove any residue or sticky layer left on the nails. This step gives your manicure a smooth and glossy finish.
By following these steps, you can achieve a flawless and long-lasting gel manicure at home. Remember to take your time and be precise in your application to ensure salon-quality results. With the help of a UV nail lamp, your gel polish will cure quickly and efficiently, leaving you with beautiful and durable nails.
Setting Up the UV Nail Lamp
Setting up your UV nail lamp properly is essential for achieving the best results and ensuring a safe and effective curing process. Here’s a step-by-step guide to help you set up your UV nail lamp:
1. Begin by finding a flat and stable surface to place your UV nail lamp. Make sure the area is well-lit and near an electrical outlet.
2. Carefully unpack the UV nail lamp and remove any protective packaging. Inspect the lamp for any visible damage or defects before proceeding.
3. Before plugging in the lamp, double-check the manufacturer’s instructions or the lamp’s user manual for any specific setup requirements or precautions. This will ensure that you set up the lamp correctly and follow any safety guidelines.
4. Once you’ve familiarized yourself with the instructions, plug the UV nail lamp into the electrical outlet. Ensure that the cord is placed in a position where it won’t interfere with your workspace or risk being damaged.
5. Some UV nail lamps may have a power switch located on the front or side of the device. Switch on the lamp to activate the curing function.
6. Many UV nail lamps have a built-in timer feature. Set the desired curing time according to the instructions provided with your gel polish. This is typically done by pressing a button or adjusting a dial on the lamp.
7. If your lamp has removable or interchangeable bulbs, ensure that they are securely installed in the lamp. Follow the manufacturer’s instructions for proper bulb replacement or maintenance.
8. Take a moment to adjust the position of the lamps or the tray if necessary. Some lamps have movable lamps or adjustable trays to accommodate different hand sizes or pedicures.
9. Before placing your hands in the lamp, make sure you have properly applied the gel polish on your nails. Follow the application steps provided by the gel polish manufacturer for the best results.
10. Once everything is set up, place your hands inside the UV nail lamp, positioning your nails directly under the lamps. Ensure that all nails are exposed and evenly spaced.
By following these steps and setting up your UV nail lamp correctly, you’ll be ready to cure your gel polish effectively and enjoy a long-lasting and beautiful manicure. Remember to always read and follow the specific instructions provided by the lamp manufacturer and gel polish brand for optimal results.
Placing Your Hands in the Lamp
Once you have set up your UV nail lamp and applied the gel polish, it’s time to place your hands in the lamp for the curing process. Proper placement of your hands ensures even and effective curing of the gel polish. Follow these steps to correctly position your hands in the UV nail lamp:
1. Ensure that your fingernails are properly coated with the gel polish. Double-check for any excess polish on the skin or cuticles, as this can lead to smudging or lifting during the curing process.
2. Gently place your hands inside the UV nail lamp, positioning your fingertips directly under the lamps. Rest your hands comfortably on the bottom tray or the lamp’s surface. Avoid any unnecessary pressure or movement during the curing process.
3. Make sure that all of your nails are exposed to the UV light by spreading your fingers slightly apart. This will ensure that each nail receives an even amount of UV exposure for proper curing.
4. If your UV nail lamp has side lamps or additional bulbs, check if they are positioned to cover the sides of your nails. Adjust the position of the lamps or the tray if necessary to ensure full coverage.
5. It’s crucial to keep your hands steady and avoid any sudden movements while they are inside the lamp. This helps to prevent smudging or accidentally touching the wet gel polish, which can compromise the curing process and result in an uneven finish.
6. Follow the recommended curing time provided by the gel polish manufacturer. Most gel polishes require a curing time of around 30 seconds to 2 minutes, depending on the brand and the UV nail lamp’s wattage.
7. While waiting for the gel polish to cure, take this time to relax and enjoy the process. You can read a book, listen to music, or simply take a moment to pamper yourself.
8. After the recommended curing time has elapsed, carefully remove your hands from the UV nail lamp. Be cautious not to touch any surfaces that may still have uncured gel polish or sticky residue.
By properly placing your hands in the UV nail lamp and following the recommended curing time, you can achieve optimal results and ensure a flawless and long-lasting gel manicure. Always refer to the instructions provided by the gel polish manufacturer and your UV nail lamp for the best outcome.
Setting the Timer
Setting the timer on your UV nail lamp is a crucial step in achieving a successful gel manicure. The timer ensures that your gel polish cures for the appropriate amount of time, resulting in long-lasting and beautifully finished nails. Follow these steps to effectively set the timer on your UV nail lamp:
1. Read the manufacturer’s instructions or user manual to familiarize yourself with the specific timer functions and controls on your UV nail lamp. Different models may have varying methods for setting the timer.
2. Some UV nail lamps have preset timer options, typically ranging from 30 seconds to 120 seconds. These preset timer buttons allow you to select the desired curing time with just a press of a button. Determine the appropriate time for your gel polish based on the recommendations provided by the gel polish manufacturer.
3. If your UV nail lamp doesn’t have preset timers, it may have a timer button or dial that allows you to adjust the curing time manually. In this case, refer to the gel polish instructions for the recommended curing time, and set the timer accordingly.
4. For gel polishes that require different curing times for each coat, such as a base coat, color coat, and top coat, make sure to adjust the timer accordingly. Set the timer for the recommended time for each coat, ensuring that you’re giving each layer enough time to cure properly.
5. If using gel polishes from different brands, be aware that they may have varying curing times. Follow the specific recommendations of each brand when setting the timer, as different gel polish formulas may require different lengths of time to cure effectively.
6. It’s important to note that over-curing can potentially cause your gel polish to become brittle or develop a yellowish tint. Under-curing, on the other hand, may result in poor adhesion and a shorter lifespan for your manicure. Hence, it is crucial to adhere to the recommended curing time to achieve optimal results.
7. Remember to start the timer as soon as you place your hands in the UV nail lamp. Use a stopwatch or a timer on your phone to keep track of the curing time if your UV nail lamp does not have a built-in timer.
By properly setting the timer on your UV nail lamp, you ensure that your gel polish cures for the appropriate duration, resulting in a beautiful and durable manicure. Follow the gel polish manufacturer’s recommendations and refer to the instructions provided with your UV nail lamp for the best results.
Curing the Gel Polish
Curing the gel polish is a crucial step in achieving a long-lasting and professional-looking manicure. The UV nail lamp plays a vital role in this process by utilizing UV light to harden and set the gel polish. Follow these steps to effectively cure your gel polish:
1. After applying the gel polish to your nails, carefully place your hands inside the UV nail lamp, positioning your nails directly under the UV lamps. Ensure that all of your nails are exposed to the UV light for even curing.
2. Refer to the gel polish manufacturer’s instructions for the recommended curing time. The curing time can vary depending on the brand and the type of gel polish being used. Most gel polishes require a curing time of around 30 seconds to 2 minutes.
3. Start the curing process by activating the UV nail lamp. Some lamps have a built-in timer that will automatically shut off once the designated time has elapsed.
4. Keep your hands steady and avoid any unnecessary movement during the curing process. This helps to prevent smudging or disturbing the gel polish, ensuring a smooth and even finish.
5. Remember to cure each layer of gel polish separately if you are applying multiple coats. This includes the base coat, color coats, and top coat. Refer to the gel polish instructions for the recommended curing time for each layer.
6. As the UV light activates the chemicals in the gel polish, you may notice a slight warming sensation. This is normal and indicates that the curing process is taking place.
7. If you’re using an LED nail lamp instead of a UV nail lamp, the curing time may differ. LED lamps generally require shorter curing times, typically ranging from 10 to 60 seconds. Be sure to adjust the curing time accordingly based on the specific instructions provided by the gel polish manufacturer.
8. Once the designated curing time has elapsed, carefully remove your hands from the UV nail lamp. Avoid touching any surfaces or objects that may cause damage to your freshly cured gel polish.
Properly curing the gel polish is crucial for achieving a durable and long-lasting manicure. By following these steps and adhering to the recommended curing time, you can ensure that your gel polish is hardened, resulting in beautiful and salon-quality nails.
Finishing Touches
After curing the gel polish, it’s time to add the finishing touches to your manicure. These final steps will help to enhance the appearance and longevity of your gel nails. Follow these tips for the perfect finishing touches:
1. Use a lint-free nail wipe soaked in rubbing alcohol or gel cleanser to gently remove any residue or sticky layer left on the nails. This step is crucial for achieving a smooth and glossy finish and removing any tackiness on the surface of the gel polish.
2. Once the nails are clean and dry, apply a nourishing cuticle oil or a moisturizing hand cream to hydrate and nourish your nails and cuticles. Massage the oil or cream into the skin surrounding the nails to promote healthy nail growth and maintain the overall health of your hands and nails.
3. If desired, you can add some extra flair to your manicure by applying nail art or decorative accents. Get creative with nail stickers, glitter, or hand-painted designs that reflect your personal style.
4. Apply a UV top coat to seal and protect your gel polish. The top coat adds an extra layer of shine and durability, making your manicure last even longer. Be sure to cure the top coat under the UV nail lamp according to the recommended curing time.
5. Stay mindful of your daily activities and take necessary precautions to protect your manicure. Avoid using your nails as tools and wear gloves when engaging in household chores or activities that may potentially damage your nails.
6. Regularly touch up your manicure by applying a fresh layer of top coat every few days to maintain the shine and prolong the lifespan of your gel nails. This can help prevent chipping and extend the time between full manicure sessions.
7. When it’s time to remove the gel polish, be gentle and careful to avoid damaging your natural nails. Follow the proper gel polish removal process, which typically involves soaking your nails in acetone or using gel polish remover wraps specifically designed for easy and safe removal.
By paying attention to these finishing touches, you can ensure that your gel manicure looks fantastic and lasts for an extended period. Taking these extra steps will help maintain the health of your nails and keep them looking their best between manicure sessions.
Maintaining Your UV Nail Lamp
To ensure that your UV nail lamp continues to provide effective and reliable curing for your gel manicures, it’s essential to properly maintain and care for the device. Follow these tips for maintaining your UV nail lamp:
1. Regularly clean the UV lamps and the interior of the lamp to remove any residue or gel polish buildup. Use a soft, lint-free cloth or a cotton pad soaked in rubbing alcohol to gently wipe the lamps and interior surfaces. This helps to maintain the effectiveness of the UV light and prevents any obstruction that could affect the curing process.
2. Check the condition of the lamps regularly and replace them as needed. UV bulbs have a limited lifespan and can become less effective over time. Refer to the manufacturer’s instructions or the lamp’s user manual for guidance on how often to replace the lamps.
3. If the UV nail lamp has a removable bottom tray or other removable parts, clean them regularly to prevent any buildup of gel polish residue. Remove the parts and wash them with mild soap and water, then allow them to thoroughly dry before reattaching them to the lamp.
4. Avoid placing the UV nail lamp near water or other liquids to prevent any damage to the electrical components. Keep the lamp in a dry and well-ventilated area to ensure its longevity and safe operation.
5. If you notice any unusual noises, odors, or malfunctions while using the UV nail lamp, discontinue use immediately and consult the manufacturer or a professional for assistance. Do not attempt to fix any electrical or operational issues on your own.
6. Store the UV nail lamp in a safe and secure location when not in use. Keep it away from direct sunlight, extreme temperatures, and any potential hazards that could cause damage.
7. Read and follow the manufacturer’s instructions for any additional maintenance or care recommendations specific to your UV nail lamp. Different models may have varying requirements, so it’s important to adhere to the guidelines provided by the manufacturer.
By following these maintenance tips, you can ensure that your UV nail lamp remains in good working condition, prolonging its lifespan and ensuring optimal curing performance. Regular care and cleaning will help you continue achieving salon-quality gel manicures in the comfort of your own home.
Troubleshooting Tips
While using a UV nail lamp for gel manicures is generally straightforward, you may encounter some issues along the way. Here are some troubleshooting tips to help you overcome common problems:
1. If your gel polish is not curing properly, check the wattage of your UV nail lamp. Some gel polishes require higher wattage lamps for effective curing. Consider investing in a higher wattage lamp or consult the gel polish manufacturer for lamp compatibility recommendations.
2. If the gel polish is tacky or sticky after curing, it may not have been cured for the recommended time or the curing time may need to be adjusted. Ensure that you’re following the gel polish manufacturer’s instructions for the appropriate curing time and adjust as needed for your specific lamp and gel polish combination.
3. In case of poor adhesion, ensure that you’re properly prepping your nails. Thoroughly cleanse and dehydrate the nail surface before applying the gel polish. Additionally, avoid applying thick layers of gel polish, as this can lead to poor adhesion and lifting.
4. If you notice any uneven or patchy curing, double-check that the bulbs in your UV nail lamp are positioned correctly and not blocked by any obstructions. Adjust the position of the lamps or the tray to ensure even exposure to the UV light.
5. If you’re experiencing skin sensitivity or discomfort during the curing process, make sure to properly apply cuticle oil or petroleum jelly around the nail bed before curing. This creates a barrier that helps prevent any possible skin irritation caused by the UV light.
6. If your gel polish is cracking or peeling prematurely, check the curing time and ensure you’re curing each layer for the appropriate duration. Be mindful not to overly cure the gel polish, as this can lead to brittleness and decreased flexibility.
7. If the gel polish is lifting from the nail bed, review your application technique. Ensure that you’re properly prepping the nails, applying thin and even coats, and sealing the edges of each nail with the gel polish to promote longevity and prevent lifting.
8. If you’re experiencing any other issues or have specific questions about your UV nail lamp, consult the manufacturer’s instructions or reach out to customer support for guidance. They can provide further troubleshooting tips and address any concerns you may have.
By following these troubleshooting tips, you can overcome common issues that may arise during gel manicures. With a little troubleshooting and adjustment, you’ll be able to achieve beautiful and long-lasting gel nails with the help of your UV nail lamp.