
Option 1: USB Port
One of the most convenient and widely available options to charge your Fitbit watch without a charger is by using a USB port. Almost every computer, laptop, or even a lot of electronic devices like smart TVs and gaming consoles have USB ports that can be used for charging.
To charge your Fitbit watch using a USB port, follow these steps:
- Locate a USB port: Look for a USB port on your computer, laptop, or any other electronic device that you can use for charging.
- Plug in the charging cable:Insert one end of the charging cable into the USB port and the other end into your Fitbit watch. Make sure it is securely connected.
- Monitor the charging status: Your Fitbit watch will start charging as soon as it is connected. Check the battery icon on the display to see the charging status.
- Wait for the watch to fully charge: It may take some time for your Fitbit watch to charge completely, depending on the model and the current battery level.
- Disconnect and use: Once your Fitbit watch is fully charged, disconnect it from the USB port and start using it as usual.
Using a USB port to charge your Fitbit watch is a simple and accessible option. It is especially useful when you are near a computer or have access to an electronic device with a USB port. However, it may take longer to charge compared to using a dedicated charger.
Remember to use a reliable charging cable compatible with your Fitbit watch to ensure safe and efficient charging. Always check the manufacturer’s recommendations and guidelines for charging your specific Fitbit model without a charger.
Option 2: Wall Adapter
If you don’t have access to a charger specifically designed for your Fitbit watch, another viable option is to use a wall adapter. Many electronic devices, such as smartphones and tablets, come with a wall adapter that can be used for charging.
To charge your Fitbit watch using a wall adapter, follow these steps:
- Find a compatible wall adapter: Look for a wall adapter that has a USB port and compatible voltage output. Make sure that the wall adapter output matches your Fitbit watch’s charging requirements. It is recommended to use an adapter with the same or higher voltage output.
- Connect the charging cable: Insert one end of the Fitbit watch’s charging cable into the USB port of the wall adapter and the other end into your Fitbit watch, ensuring a secure connection.
- Plug into a power outlet: Insert the wall adapter into a nearby power outlet. Ensure that the connection is firm and the adapter is properly seated.
- Check the charging status: Once connected, your Fitbit watch should start charging. Observe the battery icon on the watch’s display to monitor the charging progress.
- Wait for complete charging: Depending on the battery level, it may take some time for your Fitbit watch to reach a full charge. Be patient and let it charge until the battery icon indicates a complete charge.
- Disconnect and use: Once fully charged, remove the charging cable from your Fitbit watch and unplug the wall adapter from the power outlet. Your watch is now ready to be used.
Using a wall adapter to charge your Fitbit watch is a convenient method, especially when you have access to a power outlet. However, it is important to ensure that the wall adapter you are using is compatible with the voltage output required by your Fitbit watch to avoid any potential damage and ensure safe charging.
Always refer to the manufacturer’s guidelines and specifications for your Fitbit watch to ascertain the appropriate charging requirements.
Option 3: Laptop or Computer
If you don’t have access to a charger or a wall adapter, another handy option to charge your Fitbit watch is by using a laptop or computer. Most laptops and computers have USB ports that can be used for charging various devices, including Fitbit watches.
To charge your Fitbit watch using a laptop or computer, follow these steps:
- Find an available USB port: Locate a USB port on your laptop or computer. It is usually located on the sides or the back of the device.
- Connect the charging cable:Insert one end of the charging cable into the USB port of the laptop or computer and the other end into your Fitbit watch. Ensure that the connection is secure.
- Monitor the charging status: Once connected, your Fitbit watch will start charging. Keep an eye on the battery icon on the display of your watch to track the charging progress.
- Allow time for full charging: Depending on the current battery level, your Fitbit watch may take some time to reach a complete charge. Be patient and let it charge until it is fully powered up.
- Disconnect and start using: Once your Fitbit watch is fully charged, disconnect it from the USB port of your laptop or computer. Your watch is now ready to be used.
Charging your Fitbit watch using a laptop or computer is a convenient option, especially when you are working or using your device near a computer. However, it’s worth mentioning that charging speed may vary compared to using a dedicated charger or a wall adapter, as the USB ports on computers and laptops typically deliver lower power output.
Always ensure that the USB port is functioning correctly and that the laptop or computer is connected to a power source when charging your Fitbit watch to ensure a stable charge. Additionally, use a high-quality charging cable compatible with your Fitbit watch to ensure optimal charging performance.
Option 4: Power Bank
If you find yourself without a traditional charger or access to a power outlet, a power bank can be a savior when it comes to charging your Fitbit watch on the go. A power bank is a portable and rechargeable battery pack that can provide instant power to your devices, including your Fitbit watch.
To charge your Fitbit watch using a power bank, follow these steps:
- Ensure that you have a fully charged power bank: Before you can charge your Fitbit watch, make sure that your power bank is fully charged. Connect it to a power source and allow it to charge until all the indicator lights show that it is at maximum capacity.
- Connect the charging cable: Plug one end of the charging cable into the USB output port of the power bank and the other end into your Fitbit watch. Ensure that the connection is secure.
- Turn on the power bank: Activate the power bank by pressing the power button. This will initiate the charging process and provide power to your Fitbit watch.
- Monitor the charging status: Keep track of the battery icon on your Fitbit watch to monitor the charging progress. The power bank will continue to deliver power until your watch reaches a full charge.
- Disconnect and resume your activities: Once your Fitbit watch is fully charged, disconnect the charging cable from the power bank. You can now resume using your watch as usual.
A power bank is an excellent option for charging your Fitbit watch while on the move or when you don’t have access to a traditional charger or power outlet. Ensure that your power bank has sufficient capacity to provide a full charge for your watch, as smaller capacity power banks may not be able to charge your device completely.
It’s essential to choose a power bank that is compatible with your Fitbit watch and possesses the necessary output capabilities to charge it efficiently. Also, keep in mind that the charging speed may vary depending on the power bank’s output and the capacity and power requirements of your Fitbit watch.
Option 5: Fitbit Charging Dock
If you own a Fitbit charging dock specifically designed for your Fitbit watch model, using it is one of the most convenient and efficient ways to charge your device. The Fitbit charging dock provides a dedicated and stable connection for charging, ensuring optimal charging performance.
To charge your Fitbit watch using a Fitbit charging dock, follow these steps:
- Connect the charging dock to a power source: Plug the charging dock into a power outlet using the included power adapter. Ensure that the dock is properly connected and powered.
- Place your Fitbit watch on the charging dock: Align the charging pins on the dock with the corresponding contacts on the back of your Fitbit watch. Gently place your watch on the dock, making sure it is securely seated.
- Monitor the charging status: The charging dock usually has LED indicators that show the charging status. Observe the lights to see if your Fitbit watch is charging.
- Wait for complete charging: Leave your Fitbit watch on the charging dock until it reaches a full charge. The dock is designed to provide a stable and reliable charge, allowing your watch to charge efficiently and safely.
- Remove the watch from the dock: Once your Fitbit watch is fully charged, remove it from the charging dock. You can now use your watch as normal.
The Fitbit charging dock offers a seamless and hassle-free charging experience. It eliminates the need for dealing with cables and provides a reliable connection for efficient charging.
It’s important to note that Fitbit charging docks may vary depending on the model of your Fitbit watch. Ensure that you have the correct charging dock compatible with your watch to ensure optimal charging performance. Refer to the manufacturer’s instructions and guidelines for proper usage and compatibility.
Option 6: Using a Phone Charger
If you don’t have access to a dedicated charger for your Fitbit watch, another convenient option is to use a phone charger. Most phone chargers utilize a USB connection and can be compatible with certain Fitbit watch models.
To charge your Fitbit watch using a phone charger, follow these steps:
- Check the compatibility: Ensure that your Fitbit watch and the phone charger are compatible. Some Fitbit models support charging with standard USB phone chargers, while others may require specific charging cables or adapters.
- Connect the charging cable: Plug one end of the charging cable into the USB port of the phone charger and the other end into your Fitbit watch. Make sure it is securely connected.
- Plug into a power outlet: Insert the phone charger into a nearby power outlet. Ensure that the connection is firm and the charger is properly seated.
- Monitor the charging status: Once connected, your Fitbit watch should start charging. Observe the battery icon on the display to monitor the charging progress.
- Wait for complete charging: Depending on the battery level, it may take some time for your Fitbit watch to reach a full charge. Be patient and let it charge until the battery icon indicates a complete charge.
- Disconnect and use: Once fully charged, remove the charging cable from your Fitbit watch and unplug the phone charger from the power outlet. Your watch is now ready to be used.
Using a phone charger to charge your Fitbit watch is a convenient option, especially when you are in a hurry or don’t have access to a dedicated charger. However, not all phone chargers may be compatible with Fitbit watches, so it’s important to check the compatibility before charging to avoid any potential damage to your device.
Always refer to the manufacturer’s guidelines and specifications for your Fitbit watch and ensure that the phone charger you are using provides the correct voltage and current output to ensure safe and efficient charging.
Option 7: Solar Charger
If you are looking for an environmentally-friendly and portable charging solution for your Fitbit watch, a solar charger can be a great option. Solar chargers utilize sunlight and convert it into energy to charge your devices, including your Fitbit watch.
To charge your Fitbit watch using a solar charger, follow these steps:
- Choose a solar charger: Invest in a reliable solar charger that is designed for charging portable devices. Ensure that it has a USB port or compatible charging connectors for your Fitbit watch.
- Place the solar charger under direct sunlight: Find a spot with ample sunlight and place the solar charger in a position where it can receive maximum sunlight exposure. Ensure that there are no obstructions blocking the sunlight.
- Connect the charging cable: Attach one end of the charging cable to the solar charger’s USB port and the other end to your Fitbit watch. Make sure the connection is secure.
- Monitor the charging status: Depending on the strength of the sunlight and the capacity of your solar charger, your Fitbit watch will start charging. Keep an eye on the battery icon on your watch to track the progress of charging.
- Wait for complete charging: Charging time using a solar charger can vary depending on sunlight conditions. Be patient and allow your Fitbit watch to charge until it reaches a full battery level.
- Disconnect and resume using: Once your Fitbit watch is fully charged, disconnect it from the solar charger. Your watch is now ready to be used.
A solar charger is a convenient option, especially for outdoor enthusiasts or those traveling in remote areas where access to power outlets may be limited. It provides a sustainable and renewable energy source to keep your Fitbit watch charged on the go.
Be aware that charging with a solar charger may take longer compared to traditional chargers, as it relies on the availability of sunlight. It’s important to position the solar charger optimally to receive the maximum amount of sunlight for efficient charging.
Ensure that your solar charger is compatible with your Fitbit watch and provides the necessary power output for proper charging. Refer to the manufacturer’s guidelines and specifications to ensure safe and effective charging using a solar charger.
Option 8: Car Charger
If you’re constantly on the go and need a convenient way to charge your Fitbit watch while traveling in your car, a car charger can be a practical option. Car chargers are designed to plug into the cigarette lighter or accessory socket in your vehicle and provide power to your devices.
To charge your Fitbit watch using a car charger, follow these steps:
- Obtain a car charger: Purchase a car charger that has a USB port or is compatible with the charging cable for your Fitbit watch. Look for a charger that is designed to deliver the appropriate power output for your device.
- Plug in the car charger: Insert the car charger into the cigarette lighter or accessory socket of your vehicle. Ensure that it is securely connected and receiving power.
- Connect the charging cable: Attach one end of the charging cable to the USB port of the car charger and the other end to your Fitbit watch. Confirm that the connection is secure.
- Monitor the charging progress: Your Fitbit watch will start charging as soon as it is connected to the car charger. Observe the battery icon on the display to track the charging progress.
- Wait for complete charging: Depending on the battery level and the charging speed of the car charger, it may take some time for your Fitbit watch to reach a full charge. Allow it to charge until the battery icon indicates a complete charge.
- Disconnect and continue driving: Once your Fitbit watch is fully charged, disconnect it from the car charger. You can now continue your journey with a fully powered watch.
A car charger is a convenient option, especially for long car rides or when you’re constantly on the move. It eliminates the worry of battery draining and ensures that you can keep your Fitbit watch charged while traveling.
When choosing a car charger, make sure it is compatible with your Fitbit watch and provides the necessary power output. It’s advisable to use a quality car charger from a reputable brand to ensure safe and efficient charging.
Note that charging times may vary depending on the charging capabilities of the car charger and the specific model of your Fitbit watch. Additionally, be cautious when connecting and disconnecting your Fitbit watch while driving to avoid any distractions on the road.
Option 9: Wireless Charger
If you prefer a more convenient and cable-free charging solution for your Fitbit watch, a wireless charger can be a great option. Wireless chargers use electromagnetic fields to transfer energy from the charger to your device, eliminating the need for physical connections.
To charge your Fitbit watch using a wireless charger, follow these steps:
- Get a compatible wireless charger: Ensure that you have a wireless charger that supports charging your specific model of Fitbit watch. Check for compatibility with your device before purchasing.
- Place the charger on a flat surface: Find a stable and flat surface to place the wireless charger. This can be a desk, nightstand, or any other suitable location.
- Connect the charging dock: Connect the charging dock to a power source using the included power adapter. It is important to ensure that the charger is receiving power.
- Align your Fitbit watch: Align the back of your Fitbit watch with the charging dock or pad of the wireless charger. Ensure that the charging pins or connectors on the watch make contact with the charging dock.
- Monitor the charging status: Many wireless chargers have built-in indicators to indicate the charging status. Check the lights on the charger or the watch’s display to confirm that it is charging.
- Wait for complete charging: Give your Fitbit watch enough time to charge fully. The wireless charger will provide a steady and efficient charge to your device.
- Remove your watch: Once your Fitbit watch is fully charged, remove it from the wireless charger. Your watch is now ready to be worn and used.
Using a wireless charger offers the convenience of hassle-free charging without the need for cables or specific connectors. It allows you to charge your Fitbit watch simply by placing it on the charging pad or dock.
Note that the charging speed with a wireless charger may be slightly slower compared to traditional wired chargers. Additionally, it is crucial to ensure that your Fitbit watch model is compatible with wireless charging before using a wireless charger.
Always follow the manufacturer’s guidelines and recommendations when using a wireless charger for your Fitbit watch to ensure safe and efficient charging.
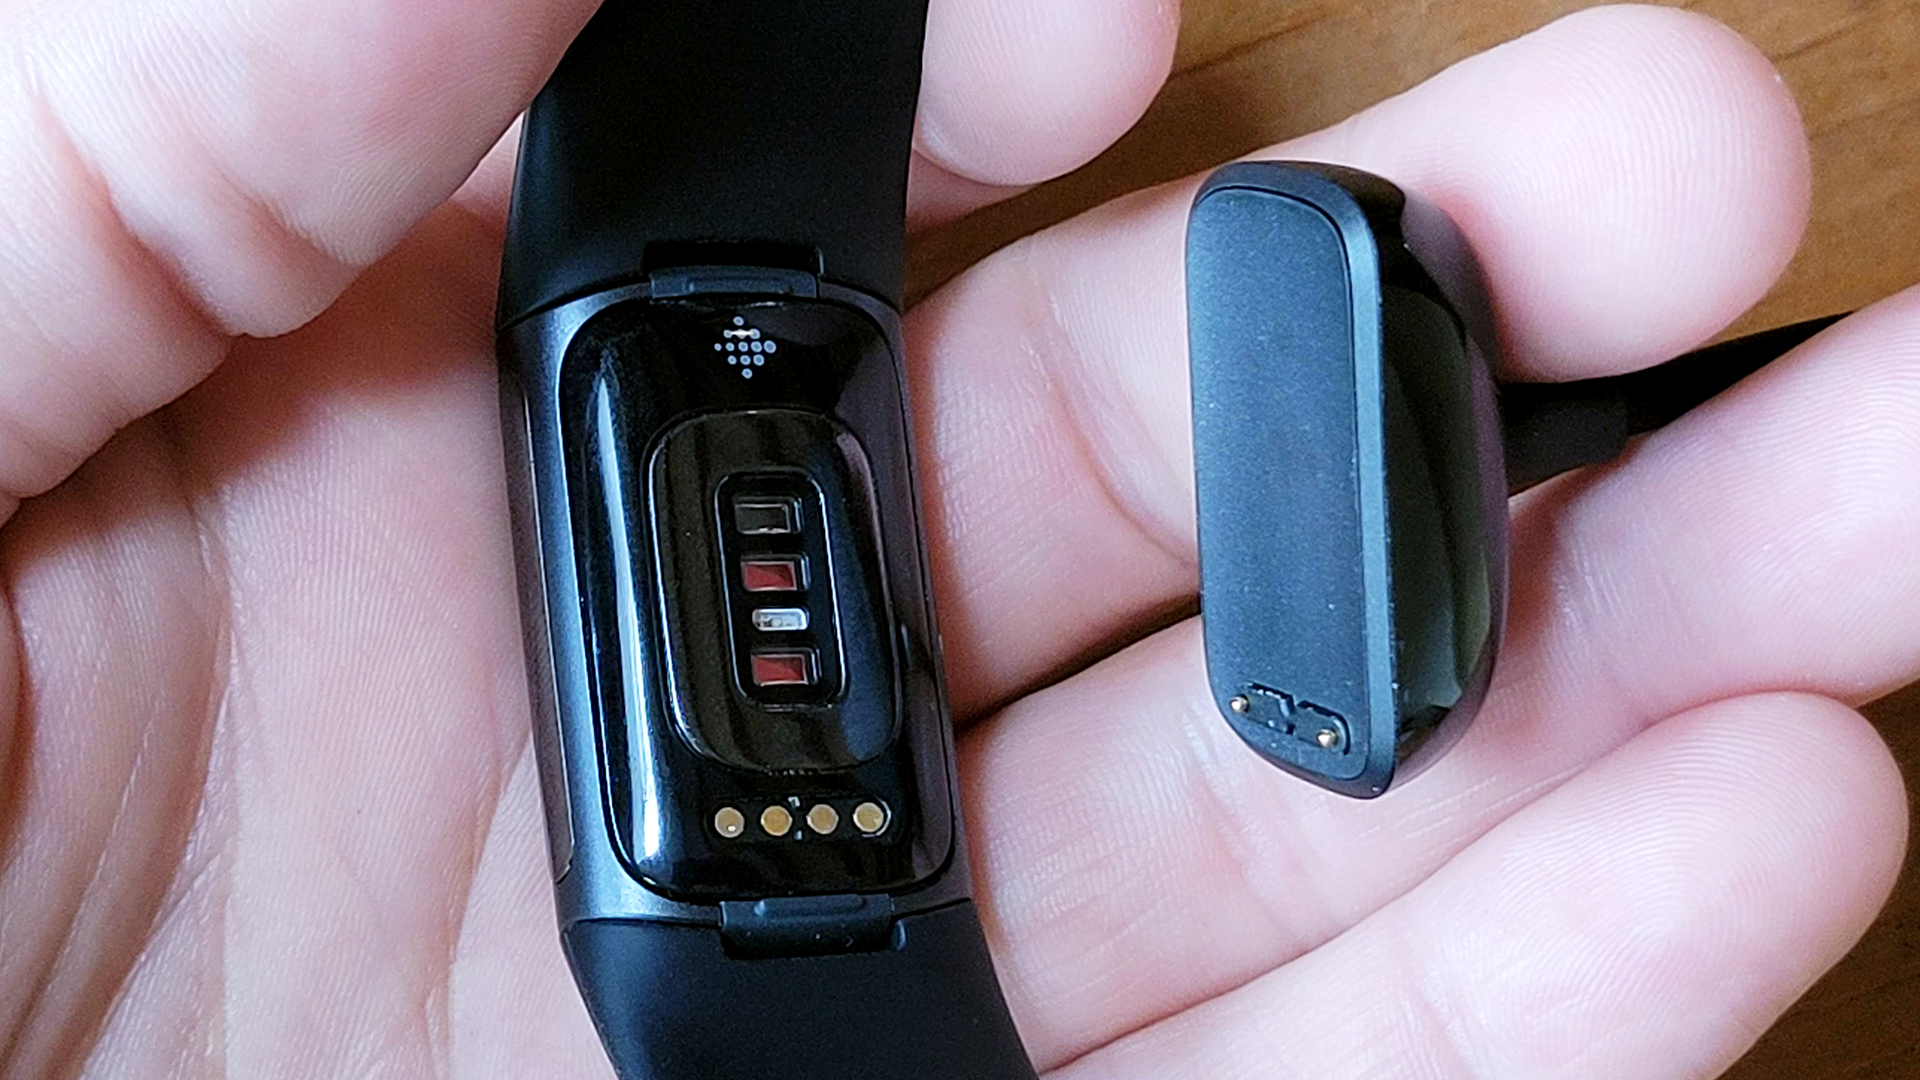
Option 10: Fitbit Surge Magnetic Connector
If you own a Fitbit Surge watch, you have the convenience of using the Fitbit Surge Magnetic Connector for charging. This unique magnetic connector provides a secure and reliable connection for charging your Fitbit Surge watch.
To charge your Fitbit Surge using the magnetic connector, follow these steps:
- Locate the magnetic connector: Look for the magnetic connector on the back of your Fitbit Surge watch. It is a small, rectangular connector with magnetic pins.
- Align the magnetic pins: Align the magnetic pins on the connector with the corresponding contacts on the back of your Fitbit Surge watch. Ensure that they are properly aligned for a secure connection.
- Magnetic attachment: Allow the magnetic force to draw the connector towards the back of the Fitbit Surge watch. The magnetic attachment ensures a strong and stable charging connection.
- Monitor the charging status: Once the magnetic connector is attached, the Fitbit Surge watch will start charging. Observe the battery icon on the watch’s display to track the charging progress.
- Wait for complete charging: Depending on the battery level, it may take some time for your Fitbit Surge watch to reach a full charge. Give it enough time to fully charge before disconnecting.
- Disconnect and use: Once your Fitbit Surge watch is fully charged, carefully detach the magnetic connector from the back of the watch. Your watch is now ready to be used.
The Fitbit Surge Magnetic Connector provides a seamless and reliable charging experience specific to the Fitbit Surge watch. It eliminates the need for cables and ensures a secure connection for efficient charging.
It’s important to note that this charging option is exclusive to the Fitbit Surge watch and may not be compatible with other Fitbit models. Always follow the manufacturer’s guidelines and recommendations for charging your Fitbit Surge watch using the Magnetic Connector.
Ensure that the magnetic pins and contacts on both the connector and the Fitbit Surge watch are clean and free from debris to maintain optimal charging performance. Regularly inspect and clean the contacts if necessary.