
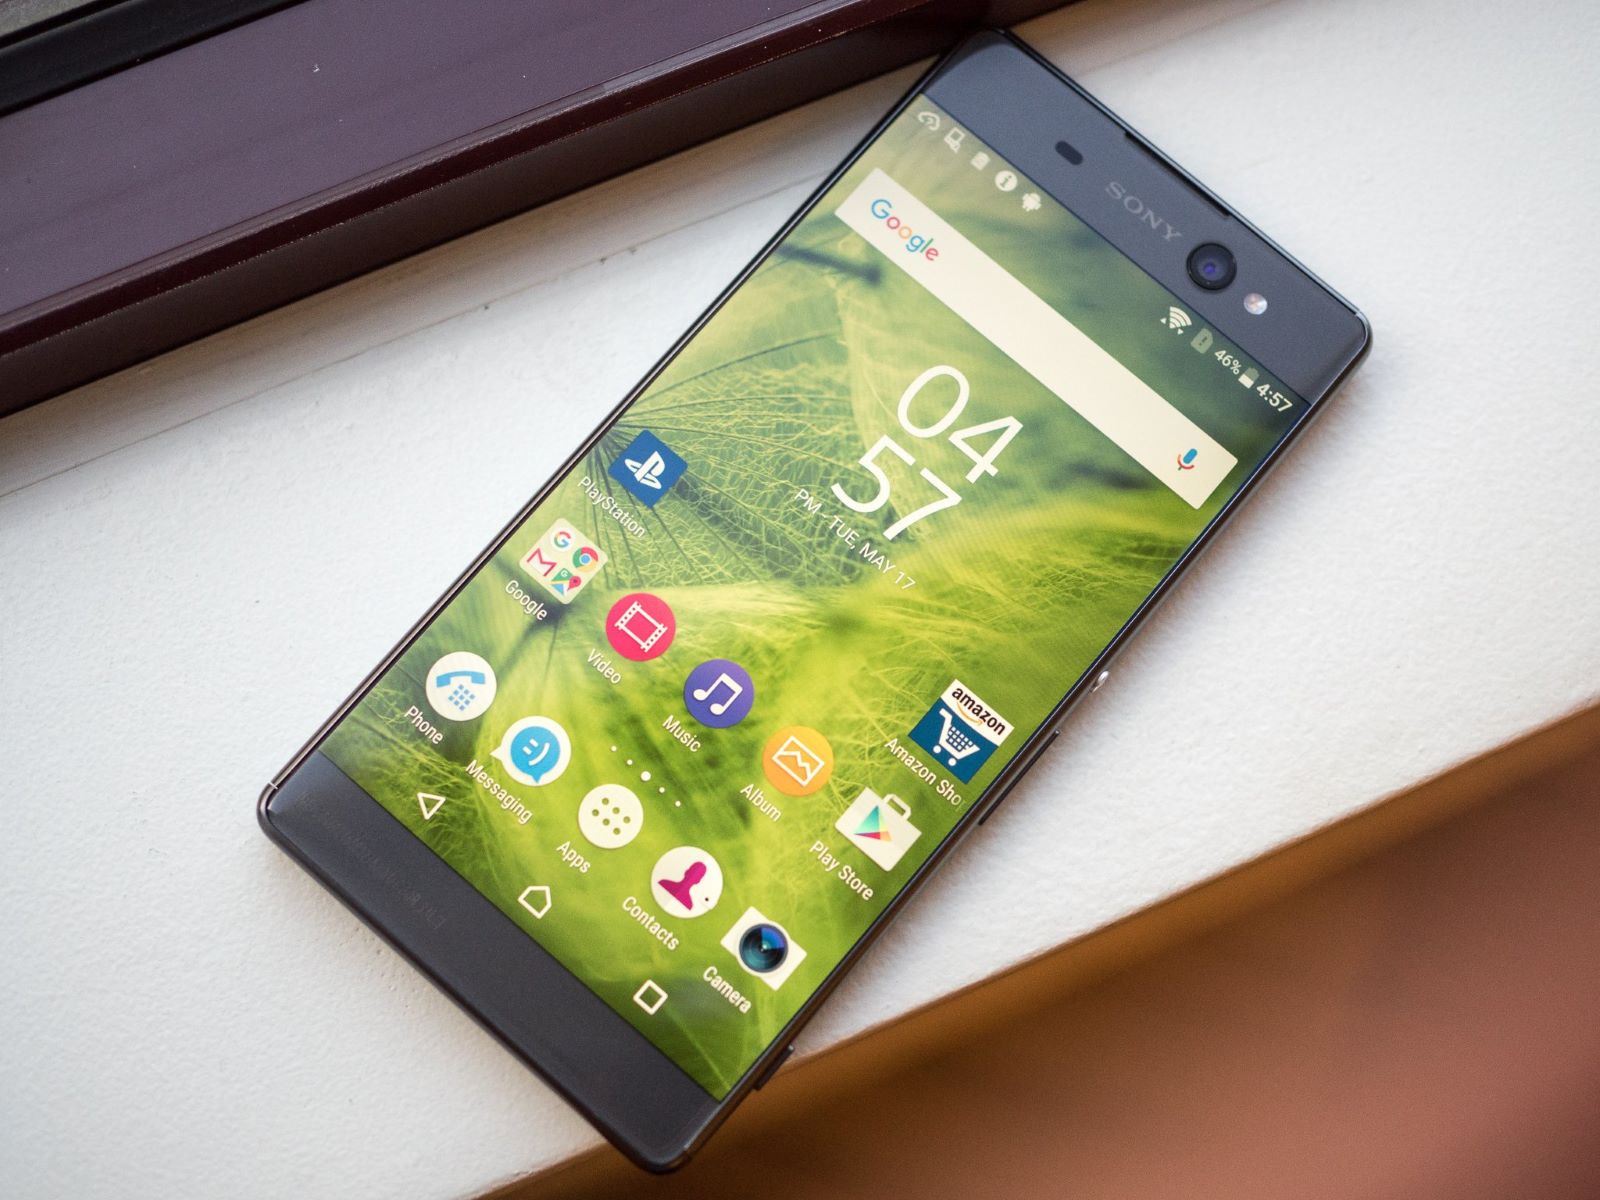
Reasons for Removing Google Window
The decision to remove the Google window from your Xperia XA1 Ultra may stem from various reasons. Understanding these motivations can provide valuable insights into the significance of this process.
-
Enhanced Privacy: By removing the Google window, you can mitigate concerns related to data privacy. Google's extensive data collection practices have raised apprehensions about user privacy. Removing the Google window can limit the amount of data shared with the tech giant, fostering a greater sense of privacy and control over personal information.
-
Improved Performance: The presence of the Google window on your device can contribute to a decrease in performance. This is due to the constant background processes and data syncing associated with Google services. By removing the Google window, you may experience a noticeable improvement in the overall speed and responsiveness of your Xperia XA1 Ultra.
-
Reduced Bloatware: Many users find the pre-installed Google window to be unnecessary bloatware that occupies valuable storage space. Removing this window can free up storage capacity, allowing you to utilize the space for apps and files that are more essential to your needs.
-
Customization Opportunities: Removing the Google window opens up possibilities for customizing the user interface of your device. Without the omnipresent Google search bar, you can explore alternative widgets and design elements to personalize your Xperia XA1 Ultra according to your preferences.
-
Battery Conservation: The Google window's continuous background processes can contribute to battery drain. By removing it, you may extend your device's battery life, as it reduces the load on the processor and conserves power.
Recognizing these reasons can help you make an informed decision about whether removing the Google window aligns with your specific preferences and requirements for your Xperia XA1 Ultra.
Precautions before Removing Google Window
Before embarking on the process of removing the Google window from your Xperia XA1 Ultra, it is crucial to consider several precautions to ensure a smooth and successful outcome. Taking these precautions can help mitigate potential risks and optimize the overall experience of modifying your device.
-
Backup Data: Prior to initiating any modifications, it is imperative to back up all essential data stored on your Xperia XA1 Ultra. This includes contacts, photos, videos, documents, and any other pertinent information. Utilizing cloud storage services or transferring data to a computer can safeguard against accidental loss during the removal process.
-
Research and Understand: Thoroughly research the implications of removing the Google window from your device. Familiarize yourself with the potential consequences and benefits of this modification. Understanding the impact on functionality, user interface, and system stability can help you make an informed decision and set realistic expectations.
-
Check Warranty and Legal Implications: Review the warranty terms and conditions provided by the device manufacturer. Modifying the software or system components of your Xperia XA1 Ultra may void the warranty. Additionally, consider the legal implications of altering the pre-installed software, ensuring compliance with relevant regulations and user agreements.
-
Ensure Sufficient Battery and Storage: Before commencing the removal process, ensure that your device has an adequate battery charge to prevent interruptions during the procedure. Additionally, verify that your Xperia XA1 Ultra has ample storage space available, as the modification may require temporary files or backups.
-
Identify Reversible Methods: Explore options for reverting the modifications in case of unexpected issues or dissatisfaction with the outcome. Research reversible methods or create a backup of the original system state to facilitate restoration if needed.
-
Evaluate Risks and Expertise: Assess the potential risks associated with modifying the device's software. Consider your level of technical expertise and familiarity with the process. If uncertain, seek guidance from reliable sources or professional technicians to ensure a safe and effective removal of the Google window.
By conscientiously addressing these precautions, you can approach the removal of the Google window from your Xperia XA1 Ultra with a comprehensive understanding of the potential implications and necessary safeguards. These measures aim to minimize disruptions and facilitate a seamless transition, empowering you to make informed decisions regarding the customization of your device.
Tools Required for Removing Google Window
When undertaking the task of removing the Google window from your Xperia XA1 Ultra, it is essential to have the appropriate tools at your disposal to facilitate a smooth and efficient process. The following tools are recommended for this task:
-
Smartphone Toolkit: A comprehensive smartphone toolkit containing precision screwdrivers, spudgers, tweezers, and other essential tools is indispensable for accessing and manipulating the internal components of your Xperia XA1 Ultra. These tools enable careful disassembly and reassembly of the device, ensuring that the removal process is conducted with precision and minimal risk of damage.
-
Microfiber Cloth: A microfiber cloth is crucial for maintaining a clean and dust-free work environment. Prior to initiating the removal procedure, it is advisable to wipe the device's exterior and screen to prevent dust particles or debris from interfering with the process. Additionally, the microfiber cloth can be utilized to handle delicate components and prevent smudges during the disassembly process.
-
Heat Gun or Hair Dryer: In certain instances, the application of heat may be necessary to soften adhesive securing the components, particularly when accessing the internal structure of the device. A heat gun or hair dryer, set to a low and controlled temperature, can aid in loosening adhesive bonds, facilitating the safe removal of the Google window without causing damage to the device.
-
Adhesive Strips or Adhesive Remover: As the removal process may involve detaching adhesive-secured components, having adhesive strips or a specialized adhesive remover can simplify the separation of parts without leaving residue or causing structural harm. These tools contribute to the careful disassembly and reassembly of the Xperia XA1 Ultra, ensuring that the removal of the Google window is executed with precision and attention to detail.
-
Anti-Static Wrist Strap: To mitigate the risk of electrostatic discharge that could potentially damage sensitive electronic components, an anti-static wrist strap is recommended. This essential tool grounds the individual working on the device, dissipating any built-up static electricity and safeguarding the internal circuitry of the Xperia XA1 Ultra during the removal process.
By ensuring the availability of these tools, you can approach the task of removing the Google window from your Xperia XA1 Ultra with confidence and preparedness. These tools are instrumental in facilitating a careful and systematic removal process, minimizing the likelihood of damage to the device and promoting a successful outcome.
Steps for Removing Google Window
Removing the Google window from your Xperia XA1 Ultra involves a series of precise steps to ensure a seamless and effective process. It is essential to approach each step with caution and attention to detail to safeguard the integrity of the device. Here are the comprehensive steps for removing the Google window:
-
Prepare the Workspace: Begin by setting up a clean and well-lit workspace with ample room to maneuver. Gather the necessary tools, including a smartphone toolkit, microfiber cloth, heat gun or hair dryer, adhesive strips or adhesive remover, and an anti-static wrist strap.
-
Power Off the Device: Turn off your Xperia XA1 Ultra to prevent any electrical mishaps during the removal process. This step is crucial to ensure the safety of both the device and the individual performing the modification.
-
Remove the Back Cover: Using the appropriate tools from the smartphone toolkit, carefully detach the back cover of the device. Exercise caution to avoid damaging the cover or the internal components. Place the cover in a secure location to prevent misplacement.
-
Disassemble the Device: With precision screwdrivers and spudgers, disassemble the necessary components to access the internal structure of the Xperia XA1 Ultra. This may involve removing screws, detaching connectors, and gently separating the components to reveal the area where the Google window is located.
-
Apply Heat (If Necessary): In cases where the Google window is secured with adhesive, gently apply heat using a heat gun or hair dryer set to a low temperature. This aids in softening the adhesive, making it easier to detach the window without causing damage to the device.
-
Detach the Google Window: Using spudgers and tweezers, carefully detach the Google window from its position. Exercise patience and precision to avoid damaging the surrounding components. Ensure that any adhesive residue is removed from the area to facilitate a clean and smooth surface.
-
Clean and Inspect: Utilize the microfiber cloth to wipe the area where the Google window was located, removing any remaining debris or adhesive residue. Inspect the surrounding components to ensure that no damage occurred during the removal process.
-
Reassemble the Device: With meticulous care, reassemble the components of the Xperia XA1 Ultra, ensuring that all connectors are securely attached and the back cover is properly reinstalled. Take note of the placement of each component to avoid misalignment or damage.
-
Power On and Test: Power on your device to verify that it functions as intended after the removal of the Google window. Test the touchscreen, display, and other essential features to ensure that the device operates without any disruptions.
By following these steps diligently and attentively, you can successfully remove the Google window from your Xperia XA1 Ultra, facilitating enhanced privacy, improved performance, and customization opportunities. It is imperative to approach each step with patience and precision to achieve a satisfactory outcome without compromising the integrity of the device.
Testing the Device after Google Window Removal
After the meticulous process of removing the Google window from your Xperia XA1 Ultra, thorough testing is essential to ensure that the device functions optimally and without any adverse effects. This testing phase serves as a critical checkpoint to validate the success of the removal process and to address any potential issues that may arise. The following steps outline the comprehensive testing procedures to be undertaken after the removal of the Google window:
1. Functional Assessment:
Upon powering on the device, assess the fundamental functionalities such as the touchscreen responsiveness, display clarity, and audio output. Verify that the device boots up without any delays or anomalies, indicating that the removal process did not disrupt the core operations of the Xperia XA1 Ultra.
2. System Stability:
Test the stability of the device by navigating through various applications, menus, and settings. Monitor the system for any unexpected crashes, freezes, or performance inconsistencies. This evaluation ensures that the removal of the Google window has not compromised the overall stability and responsiveness of the device.
3. Connectivity Validation:
Verify the connectivity features of the Xperia XA1 Ultra, including Wi-Fi, Bluetooth, cellular network, and GPS functionality. Ensure that these essential connectivity options remain unaffected, allowing seamless communication and access to online services without interruptions.
4. Battery Performance:
Assess the battery performance post-removal to determine if there are any noticeable improvements in battery life or any unexpected drainage. Monitoring the battery usage over a period of normal usage provides insights into the impact of the removal process on power consumption.
5. User Interface Customization:
Explore the opportunities for user interface customization in the absence of the Google window. Test alternative widgets, home screen layouts, and search bar replacements to personalize the device according to individual preferences. This phase allows for the exploration of new design elements and interface enhancements.
6. Privacy and Data Handling:
Conduct a review of the device's privacy settings and data handling to ensure that the removal of the Google window aligns with the intended enhancement of privacy. Verify that data sharing and collection mechanisms related to the removed window have been appropriately adjusted to reflect the desired privacy measures.
7. Performance Benchmarking:
If feasible, perform performance benchmarking tests to compare the device's performance metrics before and after the removal of the Google window. This objective analysis provides quantitative insights into any improvements in speed, responsiveness, and resource utilization.
8. User Experience Validation:
Solicit feedback from regular usage and interactions with the device to gauge the overall user experience after the removal of the Google window. Consider aspects such as ease of navigation, visual aesthetics, and the absence of intrusive elements to validate the positive impact on user experience.
By meticulously conducting these testing procedures, you can ascertain the successful removal of the Google window from your Xperia XA1 Ultra and validate the anticipated benefits in terms of privacy, performance, and user customization. This comprehensive testing phase serves as a crucial validation of the removal process and ensures the continued functionality and satisfaction derived from the modified device.