
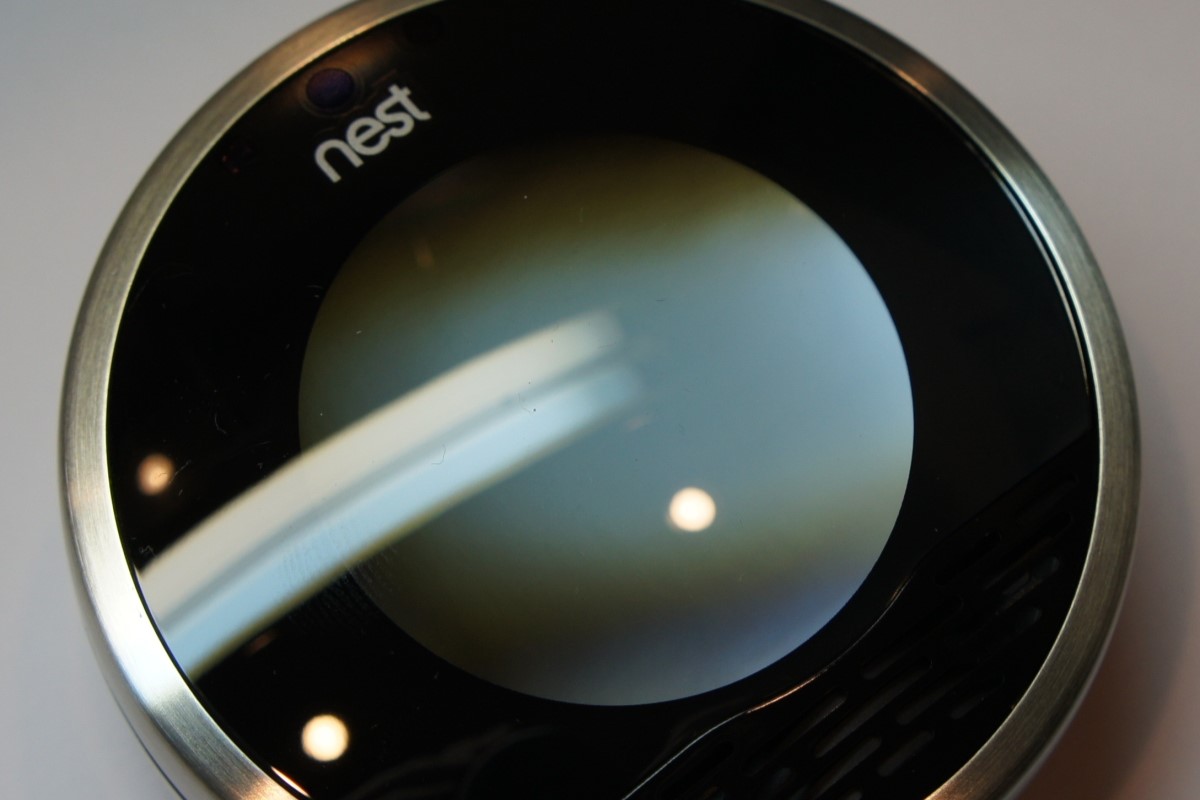
Common Issues with Nest Thermostat
The Nest Thermostat is a smart home device that allows you to control the temperature of your home with ease. However, like any technology, it is not immune to issues and glitches that can affect its performance. In this section, we will discuss some of the common issues that users may encounter with their Nest Thermostat and provide troubleshooting steps to resolve them.
One of the most common issues with the Nest Thermostat is it not heating or cooling properly. This could be due to a variety of factors, such as incorrect temperature settings, a faulty thermostat sensor, or even an issue with your HVAC system. To troubleshoot this issue, you can start by checking the temperature settings on your Nest Thermostat and ensuring they are set correctly. You can also try restarting the thermostat by turning it off and on again from the device settings in the Nest app.
Another common issue is the Nest Thermostat not connecting to Wi-Fi. This can be frustrating as it limits the thermostat’s functionality and remote control capabilities. To resolve this issue, you can start by checking your Wi-Fi network settings and making sure you have a stable internet connection. You can also try restarting your router and the Nest Thermostat to see if that helps establish a connection. If the issue persists, you may need to contact Nest support for further assistance.
Sometimes, the Nest Thermostat may show the wrong temperature, which can lead to discomfort and confusion. This could be caused by a calibration issue or a faulty sensor. To fix this issue, you can try recalibrating the thermostat by going to the Nest app settings and selecting the “Calibrate” option. If that doesn’t work, you may need to check the placement of the thermostat and ensure that it is away from direct sunlight, drafts, or heat sources that could affect its temperature readings.
Another frustrating issue is when the Nest Thermostat does not turn on at all. This could be due to a power issue or a faulty power cable. To troubleshoot this issue, you can check the power source and make sure it is providing the necessary voltage. You can also try connecting the thermostat to a different power outlet or using a different power cable to see if that resolves the issue. If the problem persists, it may be a hardware issue, and you may need to contact Nest support for further assistance.
Other common issues with the Nest Thermostat include sensor issues, battery problems, display not working, and firmware update issues. Each of these issues has its own troubleshooting steps, and it is recommended to refer to the Nest support documentation or contact their customer support for specific guidance.
Overall, the Nest Thermostat is a reliable and innovative device for regulating the temperature in your home. However, it can encounter common issues that may affect its performance. By following the troubleshooting steps mentioned above, you can resolve most of these issues and continue enjoying the benefits of a smart and comfortable home.
Nest Thermostat Not Heating or Cooling Properly
One of the most common issues that users may encounter with their Nest Thermostat is it not heating or cooling properly. This can lead to discomfort and frustration, especially during extreme weather conditions. There are several factors that could contribute to this issue, and here are some troubleshooting steps you can take to resolve it.
Firstly, check the temperature settings on your Nest Thermostat. Make sure that the temperature is set to the desired level and that it is not accidentally set to the “Off” mode. Additionally, ensure that the temperature mode is set correctly, whether it is in heating or cooling mode, depending on your needs.
If the temperature settings are correct, the next step is to verify the functioning of the thermostat sensor. The thermostat sensor is responsible for measuring the temperature in the environment and communicating it to the thermostat. If the sensor is faulty or dirty, it may provide inaccurate temperature readings, leading to improper heating or cooling. To address this, gently clean the sensor with a soft cloth and ensure that there are no obstructions in its vicinity, such as furniture or curtains that could affect its accuracy.
Another potential cause is an issue with your HVAC system. Check if the air filters are clean and not clogged, as dirty filters can restrict airflow and impact the effectiveness of heating or cooling. Additionally, inspect the air vents and registers to ensure they are not blocked by furniture or other objects. If you notice any issues with your HVAC system, it is advisable to have it inspected and serviced by a professional technician.
Power issues can also contribute to improper heating or cooling. Verify that the Nest Thermostat has a stable power connection and that the battery level is not critically low. If the thermostat is running on batteries, replace them with fresh ones and observe if it improves the performance. If the thermostat is connected to a C-wire or common wire, ensure that it is securely connected and providing a stable power supply.
Lastly, try restarting the Nest Thermostat. To do this, go to the device settings in the Nest app and select the option to turn it off. Wait for a few minutes, and then turn it back on. This can sometimes resolve minor software glitches and restore proper functionality.
By following these troubleshooting steps, you can address the issue of the Nest Thermostat not heating or cooling properly. However, if the problem persists or if you are unsure of the cause, it is recommended to contact Nest support for further assistance. Their technical team can provide more specific guidance based on your situation and help you resolve the issue effectively.
Nest Thermostat Not Connecting to Wi-Fi
Having the Nest Thermostat connected to Wi-Fi is essential for accessing its full range of features and controlling it remotely. However, there may be instances where you encounter issues with the thermostat not connecting to Wi-Fi. This can be frustrating, but there are several troubleshooting steps you can take to resolve the problem.
Firstly, check your Wi-Fi network settings and ensure that you have a stable internet connection. Make sure that your Wi-Fi network is within range of the thermostat and that there are no obstructions that may interfere with the signal. If possible, try connecting other devices to your Wi-Fi network to ensure that the issue is specific to the Nest Thermostat.
If your internet connection is stable and other devices are able to connect to the Wi-Fi network without any problems, then the issue may be with the Nest Thermostat itself. In this case, try restarting the thermostat by turning it off and on again. You can do this from the device settings in the Nest app. Sometimes, a simple restart can help establish a connection with the Wi-Fi network.
Another troubleshooting step is to restart your router. Sometimes, the router may encounter minor issues that prevent devices from connecting to the Wi-Fi network. By restarting the router, you can refresh its settings and potentially resolve any connectivity issues. Allow the router to fully power off, wait for a few minutes, and then turn it back on. Once the router is back online, check if the Nest Thermostat can establish a connection.
If the issue persists, you can try resetting the Wi-Fi settings on the Nest Thermostat. Go to the device settings in the Nest app and select the option to reset the Wi-Fi settings. This will remove any previously saved network settings, allowing you to set up a fresh connection. Follow the on-screen instructions to reconnect the thermostat to your Wi-Fi network.
If none of the above steps work, there may be a compatibility issue between your Wi-Fi network and the Nest Thermostat. Contact your internet service provider or Nest support to ensure that your Wi-Fi network meets the necessary requirements for connecting the thermostat. They may be able to provide further guidance or offer additional solutions.
In some cases, there may be an underlying firmware issue with the Nest Thermostat that prevents it from connecting to Wi-Fi. Ensure that the thermostat is updated to the latest firmware version. Check the Nest app for any available updates and follow the prompts to install them. Updating the firmware can sometimes resolve connectivity problems.
If all else fails, reach out to Nest support for further assistance. They have a dedicated technical team that can provide specific guidance based on your situation and help you troubleshoot the Wi-Fi connectivity issue with your Nest Thermostat.
Nest Thermostat Showing Wrong Temperature
One frustrating issue that users may encounter with their Nest Thermostat is when it shows the wrong temperature. This can lead to discomfort and confusion, as the thermostat may not accurately reflect the actual temperature in your home. There can be several reasons for this issue, but there are steps you can take to troubleshoot and resolve it.
One possible cause is a calibration issue. Over time, the Nest Thermostat’s temperature sensor may become slightly inaccurate, resulting in incorrect temperature readings. To address this, you can try recalibrating the thermostat. Open the Nest app, go to the device settings, and select the option to calibrate the thermostat. Follow the instructions provided to ensure the thermostat is accurately measuring the temperature in your home.
Another potential cause is the placement of the thermostat. If the thermostat is exposed to direct sunlight, drafts, or heat sources, it can affect its temperature readings. Make sure the thermostat is not placed near windows, vents, or any other sources of heat or cold. Additionally, avoid placing it in areas with poor airflow, such as behind furniture or in corners.
In some cases, the issue may not be with the thermostat itself, but rather with the sensor that communicates the temperature to the thermostat. If the sensor is faulty or dirty, it can lead to inaccurate temperature readings. Gently clean the sensor with a soft cloth to remove any dust or debris that may be affecting its performance. Ensure that there are no obstructions around the sensor that could interfere with its ability to measure the temperature correctly.
If you have recently made any changes to your HVAC system, such as installing a new furnace or air conditioning unit, it’s possible that the Nest Thermostat may need to be reconfigured to work properly with the new equipment. Refer to the Nest app or Nest support documentation for instructions on how to set up the thermostat with your specific HVAC system.
It is also worth checking the firmware of the Nest Thermostat. Outdated firmware can sometimes cause issues with temperature readings. Ensure that the thermostat is updated to the latest firmware version by checking for updates in the Nest app. If there are any available updates, follow the prompts to install them and check if the temperature readings improve.
In some cases, there may be underlying technical issues that require further troubleshooting or assistance from Nest support. If you have tried the above steps and the Nest Thermostat continues to show the wrong temperature, it is recommended to contact their customer support for further guidance. They have a dedicated team that can help resolve the issue and ensure that the thermostat is accurately measuring the temperature in your home.
Nest Thermostat Not Turning On
One frustrating issue that users may encounter with their Nest Thermostat is when it fails to turn on. This can be concerning, especially if you rely on the thermostat to regulate the temperature in your home. There are several reasons why the Nest Thermostat may not turn on, and here are some troubleshooting steps you can take to address the problem.
Firstly, check the power connection of the Nest Thermostat. Ensure that it is securely connected to the power source, whether it is a C-wire or common wire connection, or if you are using batteries. If you are using batteries, make sure they have enough charge or replace them with fresh ones.
If the Nest Thermostat is connected to a C-wire or common wire, it is important to ensure that the wire is correctly connected and providing a stable power supply. Double-check the wiring connections and ensure that there are no loose or damaged wires that could be preventing the thermostat from turning on.
Power issues in your home can also affect the Nest Thermostat’s ability to turn on. Check if there has been a power outage or if any circuit breakers have tripped. If there are any power disruptions, it may be necessary to reset the circuit breakers or contact an electrician to address any electrical issues.
In some cases, a firmware issue may be causing the Nest Thermostat to malfunction and not turn on. Ensure that the thermostat is updated to the latest firmware version. Check for any available updates in the Nest app and follow the prompts to install them. Updating the firmware can sometimes resolve compatibility issues and restore the thermostat’s functionality.
If none of the above steps work, try restarting the Nest Thermostat. Go to the device settings in the Nest app and select the option to turn off the thermostat. Wait for a few minutes, and then turn it back on. This can help clear any temporary glitches or software issues and may allow the thermostat to turn on.
If the Nest Thermostat still does not turn on after trying the above troubleshooting steps, it is recommended to contact Nest support for further assistance. They have a dedicated technical team that can provide specific guidance, perform remote diagnostics, and help resolve the issue. They may identify any underlying hardware issues or provide further troubleshooting steps to address the problem.
Remember to perform these troubleshooting steps carefully and refer to the Nest support documentation or contact their customer support for more detailed guidance based on your specific situation.
Nest Thermostat Sensor Issues
The sensor of the Nest Thermostat plays a crucial role in accurately measuring the temperature in your home. If you encounter sensor issues, it can lead to incorrect readings and potentially affect the thermostat’s performance. To troubleshoot and address sensor issues with your Nest Thermostat, consider the following steps.
Firstly, check the placement of the thermostat. Ensure that it is not exposed to direct sunlight, drafts, or heat sources. These external factors can interfere with the sensor’s ability to measure the temperature accurately. Additionally, avoid placing the thermostat near vents or registers, as this can affect its readings due to the airflow.
If you notice that the Nest Thermostat is displaying inconsistent temperature readings or failing to respond to temperature changes, there may be a calibration issue with the sensor. Fortunately, you can recalibrate the thermostat to ensure accurate temperature measurements. Open the Nest app, go to the device settings, and select the option to calibrate the thermostat. Follow the instructions provided to ensure precise temperature readings.
Another common sensor issue is when the sensor becomes dirty or obstructed. Dust, debris, or any other obstructions can affect the sensor’s performance and lead to inaccurate temperature readings. Use a soft cloth to gently clean the sensor and remove any dust or debris that may have accumulated. Ensure that there are no obstructions around the sensor, such as furniture or curtains, that could interfere with its ability to measure the temperature correctly.
In some cases, the sensor issues may not be related to the Nest Thermostat itself, but rather to the HVAC system it is connected to. If you recently installed a new furnace or air conditioning unit, the Nest Thermostat may need to be reconfigured to work seamlessly with the new equipment. Refer to the Nest app or Nest support documentation for instructions on how to set up the thermostat with your specific HVAC system.
It is also essential to keep the firmware of the Nest Thermostat up to date. Outdated firmware can sometimes cause sensor issues. Check for any available firmware updates in the Nest app and follow the prompts to install them. Updating the firmware can often resolve compatibility issues and improve the overall performance of the thermostat’s sensor.
If you have tried the above troubleshooting steps and the sensor issues with your Nest Thermostat persist, it is advisable to contact Nest support for further assistance. Their dedicated technical team can provide specific guidance tailored to your situation and help identify and address any underlying hardware or software issues affecting the sensor.
Remember to always refer to the Nest support documentation or consult with their customer support for more detailed instructions and assistance specific to your Nest Thermostat model.
Nest Thermostat Battery Problems
The Nest Thermostat relies on battery power to function, and encountering battery problems can disrupt its performance and functionality. If you’re experiencing issues with the battery of your Nest Thermostat, here are some troubleshooting steps to help resolve the problem.
Firstly, check the battery level of your Nest Thermostat. You can find this information in the device settings on the Nest app. If the battery level is critically low, it may be the cause of the issue. Replace the batteries with fresh ones and ensure they are properly inserted into the thermostat. It is recommended to use high-quality, alkaline batteries for optimal performance.
Ensure that the battery contacts within the Nest Thermostat are clean and free of any debris or corrosion. If necessary, use a soft cloth or cotton swab dipped in rubbing alcohol to clean the contacts. This will ensure a proper connection between the batteries and the thermostat, allowing it to function correctly.
For some Nest Thermostat models, it is possible to connect the thermostat to a C-wire or common wire for a constant power supply. This eliminates the need for batteries and resolves any potential battery-related problems. If your thermostat has the option for a C-wire connection, consider connecting it to a stable power source instead of relying on batteries.
In certain cases, the issue may be related to the firmware of the Nest Thermostat. Outdated firmware can sometimes cause battery problems. Ensure that the thermostat is updated to the latest firmware version by checking for updates in the Nest app. If any updates are available, follow the prompts to install them and see if it improves the battery performance.
Another possible cause of battery problems is excessive usage of Wi-Fi connectivity or other power-intensive features. These features can drain the battery quickly, especially if the thermostat is constantly connected to Wi-Fi or experiencing connectivity issues. Adjust the Wi-Fi connection settings in the Nest app, such as reducing the frequency of updates or disabling certain features if they are not essential.
If you have already tried the above troubleshooting steps and the battery problems persist, it is recommended to contact Nest support for further assistance. They can provide specific guidance based on your Nest Thermostat model and help identify any underlying hardware issues that may be affecting the battery performance.
Throughout the troubleshooting process, it is important to periodically check the battery level of your Nest Thermostat and replace the batteries as needed. Regular maintenance and keeping the thermostat’s firmware up to date will ensure optimal performance and prevent further battery-related problems.
Remember to refer to the Nest support documentation or contact their customer support for more specific instructions and assistance related to your Nest Thermostat.
Nest Thermostat Display Not Working
A common issue that users may encounter with their Nest Thermostat is when the display stops working. This can be concerning as it hinders the ability to control and monitor the thermostat effectively. If you’re facing a display issue with your Nest Thermostat, here are some troubleshooting steps to help resolve it.
Firstly, check the power connection of the thermostat. Ensure that the Nest Thermostat is securely connected to the power source, whether it is through a C-wire or by using batteries. If you’re relying on batteries, try replacing them with fresh ones to see if it resolves the display problem.
If the thermostat is connected to a C-wire, make sure that the wire is correctly connected and providing a stable power supply. Double-check the wiring connections at both the thermostat and HVAC system ends to ensure they are secure.
Rebooting the Nest Thermostat can sometimes help resolve display issues. To do this, turn off the thermostat by going to the device settings in the Nest app and selecting the option to turn it off. Wait for a few minutes, and then turn it back on. This can help clear any temporary glitches or software issues that may be affecting the display.
Check for any available firmware updates for your Nest Thermostat. Outdated firmware can sometimes cause display issues. Open the Nest app and navigate to the device settings to check for updates. If updates are available, follow the prompts to install them and see if it resolves the display problem.
If the above steps do not resolve the issue, try performing a factory reset on the Nest Thermostat. This will restore the thermostat to its default settings and can often fix display issues. Refer to the Nest support documentation for instructions on how to perform a factory reset for your specific model of the thermostat.
If the display still does not work after trying the above troubleshooting steps, it is recommended to contact Nest support for further assistance. They have a dedicated technical team that can provide specific guidance based on your situation and help identify any underlying hardware issues that may be affecting the display.
Remember to refer to the Nest support documentation or contact their customer support for more detailed instructions and assistance specific to your Nest Thermostat model.
Nest Thermostat Firmware Update Issues
Firmware updates are important to keep your Nest Thermostat up to date with the latest features, bug fixes, and security enhancements. However, occasionally users may encounter issues while attempting to update the firmware on their Nest Thermostat. If you’re facing firmware update issues, here are some troubleshooting steps to help resolve the problem.
Firstly, ensure that your Nest Thermostat is connected to a stable Wi-Fi network. A reliable internet connection is necessary to download and install firmware updates. Check your Wi-Fi network settings and ensure that there are no connectivity issues. Restarting your router may also help establish a more stable connection.
If you’re experiencing difficulties with the firmware update process, it is worth checking for any firewall or security settings that may be blocking the connection. Temporarily disabling these security measures (if possible) during the firmware update process may resolve any connectivity issues.
Another troubleshooting step is to restart the Nest Thermostat. Simply turn it off from the device settings in the Nest app and wait for a few minutes before turning it back on. Restarting the thermostat can help resolve minor software glitches, allowing the firmware update to be successfully completed.
It is also recommended to check if there are any pending updates for the Nest app itself. Outdated app versions can sometimes cause compatibility issues during the firmware update process. Updating the Nest app to the latest version from your device’s app store can address these compatibility issues.
Make sure that your Nest Thermostat is connected to a power source during the firmware update process. This can be either through a C-wire connection or by using batteries. If you’re using batteries, ensure that they have sufficient charge. If the battery level is low, consider replacing them with fresh batteries before attempting the firmware update.
If you’re still encountering firmware update issues after trying the above steps, it is advisable to contact Nest support for further assistance. Their technical team can provide specific guidance and help troubleshoot the problem. They may suggest alternative methods or provide a manual process for updating the firmware on your Nest Thermostat.
Remember, firmware updates are important for the optimal performance, security, and functionality of your Nest Thermostat. It is recommended to keep your thermostat up to date with the latest firmware versions to ensure a seamless and efficient user experience.
Always refer to the Nest support documentation or contact their customer support for more detailed instructions and assistance specific to your Nest Thermostat model.
Troubleshooting Steps for Nest Thermostat Not Working
If you’re experiencing issues with your Nest Thermostat and it is not working as expected, there are several troubleshooting steps you can take to identify and resolve the problem. Here are some steps to help you get your Nest Thermostat back up and running.
1. Check the power source: Ensure that your Nest Thermostat is receiving power either through a C-wire connection or by using batteries. Confirm that the power source is securely connected and providing a stable power supply. If you’re using batteries, make sure they have enough charge or replace them with fresh ones.
2. Verify the Wi-Fi connection: Ensure that your Nest Thermostat is properly connected to your Wi-Fi network. Check your Wi-Fi network settings and ensure that there are no connectivity issues. Restart your router if necessary to establish a stable connection.
3. Restart the Nest Thermostat: Try restarting the Nest Thermostat by turning it off and then on again. You can do this through the device settings in the Nest app. Restarting the thermostat can help clear any temporary glitches or software issues.
4. Check the temperature settings: Double-check the temperature settings on your Nest Thermostat and ensure that they are set correctly. Verify that the thermostat is in the correct mode (heating or cooling) and that the temperature is set to your desired level.
5. Clean the thermostat and sensor: If the display or temperature readings appear inaccurate, clean the thermostat and sensor. Use a soft cloth to gently clean the device, removing any dirt or dust that may be affecting its performance. Ensure that there are no obstructions around the thermostat or sensor that could interfere with their functionality.
6. Perform a factory reset: If all else fails, you can try performing a factory reset on your Nest Thermostat. This will restore the thermostat to its default settings. Refer to the Nest support documentation or contact their customer support for instructions on how to perform a factory reset for your specific model of the thermostat.
7. Contact Nest support: If you have attempted the above troubleshooting steps and your Nest Thermostat is still not working, it is recommended to reach out to Nest support. Their technical team can provide specific guidance based on your situation and help identify and resolve any underlying hardware or software issues.
Remember to refer to the Nest support documentation or contact their customer support for more detailed instructions and assistance specific to your Nest Thermostat model. They are a valuable resource to help you diagnose and troubleshoot any issues you may encounter.