
Main Features of Norton Internet Security
Norton Internet Security is a comprehensive cybersecurity software that offers robust protection against various online threats. With its advanced features and effective defenses, it ensures the safety and security of your digital life. Here are some of the main features that make Norton Internet Security one of the leading security solutions in the market:
- Real-time Protection: Norton Internet Security constantly monitors your device for any suspicious activity and proactively detects and blocks malware, viruses, spyware, and other potential threats. It provides real-time protection to keep your system safe at all times.
- Firewall Protection: The software comes with a built-in firewall that acts as a barrier between your device and the outside world. It monitors incoming and outgoing network traffic and blocks unauthorized access, ensuring that your sensitive data remains secure.
- Secure VPN: Norton Internet Security offers a secure virtual private network (VPN) that encrypts your internet connection, making it impossible for anyone to intercept or access your data. This feature is especially useful when using public Wi-Fi networks, as it protects your privacy and prevents cybercriminals from intercepting sensitive information.
- Identity Theft Protection: With Norton Internet Security, you can safeguard your personal information from being compromised. The software includes identity theft protection features that help prevent phishing attacks, malicious websites, and online scams, keeping your sensitive data safe from cybercriminals.
- Safe Web Browsing: Norton Internet Security scans websites for potential threats before you visit them, giving you a warning if a site is determined to be malicious or unsafe. It also blocks unwanted and annoying ads, ensuring a smoother and safer browsing experience.
- Parental Control: The software includes robust parental control features that allow you to set limits on your child’s online activities. You can block inappropriate content, manage screen time, and monitor their online behavior to ensure they stay safe while exploring the digital world.
- Password Manager: Norton Internet Security offers a secure password manager that helps you create strong, unique passwords for your various online accounts. It stores and manages your passwords, making it easy to log in to your favorite websites and apps without the need to remember multiple complex passwords.
- Cloud Backup: With Norton Internet Security, you can securely back up your important files and documents to the cloud. This ensures that your data is protected even if your device gets lost, stolen, or damaged, giving you peace of mind knowing that your files are safely stored.
These are just a few of the main features offered by Norton Internet Security. With its comprehensive protection and user-friendly interface, it is an ideal choice for individuals and businesses looking to stay safe and secure in the digital world.
Benefits of Using Norton Internet Security
Norton Internet Security offers numerous benefits that make it an essential tool for protecting your digital life. Whether you’re a home user or a business professional, here are some key benefits of using Norton Internet Security:
- Comprehensive Protection: With Norton Internet Security, you get comprehensive protection against a wide range of online threats, including malware, viruses, spyware, ransomware, and phishing attacks. It constantly monitors your device and safeguards your sensitive data from cybercriminals.
- User-Friendly Interface: Norton Internet Security features a user-friendly interface that makes it easy to navigate and use. The simple and intuitive design allows even non-technical users to take full advantage of its features without any hassle.
- Real-time Updates: The software regularly updates its virus definitions and security features in real-time, ensuring that your device is protected against the latest threats. This proactive approach keeps your system immune to emerging malware and vulnerabilities.
- Enhanced Privacy: Norton Internet Security prioritizes your privacy and offers features like secure VPN and identity theft protection. The secure VPN encrypts your internet connection, protecting your online activities from prying eyes. The identity theft protection feature safeguards your personal information and prevents it from falling into the wrong hands.
- Multi-Device Compatibility: Norton Internet Security is compatible with multiple devices, including PCs, Macs, smartphones, and tablets. This allows you to protect all your devices with a single subscription, ensuring consistent and reliable security across your digital ecosystem.
- Optimized Performance: Unlike some security software that can slow down your system, Norton Internet Security is designed to have minimal impact on your device’s performance. It operates efficiently in the background, allowing you to enjoy a fast and smooth user experience.
- Parental Control Features: For parents, Norton Internet Security offers robust parental control features that allow you to monitor and control your child’s online activities. You can set age-appropriate filters, block inappropriate content, and track their usage to ensure a safe and controlled online environment for your children.
- Data Backup and Recovery: Norton Internet Security provides the option to backup your important files and documents to the cloud. This ensures that your data is protected and easily recoverable in case of device loss, damage, or accidental deletion.
- 24/7 Customer Support: Norton Internet Security offers reliable customer support round the clock to assist you in case of any technical issues or concerns. Their knowledgeable support team is available via phone, chat, or email to provide prompt solutions and guidance.
Overall, Norton Internet Security offers a wide range of benefits, from robust protection against online threats to enhanced privacy and optimized performance. It is a trusted and reliable security solution that gives you the peace of mind you need in today’s digital landscape.
How to Install Norton Internet Security
Installing Norton Internet Security is a straightforward process that can be completed in just a few steps. Follow the steps below to install Norton Internet Security on your device:
- Step 1: Purchase Norton Internet Security: Visit the official Norton website or an authorized retailer to purchase a subscription to Norton Internet Security. Choose the appropriate plan based on your needs and budget.
- Step 2: Download the Installer: Once you have purchased the subscription, go to the Norton website and sign in to your Norton account. Navigate to the “My Norton” section and click on the “Download” button to download the Norton Internet Security installer.
- Step 3: Run the Installer: Locate the downloaded installer on your device and double-click on it to run the installation process. You may be prompted to grant permission for the installation to proceed.
- Step 4: Follow the On-Screen Instructions: The installer will guide you through the installation process. Read and accept the terms and conditions, and choose the desired installation options, such as the installation location and additional features you want to include.
- Step 5: Wait for the Installation to Complete: The installation process may take a few minutes to complete. Allow the installer to finish its tasks, and do not interrupt or close the installation window until it has successfully installed Norton Internet Security on your device.
- Step 6: Sign in and Activate: After the installation is complete, you will be prompted to sign in to your Norton account. Enter your account credentials and click on the “Sign In” button. If you do not have an account, you can create one during this step. Once signed in, follow the on-screen instructions to activate your Norton Internet Security subscription.
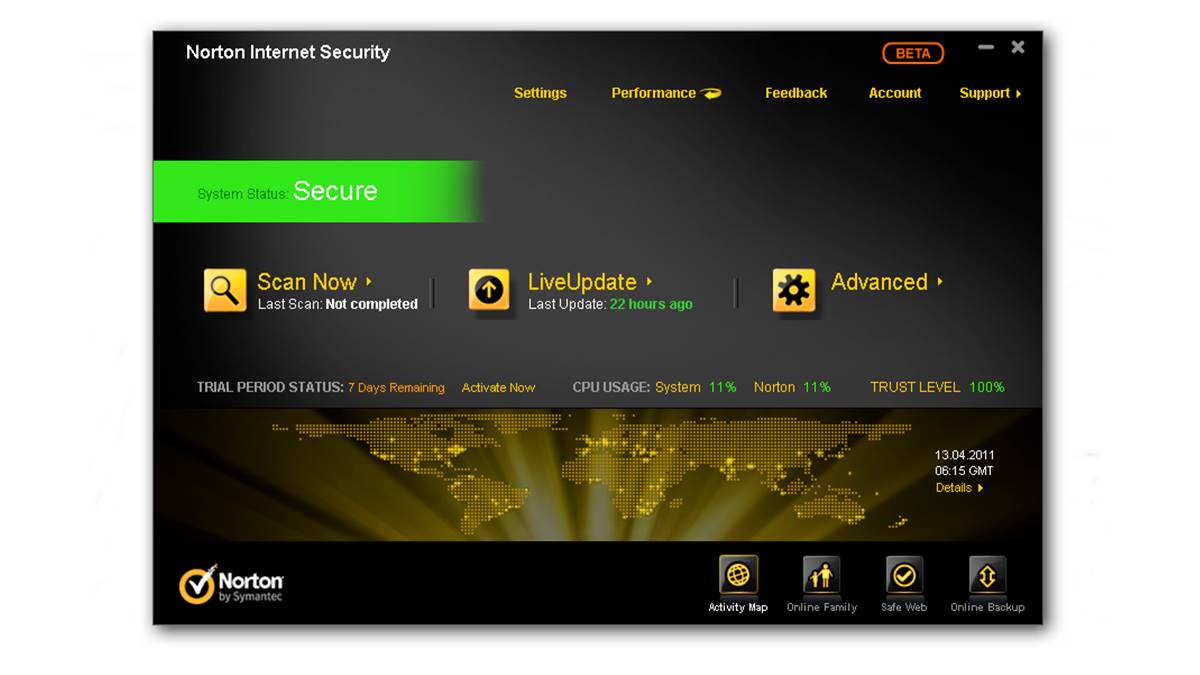
- Step 7: Run LiveUpdate: After activating Norton Internet Security, it is essential to run LiveUpdate to ensure that the software is up to date with the latest security patches and virus definitions. Open the Norton Internet Security application and locate the LiveUpdate option. Click on it to start the update process.
That’s it! You have successfully installed Norton Internet Security on your device. It is recommended to regularly run LiveUpdate to keep the software up to date and ensure optimal protection against the latest threats.
How to Activate Norton Internet Security
Activating Norton Internet Security is a crucial step that ensures your subscription is valid and allows you to access all the features and protection offered by the software. Follow the steps below to activate your Norton Internet Security subscription:
- Step 1: Launch Norton Internet Security: Open the Norton Internet Security application on your device. You can usually find it in the system tray or by searching for it in the Start menu.
- Step 2: Sign in to Your Norton Account: If you haven’t already done so, sign in to your Norton account. Enter your email address and password associated with your Norton account, then click on the “Sign In” button. If you do not have a Norton account, you can create one during this step.
- Step 3: Enter Your Product Key: Once signed in, click on the “Activate Now” or “Activate a Product” option. You will be prompted to enter your product key. Locate the product key provided with your Norton Internet Security purchase and enter it in the designated field. Make sure to enter the key correctly, as it is case-sensitive.
- Step 4: Complete the Activation: After entering the product key, click on the “Activate” or “Continue” button to complete the activation process. Norton Internet Security will validate your product key and activate your subscription.
- Step 5: Check your Subscription Status: Once activation is complete, you can verify the status of your subscription in the Norton Internet Security interface. It should display the remaining days or months of your subscription.
- Step 6: Run LiveUpdate: After activation, it is essential to run LiveUpdate to ensure that Norton Internet Security has the latest security patches and virus definitions. Open the Norton Internet Security application and locate the LiveUpdate option. Click on it to start the update process.
That’s it! You have successfully activated your Norton Internet Security subscription. Remember to regularly run LiveUpdate to keep your software up to date and fully protected against the latest threats.
How to Update Norton Internet Security
Keeping Norton Internet Security up to date is essential to ensure that your device is protected against the latest threats and vulnerabilities. Norton regularly releases updates to improve the software’s performance and add new security features. Here’s how you can update Norton Internet Security:
- Step 1: Launch Norton Internet Security: Open the Norton Internet Security application on your device. You can usually find it in the system tray or by searching for it in the Start menu.
- Step 2: Check for Updates: Once the application is open, navigate to the “Settings” section. Look for the “LiveUpdate” or “Update” option and click on it to check for available updates.
- Step 3: Run LiveUpdate: Norton Internet Security will connect to the Norton servers and check for any available updates. If updates are found, click on the “Run LiveUpdate” or “Update Now” button to initiate the update process.
- Step 4: Wait for the Update to Complete: Norton Internet Security will now download and install the updates. The time it takes to complete the update process may vary depending on your internet connection speed and the size of the updates. Ensure that you have a stable internet connection and be patient while the updates are being installed.
- Step 5: Restart if Required: After the updates are installed, Norton Internet Security may prompt you to restart your device to apply the changes. If prompted, save any ongoing work and click on the “Restart” option to reboot your device.
- Step 6: Verify the Update: Once your device has restarted, open Norton Internet Security again. Navigate to the “Settings” section and click on “LiveUpdate” or “Update” to check for any remaining updates. If no further updates are found, it means that Norton Internet Security is up to date.
By regularly updating Norton Internet Security, you can ensure that your device is equipped with the latest security patches and virus definitions, providing optimal protection against threats. Make it a habit to check for updates frequently or enable automatic updates to keep your software up to date effortlessly.
How to Perform a Full System Scan with Norton Internet Security
Performing a full system scan with Norton Internet Security helps detect and remove any potential threats or malware present on your device. Here’s how you can initiate a full system scan with Norton Internet Security:
- Step 1: Launch Norton Internet Security: Open the Norton Internet Security application on your device. You can usually find it in the system tray or by searching for it in the Start menu.
- Step 2: Navigate to Security: Once the application is open, look for the “Security” or “Scan” tab. Click on it to access the security features and scanning options.
- Step 3: Choose Full System Scan: In the security section, locate the “Full System Scan” or “Full Scan” option. This option scans your entire device, including all files and folders, for any potential threats. Click on the “Full System Scan” option to initiate the scan.
- Step 4: Start the Scan: Norton Internet Security will now start the full system scan. The scan may take some time to complete, depending on the size of your hard drive and the number of files on your device. During the scan, Norton will thoroughly analyze each file, checking for any signs of malware or malicious activity.
- Step 5: Review Scan Results: Once the scan is completed, Norton Internet Security will display the results of the scan. It will provide a detailed report, indicating any threats or suspicious files detected during the scan. Take note of any identified threats or issues for further action.
- Step 6: Take Necessary Actions: If any threats are identified, Norton Internet Security will provide options to take appropriate actions. You can choose to quarantine or remove the detected threats to ensure your device’s safety. Follow the on-screen instructions to proceed with the recommended actions.
- Step 7: Regularly Schedule Scans: To maintain ongoing protection, it is advisable to schedule regular full system scans with Norton Internet Security. You can set up an automatic scanning schedule to ensure your device is regularly checked for any potential threats without manual intervention.
Performing a full system scan with Norton Internet Security on a regular basis is crucial for keeping your device free from malware and ensuring optimal security. By following these steps, you can effectively scan and protect your system from potential threats.
How to Customize Norton Internet Security Settings
Norton Internet Security provides a range of customizable settings that allow you to personalize the software’s behavior and tailor it to your specific preferences. Here’s how you can customize the settings in Norton Internet Security:
- Step 1: Launch Norton Internet Security: Open the Norton Internet Security application on your device. You can usually find it in the system tray or by searching for it in the Start menu.
- Step 2: Access Settings: Once the application is open, locate the “Settings” or “Preferences” tab. Click on it to access the various settings options available.
- Step 3: Explore General Settings: In the settings section, you will find a range of general settings that you can customize. These may include options related to notifications, automatic updates, idle time scans, etc. Review these settings and modify them according to your preferences.
- Step 4: Configure Scan Settings: Norton Internet Security allows you to adjust the settings related to different types of scans. You can customize the frequency of scans, scanning parameters, and the level of aggressiveness. Take a look at these options and set them up based on your requirements.
- Step 5: Personalize Firewall Settings: Norton Internet Security comes with a built-in firewall that offers advanced protection. Explore the firewall settings to customize the rules for inbound and outbound connections. You can also create specific rules for applications and networks, granting or denying access as per your preference.
- Step 6: Manage Identity Protection: Norton Internet Security provides identity theft protection features. You can customize the settings related to blocking malicious websites, detecting and blocking phishing attempts, and managing credit card information or personal data protection. Adjust these options to enhance your security and privacy.
- Step 7: Explore Additional Settings: Norton Internet Security offers additional settings related to web browsing protection, email protection, parental controls, and more. Take some time to navigate through these settings and modify them based on your requirements and preferences.
- Step 8: Save and Apply Changes: After customizing the settings to your liking, make sure to save and apply the changes. Look for an option like “Save” or “Apply” in the settings menu or on each specific setting page. Click on it to save your customized settings.
By customizing the settings in Norton Internet Security, you can fine-tune the software to meet your specific needs and preferences. Take advantage of these customizable options to enhance your security and optimize the software’s performance on your device.
How to Exclude Files and Folders from Norton Internet Security Scans
Norton Internet Security provides the flexibility to exclude specific files and folders from its scans. This can be useful if you have files or folders that you know are safe and do not need to be scanned, saving time and resources. Here’s how you can exclude files and folders from Norton Internet Security scans:
- Step 1: Launch Norton Internet Security: Open the Norton Internet Security application on your device. You can usually find it in the system tray or by searching for it in the Start menu.
- Step 2: Access Settings: Once the application is open, locate the “Settings” or “Preferences” tab. Click on it to access the various settings options available.
- Step 3: Navigate to Scans and Risks Settings: In the settings section, look for the “Scans and Risks” or “Scan Exclusions” option. Click on it to access the scan exclusion settings.
- Step 4: Add Exclusions: In the scan exclusion settings, you will find options to exclude specific files or folders. Click on the “Add” or “Exclude” button to add an exclusion.
- Step 5: Select File or Folder: A window will appear, allowing you to browse and select the file or folder that you want to exclude from Norton Internet Security scans. Navigate to the location of the file or folder, select it, and click “OK” or “Apply” to add the exclusion.
- Step 6: Review Exclusions: Once you have added the exclusion, it will appear in the list of exclusions in the scan exclusion settings. Review the exclusions to ensure that the correct files and folders have been added.
- Step 7: Edit or Remove Exclusions: If you need to edit or remove an exclusion, simply select it from the list and click on the “Edit” or “Remove” button. Make the necessary changes and save the settings.
- Step 8: Test Exclusions: After adding exclusions, it is recommended to test them to ensure that Norton Internet Security does not scan the excluded files or folders. You can do this by running a scan and verifying that the excluded items are not scanned.
By excluding files and folders from Norton Internet Security scans, you can customize the scanning behavior and save time by skipping items that do not require scanning. Use this feature judiciously and ensure that the excluded files and folders are safe and trusted.
How to Disable Norton Internet Security Temporarily
There may be situations where you need to temporarily disable Norton Internet Security, such as when installing a trusted application or troubleshooting network connectivity issues. Here’s how you can disable Norton Internet Security temporarily:
- Step 1: Launch Norton Internet Security: Open the Norton Internet Security application on your device. You can usually find it in the system tray or by searching for it in the Start menu.
- Step 2: Access Settings: Once the application is open, locate the “Settings” or “Preferences” tab. Click on it to access the various settings options available.
- Step 3: Disable Auto-Protect: In the settings section, find the “Antivirus” or “Auto-Protect” option. Click on it to access the settings related to real-time protection. Temporarily disabling the auto-protect feature will stop Norton Internet Security from actively scanning for threats.
- Step 4: Toggle the Auto-Protect Switch: In the auto-protect settings, you will find a toggle switch. Click on it to disable auto-protect. You may be prompted to confirm the action. Follow the on-screen instructions to proceed and temporarily disable the feature.
- Step 5: Disable Firewall: If you also need to disable the firewall temporarily, navigate to the “Firewall” settings. Toggle the switch or choose the option to disable the firewall. Confirm the action if prompted.
- Step 6: Specify Time Limit (Optional): Some versions of Norton Internet Security allow you to specify a time limit for the temporary disablement. If this option is available, set the desired time limit to ensure that the security features are automatically enabled after the specified timeframe.
It is important to note that disabling Norton Internet Security temporarily leaves your device vulnerable to potential threats. Ensure that you only disable it when necessary and re-enable it as soon as the temporary requirement is fulfilled.
Remember to reactivate Norton Internet Security by reversing the above steps once you have completed the task that required it to be temporarily disabled. This will restore the protection provided by the software and ensure the safety of your device and data.
How to Uninstall Norton Internet Security
If you no longer require Norton Internet Security or want to switch to a different security solution, you can uninstall it from your device. Here are the steps to uninstall Norton Internet Security:
- Step 1: Open Control Panel: Click on the “Start” button on your Windows taskbar and select “Control Panel” from the menu. Alternatively, you can search for “Control Panel” in the Windows search bar and open it.
- Step 2: Access Programs and Features: In the Control Panel window, look for the “Programs” or “Programs and Features” option and click on it. This will open a list of installed programs on your device.
- Step 3: Locate Norton Internet Security: Scroll through the list of installed programs and locate “Norton Internet Security.” Click on it to select it.
- Step 4: Click on Uninstall: After selecting Norton Internet Security, click on the “Uninstall” or “Remove” button at the top of the Programs and Features window. You may also find an “Uninstall” option in the right-click context menu for Norton Internet Security.
- Step 5: Confirm Uninstallation: A confirmation prompt will appear, asking if you want to uninstall Norton Internet Security. Review the prompt and click “Yes” or “Uninstall” to proceed with the uninstallation.
- Step 6: Follow the Uninstallation Wizard: The Norton Internet Security uninstallation wizard will guide you through the process. Follow the on-screen instructions, and if prompted, choose any additional options, such as keeping or removing user settings.
- Step 7: Restart Your Device: After the uninstallation is complete, you may be prompted to restart your device. Save any ongoing work and click on the “Restart Now” or “Restart” button to reboot your device.
After your device restarts, Norton Internet Security should be successfully uninstalled. It is recommended to restart your device even if not prompted, as it ensures that any remnants of Norton Internet Security are completely removed.
Remember that uninstalling Norton Internet Security will leave your device vulnerable to threats. If you do not plan on installing another security solution immediately, it is essential to have an alternative security plan in place to protect your device and data.