
What are Quarantined Files?
Quarantined files refer to potentially malicious or suspicious files that have been identified by Norton Internet Security and isolated from the rest of your computer system. When Norton detects a file that exhibits suspicious behavior or is known to be associated with malware or viruses, it takes immediate action to protect your device and prevent any harm.
These files are moved to a separate quarantine area to ensure they cannot cause any harm to your computer or compromise your data. Think of quarantine as a digital isolation chamber for infected or potentially harmful files. By removing these files from their original location, Norton Internet Security mitigates the risk of the infection spreading or causing further damage.
When a file is quarantined, it is essentially being held in a secure and controlled environment, separate from your regular files and applications. This allows Norton to carefully analyze the file and its behavior without putting your computer at risk. The quarantine feature is an integral part of Norton’s comprehensive security system, providing an extra layer of protection against threats that may have bypassed initial scans.
It’s important to note that not all files placed in quarantine are necessarily malicious. There may be instances where legitimate files are mistakenly flagged as suspicious due to false positives. However, it is always better to err on the side of caution and keep potentially harmful files isolated until they can be further examined and determined safe.
By identifying and quarantining suspicious files, Norton Internet Security ensures that your computer remains safe from potential threats, allowing you to confidently navigate the digital landscape without fear of malware or viruses affecting your system’s integrity.
Why Would a File Be Quarantined?
Files can be quarantined for several reasons, all of which are aimed at protecting your computer from potential threats. Here are some common scenarios that may lead to a file being quarantined by Norton Internet Security:
- Detection of Malware: Norton Internet Security uses advanced scanning techniques to identify malware and viruses on your computer. If a file is found to contain malicious code or behavior, it will be immediately quarantined to prevent any further damage.
- Suspicious Behavior: Some files may not be outright malicious, but their behavior raises concerns. Norton’s behavior-based detection system can identify files that exhibit suspicious activity, such as attempting to modify system files or accessing sensitive information. In such cases, the file will be placed in quarantine for further investigation.
- Known Threats: Norton Internet Security constantly updates its database of known threats. If a file matches the signature or characteristics of a known malware or virus, it will be quarantined to prevent it from causing harm to your computer or compromising your data.
- Zero-Day Threats: Zero-day threats refer to newly discovered vulnerabilities or malware that have not yet been patched or detected by traditional security software. Norton’s heuristic analysis can identify files that exhibit characteristics of a zero-day threat, ensuring they are immediately quarantined to protect your system until a proper solution is found.
- User Action: In some cases, users may manually choose to quarantine a file if they suspect it to be potentially harmful or a false positive. This allows for cautious handling and further investigation before determining the file’s actual threat level.
By quarantining files in the above scenarios, Norton Internet Security provides vital protection to your computer and helps prevent the execution of malicious code, ensuring the safety and integrity of your system.
Understanding Norton Internet Security Quarantine
Norton Internet Security quarantine is a designated area within the software where potentially malicious or suspicious files are isolated for further examination and secure storage. This feature plays a crucial role in maintaining the integrity and security of your computer system. Here’s what you need to know about Norton Internet Security quarantine:
Isolation and Protection: When Norton detects a file that exhibits suspicious behavior or is known to be associated with malware or viruses, it moves the file to the quarantine area. By isolating the file, Norton ensures that it cannot cause any harm to your computer or compromise your data. This prevents the spread of infections and potential damage to your system.
Secure Storage: The quarantine area is a secure environment specifically designed to hold potentially harmful files. Norton Internet Security employs an encrypted storage mechanism to ensure that these files cannot be accessed or executed. This prevents any accidental launch of malware and helps maintain the overall security of your computer.
Analysis and Examination: Once a file is placed in quarantine, Norton Internet Security analyzes it to determine its threat level and behavior. This analysis includes scanning the file for known malware signatures, examining its code and behavior, and even comparing it to behavior patterns of similar files. This in-depth examination helps Norton’s security system make informed decisions regarding the file’s disposition.
Restoration or Removal: Norton Internet Security gives you control over the quarantined files. You can review the list of quarantined files and choose to either restore or delete them. Restoring a file moves it back to its original location, while deleting permanently removes it from your system. This flexibility allows you to review and restore any falsely quarantined files while ensuring that genuinely malicious files are permanently removed from your computer.
Notifications and Updates: Norton Internet Security keeps you informed about any suspicious files that are quarantined. It provides notifications and updates, allowing you to review and manage the quarantined files whenever necessary. Regular updates of the antivirus definitions ensure that Norton keeps up with the latest threats and improves its ability to accurately detect potential risks.
Understanding how Norton Internet Security quarantine works helps you make informed decisions about the files in quarantine and ensures that your computer remains protected from potential threats, keeping your system running smoothly and securely.
How to Access the Quarantine in Norton Internet Security
If you suspect that Norton Internet Security has quarantined a file by mistake or if you want to review the quarantined files for any other reason, you can easily access the quarantine feature. Here’s how you can access the quarantine in Norton Internet Security:
- Open Norton Internet Security: Launch the Norton Internet Security application on your computer.
- Go to Security History: Look for the “Security” or “Security History” tab in the Norton user interface. Different Norton versions may have slightly different interfaces, but you should be able to find the Security History option in the main menu or sidebar.
- Access Quarantine: Within the Security History section, look for an option related to quarantine or quarantine management. It may be labeled as “Quarantine”, “Quarantine Center”, or something similar. Click on this option to access the quarantine area.
- View Quarantined Files: Once you enter the quarantine area, you should see a list of files that have been quarantined by Norton Internet Security. Each file will be accompanied by information such as the name, date quarantined, and the threat level or category.
- Take Action: From here, you can choose to take various actions on the quarantined files. You may have options such as restoring a file (moving it back to its original location), permanently deleting a file, or even sending a file to Norton for further analysis if you suspect it to be a false positive.
It’s important to note that you should exercise caution when handling quarantined files and only take action if you are certain about the file’s nature. If you’re unsure about a file, it’s recommended to seek guidance from Norton support or proceed with caution.
By following these steps, you can easily access and manage the quarantine in Norton Internet Security, allowing you to review, restore, or delete quarantined files as necessary.
Viewing the Quarantined Files
To effectively manage the quarantine in Norton Internet Security, it’s important to know how to view the quarantined files. Here are the steps to view the quarantined files in Norton Internet Security:
- Open Norton Internet Security: Launch the Norton Internet Security application on your computer.
- Access the Quarantine: Depending on the version of Norton you’re using, navigate to the quarantine section using the instructions provided in the previous section (How to Access the Quarantine in Norton Internet Security).
- List of Quarantined Files: Once you’re in the quarantine area, you’ll see a list of files that Norton has quarantined. The list may include details such as the name of the file, the date it was quarantined, and the threat level or category associated with the file.
- File Information: Click on a specific file to view more information about it. Norton may provide additional details about the file, including its location on your computer, the type of threat it poses, and any actions taken by Norton to secure it.
- Reviewing File Details: Take the time to review the file details provided by Norton. This will help you assess the threat level and determine whether you need to restore the file, delete it, or send it to Norton for further analysis if you suspect it to be a false positive.
- Additional Options: Depending on your version of Norton, you may have additional options available for each file in quarantine. These options typically include restoring the file, permanently deleting it, or sending it to Norton for further analysis if you suspect a false positive. Choose the appropriate action based on your assessment of the file’s risk level.
By following these steps, you can easily view the quarantined files in Norton Internet Security. This enables you to review important information about the files and make informed decisions about their disposition, ensuring the security and integrity of your computer system.
Restoring Files from Quarantine
If you believe that a file was mistakenly quarantined by Norton Internet Security or you simply want to restore a file that was previously quarantined, you can easily do so using the following steps:
- Access the Quarantine: Open Norton Internet Security and navigate to the quarantine section. Refer to section 4, “How to Access the Quarantine in Norton Internet Security,” for detailed instructions on how to access the quarantine.
- Review the Quarantined Files: Once you’re in the quarantine area, you’ll see a list of files that have been quarantined by Norton. Take your time to review the files and identify the one you wish to restore.
- Select the File: Click on the file you want to restore from the quarantine list. This will typically highlight the file and provide additional information about it.
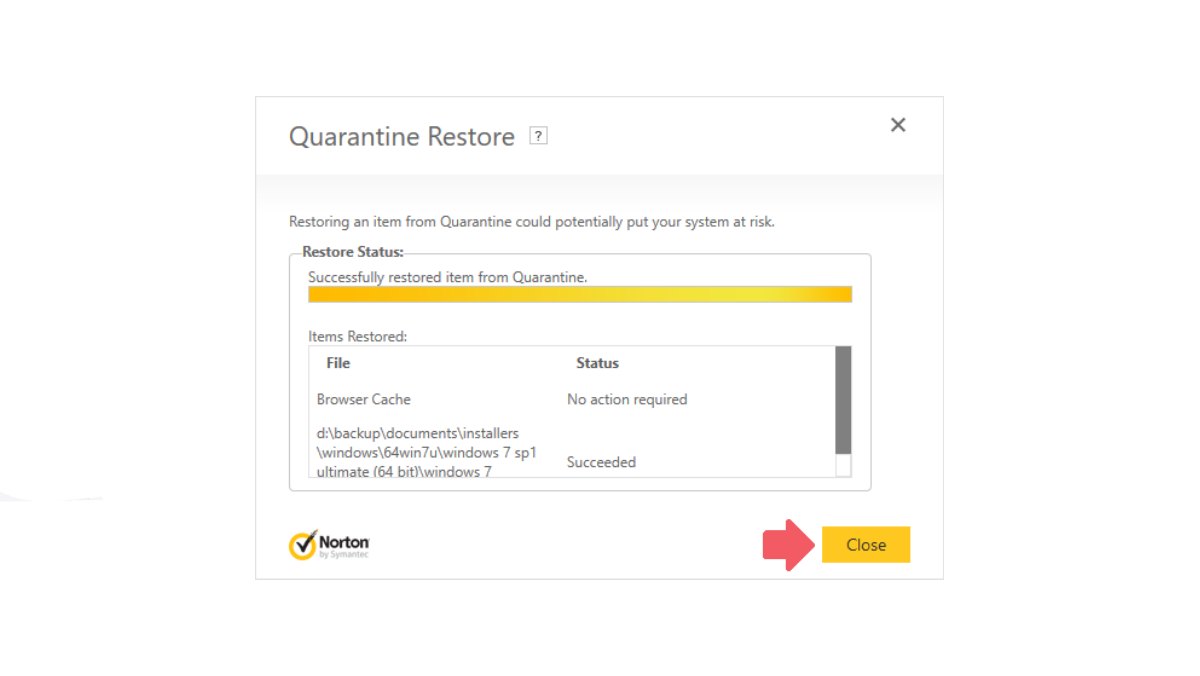
- Restore the File: Look for an option or button that allows you to restore the selected file. It may be labeled as “Restore,” “Move out of Quarantine,” or something similar. Click on this option to initiate the restoration process.
- Confirmation: Norton may ask for confirmation before restoring the file. This confirmation step ensures that you are aware of the action being taken. Confirm your decision to restore the file.
- Verify the File: After restoring the file, double-check its location to ensure it has been successfully restored to its original location. You can manually navigate to the file’s original folder or use Norton’s file search feature to locate the restored file.
- Scan the Restored File: It’s always a good idea to run a virus scan on the restored file to ensure it is now free from any potential threats. Norton Internet Security allows you to initiate a manual scan on specific files or folders.
By following these steps, you can easily restore a file from the quarantine in Norton Internet Security. This allows you to recover files that were mistakenly quarantined or resolve false positives while maintaining the security and integrity of your computer system.
Deleting Files from Quarantine
If you no longer need or want to keep a file in quarantine, you can easily delete it from the quarantine area in Norton Internet Security. Here’s how you can delete files from quarantine:
- Open Norton Internet Security: Launch the Norton Internet Security application on your computer.
- Access the Quarantine: Navigate to the quarantine section within the Norton interface. Refer to section 4, “How to Access the Quarantine in Norton Internet Security,” for instructions on how to access the quarantine.
- Identify the File: In the quarantine area, locate the file that you want to delete. Review the list of quarantined files to find the specific file you wish to remove.
- Select the File: Click on the file you want to delete from the quarantine. This will typically highlight the file, indicating that it has been selected.
- Delete the File: Look for an option or button that allows you to delete the selected file from the quarantine. It may be labeled as “Delete,” “Remove,” or something similar. Click on this option to initiate the deletion process.
- Confirmation: Norton may ask for confirmation before deleting the file from the quarantine. Confirm your decision to permanently delete the file. Please note that once deleted, the file cannot be recovered.
- Verify the Deletion: After deleting the file, double-check the quarantine list to ensure that it has been successfully removed. The file should no longer appear in the quarantine area.
Deleting files from the quarantine helps you manage and organize the quarantined files effectively. Removing unnecessary files from the quarantine ensures that you focus on files that require further analysis or restoration, streamlining the security management process within Norton Internet Security.
Managing Quarantine Settings in Norton Internet Security
Norton Internet Security provides various options to manage the quarantine settings according to your preferences. These settings allow you to customize how Norton handles quarantined files and enhances your overall security management experience. Here’s how you can manage quarantine settings in Norton Internet Security:
- Open Norton Internet Security: Launch the Norton Internet Security application on your computer.
- Access the Settings: Look for a settings menu or gear icon within the Norton interface. This menu is typically located in the top-right corner or can be accessed from a sidebar. Click on the settings option to proceed.
- Open Quarantine Settings: Within the Norton settings, navigate to the section related to quarantine settings. This section may be labeled as “Quarantine Settings,” “Security Settings,” or something similar.
- Configure Settings: Once you’re in the quarantine settings section, you’ll have various options to customize the way Norton handles quarantined files. These options may include:
- Automatic Actions: Choose the default action for quarantined files, such as automatically deleting them or automatically restoring them to their original location.
- Quarantine Exclusions: Specify files or folders that you want Norton to exclude from being quarantined. This is useful for ensuring that certain safe files are not mistakenly flagged as threats.
- Notifications: Configure the notification settings for quarantined files. You may choose to receive real-time notifications when a file is quarantined or adjust the level of notifications.
- Quarantine Duration: Set the time period for how long a file remains in quarantine. After the specified duration, Norton may automatically delete the file, providing an extra layer of protection.
- Save Changes: After configuring your desired quarantine settings, make sure to save the changes by clicking the “Save” or “Apply” button within the settings menu.
- Regular Review and Adjustment: It’s important to regularly review and adjust your quarantine settings based on your evolving needs and threats. Stay updated with new features and options that Norton may introduce to enhance the quarantine management experience.
By managing the quarantine settings in Norton Internet Security, you can tailor the software to align with your specific requirements. This customization ensures that quarantined files are handled in a manner that best suits your security preferences and helps safeguard your computer system effectively.
Tips to Avoid Files Being Quarantined
While Norton Internet Security’s quarantine feature is essential for protecting your computer from potential threats, there are steps you can take to minimize the chances of legitimate files being mistakenly quarantined. Here are some tips to help you avoid files being quarantined:
- Exclude Trusted Files: Take advantage of Norton’s exclusion settings to specify files or folders that you know are safe and shouldn’t be flagged as threats. By excluding trusted files, you reduce the likelihood of them being mistakenly quarantined.
- Keep Software Updated: Regularly update your operating system, applications, and antivirus software to ensure that you have the latest security patches and virus definitions. Outdated software may trigger false positives and result in files being quarantined incorrectly.
- Download from Trusted Sources: Obtain software, files, and documents from reputable sources. Avoid downloading files from untrusted or suspicious websites, as they may contain malicious code that could trigger quarantine alerts.
- Be Cautious with Email Attachments: Exercise caution when opening email attachments. If an attachment looks suspicious or comes from an unknown sender, refrain from opening it. Scan email attachments with your antivirus software to detect any potential threats before opening them.
- Perform Regular Scans: Run regular virus scans on your computer using Norton Internet Security to catch and remove any potential threats before they trigger quarantine alerts. This proactive approach helps prevent false positives and ensures that your system remains secure.
- Scan Files Before Opening: Prior to opening or executing downloaded files, ensure that you scan them using your antivirus software. This extra step can help identify any potential threats and avoid unwanted quarantine actions.
- Practice Safe Browsing Habits: Be mindful of the websites you visit and exercise caution when interacting with online content. Avoid clicking on suspicious links, pop-up ads, or engaging in potentially unsafe online activities that could introduce malware or trigger quarantine alerts.
- Keep Security Software Enabled: Ensure that Norton Internet Security or your chosen antivirus software is always enabled and running in the background. Disabling or pausing your security software increases the risk of threats going undetected and potentially triggering quarantine actions.
- Learn about Norton’s False Positive Process: Familiarize yourself with Norton’s false positive reporting and analysis process. If you believe a file has been mistakenly quarantined, you can submit it to Norton for further inspection and correction if necessary.
By following these tips, you can minimize the chances of legitimate files being quarantined by Norton Internet Security. This ensures that your computer remains protected while allowing trusted files and applications to function without interruptions.