
What Is My Network Places?
My Network Places is a feature in Microsoft Windows that allows users to access and manage network resources, such as computers, printers, and shared folders, in a local network or over a VPN (Virtual Private Network). It provides a convenient way to view and interact with network devices and resources from a single location.
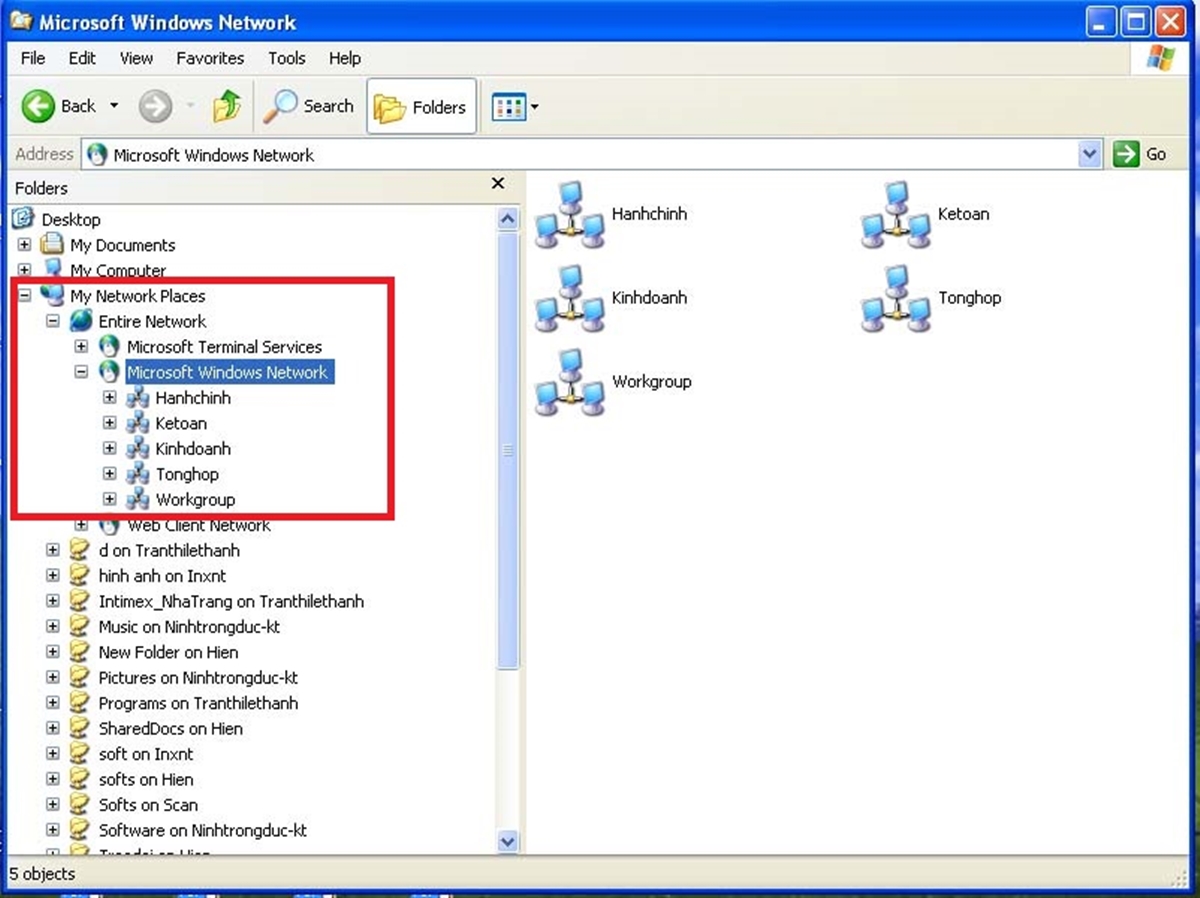
When you open My Network Places, you can find a list of icons representing the network devices and resources available to you. These icons represent computers, servers, shared folders, network printers, and other network devices that are part of your local network or connected via a VPN.
Using My Network Places, you can easily browse through the network and access shared files, folders, and network printers. It allows you to connect and collaborate with other users on the network, making it a vital tool for businesses and organizations working in a collaborative environment.
Furthermore, My Network Places provides a centralized location for managing network connections and settings. You can view and modify properties for network adapters, configure sharing settings for folders, and troubleshoot network-related issues right from within the My Network Places interface.
This feature simplifies network management tasks, making it easier for users to connect to network resources, share files, and print documents. Whether you are working in a small office with multiple computers or in a large organization with complex network infrastructure, My Network Places provides a user-friendly interface for accessing and managing network resources.
Overall, My Network Places serves as a hub for networking in Windows, allowing users to easily navigate, connect to, and manage network resources. It enhances productivity and facilitates collaboration by providing a seamless experience for accessing shared files, printers, and network devices.
How to Access My Network Places
To access My Network Places in Microsoft Windows, follow these simple steps:
- Click on the “Start” button on the lower-left corner of your screen.
- Select “My Network Places” from the Start menu. It may also be labeled as “Network” or “Network Places” depending on your Windows version.
- The My Network Places window will open, showing you the network devices and resources available on your network.
Alternatively, you can also access My Network Places through Windows Explorer. Here’s how:
- Open Windows Explorer by clicking on the folder icon on your taskbar or pressing the “Windows key + E” on your keyboard.
- In the left-hand navigation pane, you will see the option for “My Network Places” or “Network.” Click on it.
- The My Network Places window will open, displaying the network devices and resources in your network.
Once you have accessed My Network Places, you can browse through the available network resources. By clicking on a specific resource, such as a computer or shared folder, you can access the contents and perform actions like opening files, copying or moving files, or even printing documents on network printers.
It is important to note that the availability and visibility of network devices and resources in My Network Places depend on the network configuration and permissions set by the network administrator. In some cases, you may need to enter network credentials or obtain permission to access certain resources.
Now that you know how to access My Network Places, you can easily manage and interact with network devices and resources on your local network or connected via a VPN. It provides a centralized and convenient way to collaborate, share files, and utilize network resources within your Windows environment.
Overview of My Network Places
My Network Places is a feature in Microsoft Windows that provides a centralized location for accessing and managing network resources. It serves as a gateway to connect and interact with the devices and shared folders on your local network or over a VPN (Virtual Private Network).
When you open My Network Places, you will see a collection of icons representing the network devices and resources available to you. These icons include computers, servers, shared folders, network printers, and other network devices that are part of your network infrastructure.
By double-clicking on a computer or server icon, you can explore its shared resources, such as folders, drives, or printers. This allows you to navigate through the network and access files and resources shared by other users on the network. You can perform operations like copying, moving, or deleting files, as well as printing documents on network printers directly from My Network Places.
Furthermore, My Network Places allows you to organize and customize the view of network resources. You can create shortcuts to frequently accessed network folders or resources, making it faster and easier to find and access them. It enables you to arrange the icons based on your preference, such as sorting them alphabetically or by type.
Additionally, My Network Places provides a quick way to view information about a particular network device or resource. By right-clicking on an icon and selecting “Properties,” you can access detailed information about the device, including its IP address, network protocols used, and sharing settings.
Having an intuitive and user-friendly interface, My Network Places simplifies network management and enhances productivity. It allows users to easily connect and collaborate with others on the network, share files and resources, and access network devices seamlessly. It is particularly useful in business environments where file sharing and resource utilization are crucial for efficient workflow.
Icons and Names in My Network Places
When you open My Network Places in Microsoft Windows, you will encounter various icons and names representing network devices and resources. These icons provide visual representations of the connected devices and allow for easy navigation and access. Understanding the different icons and their meanings can help you quickly locate and utilize network resources. Here’s an overview of the icons and names you might encounter in My Network Places:
Computer Icon: The computer icon represents other computers on the network. By double-clicking on a computer icon, you can access shared folders and resources on that specific computer. This allows for seamless file sharing and collaboration among users.
Printer Icon: The printer icon signifies network printers available for use. Double-clicking on a printer icon allows you to send print jobs to the associated printer, making it convenient to print documents from any connected computer on the network.
Folder Icon: The folder icon represents shared folders on the network. These folders can be accessed to view and manage files shared by other users. By double-clicking on a folder icon, you can explore its contents and perform operations such as copying, moving, or deleting files.
Server Icon: The server icon is used to denote network servers. Servers typically host shared resources and provide centralized management for user access. By double-clicking on a server icon, you can access shared folders, databases, or applications hosted on that server.
Shortcut Icon: The shortcut icon resembles a small arrow overlay on the original icon of a device or resource. It is used to indicate a shortcut created in My Network Places to quickly access frequently used resources. By double-clicking on a shortcut icon, you can instantly navigate to the associated network resource.
The names displayed in My Network Places correspond to the labels assigned to the network devices and resources. These names are set by the network administrator or owner of the device/resource and may reflect the computer name, printer name, or custom labels provided. They allow users to easily identify and differentiate between various network resources when browsing through My Network Places.
It is worth noting that the availability of icons and names in My Network Places depends on the network configuration and the devices/resources connected to the network. Network administrators can manage and customize the visibility of devices and resources to ensure security and proper access for individual users or user groups.
Understanding the icons and names in My Network Places enables users to navigate, connect, and utilize network resources effectively. It simplifies the process of accessing shared folders, printers, and other resources, ultimately enhancing productivity and collaboration within a networked environment.
Tips for Organizing and Customizing My Network Places
My Network Places in Microsoft Windows provides a convenient interface for accessing and managing network resources. To improve efficiency and make the most out of this feature, consider the following tips for organizing and customizing My Network Places:
Create Shortcuts: One way to streamline access to frequently used network resources is by creating shortcuts. Right-click on a network folder or resource, select “Create Shortcut,” and then drag and drop the shortcut into My Network Places. This allows for quick and easy access without the need to navigate through multiple levels of folders.
Arrange Icons: By default, My Network Places may display icons in a particular order. However, you can arrange them based on your preference. Simply click on the “View” menu and select “Arrange Icons.” You can choose to sort the icons by name, type, or other criteria to simplify navigation and locate specific resources quickly.
Customize Folder Views: When accessing shared folders within My Network Places, you can customize the folder view options to suit your needs. In the folder window, click on “View” and select “Customize This Folder.” From there, you can choose how files and folders appear, such as displaying them as thumbnails, details, or icons, and customize other view settings like sorting and grouping.
Add Network Locations: My Network Places allows you to add network locations outside of your local network. This includes remote networks accessed via VPN or websites that require network access. To add a network location, click on “Add Network Place” in the My Network Places window and follow the prompts to add the location’s URL or network address. This feature enhances connectivity and facilitates seamless access to network resources.
Remove Unused Network Folders: If you have network folders that are no longer needed or accessed frequently, you can remove them from My Network Places. Simply right-click on the folder you want to remove and select “Delete” or “Remove.” This helps declutter and maintain a streamlined view of only the essential network resources.
Customize Folder Icons: To make it easier to identify specific network folders, you can customize their icons. Right-click on a folder, select “Properties,” go to the “Customize” tab, and click on “Change Icon.” You can choose from a variety of icons or even use a custom icon file. This customization option allows for personalization and visual differentiation of important folders.
Access Network Connections: My Network Places also provides quick access to network connections and settings. By clicking on “Network Connections” in the My Network Places window, you can manage and modify network adapters, configure network protocols, and troubleshoot connectivity issues. This simplifies network management tasks and ensures smooth network operations.
By implementing these tips, you can tailor My Network Places to your specific needs, improving its usability and efficiency. This allows for better organization and customization of network resources, enhancing productivity and making network interaction more seamless.
How to Add or Remove a Network Folder in My Network Places
In Microsoft Windows, My Network Places provides a central hub for accessing and managing network resources. Adding or removing a network folder within My Network Places allows you to customize the view and streamline access to important shared folders. Here’s how you can add or remove a network folder:
Adding a Network Folder:
- Open My Network Places by clicking on the “Start” button and selecting “My Network Places” or “Network” from the Start menu. Alternatively, you can access it through Windows Explorer by clicking on the folder icon on the taskbar or pressing “Windows key + E” on your keyboard.
- In the My Network Places window, click on “Add a network place” or “Add Network Location” in the left-hand navigation pane. This opens the Add Network Place Wizard.
- Follow the prompts in the wizard to specify the network folder location. You can choose to browse for the folder on the network or enter the folder’s network path directly. Click “Next” to continue.
- Provide a meaningful name for the network folder to help identify it easily in My Network Places. You can also choose to add a description or leave it blank. Click “Next” to proceed.
- Review the settings you’ve entered and click “Finish” to add the network folder to My Network Places. The folder will now appear in the My Network Places window for easy access.
Removing a Network Folder:
- Open My Network Places as mentioned above.
- Locate the network folder you want to remove from the list of available resources.
- Right-click on the folder and select “Delete” or “Remove” from the context menu.
- Confirm your action when prompted to remove the network folder from My Network Places.
- The folder will no longer be displayed in My Network Places, decluttering the view and removing access to that particular network folder.
By adding specific network folders to My Network Places, you can have quick access to frequently used folders and resources. You can easily navigate through these folders and perform file operations without having to search for them in the network hierarchy each time.
On the other hand, removing unused or irrelevant network folders from My Network Places helps streamline the view, keeping only the essential resources visible and enhancing usability.
By following these steps, you can add or remove network folders in My Network Places, tailoring the view to your specific needs and making your network browsing experience more efficient.
How to View and Access Network Computers and Resources
My Network Places in Microsoft Windows provides a convenient way to view and access network computers and resources within a local network or over a VPN (Virtual Private Network). With this feature, you can easily collaborate and share files with other users, as well as utilize network devices like printers. Here’s how you can view and access network computers and resources:
- Open My Network Places by clicking on the “Start” button and selecting “My Network Places” or “Network” from the Start menu. Alternatively, you can access it through Windows Explorer by clicking on the folder icon on the taskbar or pressing “Windows key + E” on your keyboard.
- In the My Network Places window, you will see a list of icons representing available network devices and resources. These icons can include computers, servers, shared folders, printers, and other network devices on your network.
- To access a specific network computer, double-click on the corresponding computer icon. This will open the shared resources and folders available on that computer. From here, you can browse and interact with the shared files, folders, and printers as needed.
- If you want to access a shared folder on a specific computer, double-click on the computer icon, navigate to the desired folder, and double-click to open it. You can then perform actions like copying, moving, or deleting files within the shared folder.
- To access network printers, navigate to My Network Places and double-click on the printer icon. This will display available printers on the network. Double-click on a printer to view its properties and send print jobs to it.
- Additionally, you can use the search box in the My Network Places window to look for specific computers or shared resources on the network. Simply type in the name of the computer or shared folder you’re looking for, and the search results will display the relevant icons.
It is important to note that accessing network computers and resources in My Network Places requires appropriate permissions and authentication. Depending on the network configuration, you may need to enter network credentials, such as a username and password, to access certain resources.
With My Network Places, you can easily view and access network computers, shared folders, and printers within your local network or VPN. This functionality promotes seamless collaboration, file sharing, and resource utilization, making it an integral part of a networked environment.
How to Map a Network Drive
Mapping a network drive in Microsoft Windows allows you to connect and access a shared folder on a remote computer or server as if it were a local drive on your computer. This makes it convenient to access and work with files stored on the network, enhancing productivity and collaboration. Here’s a step-by-step guide on how to map a network drive:
- Open File Explorer by clicking on the folder icon on the taskbar or pressing “Windows key + E” on your keyboard.
- Click on the “This PC” or “Computer” option in the left-hand navigation pane.
- In the “Computer” tab of the File Explorer ribbon, click on the “Map Network Drive” button.
- A “Map Network Drive” window will appear, allowing you to specify the drive letter you want to assign to the network drive. Click on the dropdown menu to choose an available drive letter, or you can leave it as the default selection.
- Next, you need to enter the path of the shared folder you want to map. The path can be the network address (e.g., \\computername\sharename) or the IP address of the computer hosting the shared folder. If necessary, click on the “Browse” button to locate and select the shared folder.
- If you want the network drive to be accessible automatically every time you start your computer, check the box that says “Reconnect at sign-in.”
- Finally, click on the “Finish” button to complete the mapping process. The network drive will now appear in File Explorer under “This PC” or “Computer,” and you can access it just like any other local drive on your computer.
When you map a network drive, you have the option to provide your credentials, including a username and password, if required to access the shared folder. You can choose to save these credentials, so you don’t need to enter them every time you access the network drive.
Mapping a network drive makes it convenient to work with files stored on shared folders by providing a direct and easy-to-access link to the network location. It allows for seamless file transfer, collaboration, and efficient workflow within a networked environment.
How to Connect to a VPN or Remote Network
A VPN (Virtual Private Network) allows you to connect securely to a remote network over the internet, providing access to network resources as if you were physically present in that location. Connecting to a VPN is useful for remote work, accessing files on a private network, or maintaining online privacy. Here’s a step-by-step guide on how to connect to a VPN or remote network:
- Ensure you have the necessary VPN client software installed on your computer. This software is typically provided by your organization or VPN service provider.
- Open the VPN client software and enter the required information to establish the connection. This information typically includes the server address or URL, your username, and password.
- If applicable, select the connection protocol to use. Common VPN protocols include PPTP, L2TP/IPSec, SSTP, and OpenVPN. Your organization or VPN service provider will specify which protocol to use.
- Click the “Connect” or “Start” button to initiate the VPN connection.
- The VPN client will attempt to establish a secure connection with the remote network. This process may take a few moments.
- Once the VPN connection is established, you will be assigned an IP address from the remote network, and your internet traffic will be routed through the VPN server.
- You can now access resources on the remote network as if you were physically connected to it. This may include accessing shared files, printers, databases, or other network resources.
When connected to a VPN, it is important to remember that your internet traffic is encrypted and secured. This protects your data from unauthorized access and ensures privacy while accessing resources on the remote network.
When you have finished using the VPN connection, simply disconnect from the VPN client software. This will terminate the secure connection and restore your internet traffic to its default routing.
Connecting to a VPN or remote network provides a secure and convenient way to access resources on private networks, collaborate with team members, and maintain online privacy. This capability is particularly valuable for remote work, allowing users to connect to their organization’s network from anywhere in the world.
Troubleshooting Common Issues with My Network Places
While My Network Places in Microsoft Windows is a powerful tool for accessing and managing network resources, it can occasionally encounter issues that may prevent proper functionality. Here are some common issues you may come across with My Network Places and troubleshooting steps to resolve them:
Issue 1: Unable to Access Network Devices or Resources
If you are unable to access network devices or resources through My Network Places, follow these steps:
- Check your network connection: Ensure that you are connected to the network correctly, both physically (if applicable) and through your network adapter settings.
- Verify network credentials: Make sure you have the necessary permissions and enter the correct credentials (username and password) if prompted.
- Check network sharing settings: Ensure that the network device or resource you are trying to access has sharing enabled and proper permissions assigned.
- Disable firewall or security software: Temporarily disable any firewall or security software running on your computer to determine if they are blocking network access. Remember to re-enable them after troubleshooting.
Issue 2: Network Resources Not Displaying in My Network Places
If you cannot see network devices or resources in My Network Places, try the following steps:
- Refresh the network view: Click on the “Refresh” button or press F5 to refresh the My Network Places window. This ensures that any changes or updates in the network are reflected.
- Check network discovery settings: Ensure that network discovery is enabled on both your computer and the network devices. Go to the Network and Sharing Center in Control Panel and verify the network discovery settings.
- Restart network services: Restart the “Computer Browser” and “Server” services on your computer. Open the Services console, locate the relevant services, and right-click > Restart.
Issue 3: Slow Network Browsing or File Access
If you experience slow network browsing or file access in My Network Places, consider these troubleshooting steps:
- Check network connectivity: Verify that your network connection is stable and not experiencing any bandwidth or latency issues. Run network tests or speed tests to assess the performance of your network connection.
- Disable unnecessary network services: If there are other network services or applications running in the background, temporarily disable them to see if they are affecting network performance.
- Update network drivers: Ensure that your network adapter drivers are up to date. Visit the manufacturer’s website or use Windows Update to check for driver updates.
- Optimize network settings: Adjust network settings such as network adapter properties, configuration parameters, or advanced settings to optimize network performance.
If the above troubleshooting steps do not resolve the issue, you may need to seek assistance from your network administrator or technical support. They can help diagnose and resolve more complex network-related problems that affect My Network Places.
By following these troubleshooting steps, you can address common issues encountered with My Network Places. This ensures smooth network browsing, resource access, and collaboration within your networked environment.