
Network Settings Overview
Network settings are a crucial aspect of any computer or device connected to a network. They determine how your device communicates and interacts with other devices and resources on the network. These settings control various aspects of network connectivity, including IP addresses, DNS servers, and proxy configurations.
Whether you’re using a Windows, Mac, or Linux operating system, understanding network settings is essential for troubleshooting connectivity issues, setting up a secure network, or optimizing network performance.
Network settings allow you to customize your network connection to meet your specific requirements. You can adjust settings such as IP address configuration, subnet masks, default gateways, DNS servers, and more. These settings ensure that your device can find and communicate with other devices on the network and access the internet.
Configuring network settings also involves choosing between dynamic or static IP address allocation. Dynamic Host Configuration Protocol (DHCP) automatically assigns IP addresses to devices on the network, while manual IP configuration allows you to manually assign a specific IP address to your device.
Additionally, DNS settings play a vital role in network connectivity. Domain Name System (DNS) resolves domain names into IP addresses, allowing you to access websites and resources using human-readable domain names instead of complicated IP addresses.
By understanding network settings and their functionalities, you can troubleshoot network issues, optimize network performance, and ensure secure and reliable connectivity. Whether you’re a home user, a small business owner, or an IT professional, having a solid grasp of network settings is essential in today’s interconnected world.
What Are Network Settings?
Network settings refer to the configuration parameters that control how a device connects and communicates on a network. These settings determine how your device interacts with other devices, internet services, and resources on the network.
At their core, network settings define critical elements of your network connection, such as IP addresses, subnet masks, default gateways, DNS servers, and proxy configurations. Let’s take a closer look at some of these settings:
- IP Addresses: An IP address is a unique numerical identifier assigned to each device on a network. It enables devices to locate and communicate with each other. IP addresses can be either dynamic or static, depending on how they are assigned.
- Subnet Masks: A subnet mask helps determine which portion of an IP address represents the network and which portion represents the host. It is used to partition large networks into smaller, more manageable subnetworks.
- Default Gateways: A default gateway is the IP address of a device that serves as the entry point to other networks or the internet. It directs network traffic to the appropriate destination.
- DNS Servers: Domain Name System (DNS) servers translate human-readable domain names (such as example.com) into IP addresses. These servers help your device locate and connect to websites and other resources on the internet.
- Proxy Configurations: Proxy settings allow you to route your network traffic through a proxy server, which can provide security, caching, or other network services.
Network settings can vary depending on the operating system you are using. Common operating systems such as Windows, Mac, and Linux provide built-in tools and interfaces to configure these settings.
Understanding network settings is crucial for troubleshooting network connectivity issues, ensuring secure network access, and optimizing network performance. By correctly configuring these settings, you can enable your device to communicate seamlessly with other devices, access the internet, and securely connect to resources on your network.
Why Are Network Settings Important?
Network settings play a vital role in establishing and maintaining a reliable and secure network connection. Here are several key reasons why network settings are essential:
1. Connectivity: Network settings determine how your device connects to the network and communicates with other devices. By configuring the correct settings, you can establish a stable and consistent network connection, enabling seamless data transfers and access to internet services and resources.
2. Network Security: Properly configuring network settings helps protect your device and network from unauthorized access and security threats. By setting up secure passwords, enabling firewalls, and implementing encryption protocols, you can safeguard your data and prevent unauthorized users from accessing your network and sensitive information.
3. Resource Sharing: Network settings allow you to share resources such as printers, files, and internet connections among multiple devices. By configuring settings like printer sharing or file sharing, you can easily collaborate and share information with other devices connected to the network.
4. Internet Access: Network settings, particularly DNS configurations, are crucial for accessing websites, online services, and other internet resources. By specifying the correct DNS servers, your device can resolve domain names into IP addresses, enabling seamless internet browsing and access to web-based applications.
5. Network Performance: Properly configuring network settings can optimize network performance. By setting appropriate IP address ranges, subnet masks, and default gateways, you can ensure efficient data routing and minimize network congestion, improving overall network speed and performance.
6. Troubleshooting: Understanding network settings is essential for troubleshooting network connectivity issues. By familiarizing yourself with the settings and their functionalities, you can diagnose and resolve problems related to IP conflicts, DNS resolution, gateway mismatches, or proxy misconfigurations.
7. Customization: Network settings provide a level of customization, allowing you to tailor your network connection to your specific requirements. Whether you need to adjust IP address configurations, set up network protocols, or configure proxy settings, having control over network settings allows you to optimize your network for your unique needs.
By recognizing the importance of network settings and configuring them correctly, you can ensure a reliable, secure, and high-performance network connection for your devices. Whether you are a home user, a small business owner, or an IT professional, understanding and managing network settings is essential in today’s interconnected world.
Common Network Settings on Windows
Windows operating systems provide a comprehensive set of network settings that allow you to configure and manage your network connections effectively. Here are some of the most common network settings found in Windows:
1. IP Address Configuration: Windows offers two main options for IP address configuration: dynamic and static. Dynamic IP addresses are automatically assigned by a DHCP server, whereas static IP addresses are manually assigned. You can configure these settings through the network adapter settings or using the Command Prompt or PowerShell.
2. Subnet Mask and Default Gateway: Along with the IP address, configuring the subnet mask and default gateway is crucial for proper network communication. The subnet mask determines the network portion of the IP address, while the default gateway is the IP address of the router that connects your device to other networks or the internet.
3. DNS Configuration: Windows allows you to specify the DNS servers your device uses to resolve domain names into IP addresses. You can configure this setting through the network adapter settings or TCP/IP properties. By customizing DNS settings, you can improve internet access and control how your device resolves domain names.
4. Proxy Settings: If you need to access the internet through a proxy server, Windows provides options to configure proxy settings. You can specify proxy server addresses, ports, and authentication details for both HTTP and HTTPS connections. These settings are essential for environments where internet traffic needs to be routed through a proxy server, such as in corporate networks.
5. Network Sharing and Discovery: Windows allows you to enable or disable network sharing and discovery features. You can configure whether your device can be discovered by other devices on the network, access shared files and printers, and allow remote desktop connections. These settings are particularly useful in home or small office networks where devices need to interact with each other.
6. Firewall Settings: Windows Firewall is a built-in security feature that controls incoming and outgoing network traffic. You can customize firewall settings to allow or block specific programs or ports, ensuring that your device is protected from unauthorized network access.
7. Network Adapter Properties: Windows provides extensive settings for network adapters, allowing you to configure advanced properties such as link speed, duplex mode, power management, and more. These settings can help optimize network performance and troubleshoot issues related to network connectivity.
These are just a few examples of the network settings available in Windows. Navigating and configuring these settings can be done through the Control Panel, Network and Sharing Center, or Settings app, depending on the version of Windows you are using. Understanding and properly configuring these settings empower you to establish and manage a secure and efficient network connection on your Windows device.
Common Network Settings on Mac
Mac operating systems provide a range of network settings that allow you to configure and manage network connections effectively. Here are some common network settings you’ll find on a Mac:
1. IP Address Configuration: Mac allows you to configure IP addresses dynamically using DHCP or manually assign static IP addresses. You can access these settings by navigating to the Network preferences pane or using the Terminal.
2. Subnet Mask and Default Gateway: Along with the IP address, you can configure the subnet mask and default gateway on your Mac. These settings are essential in determining the network portion of the IP address and routing network traffic. You can modify these settings through the Network preferences pane.
3. DNS Configuration: Mac provides options for configuring DNS settings to specify the servers used for domain name resolution. You can customize DNS settings through the Network preferences pane, allowing you to use custom DNS servers or automatically obtain DNS server information from your network.
4. Proxy Settings: If you need to connect to the internet through a proxy server, Mac allows you to configure proxy settings easily. You can set up HTTP, HTTPS, FTP, and SOCKS proxies through the Network preferences pane, enabling your Mac to route network traffic through the proxy server.
5. Network Sharing: Mac offers built-in network sharing capabilities, allowing you to share files, printers, and internet connections with other devices on the network. You can configure network sharing settings through the Sharing preferences pane, making it simple to collaborate and access shared resources.
6. Firewall Settings: Like Windows, Mac includes a built-in firewall that safeguards your device from unauthorized network access. You can configure firewall settings through the Security & Privacy preferences pane to allow or block specific incoming connections to your Mac.
7. Network Diagnostics: Mac provides a comprehensive set of network diagnostic tools that can help troubleshoot connectivity issues. Utilities such as Network Diagnostics and Network Utility offer insights into network performance, ping tests, DNS resolution, and more.
8. VPN Configuration: Mac supports Virtual Private Network (VPN) connections, allowing you to establish secure connections over public networks. You can configure VPN settings through the Network preferences pane, enabling secure access to remote resources.
These are just a few examples of the common network settings available on Mac. You can access and customize these settings through the System Preferences application. Understanding and configuring these settings allows you to establish reliable network connections, optimize performance, and ensure secure network access on your Mac device.
Common Network Settings on Linux
Linux operating systems offer a wide range of network settings that allow you to configure and manage network connections efficiently. Here are some common network settings you’ll encounter on Linux:
1. IP Address Configuration: Linux supports both dynamic and static IP addresses. Network configuration files, such as /etc/network/interfaces or /etc/sysconfig/network-scripts/ifcfg-ethX, allow you to assign IP addresses manually or use network management tools such as NetworkManager or systemd-networkd to configure dynamic IP addressing.
2. Subnet Mask and Default Gateway: Like other operating systems, Linux requires subnet mask and default gateway configurations for proper network communication. These settings are typically defined in the network configuration files or managed through network management tools.
3. DNS Configuration: Linux uses the /etc/resolv.conf file to specify DNS servers. You can manually edit this file to set custom DNS servers or use network management tools to configure DNS settings. Dynamic DNS assignments are also possible through DHCP client services.
4. Proxy Settings: If you need to connect to the internet through a proxy server, Linux provides various methods to configure proxy settings. You can set environment variables, modify system-wide proxy configurations, or configure individual application proxy settings to route network traffic through the proxy server.
5. Network Sharing: Linux distributions offer comprehensive network sharing capabilities. You can share files, printers, and internet connections using protocols like Samba, NFS, or SSH. Network sharing settings are typically managed through graphical interfaces or command-line tools like Samba or NFS configuration files.
6. Firewall Settings: Linux distributions come with powerful firewall management tools like iptables or firewalld. You can configure firewall rules to allow or block specific network traffic based on ports, protocols, or source/destination IP addresses. Firewall settings are typically configured through command-line tools or graphical firewall configuration utilities.
7. Network Manager Tools: Many Linux distributions utilize network management tools like NetworkManager or systemd-networkd. These tools offer user-friendly interfaces to configure network settings, including basic IP addressing, DNS configurations, proxy settings, and wireless networking.
8. Network Diagnostics: Linux provides various command-line tools for network diagnostics, such as ping, traceroute, ifconfig, ip, and netstat. These tools help troubleshoot network connectivity issues, check routing tables, view network interface configurations, and perform other network-related tasks.
These are just a few examples of the common network settings on Linux. The specific configuration methods and files may vary depending on the Linux distribution you are using. Understanding and properly configuring these settings allows you to manage network connections effectively and ensure reliable network communication on your Linux system.
How to Access Network Settings
Accessing network settings may vary depending on the operating system you are using. Here are some common methods to access network settings on different platforms:
1. Windows:
- Open the “Control Panel” and navigate to “Network and Internet” or “Network and Sharing Center.”
- Click on “Network and Sharing Center” to access basic network settings.
- You can also access network adapter settings by right-clicking on the network icon in the system tray and selecting “Open Network and Sharing Center.”
2. Mac:
- Go to the Apple menu and select “System Preferences.”
- Click on “Network” to access network settings.
- In the Network preferences pane, you can configure network connections, view network status, and access advanced settings.
3. Linux:
- Accessing network settings on Linux can vary depending on the distribution and desktop environment used.
- For distributions with graphical interfaces like Ubuntu or Fedora, you can typically find the network settings in the system settings or preferences.
- Alternatively, network settings can be accessed through command-line tools such as ifconfig, ip, or nmcli for network management on Linux.
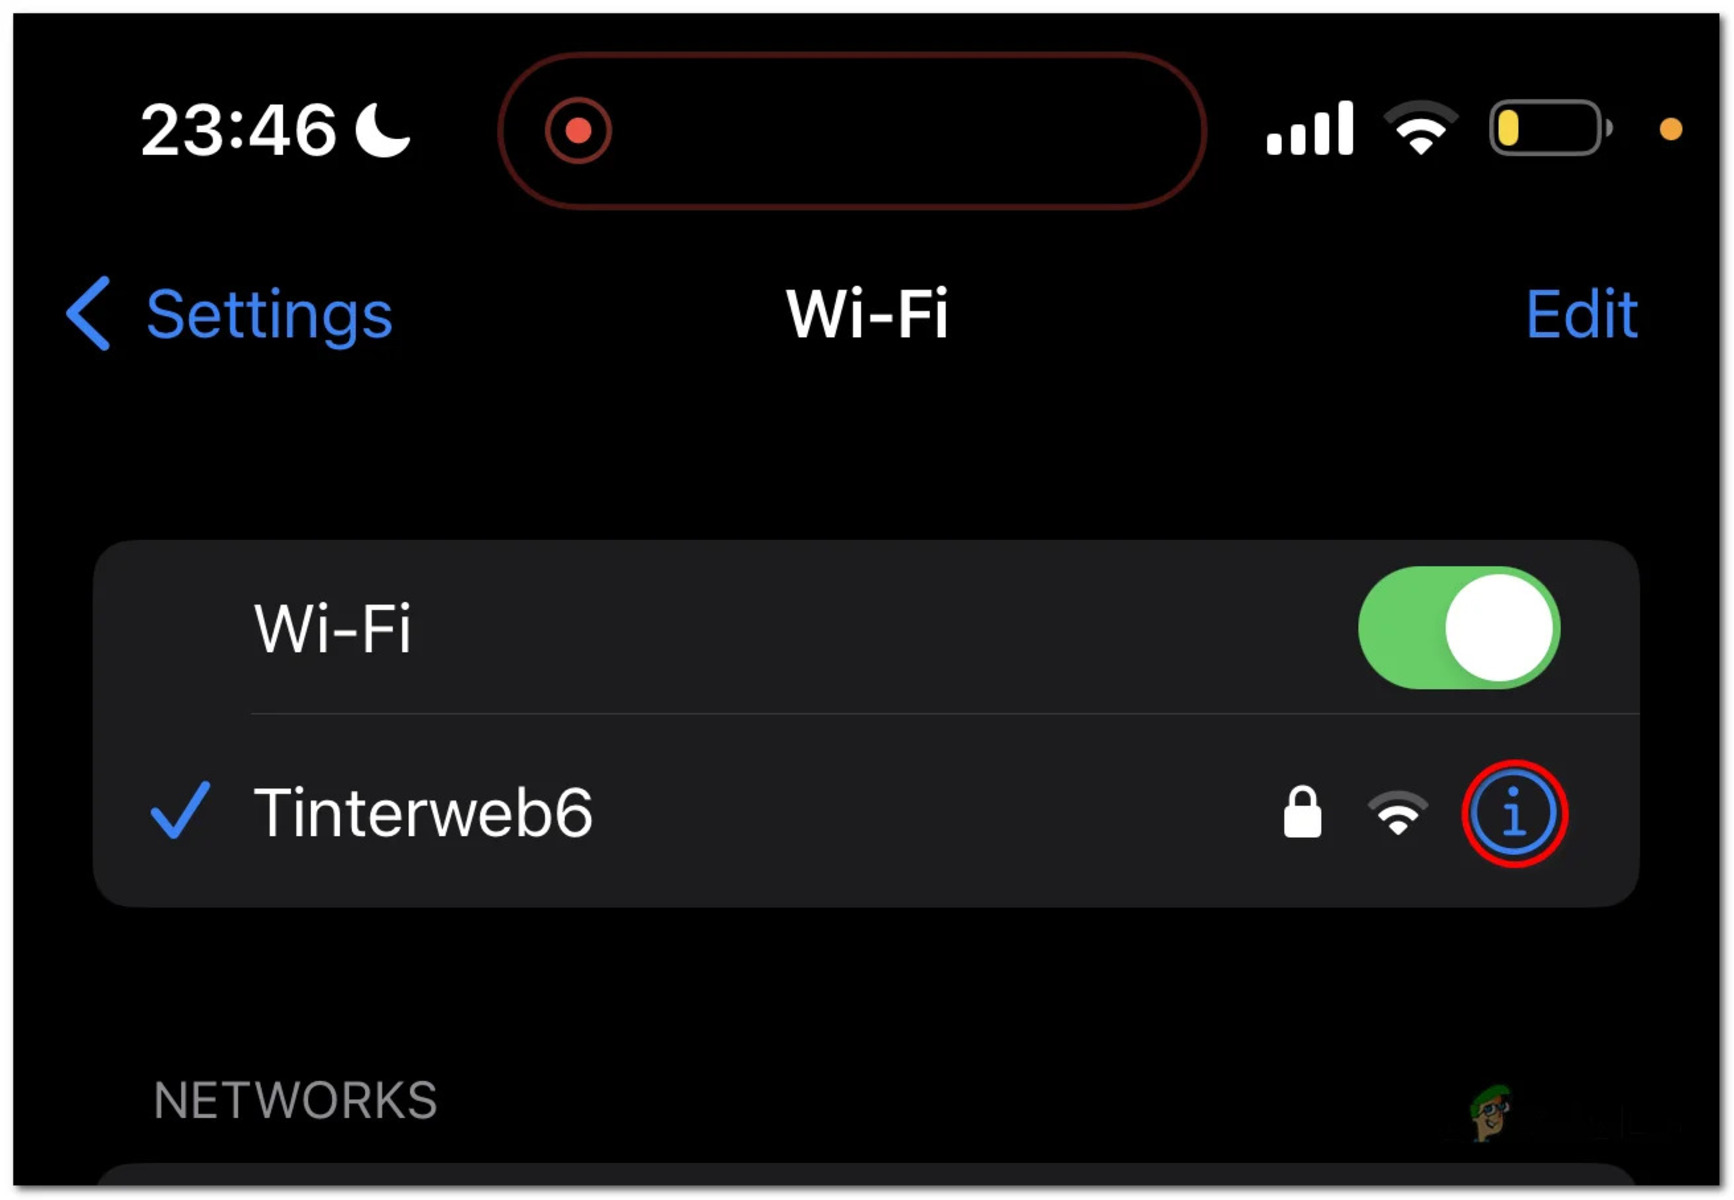
4. Mobile Devices (iOS and Android):
- On iOS devices, go to “Settings” and select “Wi-Fi” or “Cellular” to access network settings.
- On Android devices, go to “Settings” and look for “Wi-Fi & Networks” or “Connections” to access network settings.
- In these settings, you can manage Wi-Fi connections, cellular data settings, and other network-related options.
5. Router Settings:
- To access router settings, open a web browser and enter the router’s IP address in the address bar. The IP address is typically mentioned in the router’s documentation or on the back of the router itself.
- Once you are on the router’s web interface, you can configure various network settings, including wireless network settings, security options, port forwarding, and more.
Remember that the steps to access network settings may vary slightly depending on your device, operating system version, and setup. However, the methods mentioned above should provide a general guide to accessing network settings on most commonly used platforms.
How to Change Network Settings
Changing network settings allows you to customize your network connection according to your specific needs. Here are general steps to change network settings on different platforms:
1. Windows:
- Open the “Control Panel” and navigate to “Network and Internet” or “Network and Sharing Center.”
- Click on “Change adapter settings” to view available network adapters.
- Right-click on the network adapter you want to configure and select “Properties.”
- In the properties window, you can modify settings like IP address, subnet mask, default gateway, DNS server, and proxy settings.
- Click “OK” or “Apply” to save the changes.
2. Mac:
- Go to the Apple menu and select “System Preferences.”
- Click on “Network” to access network settings.
- Select the network connection you want to configure (such as Ethernet or Wi-Fi) from the sidebar.
- Click on the “Advanced” button to access advanced network settings.
- From here, you can modify settings like IP address, DNS server, proxy settings, and more.
- Click “OK” or “Apply” to save the changes.
3. Linux:
- Accessing and changing network settings on Linux varies based on the distribution and desktop environment used.
- For graphical interfaces, like Ubuntu with GNOME, go to the “Settings” or “System Settings” menu and open the “Network” or “Wi-Fi” section.
- From there, you can select the network interface you wish to modify and make changes to settings like IP address, subnet mask, default gateway, and DNS server.
- Alternatively, you can use command-line tools such as ifconfig, ip, or nmcli to change network settings by modifying the appropriate configuration files.
4. Mobile Devices (iOS and Android):
- On iOS devices, go to “Settings” and select “Wi-Fi” or “Cellular.” Tap on the network you’re connected to and modify the settings as needed.
- On Android devices, go to “Settings” and look for “Wi-Fi & Networks” or “Connections.” Select the network you want to modify and make necessary changes.
- In these settings, you can adjust network-related options like IP settings, DNS settings, proxy configurations, and more.
5. Router Settings:
- To change router settings, open a web browser and enter the router’s IP address in the address bar.
- Enter your router’s username and password (usually found on the router or in the documentation) to access the settings page.
- Within the router’s web interface, navigate to the appropriate sections to modify network settings like IP address ranges, DHCP settings, DNS configurations, and port forwarding.
- Save the changes and restart the router, if necessary, for the new settings to take effect.
It is important to note that the steps to change network settings may vary depending on the specific device, operating system version, and configuration. The provided steps should offer a general guideline to help you modify network settings on different platforms.
Understanding IP Addresses and Subnet Masks
IP addresses and subnet masks are fundamental components of the TCP/IP networking protocol. They play a crucial role in identifying devices and facilitating communication within a network. Understanding how IP addresses and subnet masks work is essential for managing and configuring network connectivity effectively.
IP Addresses:
An IP address is a unique numeric identifier assigned to each device connected to a network. It enables devices to send and receive data within the network and over the internet. IPv4 addresses consist of four sets of numbers separated by periods, such as 192.168.0.1. IPv6 addresses are written in hexadecimal format, with eight groups of four digits separated by colons, such as 2001:0db8:85a3:0000:0000:8a2e:0370:7334.
An IP address can be classified into two parts: the network portion and the host portion. The network portion identifies the specific network to which a device belongs, while the host portion identifies the particular device within that network.
Subnet Masks:
A subnet mask is a 32-bit value used to determine the network and host portions of an IP address. It’s represented by four octets, separated by periods, just like an IP address. Each octet consists of 8 bits, with a value ranging from 0 to 255. The subnet mask uses a combination of 1s and 0s to determine which bits of the IP address represent the network portion and which bits represent the host portion.
By applying a subnet mask to an IP address, you can determine the network ID, which identifies the specific network, and the host ID, which identifies the individual device within that network. For example, if an IP address is 192.168.0.10 and the subnet mask is 255.255.255.0, the network ID is 192.168.0, and the host ID is 10.
Understanding the Relationship:
The subnet mask and IP address work together to create a logical division of networks and subnetworks within an organization. The subnet mask helps determine the size of each network segment and enables efficient routing of data within the network.
The subnet mask specifies which portion of an IP address represents the network and which portion represents the host. Any IP address within the same network has the identical network ID but unique host IDs. Devices in different networks have different network IDs.
Properly configuring IP addresses and subnet masks is crucial for managing network connectivity and ensuring seamless communication between devices. By understanding their underlying principles and how they interact, you can effectively plan and configure network segments, implement secure network designs, and troubleshoot connectivity issues.
DHCP vs. Manual IP Configuration
When setting up a network, one of the key decisions you’ll need to make is whether to use Dynamic Host Configuration Protocol (DHCP) or manually configure IP addresses. Each method has its advantages and considerations, and understanding the differences between DHCP and manual IP configuration is crucial for choosing the appropriate approach for your network.
DHCP (Dynamic Host Configuration Protocol):
DHCP is a network protocol that automatically assigns IP addresses and related network configuration settings to devices connected to a network. It simplifies the process of configuring IP addresses by automating the assignment process.
Here’s how DHCP works:
- When a device connects to a network, it sends a DHCP request, requesting an IP address and other configuration details.
- A DHCP server on the network receives the request and assigns an available IP address from a predefined pool of addresses.
- The DHCP server sends back the assigned IP address, along with subnet mask, default gateway, and DNS server information, to the requesting device.
- The device configures its network settings automatically based on the information received from the DHCP server.
Advantages of DHCP:
- Efficiency: DHCP simplifies IP address assignment, allowing devices to join the network quickly and easily without manual configuration.
- Centralized Management: DHCP centralizes IP address management, making it easier to track and manage IP address assignments within a network.
- Flexibility: DHCP allows you to configure additional network settings, such as subnet masks, default gateways, and DNS server addresses, along with the IP address assignment.
- Scalability: DHCP is particularly useful in large networks, as it can dynamically allocate IP addresses as devices connect and disconnect from the network.
Manual IP Configuration:
Manual IP configuration involves manually assigning IP addresses and network settings to each device on the network. This method requires you to configure the IP address, subnet mask, default gateway, and DNS server settings individually on each device.
Advantages of Manual IP Configuration:
- Control: Manual IP configuration provides precise control over IP address assignment, allowing you to assign specific IP addresses to certain devices.
- Stability: Once configured, manually assigned IP addresses typically remain consistent unless changed intentionally, providing stability in network connections.
- Security: Manual IP assignment can be used to enforce network security policies, ensuring that only authorized devices with specific IP addresses can connect to the network.
- Network Segmentation: Manual IP configuration is useful for creating segmented networks with dedicated IP address ranges for different departments or devices.
Considerations and Recommendations:
Ultimately, the choice between DHCP and manual IP configuration depends on your network requirements and preferences. For small to medium-sized networks or networks where devices frequently connect and disconnect, DHCP is generally recommended for its ease of use and scalability. Manual IP configuration is suitable for networks that require specific IP assignments, network segmentation, or enhanced security controls.
It’s worth noting that in some cases, a hybrid approach is used, with certain devices assigned static IP addresses manually while others receive IP addresses dynamically through DHCP.
By understanding the differences and benefits of DHCP and manual IP configuration, you can make an informed decision and implement the appropriate method for your network infrastructure.
DNS Settings and Their Importance
DNS (Domain Name System) settings are a fundamental aspect of network configuration that play a crucial role in translating human-readable domain names into IP addresses. DNS enables devices to locate and connect to websites, services, and resources on the internet using friendly domain names, making them an essential component of network connectivity.
How DNS Works:
When you type a domain name into a web browser, the DNS system steps in to resolve that domain name into the corresponding IP address. This translation process involves the following steps:
- The device sends a DNS query to a DNS resolver, typically provided by your Internet Service Provider (ISP) or a public DNS resolver.
- The DNS resolver receives the query and checks its local cache for the IP address associated with the requested domain name. If the resolver has the information, it returns the IP address directly.
- If the DNS resolver does not have the IP address in its cache, it queries other DNS servers in a hierarchical manner until it finds a server that can provide the IP address.
- Once the DNS resolver receives the IP address, it returns it to the device that made the original query.
- The device then uses the IP address to establish a connection and access the desired website or resource.
The Importance of DNS Settings:
DNS settings are essential for several reasons:
- Accessibility: DNS settings ensure that devices can access websites and resources on the internet using their domain names. Without DNS, users would need to remember and enter IP addresses manually.
- Convenience: DNS simplifies internet browsing by allowing users to type in easy-to-remember domain names rather than complicated IP addresses.
- Reliability: Proper DNS configuration ensures reliable and accurate domain name resolution, minimizing potential errors and connection issues.
- Redundancy: DNS settings can be configured to include multiple DNS servers, providing redundancy and ensuring uninterrupted domain name resolution even if some servers become unavailable.
- Load Balancing: DNS can be used to distribute incoming web traffic across multiple servers, improving performance and preventing overload on any single server.
- Security: DNS settings can be leveraged to implement security measures like domain name filtering or blocking malicious websites, protecting users from potential threats.
It is important to configure DNS settings correctly to ensure optimal network performance and secure internet access. DNS settings can be configured on individual devices, routers, or by specifying custom DNS servers in operating system settings. Public DNS services like Google DNS or Cloudflare DNS can also be used to enhance performance, security, or reliability.
By understanding the importance of DNS settings and configuring them appropriately, you can ensure reliable and efficient access to websites, services, and resources across the internet.
How to Troubleshoot Network Settings Issues
Troubleshooting network settings issues is an essential skill that can help you diagnose and resolve connectivity problems on your devices. Here are some general steps to troubleshoot network settings issues:
1. Check Physical Connections:
Ensure all physical connections, such as Ethernet cables or Wi-Fi antennas, are properly connected and undamaged. Check for any loose connections or cable damages that may be causing connectivity issues.
2. Restart Networking Devices:
Restart your modem, router, and any other networking devices you are using. Sometimes, a quick restart can resolve temporary network configuration issues and restore connectivity.
3. Verify IP Configuration:
Check your device’s IP configuration to ensure it is correctly assigned. Make sure the IP address, subnet mask, default gateway, and DNS server settings are appropriate for your network. Incorrect configuration can lead to connectivity problems.
4. Test Network Connectivity:
Use network troubleshooting tools like ping or traceroute to test network connectivity. Ping the default gateway or other devices on the network to verify if you are able to establish communication. This helps determine if the issue is with your device or the network.
Make sure your DNS settings are correctly configured. Test DNS resolution by pinging a domain name or accessing a website using its domain name. If there are DNS issues, consider using alternative DNS servers or contacting your Internet Service Provider (ISP) for assistance.
6. Disable Firewall or Security Software:
Temporarily disable firewall or security software on your device and test connectivity. Sometimes, these security measures may interfere with network connections and cause issues. If the problem is resolved, adjust your security settings accordingly.
7. Update Network Drivers:
Ensure that your network drivers are up to date. Outdated or incompatible drivers can result in network connectivity problems. Visit the manufacturer’s website or use the automatic update feature in your operating system to update your network drivers.
8. Reboot Your Device:
Sometimes, a simple device reboot can resolve network settings issues. Restart your device to clear any temporary configurations or glitches that may be affecting connectivity.
9. Reset Network Settings:
If all else fails, consider resetting your network settings to their default configurations. This can be done through the operating system’s network settings or by using the hardware reset button on your networking devices. Note that this will remove any custom settings and revert them to their factory defaults.
10. Seek Professional Help:
If you have followed these troubleshooting steps and are still experiencing network connectivity problems, it may be necessary to contact your Internet Service Provider (ISP) or consult with a network specialist for further assistance.
By following these troubleshooting steps, you can identify and resolve common network settings issues, ensuring reliable and consistent network connectivity on your devices.
Basic Network Troubleshooting Steps
When experiencing network connectivity issues, performing basic troubleshooting steps can help isolate and resolve the problem. Here are some basic network troubleshooting steps that can be applied to various network configurations:
1. Check Physical Connections:
Ensure all physical connections, such as Ethernet cables or Wi-Fi antennas, are properly connected and undamaged. Confirm that cables are securely plugged in, and no physical damage is apparent.
2. Restart Devices:
Restart your computer, modem, router, and any other networking devices you are using. This can help clear any temporary configuration glitches and restore connectivity.
3. Connect Using Different Devices:
If possible, try connecting to the network using a different device (e.g., another computer, smartphone, or tablet). If the alternate device connects successfully, the issue may be specific to the original device’s network configuration or hardware.
4. Test Connectivity to Other Devices:
Ping other devices on the network or the default gateway to determine if there is successful communication. This helps identify if the issue is localized to a specific device or affecting the entire network.
5. Check IP Address Configuration:
Verify the IP address, subnet mask, default gateway, and DNS server settings on the device. Ensure they are correctly assigned and valid for the network you are connecting to. Incorrect or conflicting IP configurations can prevent network connectivity.
6. Test DNS Resolution:
Ping a domain name or access websites using their domain names to check DNS resolution. If DNS resolution fails, consider changing your DNS server settings or using public DNS servers like Google DNS or Cloudflare DNS.
7. Disable Firewall or Security Software:
Temporarily disable any firewall or security software installed on the device and test network connectivity. Sometimes, these security measures can interfere with network connections. If the issue is resolved after disabling them, adjust the settings accordingly.
8. Update Network Drivers:
Ensure that the network drivers on your device are up to date. Outdated or incompatible drivers can lead to network connectivity problems. Visit the manufacturer’s website or use the automatic update feature in your operating system to update the network drivers.
9. Reset Network Settings:
If all else fails, consider resetting network settings to their default configurations. This can be done through the operating system’s network settings or by using the hardware reset button on networking devices. Be aware that this will remove any custom settings and revert them to their factory defaults.
10. Seek Help:
If none of the above steps resolves the issue, contact your Internet Service Provider (ISP) or consult with a network specialist for further assistance. They can provide guidance specific to your network configuration and help diagnose more complex network problems.
By following these basic network troubleshooting steps, you can often identify and resolve common network connectivity issues, restoring reliable network access on your devices.