
How to Access Terminal on your Mac
If you’re an absolute beginner in using Terminal on your Mac, don’t worry. It’s actually quite easy to access and start using it. Just follow the steps below:
- Open Finder and go to the “Applications” folder.
- From there, navigate to the “Utilities” folder.
- Look for the “Terminal” application and click on it to open.
Alternatively, you can use the Spotlight search feature to quickly locate and open Terminal. Just press Command + Spacebar to activate Spotlight, then type “Terminal” and hit Enter.
Once you have Terminal open, you’ll be greeted with a command line interface where you can start entering commands and executing various actions.
Now that you’re in Terminal, let’s explore how you can view hidden files and folders on your Mac using commands.
Command to View Hidden Files and Folders
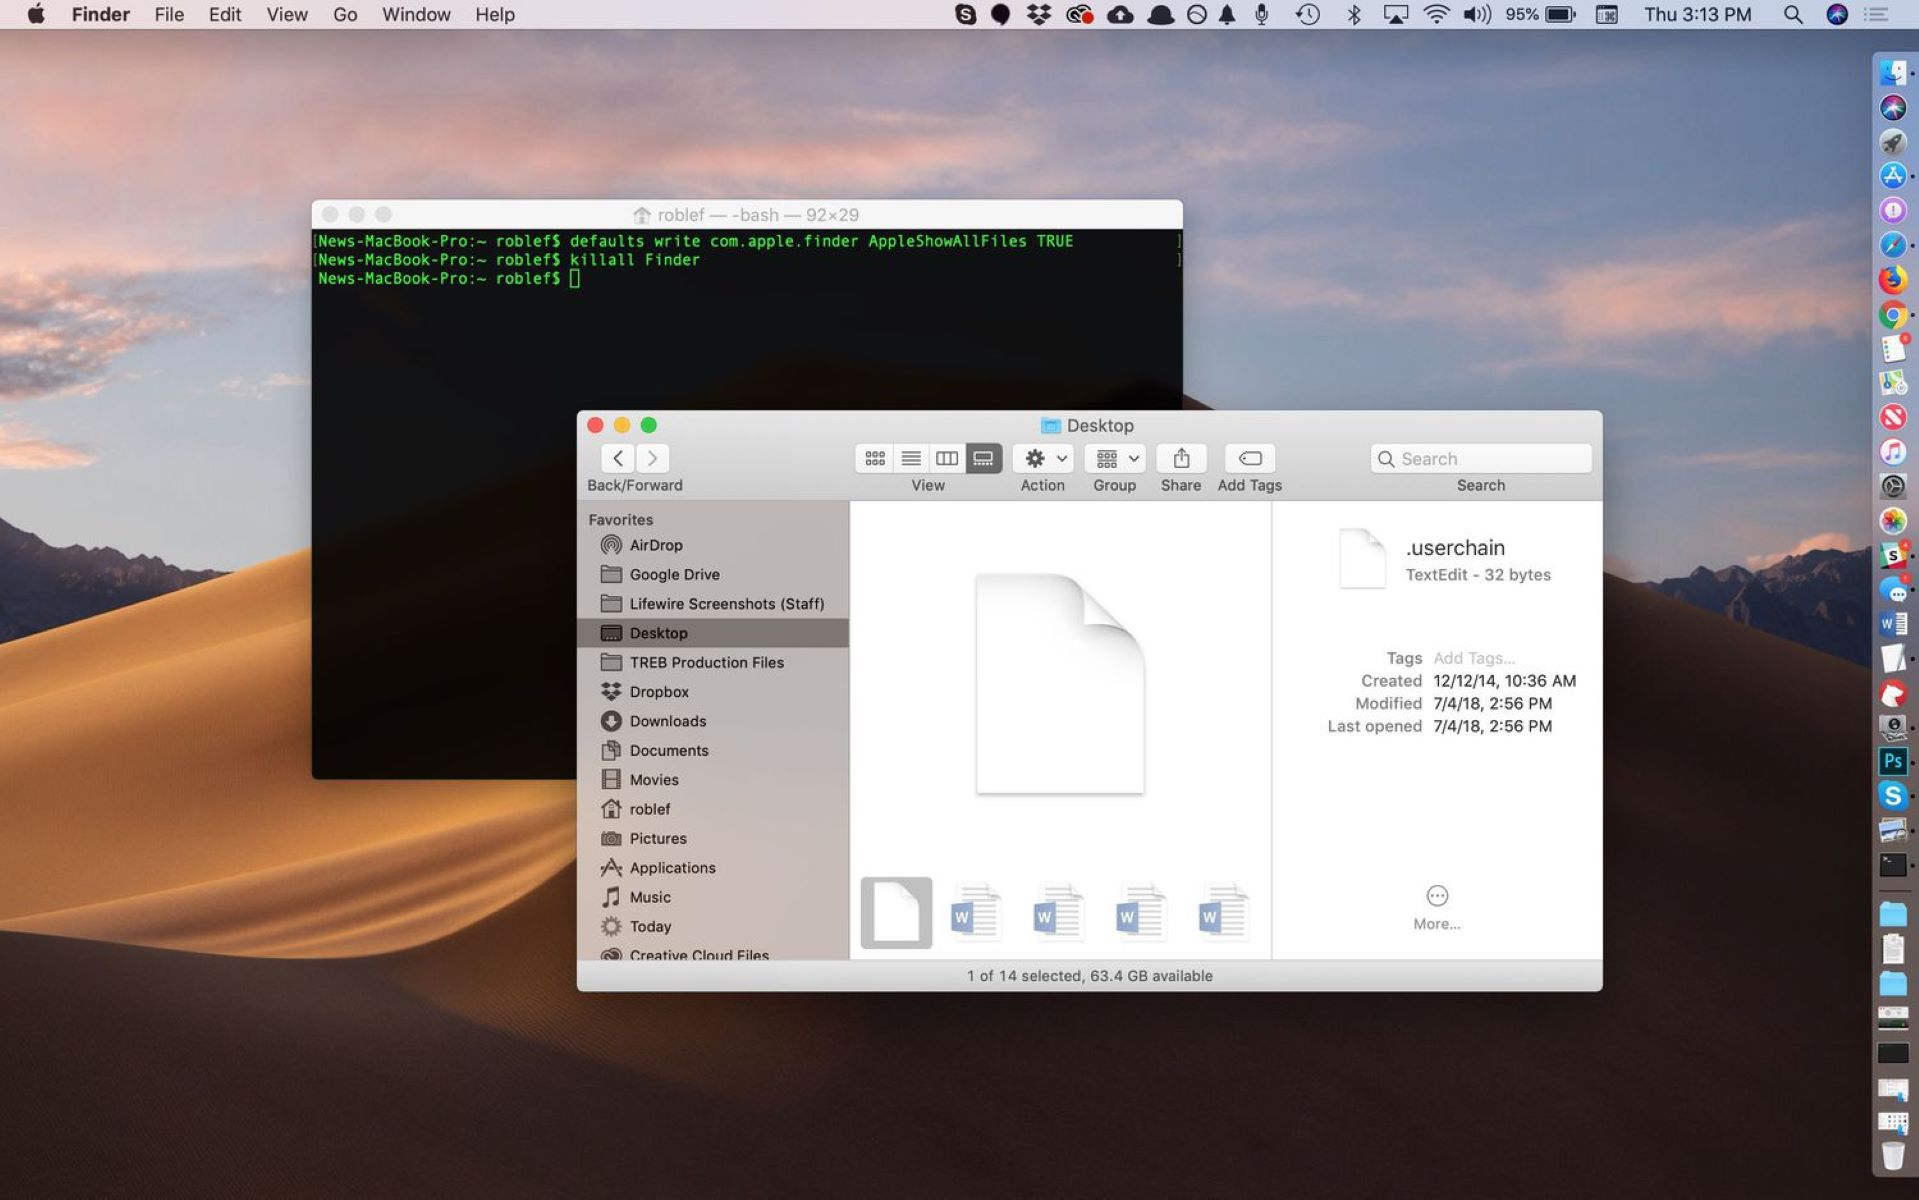
In order to view hidden files and folders on your Mac using Terminal, you’ll need to enter a specific command. The command is as follows:
defaults write com.apple.finder AppleShowAllFiles YES
killall Finder
Let’s break down what each part of the command does:
defaults: This command is used to modify user defaults in macOS.write com.apple.finder AppleShowAllFiles YES: This part of the command modifies the Finder preferences to show hidden files and folders. By setting the parameter to “YES”, you’re enabling the visibility of hidden files.killall Finder: This command restarts the Finder process so that the changes take effect immediately.
After running the command, you should be able to see hidden files and folders in Finder. Simply navigate to the directory where the hidden item is located, and it should now be visible.
It’s important to note that once you’ve finished viewing or working with hidden files and folders, you can revert the changes and hide them again. To do this, open Terminal and enter the following command:
defaults write com.apple.finder AppleShowAllFiles NO
killall Finder
This command sets the parameter to “NO”, hiding the previously revealed hidden files and folders. Again, the Finder process will need to be restarted for the changes to take effect.
Now that you know how to view and hide hidden files and folders using Terminal, let’s explore how you can find specific hidden items on your Mac.
Finding Specific Hidden Files and Folders
Once you have enabled the visibility of hidden files and folders on your Mac using Terminal, you can easily search for specific hidden items using the command line. Here’s how:
1. Locate the directory:
First, navigate to the parent directory where you suspect the hidden file or folder is located. For example, if you believe the hidden item is in your Documents folder, use the command cd ~/Documents to change to that directory.
2. Use the “ls” command:
The “ls” command is used to list the files and folders in a directory. By default, it only displays the visible items. To view both visible and hidden items, use the “-a” flag. Enter the command ls -a to see a list of all files and folders, including hidden ones.
3. Filter the results:
If you’re looking for a specific hidden file or folder, you can use additional parameters with the “ls” command to filter the results. For example, if you’re searching for a hidden file named “example.txt,” you can use the command ls -a | grep example.txt to only display the file you’re interested in.
4. Traverse subdirectories:
If you suspect that the hidden item is located in a subdirectory within the current directory, use the “cd” command followed by the directory name to change to that directory. Then, run the “ls” command or use the filtering parameters to search within that specific directory.
By following these steps and utilizing the power of Terminal commands, you can efficiently find and access specific hidden files and folders on your Mac.
Now that you’ve learned how to view and find hidden files, let’s discuss how you can hide them again when you’re finished.
Hiding Files and Folders Again
After you’ve finished viewing or working with hidden files and folders using Terminal on your Mac, you may want to hide them again to maintain a clutter-free file system. Hiding files and folders is as simple as running a command in Terminal. Here’s what you need to do:
1. Open Terminal:
If you haven’t already, open Terminal on your Mac by navigating to the “Applications” folder in Finder, then to the “Utilities” folder, and finally clicking on the “Terminal” application.
2. Enter the command:
To hide the files and folders, you need to run the following command in Terminal:
defaults write com.apple.finder AppleShowAllFiles NO
killall Finder
This command sets the parameter to “NO”, indicating that you want to hide hidden files and folders.
3. Restart Finder:
After running the command, you need to restart the Finder process for the changes to take effect. Simply enter the command killall Finder and hit Enter.
Once the Finder restarts, the previously visible hidden files and folders will be hidden from view, restoring the default settings.
It’s important to note that when you hide files and folders using Terminal, they are not encrypted or protected. It simply changes their visibility in Finder. If you require additional security, consider using other methods such as file encryption or password-protecting sensitive files.
Now that you know how to hide files and folders again using Terminal on your Mac, let’s explore some tips and tricks for working with Terminal more effectively.
Tips and Tricks for Working with Terminal on Mac
Terminal on your Mac is a powerful tool that can greatly enhance your productivity and efficiency. Here are some tips and tricks to help you make the most out of Terminal:
1. Use tab completion:
When typing commands or file paths, you can use the Tab key to automatically complete them. This saves time and reduces the chance of making errors.
2. Use up and down arrows:
If you want to repeat or modify a command you previously entered, use the up and down arrow keys to scroll through your command history. This helps you avoid retyping long or complex commands.
3. Customize your Terminal:
You can personalize your Terminal experience by changing the appearance and behavior of the window. You can modify the font, color scheme, and other settings to suit your preferences. Go to Terminal > Preferences to explore the customization options.
4. Use keyboard shortcuts:
Learn commonly used keyboard shortcuts in Terminal to streamline your workflow. For example, Command + C copies selected text or cancels a command, while Command + V pastes copied text.
5. Use multiple tabs:
If you need to work on different tasks simultaneously, open multiple tabs in Terminal. Each tab can run separate commands or have different working directories, allowing you to switch between tasks seamlessly.
6. Install and use package managers:
Package managers, such as Homebrew or MacPorts, provide a convenient way to install and manage software packages on your Mac through Terminal. Familiarize yourself with these tools to simplify the process of installing and updating software.
7. Practice caution with sudo:
The “sudo” command allows you to execute commands with administrative privileges. Use it with caution and only when necessary, as it grants you extensive control over your system. Make sure you fully understand the commands you are executing to avoid unintended consequences.
8. Take advantage of online resources:
There are numerous online communities, forums, and tutorials dedicated to Terminal and command-line usage on Mac. Take advantage of these resources to expand your knowledge, troubleshoot issues, and learn new techniques.
By implementing these tips and tricks, you’ll become more proficient in using Terminal on your Mac and unlock its true potential for your workflow.