
Basics of Mac OS X Mail Search Operators
When it comes to managing your email efficiently, the search feature in Mac OS X Mail can be a lifesaver. With the use of search operators, you can quickly locate specific emails that match your criteria, saving you time and frustration. Whether you are looking for emails from a specific sender, with particular keywords in the subject, within a specific date range, or those that contain attachments, Mac OS X Mail search operators can help you find what you need.
Here are some essential search operators and how to use them:
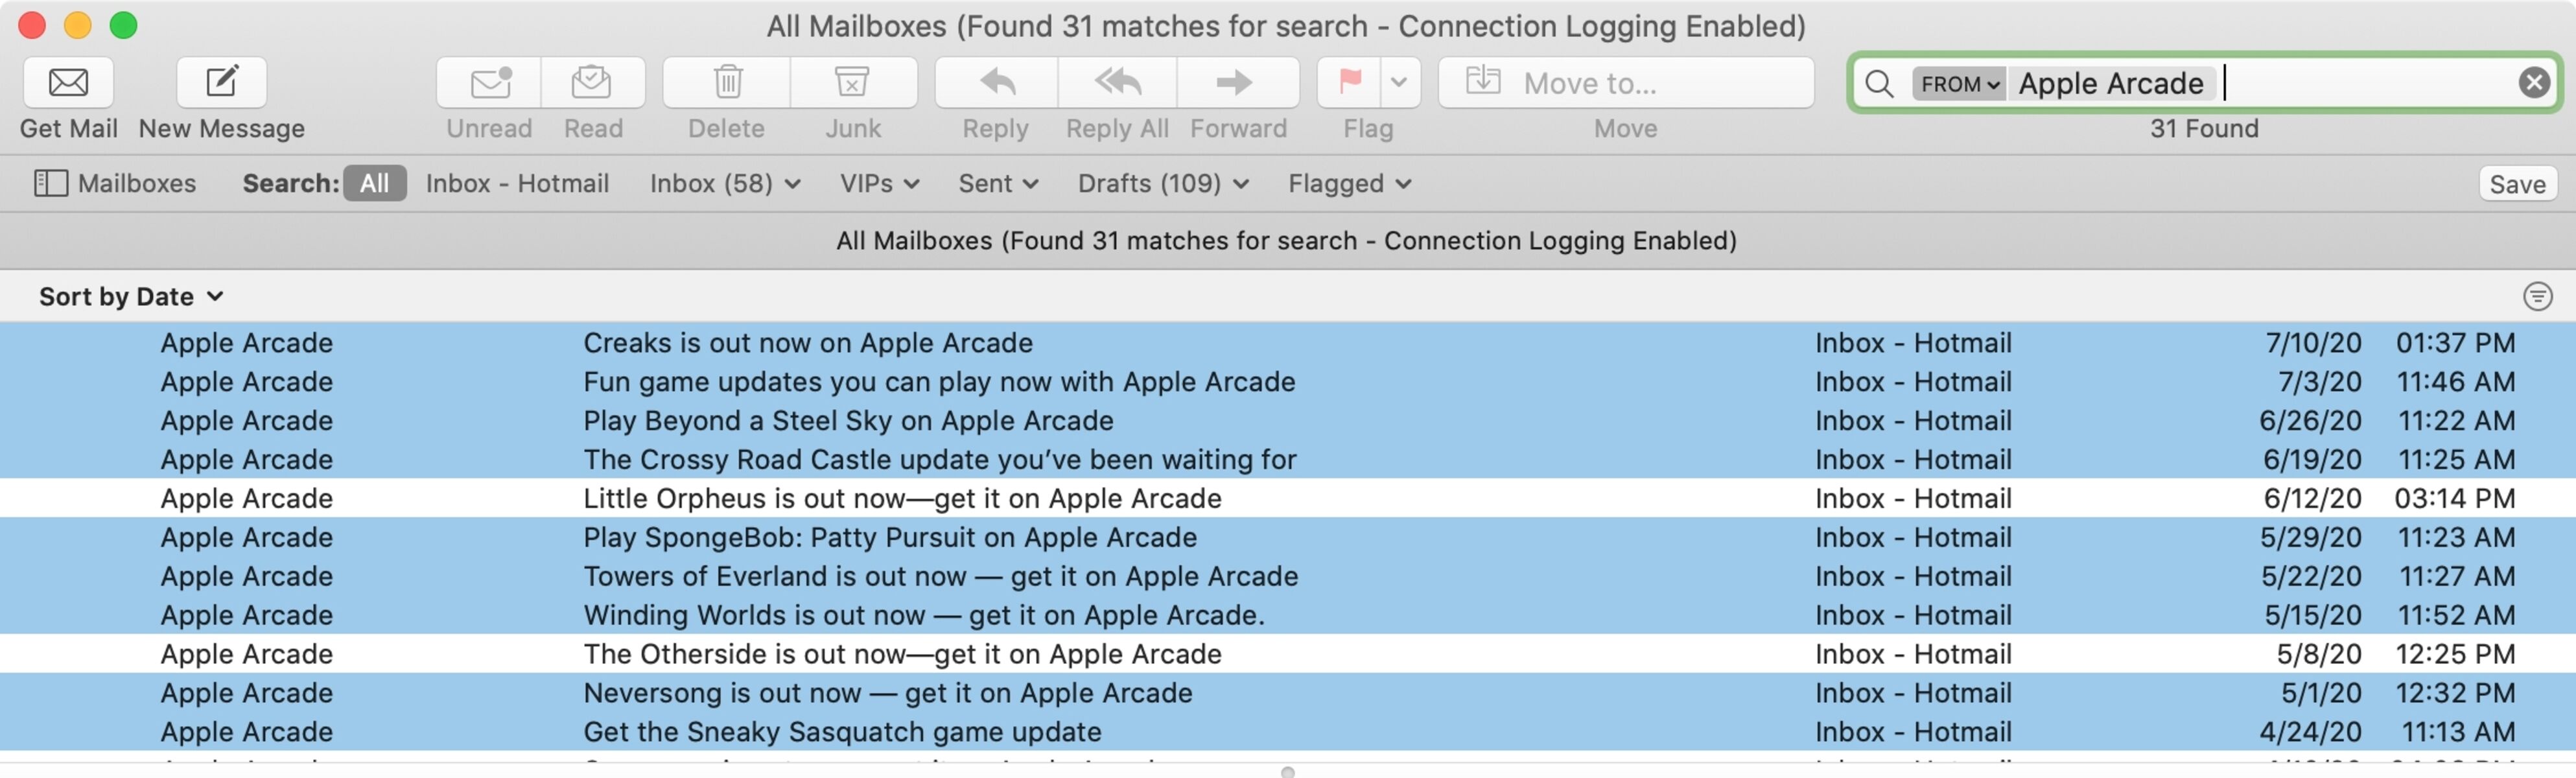
- “From:” – To search for emails from a specific sender, simply type “From:” followed by the sender’s email address or name. For example, “From: john@example.com” or “From: John Smith”. This operator allows you to filter your emails based on the sender.
- “Subject:” – To narrow down your search to emails with specific keywords in the subject, use the “Subject:” operator followed by the desired term. For instance, “Subject: project update” or “Subject: meeting agenda”. This operator helps you focus on emails relevant to a particular topic.
- “Date Received:” – If you need to find emails received within a specific date range, you can use the “Date Received:” operator. It allows you to search for emails based on a particular timeframe. For example, “Date Received: last week” or “Date Received: 01/01/2022 – 02/01/2022”. This operator enables you to locate emails from a specific period.
- “Has Attachments:” – To find emails that contain attachments, use the “Has Attachments:” operator. It enables you to filter emails based on whether they have files attached to them. For example, “Has Attachments: yes” or “Has Attachments: no”. This operator is valuable when you need to locate emails with important files.
- “Flagged:” – If you use flags to mark important emails, the “Flagged:” operator comes in handy. It allows you to search for emails that you have flagged for attention. For instance, “Flagged: yes” or “Flagged: no”. This operator helps you prioritize and locate important messages quickly.
- “Read:” / “Unread:” – To find emails that you have or have not read, you can use the “Read:” and “Unread:” operators. Typing “Read: yes” will show you all read emails, while “Unread: yes” will display unread messages. This operator assists in managing your inbox and staying on top of crucial emails.
- “Mailbox:” – If you have multiple mailboxes or folders, you can use the “Mailbox:” operator to search within a specific mailbox. For example, “Mailbox: Work” or “Mailbox: Personal”. This operator allows you to narrow down your search to a particular mailbox.
By combining these search operators, you can perform more advanced searches to pinpoint specific emails that meet your criteria. Mac OS X Mail search operators provide a powerful and efficient solution for managing your email inbox effectively. Now you can spend less time searching for emails and more time focusing on your important tasks.
Searching by Sender
When you have a lot of emails in your inbox, finding messages from a specific sender can be a time-consuming task. However, with the powerful search capabilities of Mac OS X Mail, you can easily search for emails from a particular sender using the “From:” operator.
To search for emails from a specific sender, follow these steps:
- Click on the search bar in Mac OS X Mail.
- Type “From:” followed by the email address or name of the sender you want to search for. For example, “From: john@example.com” or “From: John Smith”.
- Press Enter or click on the search icon.
Mac OS X Mail will instantly display all the emails in your mailbox that match the sender you specified. This allows you to quickly find and access emails from a specific person without scrolling through your entire inbox.
Searching by sender is particularly useful when you want to find all emails from a specific contact, a colleague, or a client. It can help you locate important conversations, track previous correspondence, or perform tasks related to a particular sender.
For example, if you are working on a project with multiple team members, you can search for emails from a specific team member to find the latest updates or attachments they have sent. This saves you the hassle of scrolling through numerous emails to find the information you need.
Additionally, searching by sender can be beneficial in organizing your inbox. You can create custom mailboxes and smart mailboxes based on specific senders to keep track of their emails more effectively. By grouping emails from a particular sender, you can have a dedicated mailbox that contains all ongoing conversations or important messages from that individual.
Overall, the “From:” operator in Mac OS X Mail’s search feature is a valuable tool for quickly locating emails from a specific sender. Whether you are searching for specific correspondence or want to organize your inbox, this search capability can save you time and improve your productivity.
Searching by Subject
When you’re looking for specific emails that revolve around a particular topic or contain specific keywords, searching by subject in Mac OS X Mail can be incredibly useful. By using the “Subject:” operator, you can narrow down your search and quickly locate the emails you need.
To search for emails by subject in Mac OS X Mail, follow these steps:
- Click on the search bar in Mac OS X Mail.
- Type “Subject:” followed by the desired keyword or phrase. For example, “Subject: project update” or “Subject: meeting agenda”.
- Press Enter or click on the search icon.
Mac OS X Mail will instantly display all the emails that match the subject you specified. This allows you to easily find and access emails that are directly related to a specific topic or contain relevant information.
Searching by subject can be particularly handy in various scenarios. For instance, if you are working on a project and need to find all emails related to a specific task or update, using the “Subject:” operator will filter out irrelevant emails and show only those that are directly related.
Additionally, if you remember discussing a particular topic in an email but can’t recall the exact sender or date, searching by subject can help you locate the relevant email quickly. This is especially useful when you are trying to find attachments or instructions related to a particular subject.
Another benefit of searching by subject is that it allows you to easily organize your inbox. By creating custom mailboxes or smart mailboxes based on specific subjects or keywords, you can keep important emails organized and easily accessible.
Overall, the “Subject:” operator in Mac OS X Mail’s search feature is a powerful tool for quickly narrowing down your search and finding emails by topic or keywords. Whether you are trying to locate specific correspondence or keeping your inbox organized, this search capability can save you time and streamline your email management process.
Searching by Date Range
When you need to find emails within a specific timeframe, searching by date range in Mac OS X Mail can be a valuable feature. With the “Date Received:” operator, you can easily narrow down your search and locate emails based on the dates they were received.
To search for emails by date range in Mac OS X Mail, follow these steps:
- Click on the search bar in Mac OS X Mail.
- Type “Date Received:” followed by the desired timeframe. For example, “Date Received: last week” or “Date Received: 01/01/2022 – 02/01/2022”.
- Press Enter or click on the search icon.
Mac OS X Mail will instantly display all the emails that were received within the specified date range. This allows you to quickly find and access emails that are relevant to a specific period.
Searching by date range can be incredibly useful in various scenarios. For example, if you want to find emails from a recent conference or event, you can search for emails received within a specific timeframe to narrow down the results and find the necessary information.
Furthermore, if you are working on a time-sensitive project and need to refer to emails from a particular period, searching by date range allows you to quickly locate the relevant emails rather than scrolling through your entire mailbox.
Additionally, searching by date range can help you keep your inbox organized. By using this feature, you can create smart mailboxes or custom folders that automatically collect emails received within specific timeframes. This allows you to quickly access emails from specific periods without having to manually search every time.
Overall, the “Date Received:” operator in Mac OS X Mail’s search feature is a powerful tool for narrowing down your search and finding emails within a specific date range. Whether you need to find recent correspondence or want to keep your inbox organized based on timeframe, this search capability can save you time and simplify your email management process.
Searching by Attachment
When you’re looking for emails that have attachments, searching by attachment in Mac OS X Mail can be a time-saving feature. With the “Has Attachments:” operator, you can quickly narrow down your search and locate emails that contain files or documents.
To search for emails by attachment in Mac OS X Mail, follow these steps:
- Click on the search bar in Mac OS X Mail.
- Type “Has Attachments:” followed by “yes” or “no” to filter emails with or without attachments, respectively. For example, “Has Attachments: yes” or “Has Attachments: no”.
- Press Enter or click on the search icon.
Mac OS X Mail will instantly display all the emails that match the attachment criteria you specified. This allows you to quickly find and access emails that contain files or documents.
Searching by attachment can be particularly useful in various scenarios. For example, if you need to locate all emails that have important documents or files attached, using the “Has Attachments:” operator will filter out emails without attachments and show only those with files.
Furthermore, if you’re working on a project and need to access files or documents that were shared via email, searching by attachment allows you to quickly locate the relevant emails. This saves you time and reduces the frustration of manually searching for specific attachments.
Additionally, searching by attachment can help you keep your inbox organized. You can create smart mailboxes or custom folders that automatically collect emails with attachments. This way, you can have a dedicated mailbox or folder that contains all emails with important files, ensuring easy access and organization.
Searching by Flag Status
Flagging emails can be a useful way to mark important messages or tasks that require your attention in Mac OS X Mail. When you want to quickly locate flagged emails, searching by flag status can be an efficient method. By using the “Flagged:” operator, you can easily filter and find emails that you have flagged.
To search for emails by flag status in Mac OS X Mail, follow these steps:
- Click on the search bar in Mac OS X Mail.
- Type “Flagged:” followed by “yes” or “no” to filter flagged or unflagged emails, respectively. For example, “Flagged: yes” or “Flagged: no”.
- Press Enter or click on the search icon.
Mac OS X Mail will instantly display all the emails that match the flag status you specified. This allows you to quickly find and access emails that you have flagged for attention.
Searching by flag status can be particularly helpful for staying organized and prioritizing your tasks. For example, if you have flagged emails that require follow-up or have important action items, using the “Flagged:” operator will filter out other emails and show only those that need your immediate attention.
In addition, searching by flag status enables you to easily manage your inbox and focus on important messages without getting overwhelmed by the sheer volume of emails. By flagging important emails and then searching for flagged emails, you can maintain better control over your workflow.
Furthermore, you can utilize the search by flag status feature as a reminder for tasks or emails that require a response or action. By flagging emails and then performing a search for flagged emails, you can ensure that no important messages or tasks slip through the cracks.
Overall, the “Flagged:” operator in Mac OS X Mail’s search feature is a valuable tool for locating and managing flagged emails. Whether you use flags to mark important messages or tasks, this search capability can help you stay organized, prioritize your workload, and ensure that important emails receive the attention they deserve.
Searching by Read or Unread Status
Managing the read and unread status of your emails is crucial for staying organized and keeping track of important messages in Mac OS X Mail. When you need to find emails that you have or have not read, searching by read or unread status can help you quickly locate the desired messages. By using the “Read:” and “Unread:” operators, you can easily filter your emails based on their read or unread status.
To search for emails by read or unread status in Mac OS X Mail, follow these steps:
- Click on the search bar in Mac OS X Mail.
- Type “Read:” followed by “yes” or “no” to filter read or unread emails, respectively. For example, “Read: yes” or “Read: no”.
- Press Enter or click on the search icon.
Mac OS X Mail will instantly display all the emails that match the read or unread status you specified. This allows you to quickly find and access emails that you have or have not yet read.
Searching by read or unread status is particularly beneficial for managing your inbox and prioritizing your workflow. For example, if you have a large number of unread emails and want to focus on those first, using the “Unread:” operator will filter out the read emails and show only the unread ones.
Conversely, if you need to refer back to emails that you have already read, searching by read status using the “Read:” operator can help you quickly locate and access the necessary information without sifting through your entire mailbox.
Additionally, by combining the read or unread status with other search operators, such as sender or subject, you can further refine your search and locate specific emails that meet multiple criteria.
Searching by read or unread status can also assist in managing your email workload. For example, if you use your mailbox as a to-do list, marking emails as unread for tasks that require attention allows you to easily locate and complete those tasks.
Searching by Mailbox
When you have multiple mailboxes or folders in Mac OS X Mail, finding specific emails within a particular mailbox can be challenging. This is where the “Mailbox:” operator comes in handy. By using this operator, you can search for emails within a specific mailbox, making it easier to locate the messages you need.
To search for emails by mailbox in Mac OS X Mail, follow these steps:
- Click on the search bar in Mac OS X Mail.
- Type “Mailbox:” followed by the name of the desired mailbox you want to search within. For example, “Mailbox: Work” or “Mailbox: Personal”.
- Press Enter or click on the search icon.
Mac OS X Mail will instantly display all the emails from the specified mailbox. This allows you to quickly find and access emails that are stored within a specific mailbox.
Searching by mailbox can be particularly useful in various scenarios. For example, if you have separate mailboxes for work-related emails and personal emails, using the “Mailbox:” operator allows you to search for emails within the designated mailbox without being overwhelmed by irrelevant messages.
Furthermore, if you have set up custom mailboxes or folders to organize your emails based on specific projects, clients, or categories, searching by mailbox enables you to easily locate emails related to a specific topic. This helps you streamline your workflow and find messages more efficiently.
In addition, if you have smart mailboxes that automatically filter emails based on predetermined criteria, searching by mailbox allows you to focus on a specific subset of emails that match the selected mailbox’s criteria. This is particularly useful when you want to access the latest updates or discussions related to a particular project or topic.
Overall, the “Mailbox:” operator in Mac OS X Mail’s search feature is a valuable tool for quickly narrowing down your search and finding emails within a specific mailbox or folder. Whether you’re searching within work-related mailboxes or custom folders, this search capability can save you time and help you stay organized.
Combining Search Operators for Advanced Searches
Mac OS X Mail provides a powerful search feature that allows you to combine search operators for more advanced and targeted searches. By using multiple search operators together, you can narrow down your search results and find emails that meet specific criteria.
Here are a few examples of how you can combine search operators for advanced searches:
- Combining “From:” and “Subject:” – If you want to find emails from a specific sender on a particular subject, you can combine the “From:” and “Subject:” operators. For example, you can search for “From: john@example.com Subject: project update” to quickly locate emails from John with the subject “project update”.
- Combining “Date Received:”, “Subject:”, and “Has Attachments:” – If you’re looking for emails received within a specific date range, with a particular subject, and containing attachments, you can combine the “Date Received:”, “Subject:”, and “Has Attachments:” operators. For instance, you can search for “Date Received: last week Subject: meeting agenda Has Attachments: yes” to find emails from the past week with the subject “meeting agenda” that also have attachments.
- Combining “Flagged:”, “Unread:”, and “Mailbox:” – If you want to find flagged and unread emails within a specific mailbox, you can combine the “Flagged:”, “Unread:”, and “Mailbox:” operators. For example, you can search for “Flagged: yes Unread: yes Mailbox: Work” to quickly locate flagged and unread emails within the “Work” mailbox.
By combining search operators, you can refine your searches and find emails that match specific criteria more effectively. This allows you to quickly access the information you need and manage your email inbox more efficiently.
Remember to experiment with different combinations of search operators to tailor your searches to your specific requirements. Whether you’re searching by sender, subject, date range, attachment, flag status, or mailbox, keep in mind that combining search operators can help you discover emails that meet multiple criteria and save you time in the process.
Saving and Reusing Search Queries
In Mac OS X Mail, you have the option to save and reuse search queries, making it even more convenient to find specific emails in the future. This feature is especially useful if you perform complex or frequent searches that you want to repeat without having to rewrite the search criteria each time.
To save and reuse search queries in Mac OS X Mail, follow these steps:
- Perform the desired search using the search bar and search operators.
- Review the search results to ensure they match your intended criteria.
- Click on the “Save” button located next to the search bar.
- Provide a name for your search query, such as “Work-related emails” or “Unread messages from John”.
- Click “Save” to store the search query.
Once you have saved a search query, you can easily reuse it in the future without needing to remember or retype the search criteria. To access and use your saved search queries, follow these steps:
- Click on the search bar in Mac OS X Mail.
- Click on the drop-down arrow next to the search bar.
- A list of your saved search queries will appear.
- Select the desired search query from the list.
- The search results for that query will be displayed.
By saving and reusing search queries, you can speed up your workflow and easily access specific groups of emails that match your predefined criteria. This feature is particularly valuable if you frequently need to refer back to certain types of emails or perform repetitive searches based on specific parameters.
Furthermore, saved search queries can be particularly useful for managing various aspects of your email workflow. For example, you can save search queries for specific projects, clients, or tasks, enabling you to quickly access relevant emails whenever needed.
Remember, you can also edit or delete saved search queries as your needs change over time. Simply click on the drop-down arrow next to the search bar, locate the saved search query you want to modify or remove, and follow the appropriate actions.
Saving and reusing search queries in Mac OS X Mail can help you stay organized and efficiently locate emails that align with specific search criteria. Take advantage of this feature to streamline your email management process and save valuable time.